corona virus projects any one?

DocG

Full Member
Dec 20, 2013
876
129
Moray
As also a scout leader we need to get our virtual heads together. I’ll create a thread in the morning to help anyone else (including me) come up with badge ideas.
Great offer - thanks. Question: how will I find it once it's up?
Keep smiling and safe
 

Wayland

Hárbarðr
Vardo-Campfire-II.jpg


Re-started work on the camp fire diorama for my Vardo Project.
 

Broch

Life Member
Jan 18, 2009
8,490
8,369
Mid Wales
www.mont-hmg.co.uk
After more effort than it should have taken, here are four potential long bows. In truth I'll be lucky if I get one out of them if past experience is anything to go by :)

I'll have to get on with some other projects as they dry out for a couple of weeks.

ash bow staves.jpg
 

bobnewboy

Native
Jul 2, 2014
1,318
870
West Somerset
After more effort than it should have taken, here are four potential long bows. In truth I'll be lucky if I get one out of them if past experience is anything to go by :)

I'll have to get on with some other projects as they dry out for a couple of weeks.

View attachment 57954
Paint the ends of the staves, and if possible the 'back' surface with some kind of sealant. PVA glue or cheap left over gloss paint, or melted wax if you have it. It slows down the drying, but it helps avoiding drying cracks. It would be removed on doing the rest of the bow work. You can also speed things along by working the stave green and reducing it to near dimensions, then setting it aside to dry. Some people leave the staves in their cars, but that can be risky, as it speeds up drying, particularly so if the car is parked in the sun.
 
  • Like
Reactions: Wayland

bobnewboy

Native
Jul 2, 2014
1,318
870
West Somerset
Here's a little project that the missus and I have done in the last few days......Its a fireplace screen, to put into the grate while the fire isn't being used. Herself made the glass screen, and I made the stand/frame. The glass is leaded round the bottom and the sides, but all other joints are done with coppper foiling, and soldered up. I made the frame from some wood which I think is a kind of mahogany, sourced in a bargain bin at Yandles.

49720587722_a7b356c682_z.jpg


49720271451_7b347a45da_z.jpg


Cheers, Bob
 

demographic

Bushcrafter (boy, I've got a lot to say!)
Apr 15, 2005
4,762
786
-------------
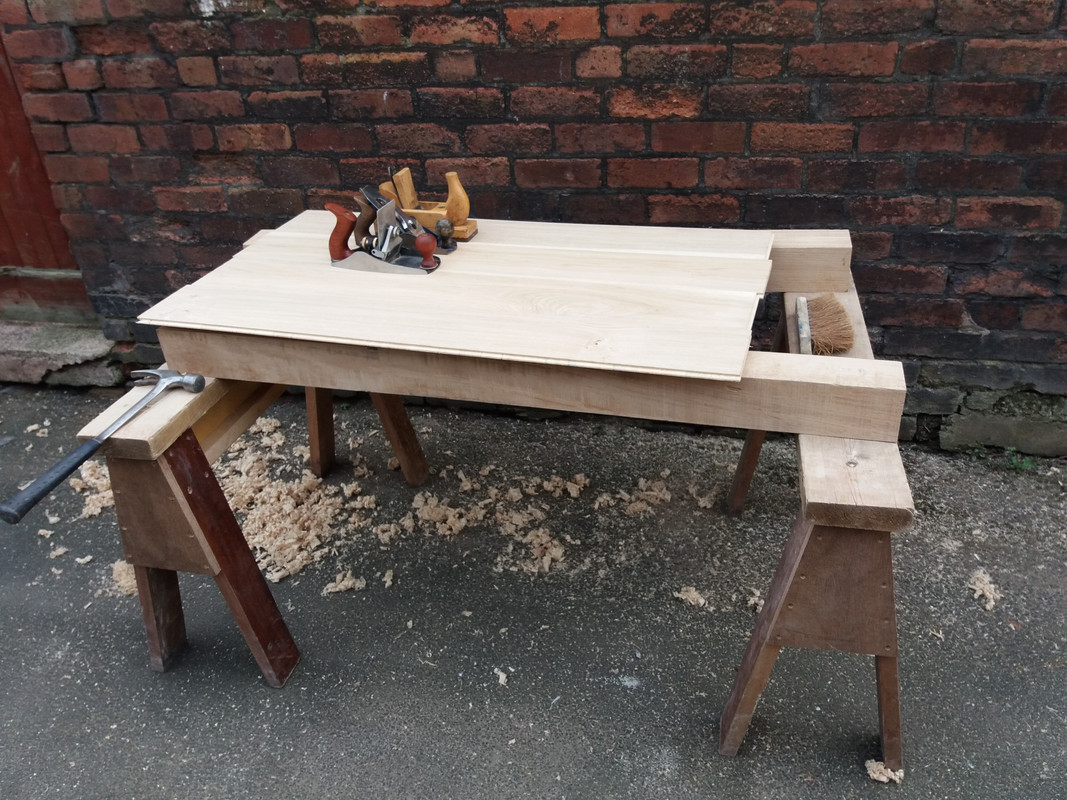
I've been pestered into making my granddaughter a tabletop to go onto a Singer sewing machine cast iron base.
The brief was, "Just get something she can do crafting and homework on, can be plywood or whatever but 1000x500 in size".

I've had a bit of 18mm plywood that size kicking about for a while and more recently have been cladding the inside of a building with engineered oak flooring (not my choice but there you go) so have some offcuts which just happened to be about 1100 long...
The boards are fairly rough as they look like they've been fired through a bandsaw at running speed but I can sort that, free boards are the best price though.

First of all I used some Sikaflex I had spare off another job to glue the flooring to the ply and secret nailed the tongues where the nails wouldnt get in the way of any cuts I needed to do.
Not showing the photo of the Sikaflex stage cos in the tradition everyone with a mastic gun my granddaughter wrote her name with the Sikaflex.
Anyway, I left all the boards overhanging the plywood so I could cut it later, left it dor a day for the Sikeflex to go off then the next day I planed it flat, using a toothing plane going across the boards at 45 degrees or so. Didn't have to be my toothing plane but I've hardly used it and I just wanted a play.
Then went over the parts where the grain was ok with my No3 record handplane and the parts with the reversing grain with a 112 scraper plane (the first time I've ever used one of these and yes I was just having a play with it) to minimise tearout.
20200327-163957.jpg

Its all just on a couple of bits of offcut 100mm square oak beams ontop of my sawstools, in the back alley cos I'm short of space.
 
Last edited:
  • Like
Reactions: Wayland

demographic

Bushcrafter (boy, I've got a lot to say!)
Apr 15, 2005
4,762
786
-------------
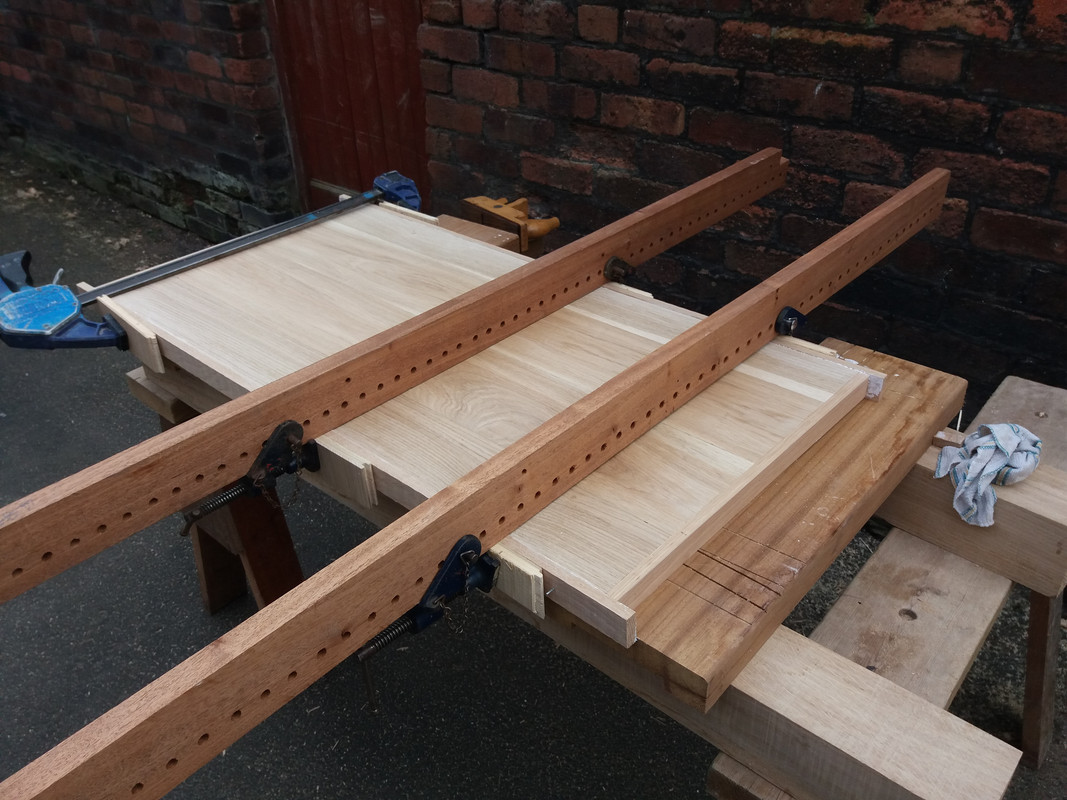
After planing it I cut it to size from the underside with a circular saw to stop it from spelching through to top surface, to be fair its a guiderail saw and the cuts are very clean but no harm in doing good practice to make it as good as possible.
Then I've glued some slightly over width oak lipping on the ends, let it go off, routed the end lipping to the same size as the tabletop, cut the lipping ends and a little bit off the width down to size.
Lipped the sides the same way, its longer that it needs to be as well as extra width (the ply and boards add upto 32mm and I'm leaving the lipping at 35 mm til its glued on. Can rout it with a flushcut bearing guided cutter.
20200329-180755.jpg


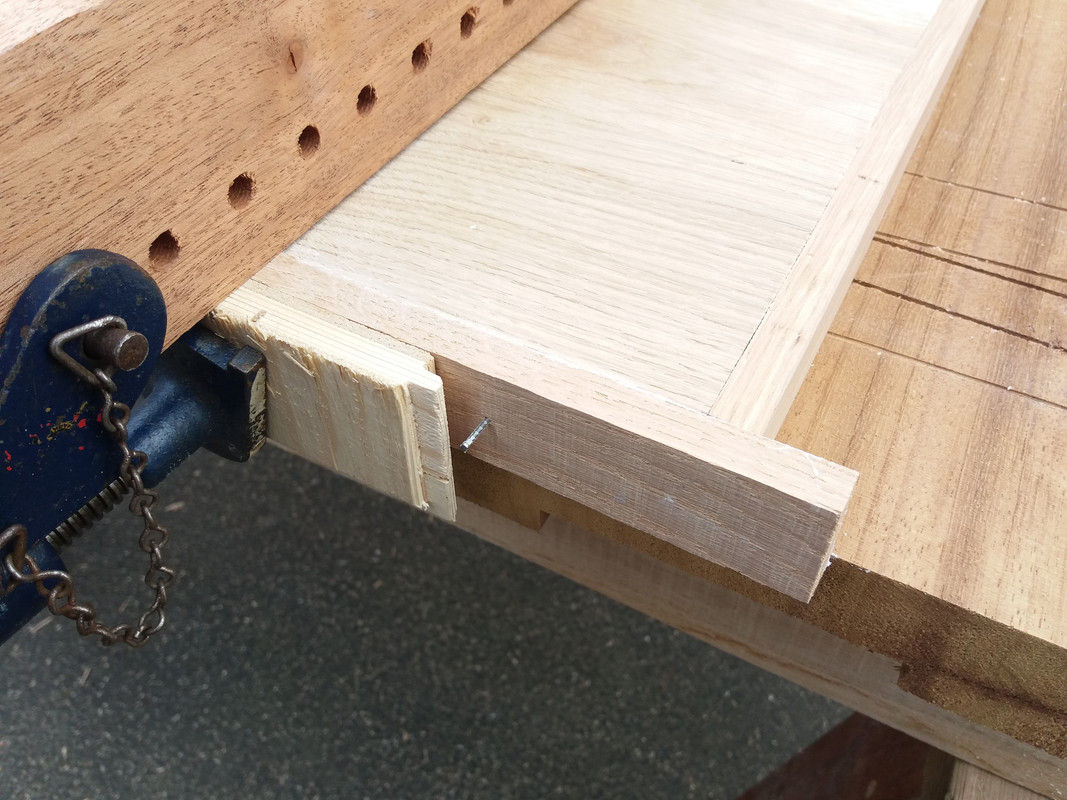
You can see where I've pinned the lipping on with three pins on each section, I used a brad nailgun shooting through a bit of wood with a slot cut in it, that leaves the pins sticking out of the lipping so I can pull it out with a pair of pincers when the glue goes off.
20200329-180746.jpg

Here it is clamped up.

As a side note, I've been using one of those Mujingfang High Speed Steel tipped plane blades in my No3 handplane, I had to attack it with a grinder to get it to fit the lateral adjustment mechanism as its designed for wooden planes not Record No 3s.
20200329-181009.jpg

It's ugly as sin, HSS brazed onto mild steel but the HSS holds a hell of an edge, way better than standard blades and it cost about the same.
I sharpen it on a diamond hone and strop it on a bit of green compound charged MDF. Dead easy.
 

Wayland

Hárbarðr
Here's a little project that the missus and I have done in the last few days......Its a fireplace screen, to put into the grate while the fire isn't being used. Herself made the glass screen, and I made the stand/frame. The glass is leaded round the bottom and the sides, but all other joints are done with coppper foiling, and soldered up. I made the frame from some wood which I think is a kind of mahogany, sourced in a bargain bin at Yandles.

49720587722_a7b356c682_z.jpg


49720271451_7b347a45da_z.jpg


Cheers, Bob

That is beautiful. Well done both of you.
 

demographic

Bushcrafter (boy, I've got a lot to say!)
Apr 15, 2005
4,762
786
-------------
Mostly been faffing about with an old Lervad bench top I've had kicking about for ages.
It was from a closed down school and had been abused by loads of schoolkids so I've used my toothing plane to clean the surface up whilst minimising tearout.

Then, as I have something that seems like it can more or less plane wood in any direction without tearout I thought I'd have a play and have a go at a few random bits of wood I have.
So thats a bit of birdeye maple floorboard offcut and a bit of very wildgrained Lignum Vitae that has defied every other plane I posess.

Seems to work just fine, works on the maple, the Lignum and obviously on the beech workbench top. Well pleased with it.
 

Muddypaws

Full Member
Jan 23, 2009
1,114
355
Southampton
I've finally got around to some tool restoration, as I bought this tenon saw that was in need of a little TLC. I wasn't in any kind of hurry as I do have several other tenon saws.
Tenonsaw1 by Alan Muddypaws, on Flickr

The blade had some rust patches, which have left it quite pitted in places, but the teeth were in good nick. I think the saw had hardly any use, and was just stored in a damp place. I wanted to take the saw apart to dip the blade in citric acid, but the screws were not screws; they were press together studs which I could only drill out. So I had to make some new brass screws. Fortunately I have recently acquired a tiny metalworking lathe, and this sort of brass turning is within its capabilities.
Brass screw by Alan Muddypaws, on Flickr

After rust removal, and screw making, I decided to reshape the somewhat basic, utilitarian handle. This makes the handle more ergonomic, and also makes the saw look like it is of higher quality! Then I just gave the teeth a tiny tickle with a three square file, and a set.

The final result:
Tenonsaw2 by Alan Muddypaws, on Flickr
 

BCUK Shop

We have a a number of knives, T-Shirts and other items for sale.

SHOP HERE