Hobo Stove Gallery (Probably picture heavy)

  • Hey Guest, Early bird pricing on the Summer Moot (29th July - 10th August) available until April 6th, we'd love you to come. PLEASE CLICK HERE to early bird price and get more information.

Still Waters

Nomad
Dec 20, 2007
459
0
North yorkshire
Heres mine boiling some water for a quick brew today

STA71702.jpg


STA71704.jpg
 

Still Waters

Nomad
Dec 20, 2007
459
0
North yorkshire
Thanks andy

Ive made it so i can also use an alcohol burner when burning wood would be frowned upon
to be honest it could do with a few more tweeks but ive enjoyed making and using it

STA71707.jpg


STA71708.jpg
 

davidpingu

Forager
Nov 3, 2012
132
1
Cwmbran
Having joined the forum just a few weeks ago this was the first thing I had a go at.

Here's mine. Completely original idea of mine, not copying anyone else in any shape or form :yelrotflm

Seriously though, great thread this, it really helped me put mine together.

The MK1 had grub screws superglued on the bottom of the Ikea strainer but as predicted these came off as soon as I used the stove for the first time today.

P1090910.jpg


P1090908.jpg


My billy can. Stainless pot provided by Harvestman fits just right. Cheers Mike :)

The handle has come off a completely useless camping toaster which I've now disected for better use. More of that in a bit. Completely unintentional but a couple of cool things about this handle. Firstly the ears on the side will support the pot low down without the need for pegs (although there wouldn't be much clearance so it would only be for charcoal or something like that I guess) the other thing is that in moving the handle to the upright position it automatically lifts the lid hence the lid not having a handle currently. Trying this out in the field today on the stove it worked fine too. If you hold the lid as you lift the handle it will actually clamp the lid down too. Just a little steam hole drilled in the top for now.

P1100004_zps1011e6c1.jpg


P1100005_zps43c9bce2.jpg


The pegs are titanium. Bit of a waste really but nice and light.

So once the glue melted my grub screw legs off I used another idea I'd seen in this thread. Pictures of my MK2 version now complete with most of the kit.

IMG_1003_zps2a8bbc06.jpg


It all goes in the utility bag except the grille part of the toaster of course. Not decided on whether to use this yet but I'll have a play and then decide. It will sit under the stove and will probably do a good job of reflecting heat upwards but at the expense of blocking some airflow from underneath.

IMG_1002_zps4044f481.jpg


The rest of the wire that was on the toaster. Have only used the one as a handle so far. The rest have yet to find a use.

Sweet tin with tinder etc. A lighter in there for worst case scenario but not had to use it yet. Getting on ok with the firesteel. One thing I did struggle with today was keeping the fire going, until I tried a tea light in the bottom. The constant flame was just what I needed to have a prolonged flame to really get it going. Will be keeping a couple tealights in my kit at all times from now on as they are great if all else fails.

New legs on the stove!

IMG_1006_zps037face8.jpg


IMG_1007_zps04f58d36.jpg


Another possible use for the toaster grille but will just have to try it out one day.....

IMG_1008_zpse5f9204a.jpg


I'm sure it will double as a cooking surface too so I'm sure it'll come in handy in some way!

Thanks for looking. All suggestions welcomed :)
 

swright81076

Tinkerer
Apr 7, 2012
1,702
1
Castleford, West Yorkshire
Nice stove there mate, nice to see you getting stuck into something. It gets addictive and expensive :rolleyes:
I like your stand too. :thumbup:

Have you thought about using waxed cotton pads or balls instead of a tea light. The are great. Break em open to expose the fibres and they'll take a spark well.

touched by nature
 

Harvestman

Bushcrafter through and through
May 11, 2007
8,656
26
55
Pontypool, Wales, Uk
That's an excellent build Dave, love those legs.

Sustaining a fire, especially in a relatively small space like this, in cold weather, is a skill that improves with practice. Preparing your fuel beforehand to get the right sizes and quantities makes it a lot easier. It is especially true with fires that preparation is everything.
 
N

Nomad

Guest
[EDIT: Found out about albums and posting image URLs for full size pics. All inline photos now updated.]

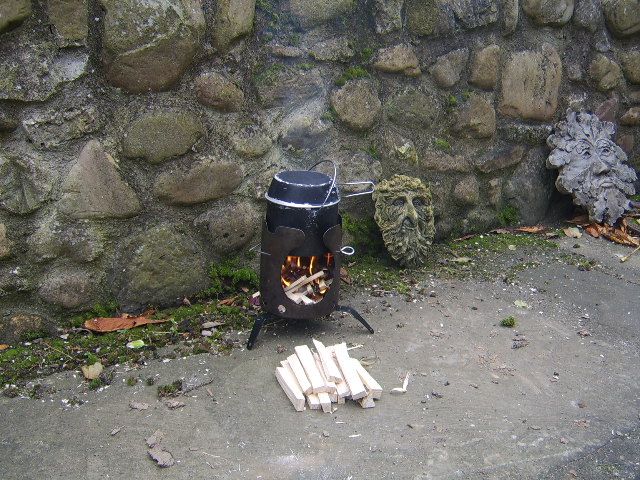
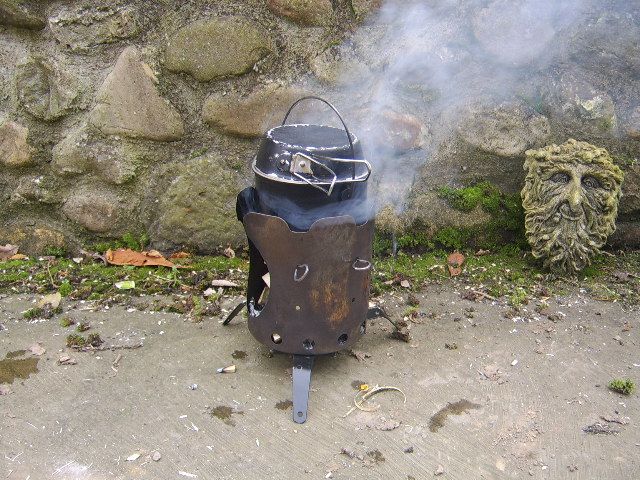
What an excellent thread! Like others, I have been inspired to have a go at making a hobo stove.

Allow me to present.... the Nomabrew Mk1. :)

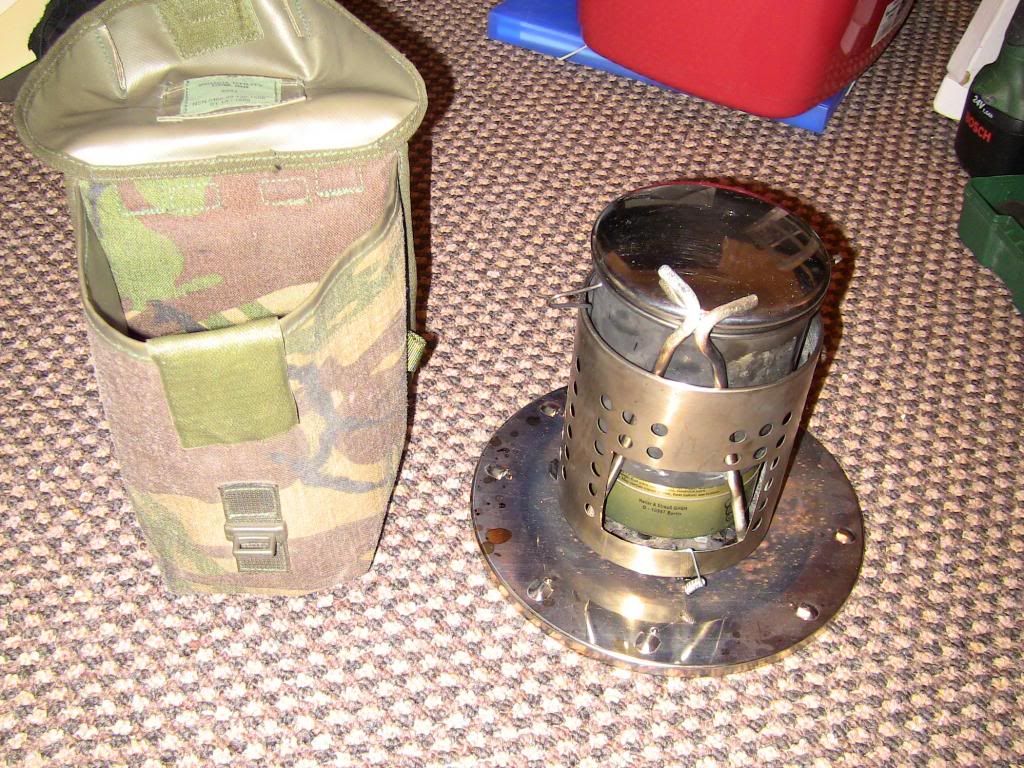
Just made this today and haven't tried it yet, so it's still shiny; and no bag made yet.

This is a small brew kit sized outfit which uses the two smaller cannisters from a set of three nesting ones that I got for 15 quid on eBay. The skewers were from a set of 6 in Sainsbury's at £2.50, and the fire grate is an old computer fan guard that I got in Maplin ages ago for about £2.50. So, not counting the fancy cup and coffee dangler, and assuming the cannisters are equal value, total cost was about £13.50.

Overall size is 11cm diameter by 14.5 cm high. As shown, it weighs 766g.


Here it is packed (Swiss Champ added for scale).

attachment.php


I was able to get all the bits to fit and still use the lid for the outer cannister. So I can put the lid upside down on the ground and have somewhere to put bits and pieces. Not much use as a plate, unfortunately, because this design of lid has a hole in the middle for a knob (they were pretty useless - couldn't stack the cannisters with them fitted). No big deal, since this is just for making brews.


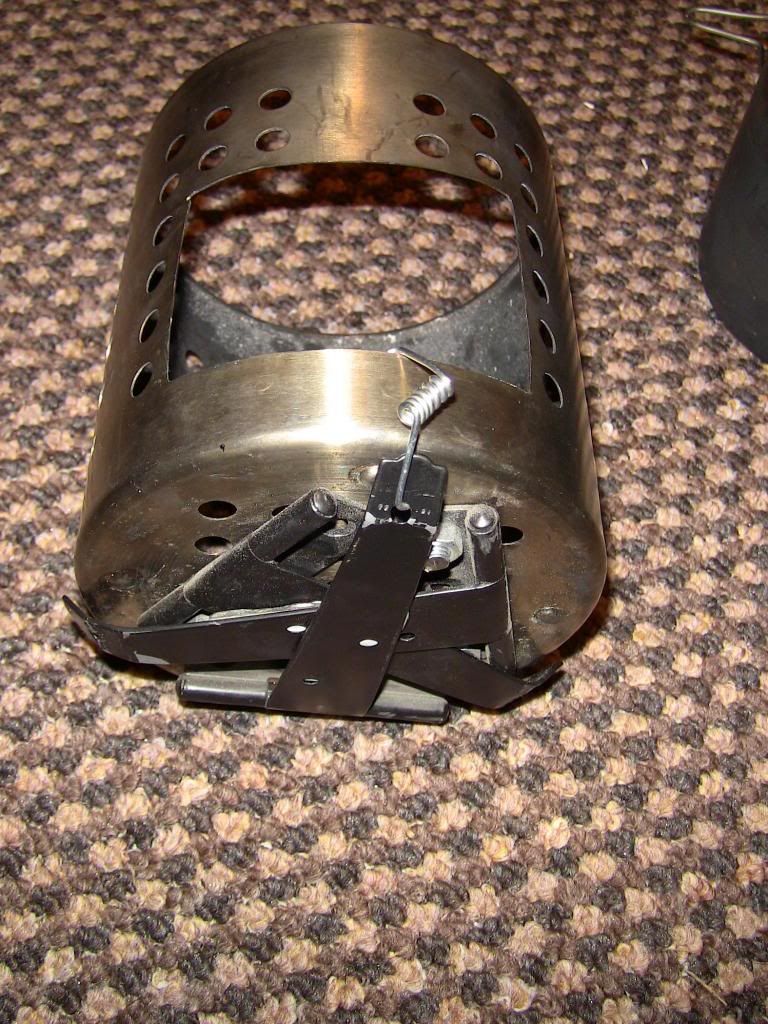
With the lid off, we can see the bits inside.

attachment.php


In the middle is the loop for the billy lid (with a sticky-outy bit). The two round bits near the front are the ends of the pot support rods, and the two bent bits at the sides are the ends of the bail.


The bits now taken out.

attachment.php


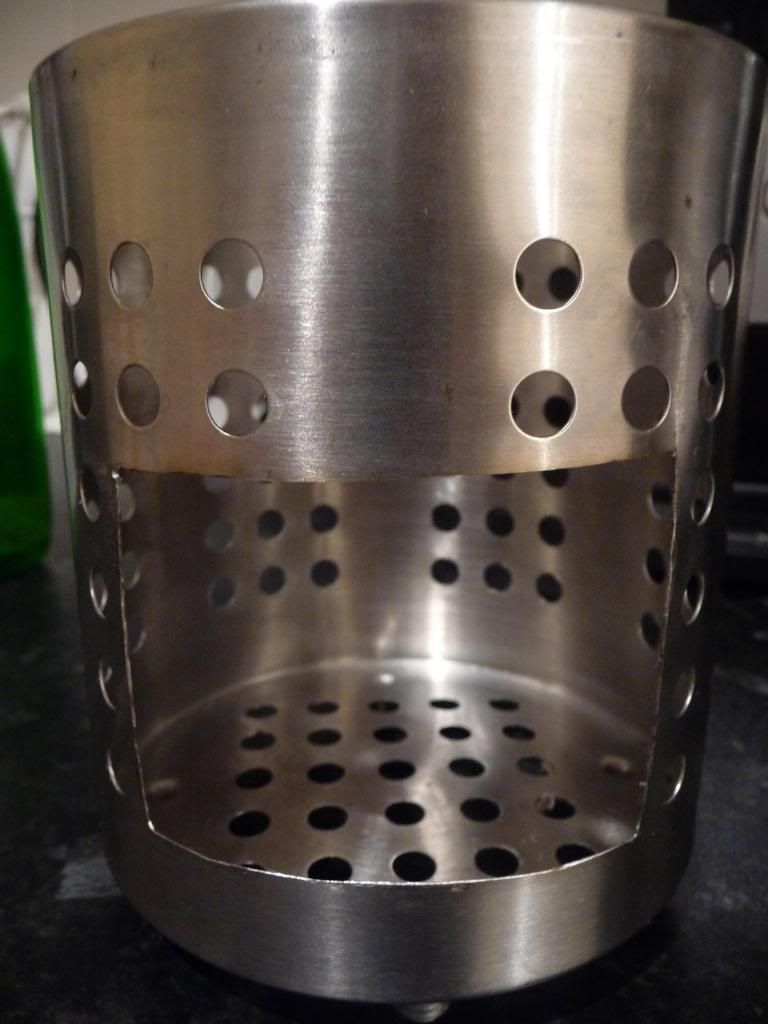
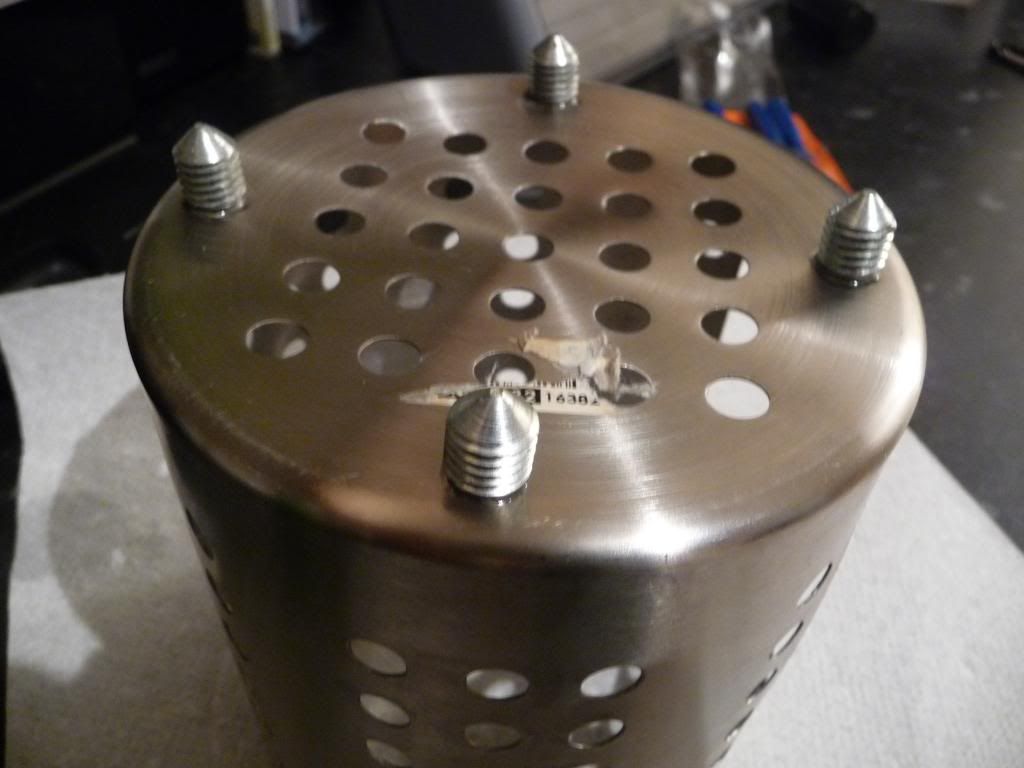
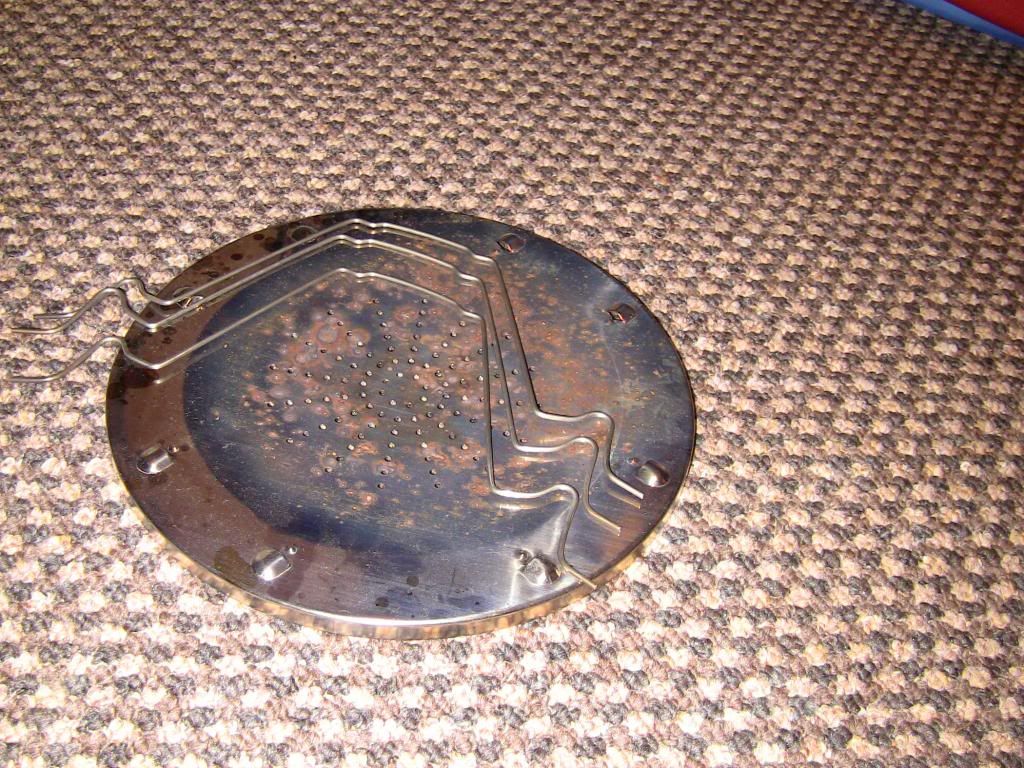
When the billy is taken out, the fan guard can be seen in the bottom.

attachment.php


The outermost ring of wire was cut off and diagonal bits bent down vertically. When packed, it goes in upside down and the bottom of the billy fits between the support legs of the grate.


Here's the grate the right way up.

attachment.php


At the moment, the grate is about level with the bottom of the rectangular hole. I might lower it a bit if I find that embers drop out - to be tried out first.


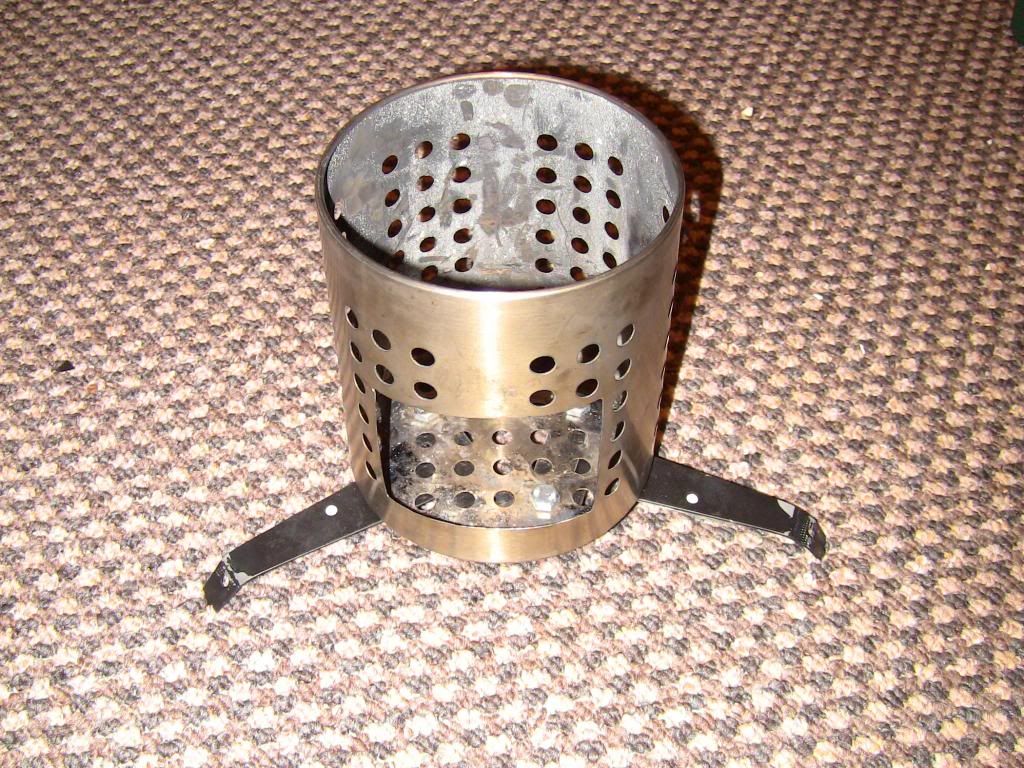
With the pot support rods fitted, the stove is assembled.

attachment.php


The holes around the bottom (16 of them) are about 8.5mm in diameter. It's a chimney effect design, where air is drawn in through the holes, passes through the grate and exits at the top around the billy.

Note the extra vertical holes for the pot support rods. I made one set near the top, and then added more at 15mm intervals. The intermediate ones leave enough room for a spirit burner, and the lowest ones could be used with hexi fuel or the like. Also, note that the bent ends of the support rods are turned inwards - if the position of the bend is set right, you can get a bit of friction when they're turned, and they don't rattle.


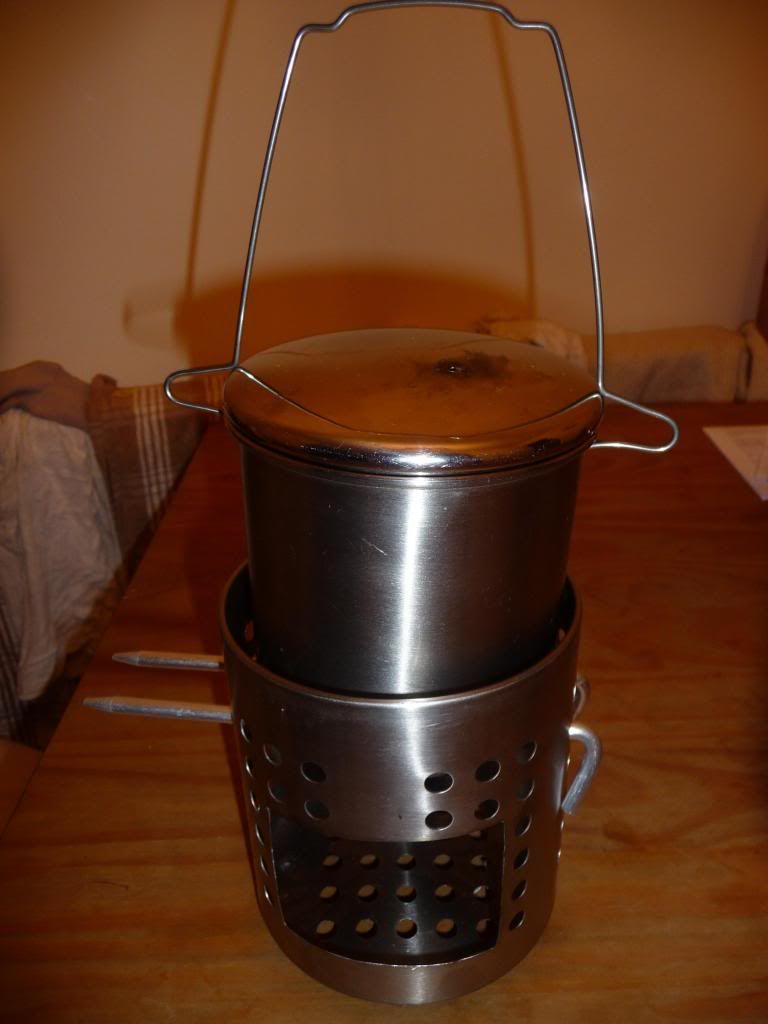
Inside the billy is my fancy new cup, a 350ml Tatonka double-walled jobbie.

attachment.php


And inside the cup...

attachment.php


...is an MSI coffee dangler...

attachment.php


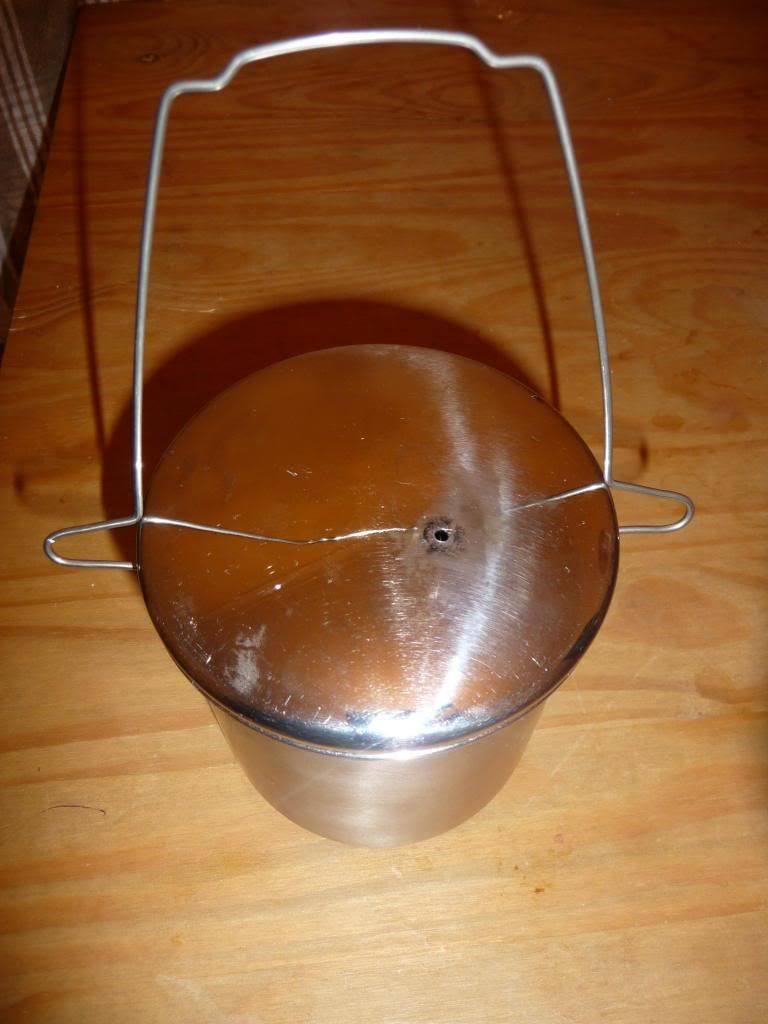
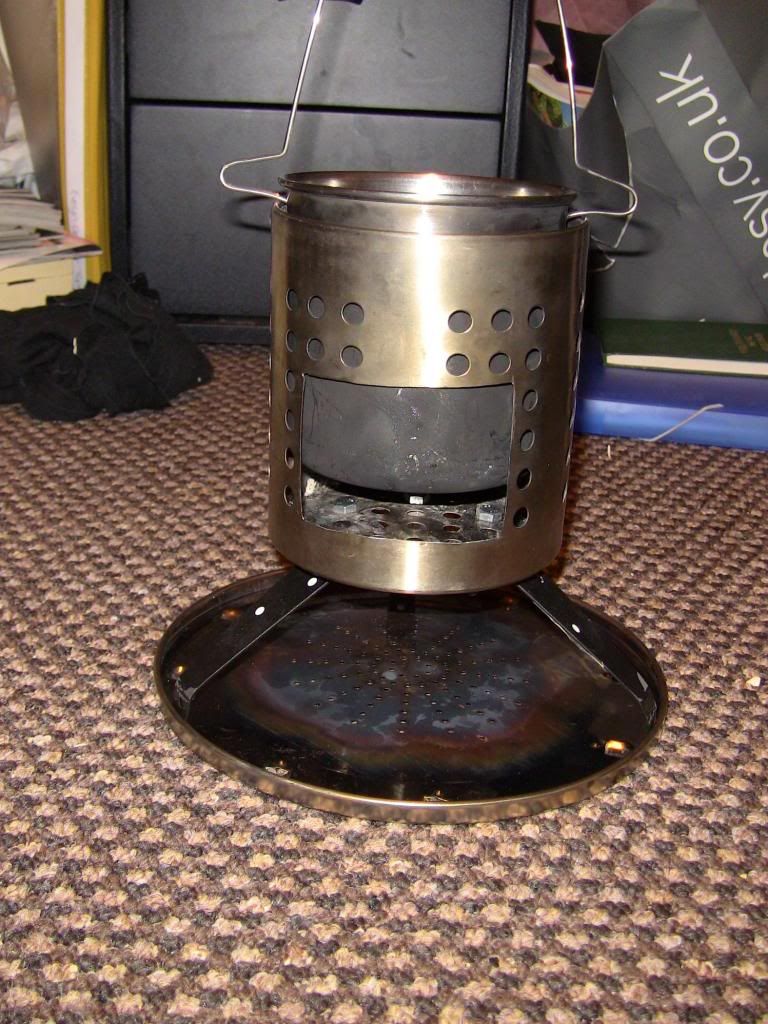
Here's the billy with the bail attached and on the stove.

attachment.php


As you can see, the bail is quite long. I played around with this for a while, initially trying to come up with something that could be permanently attached to the billy, but it never seemed to want to fit inside the stove body when packed. Once I had decided to make the bail removable, I was able to solve a second issue...

Note that the bail does not go under the raised part that the lid goes down onto when packed - the holes are above the raised part and prevent the lid going all the way down. The reason for this is because the lid has a fair amount of friction when it's right down. Using the bail to limit its travel makes the lid easier to remove.


The sticky-outy bit on the lid loop is designed to hold the bail upright.

attachment.php


Here's a detail of the lid loop holding up the bail.

attachment.php


And here's the loop set upright for lifting the lid.

attachment.php
 
Last edited by a moderator:

Pignut

Bushcrafter (boy, I've got a lot to say!)
Jun 9, 2005
4,096
12
45
Lincolnshire
Wow! awesome.

look forward to a report of how it burns?


sent from the back of beyond using "new-fangled" technology
 

bloobeetle

Member
Sep 30, 2012
31
0
tattershall, lincs
i don't know if this is a stupid question but.....is there a reason people aren't using the wire utensil holders instead of drainers or drilling holes in a tea caddy? is it a case of to much airflow? or that they rust fast?
 
N

Nomad

Guest
They might rust fast, assuming they're chrome plated mild steel. Airflow is the main reason, though. With the chimney effect designs, the rising heat draws air in through the bottom and up through the embers, which makes the embers burn hotter. Also, if there's a bit of wind, it can help if the wind comes into the stove near the bottom to increase the chimney (or forge?) effect. Trangias have holes in the bottom part of the wind shield for that reason, although only on one side so you can turn the holes into or away from the wind to regulate the heat to some extent.

I was originally going to add some sort of adjustable blanking affair to the Nomabrew to do something similar, but the space was too tight given the relative sizes of the cannisters and the desire to get to the fan guard in as well. I dare say the stove could be oriented so that the big hole in the side was towards or away from the wind, but I suspect the effect wouldn't be as good because it's blowing more in and over the embers rather than up through the bottom. I'll be making another one with the remaining cannister, which should be big enough for a 12cm Zebra billy, and I think I'd like to try the adjustable wind thingy on that. Hope to get out to test the Nomabrew soon, and that will inform the design of the larger one.
 
N

Nomad

Guest
Took the Nomabrew out for its first test today, and I can confirm that it works.

Here it is getting its first taste of fire...

attachment.php


And here's the result...

attachment.php


I had a bit of trouble getting the fire to light until I tried a generous handful of bark from a dead birch tree. I think stuff was a bit dampish (it would singe, but not take a flame), and it was fiddly trying to get it to catch in the tin (was lighting tinder on a damp leaf and then putting it in through the side hole and dropping in little twigs from above). More practice needed (first wood fire I've lit in many a year). There was only a very faint breeze.

I filled the billy to about 2/3rds (nearly half a litre) and it took about 10 minutes to boil. It might have been a bit quicker if I had kept the fire fed better - it ran low after about 6 or 7 minutes, and I didn't notice right away. I also noticed that it seemed to burn better when I took the billy off to pour the water - it suddenly had yellow flame at the top that wasn't evident when the billy was on the stove. I suspect that it maybe needs some better airflow at the top, but will try it some more before cutting any metal.

As you can see from the photo, the bail holder-upper worked. The lid loop was a bit fiddly to move between horizontal and vertical positions, but wasn't a hassle, and didn't get too hot (no burnt fingers). The reduced lid friction idea certainly works - was able to lift the lid to check on boil with no concerns about lifting the billy with the lid, or feeling that it was becoming unstable. Stability of the stove itself was surprisingly good with the weight of the billy and water - didn't feel at all tippy. I had it pretty level, and I reckon this is important. The steam hole in the middle of the lid was good - I was able to see steam coming through even though it was a bit smoky from the fire (not amazingly clear, but definitely a separate flow of vapour).

I need to tweak the bends at the ends of the bail. When I poured the water out, one end of the bail came out just as the last drop was poured. I was pouring by holding the bail and resting the bottom of the billy on a bit of branch sticking out of the stump - it all felt pretty stable. I'll try a more acute angle on the ends of the bail.

The grate could do with lowering - a couple of embers did fall out. I also didn't add fuel through the hole in the front, but by lifting off the billy and dropping it in. The pile of embers in the stove goes up quite high with respect to the top of the side hole, and there wasn't much scope to add more. That said, I did find the hole handy for blowing through to give things a boost when fresh fuel was added.


The MSI coffee dangler was pretty good. If anything, I would say that the flow through it is quite fast - I think I'd prefer to pour more slowly and let more of the coffee oils get pulled through. Cleaning it was easy - just hold the orange legs and flick away from you a couple of times to get rid of most of the grounds, then a splash of water in reverse and a few more flicks. It took a similar splash of water to rinse out the cup. When I got home, I poured the remainder of the water from by 1L bottle into a measuring jug, and found that I had used almost exactly 0.5L. The cup is 350ml, and it filled neatly to the brim when I poured the water, so I would guess that the loss due to boiling and absorption by the coffee grounds was around 100ml.

Oh - I splashed out on a dry bag at Cotswold. Got an Exped XS one, which is 3 litres. It fits the diameter of the stove nicely (rounded bottom on this bag), and takes 4 or 5 turns to bring it down to a nice package.

Overall, I'm pleased with this as a first effort. It is usable, and should be a bit better if I lower the grate and tweak the bends in the bail. The jury is out on airflow. I've been think of adding legs for stability, but I'll hold off on that for now - stability was better than expected.
 
Jan 19, 2013
139
0
Finland
It was so cold out yesterday I had to come up with something to do, so hobo and a kettle it was then.
Ember grill still missing and might need some fine tuning, but a pic of the almost ready product.

Kapykeitin1_zps4b5bc003.jpg


Must give credit to the wind shield, a local brand of beer is sold in 1 liter cans, so had to force the beer down a neigbours throat to get the can :lmao:

Kapykeitin2_zps1c1af87b.jpg


A previous version is a larger one, a hobo bucket (Ikea flower pot I think 3 liters) that can be used on the ground, or hanging from a branch or a tripod.

Isokapykeitin_zps509c978c.jpg


And a miniature frying pan, found SS kitchen dish from a fleamarket, cost about 50p, handle is made from a TV antenna.

Paistinpannu_zps22b90fbf.jpg


Popped down to the bike repair shop in town and asked if they had replaced wires and spokes in their trash that I could buy, they had plenty of wires and gave me a full box of spokes that were from the eighties and unusable in modern bikes, all FOC :)
 

Randall

Tenderfoot
Feb 16, 2012
65
0
Peak District
Not done cooking out of doors for a good year but intend to this week! Was wondering, are we allowed to fire up the stoves on all land that's open to the public? Understand you can't have a fire in some places but thought it was different for the stoves..

Anyone got the actual rules?
 

Samon

Bushcrafter (boy, I've got a lot to say!)
Mar 24, 2011
3,970
44
Britannia!
DSC00386.jpg

DSC00388.jpg


Thar she blows!

Picked up a steel container pot thing that will make a nice fancy hobo stove once drilled and pimped! now to find a usable container to boil water.. :p
 

BCUK Shop

We have a a number of knives, T-Shirts and other items for sale.

SHOP HERE