Having read the excellent tutorial in this forum I was fired up to have a go, ordered all the necessary stuff from Le Prevo and eagerly awaited delivery. Came on Tuesday so Wednesday set about following the tutorial.
Here's a few words about my experience, the knife I made the sheath for is a Frosts Clipper.
1) The template for the sheath, trial and error using paper, well I must have had six or seven goes at this until I had a shape that I was satisfied with.the problem was that the knife has a drop point and a curvy handle, so at what point do you rotate it from side to side to draw around it. There are several possibilities here, if you do it from the point then the sheath looked to be too wide at the mouth. If you do it from the middle of the handle the point of the knife appears to be too far from the centre line of the sheath.
2) Allowance for leather thickness ? again I just guessed on the shape of the template cut it out and wrapped it around the knife and repeated this process until I could see that there would be enough material to stitch.
3) Having allowed sufficient but variable distances between the blade and edge of template and handle and edge of template what width to make the welt ? Again just guessed at about half an inch.
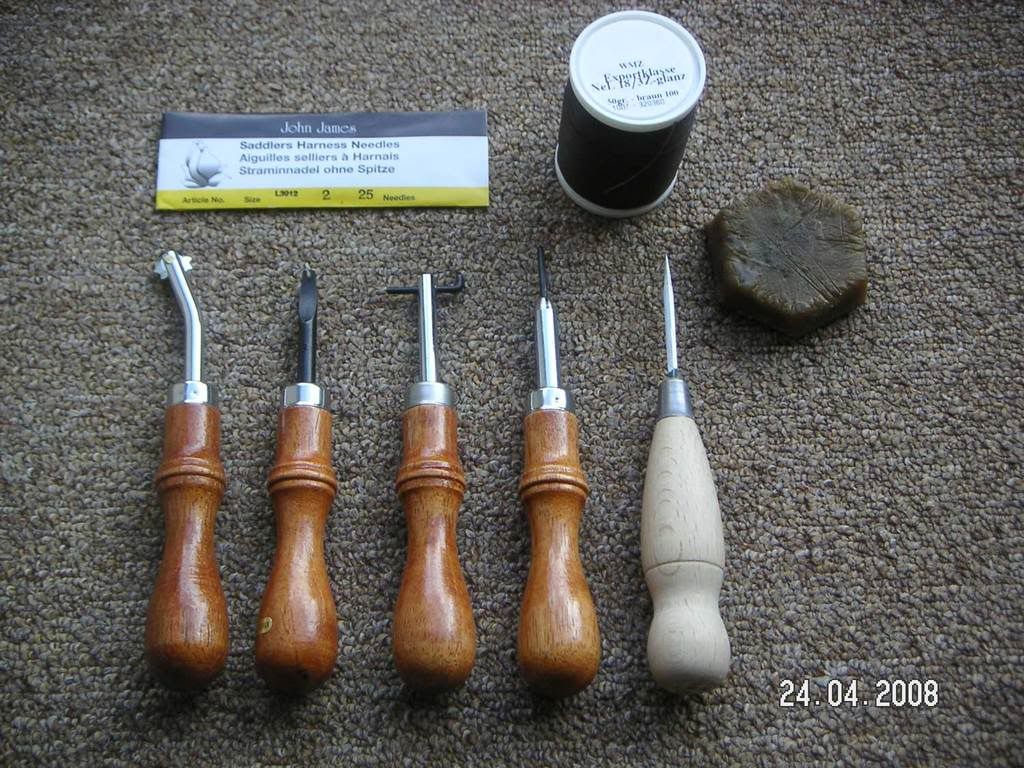
4) Cut the shapes out using the frosts, only comment is that leather is nice material to work. Made several passes with knife until material cut all the way through.
5) Use of non adjustable stitch groover, what a nightmare , me and this tool have a hate relationship. It has a tiny hole adjacent to the cutting edge and every time I tried to cut a groove the leather cut would jam up this little hole resulting in me having a leather scraper not cutting a groove. I had to keep stopping to clear this little hole with the cutting awl. If any experienced leatherworker would be kind enough to pass on some tips on how to use this little bugger that would be great.
6) Overstitch wheel was OK but when I used it in the groove cut out by the adjustable edge groover (which I liked using) it did not mark the bottom of ther groove very well, so had to highlight the marks with the cutting awl prior to drilling.
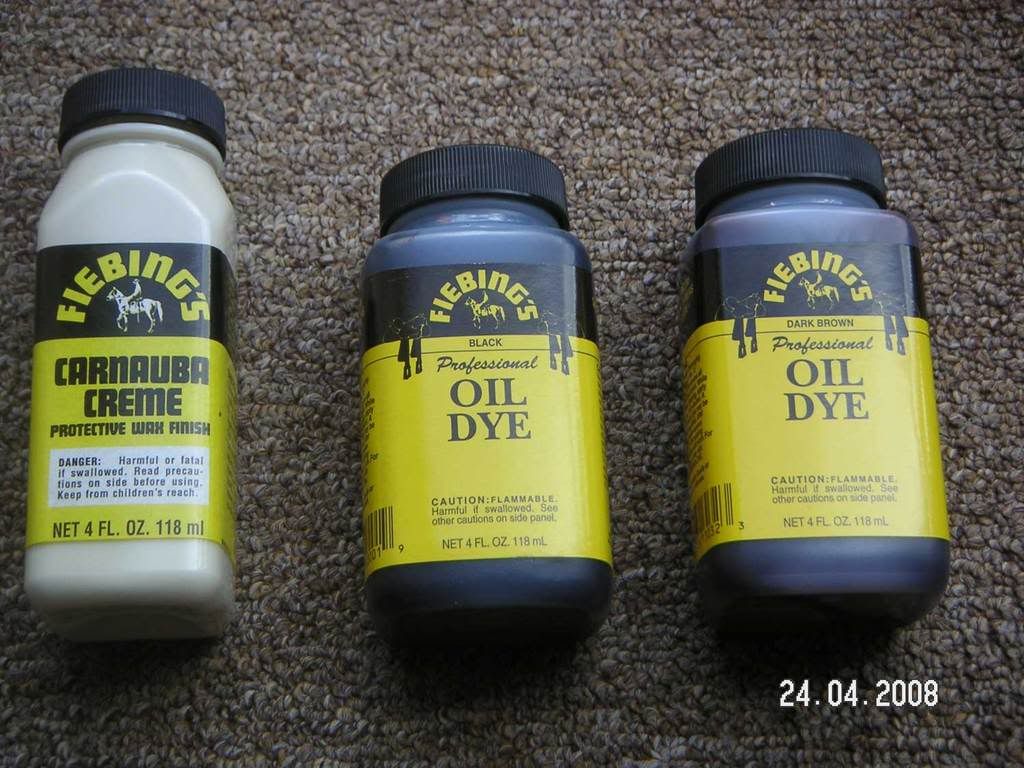
7) Drilling the holes and stitching I seemed to cope with, also the dying and polishing seeemed fairly straight forward.
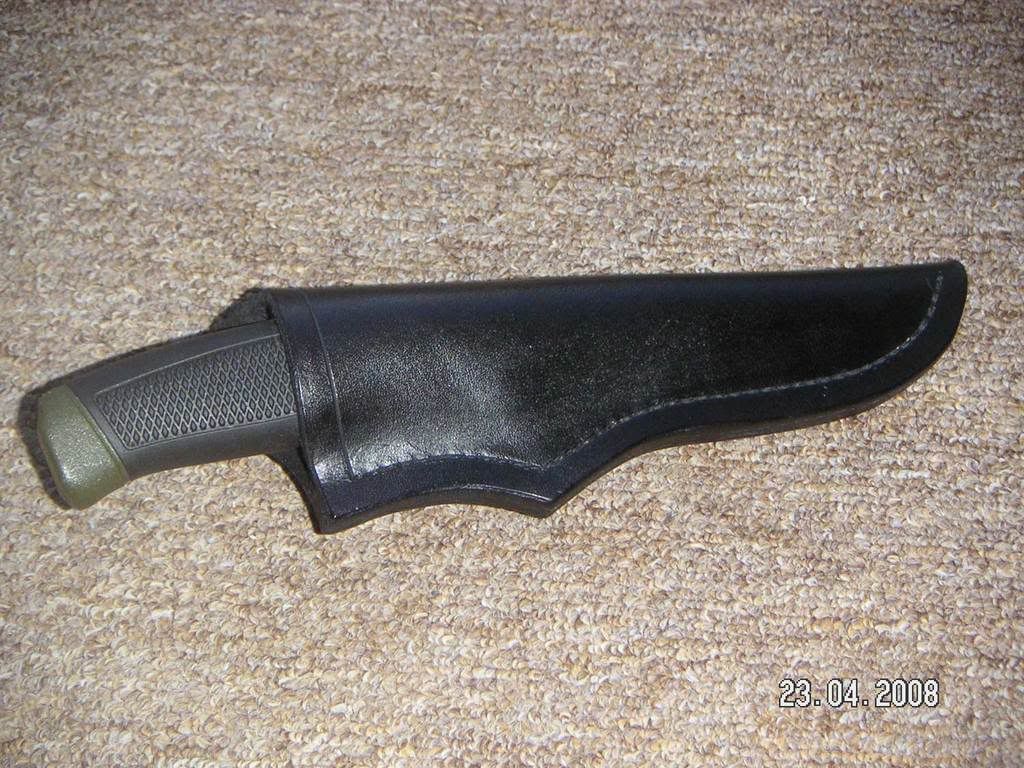
So what does the end result look like, not perfect by any means but good enough for me, it holds the knife very firmly.
Any tips and help on making templates, and how to use that damn fixed stitch groover would be greatly appreciated.
Thanks,
Here's a few words about my experience, the knife I made the sheath for is a Frosts Clipper.
1) The template for the sheath, trial and error using paper, well I must have had six or seven goes at this until I had a shape that I was satisfied with.the problem was that the knife has a drop point and a curvy handle, so at what point do you rotate it from side to side to draw around it. There are several possibilities here, if you do it from the point then the sheath looked to be too wide at the mouth. If you do it from the middle of the handle the point of the knife appears to be too far from the centre line of the sheath.
2) Allowance for leather thickness ? again I just guessed on the shape of the template cut it out and wrapped it around the knife and repeated this process until I could see that there would be enough material to stitch.
3) Having allowed sufficient but variable distances between the blade and edge of template and handle and edge of template what width to make the welt ? Again just guessed at about half an inch.
4) Cut the shapes out using the frosts, only comment is that leather is nice material to work. Made several passes with knife until material cut all the way through.
5) Use of non adjustable stitch groover, what a nightmare
, me and this tool have a hate relationship. It has a tiny hole adjacent to the cutting edge and every time I tried to cut a groove the leather cut would jam up this little hole resulting in me having a leather scraper not cutting a groove. I had to keep stopping to clear this little hole with the cutting awl. If any experienced leatherworker would be kind enough to pass on some tips on how to use this little bugger that would be great.6) Overstitch wheel was OK but when I used it in the groove cut out by the adjustable edge groover (which I liked using) it did not mark the bottom of ther groove very well, so had to highlight the marks with the cutting awl prior to drilling.
7) Drilling the holes and stitching I seemed to cope with, also the dying and polishing seeemed fairly straight forward.
So what does the end result look like, not perfect by any means but good enough for me, it holds the knife very firmly.
Any tips and help on making templates, and how to use that damn fixed stitch groover would be greatly appreciated.
Thanks,