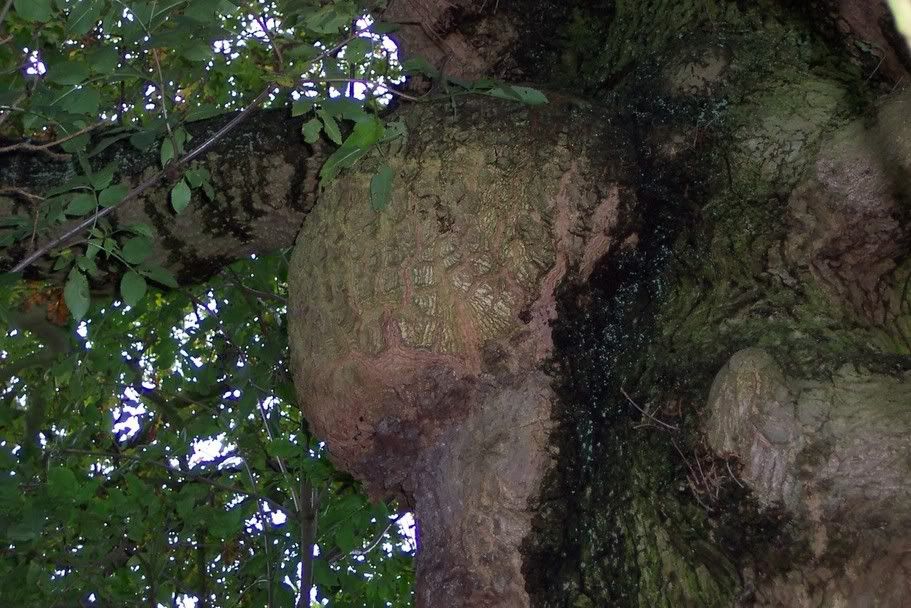
I always seek out birch burls for any kuksa that I make, as they make the nicest and best looking kuksas of them all. You can of cause make them by splitting a log to carve from, but in my experience these are more likely to crack (although not necessarily, and burls can crack too!) than when using a burl with twisted and tight grain. The grain in burls are usually twisted and locked into each other, therefore stronger than straight grain, but eventually it all comes down to how you finish the cup. Some people use linseed oil, and I have done that too in times past, but mostly I now use peanut oil or "paraffin oil" (paraffin as in paraffin wax, and not the stuff that you use on your stove!!) - which are tasteless (especially the "paraffin oil"). I also know that some people use to paint the inside of the kuksa with epoxy, but Ive never done that myself. Any wooden cup can hold water, but when used for hot brews like tea or coffee the wooden cup takes a beating if not finished properly (hot on the inside / cold on the outside).
When I have collected a burl for a cup, I rough out a semi finished cup before drying it. To do that I will use a saami knife (called Nii'pe by the Saami people, and leuku by some on this forum. I think leuku is a Finnish word?) and an axe. I try to visualise the finished kuksa in the burl before I do anything with the knife or axe, and then make the kuksa in rough dimensions (thickness about 10 15 mm). For the actual cup hole I first use an adze and then a spoon knife and / or a hooked gouge (see www.djarv.se for some good tools). The rough dimensions are done as soon as possible after the burl has been cut from the tree usually I do it in the evening when sitting at the campfire or in my workshop if Im back home.
When the rough kuksa has been made, it is time to let it dry completely. This should preferably be done slowly in order to prevent cracking and splitting there are several ways to do this. One is to place the burl / kuksa in a plastic bag with wet wood shavings, but if you use this method you have to check regularly and be careful so that the kuksa wont go mouldy when attacked by fungi - as in spalted wood. Another and better method that I use frequently is to boil the rough kuksa for about an hour (depending on size of the kuksa) in water with some salt in it. The salt will bind the water in the wood and prevent too fast drying. When finish boiled the kuksa can be put aside to dry in room temperature for at least 8 or 9 weeks I usually leave them to dry in my workshop for at least 6 months at a slightly lower temperature (which I find also prevent cracking).
When the kuksa is dry I thin down the walls a bit more (final thickness usually between 6 10 mm), and sand the cup both outside and inside with up to at least 600 grit (sometimes up to 1000#). Shaping can be done with rasp, files, spoon knife, gouge and sandpaper.
When finished sanding I place the kuksa (warmed at the fireplace or a few seconds in the microwave oven) in a small bucket (I usually use a 5 litre plastic ice box) filled with slightly warm oil for some 3-6 hours. You can also rub the oil in with your hands. After that it is placed on a drying rack to dry for several weeks.
The pic here shows a recently made kuksa of a mountain birch burl that was two years old before I finished it. It has been oiled with peanut oil.
 The crook knives on the site youve posted look like the ones RM sells, the prices are in Kr how much are they in pounds?
 ): seems that you guys also have to pay dearly for some things, good to know that it is not always the other way around :roll:
")


 as it harms and can kill the tree, but if you see forestry commission or park rangers ect felling trees they will probably chop a couple off for you :biggthump