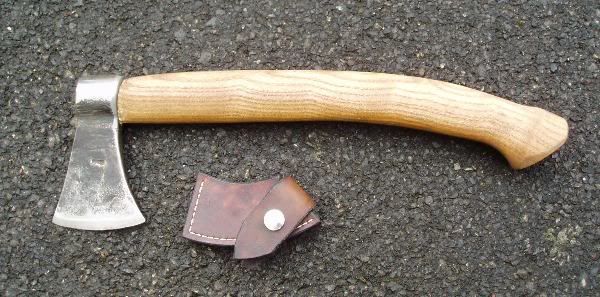
By popular request, here is a short how to of making an axe ") It's not the only way, but it's the way that I most often use and is simple enough for anybody with a forge and a bit of excess energy to try
It's not the only way, but it's the way that I most often use and is simple enough for anybody with a forge and a bit of excess energy to try 
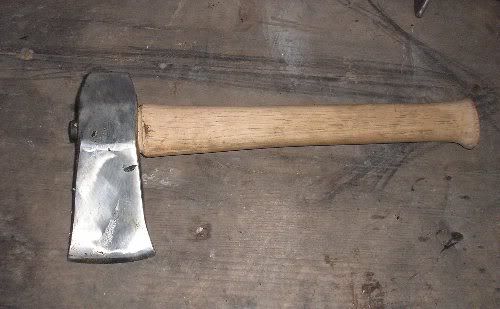
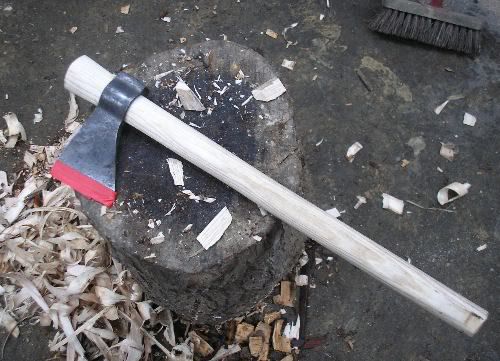
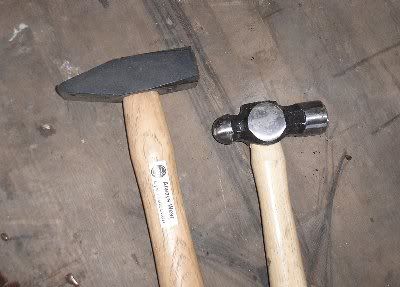
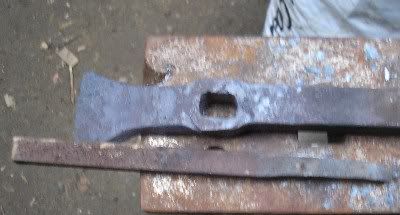
First take a hammerhead. I've started with a brand new hammer on this occasion because that way I can be sure of the type of steel (therefore the heat treating and quality control). These Kennedy machinists hammers are made from 1055 modified (it's got a bit of silicon added). The ball peen hammer is going to be a hawk when I get around to it
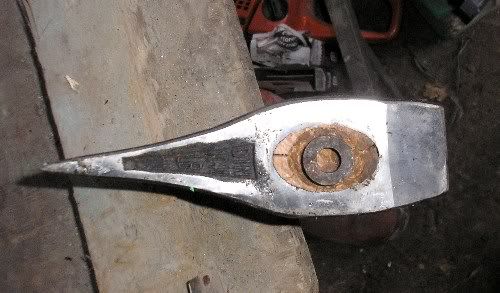
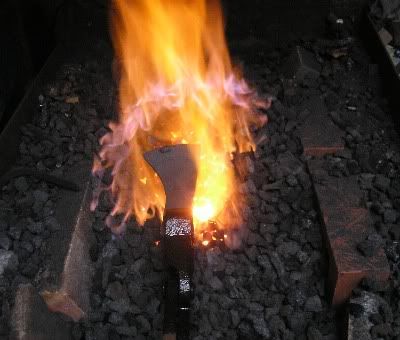
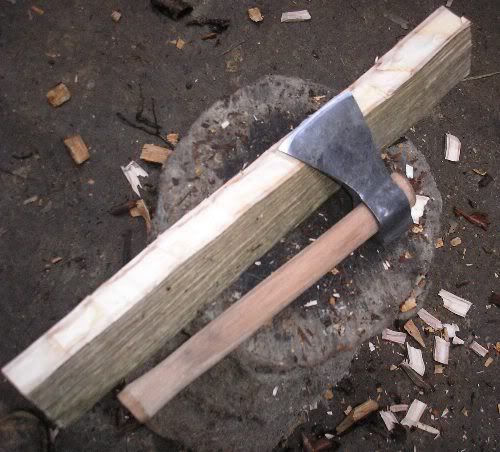
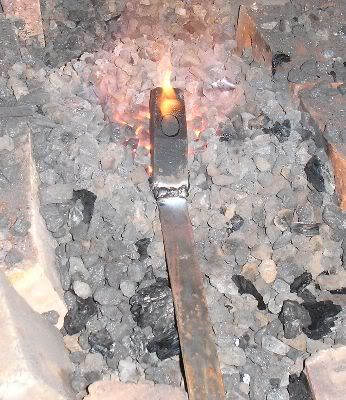
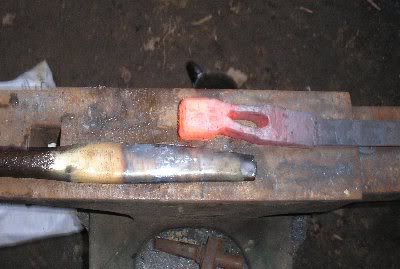
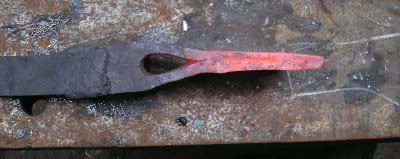
Weld it to a handle, that saves mucking about with tongs that let go whilst you work on it, or losing the head in the fire when you least want to! Then start heating in the forge (in this pic I've had it sitting on the fire for a bit to burn the handle stump out without losing the wedge )
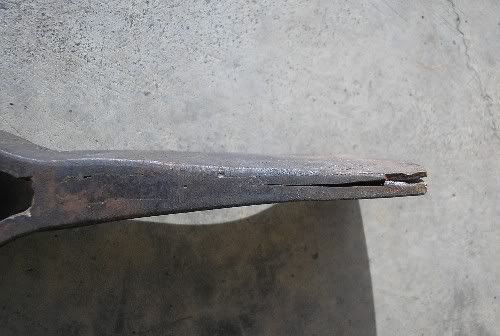
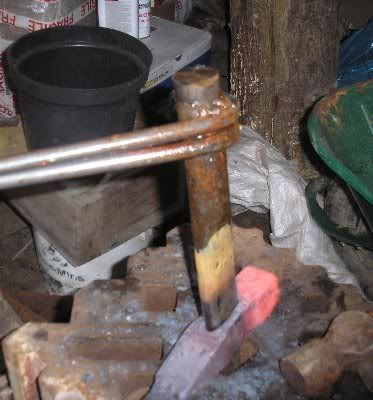
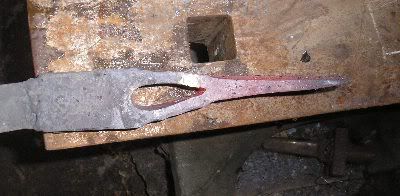
Open the eye out to the correct size and shape by driving a shaped bar called a drift through it. This is much easier with a second pair of hands and a sledge hammer, or better still a power hammer or ruddy great press! It has to be done HOT and when the drift stops moving must be taken out quickly so it isn't locked into the head
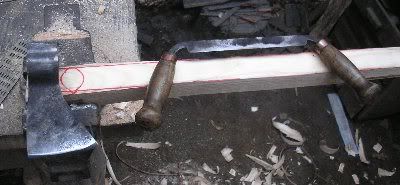
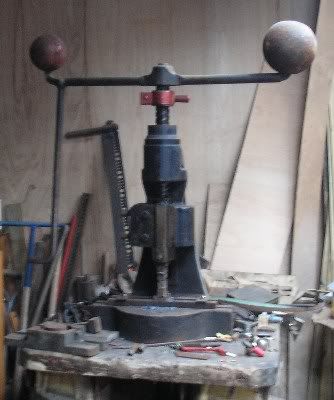
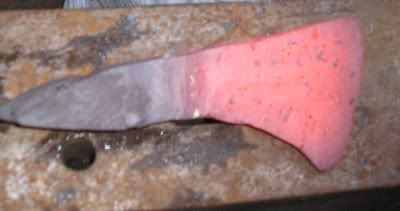
Once the eye is mostly shaped, the blade is drawn out in length and width. On group courses I get people to work in pairs and use a special sledge hammer, but I'm using my little flypress with a set of fullers in it. Before I got this baby I had to do it all by hand with a heavy cross-peen hammer in one hand, which is why I haven't made a habit of making axes outside of shows and courses! (for kit geeks, the flypress is a Norton No.6)
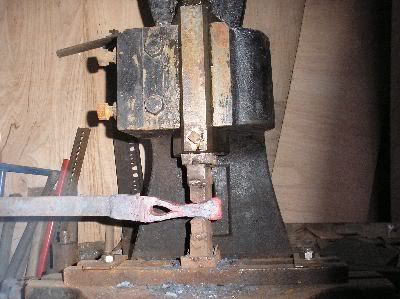
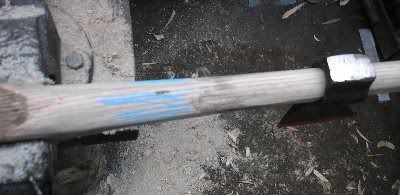
Then to and fro between the press and a hand hammer, tidying the bevelled surface and the profile of the axe. Keeping things in check as I go, if it gets too far away from my intended shape then it is a struggle to bring back
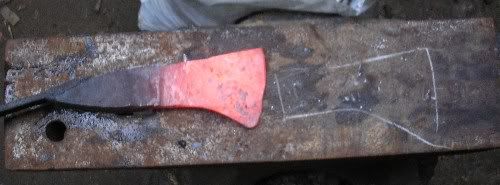
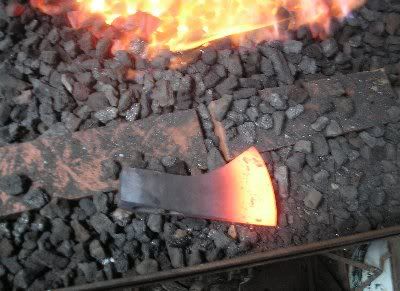
Final shape with the hand hammer and a couple of normalising cycles before I move to the grinders.
side note: whilst that was cooling, I got to work on a special hammer for bookbinding (Sandsnakes, if you're listening: I've finally got it done! ). This is how I would make an axe from a bar without the hole already in it.
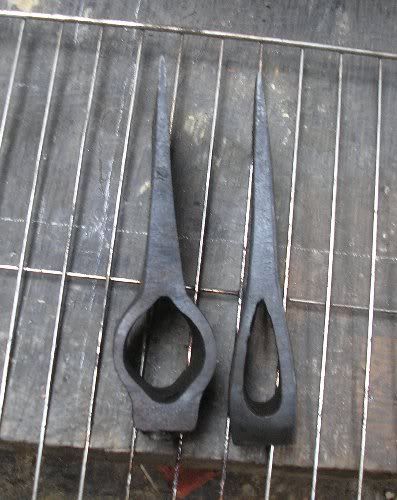
Traditionally a slot is cut in the centre of the bar using a chisel, but getting it straight and in the middle is a challenge best avoided, especially when working solo. So I drill a few holes in a line (ish in this case is close enough), then drive a drift through to open and shape
Back to the axe.
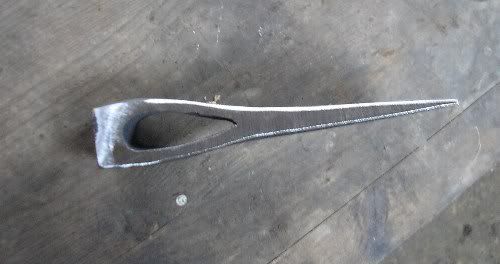
Using an angle grinder, I tidy up the profile of the axe that I'm making. Getting rid of any bulges and the writing that was stamped on the top of the hammer head and is now stretched along the top of the blade. I keep it attached to the bar to make gripping it in the vice easier.
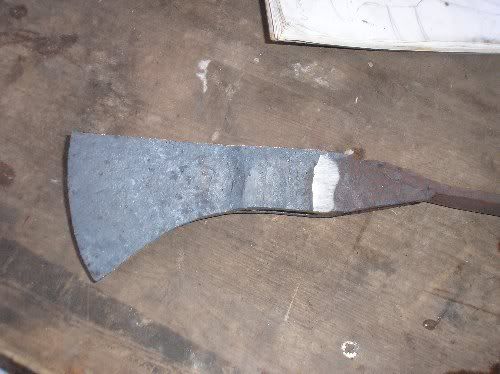
Then the sides, again the angle grinder (big one at this point) is my friend!
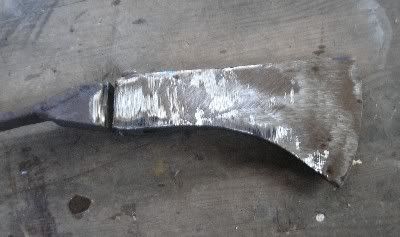
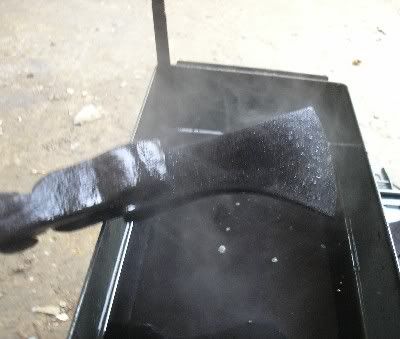
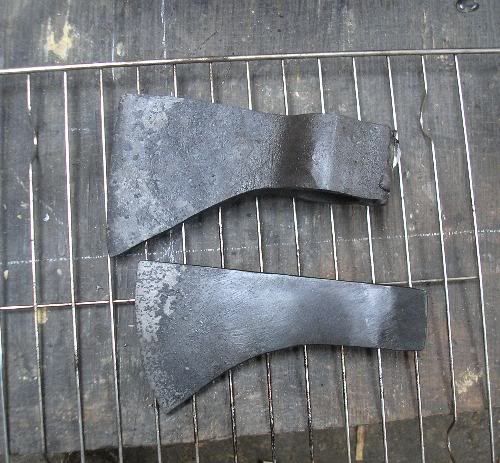
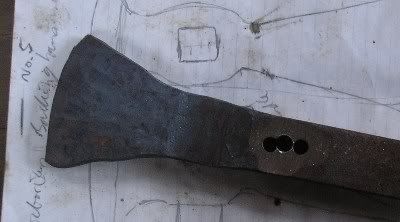
After severing the head from the handle I go over the whole thing with a 40grit flapdisk on my little angle grinder. This is to tidy up the shape, even out the curves, thickness, etc The weight at this point is approx 560g (i say approx as the scales in the workshop aren't all that precise), I expect it'll lose another 10g or so when I finish it and grind the edge on.
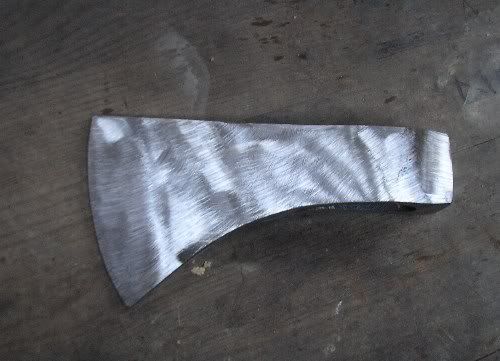
The next step is to heat treat the head, do the final grinding and fit a handle before sharpening it up That'll have to wait til next week!
thanks for sticking with me there
It's not the only way, but it's the way that I most often use and is simple enough for anybody with a forge and a bit of excess energy to try First take a hammerhead. I've started with a brand new hammer on this occasion because that way I can be sure of the type of steel (therefore the heat treating and quality control). These Kennedy machinists hammers are made from 1055 modified (it's got a bit of silicon added). The ball peen hammer is going to be a hawk when I get around to it
Weld it to a handle, that saves mucking about with tongs that let go whilst you work on it, or losing the head in the fire when you least want to!
Then start heating in the forge (in this pic I've had it sitting on the fire for a bit to burn the handle stump out without losing the wedge )
Open the eye out to the correct size and shape by driving a shaped bar called a drift through it. This is much easier with a second pair of hands and a sledge hammer, or better still a power hammer or ruddy great press! It has to be done HOT and when the drift stops moving must be taken out quickly so it isn't locked into the head
Once the eye is mostly shaped, the blade is drawn out in length and width. On group courses I get people to work in pairs and use a special sledge hammer, but I'm using my little flypress with a set of fullers in it. Before I got this baby I had to do it all by hand with a heavy cross-peen hammer in one hand, which is why I haven't made a habit of making axes outside of shows and courses! (for kit geeks, the flypress is a Norton No.6)
Then to and fro between the press and a hand hammer, tidying the bevelled surface and the profile of the axe. Keeping things in check as I go, if it gets too far away from my intended shape then it is a struggle to bring back
Final shape with the hand hammer and a couple of normalising cycles before I move to the grinders.
side note: whilst that was cooling, I got to work on a special hammer for bookbinding (Sandsnakes, if you're listening: I've finally got it done!
). This is how I would make an axe from a bar without the hole already in it.Traditionally a slot is cut in the centre of the bar using a chisel, but getting it straight and in the middle is a challenge best avoided, especially when working solo. So I drill a few holes in a line (ish in this case is close enough), then drive a drift through to open and shape
Back to the axe.
Using an angle grinder, I tidy up the profile of the axe that I'm making. Getting rid of any bulges and the writing that was stamped on the top of the hammer head and is now stretched along the top of the blade. I keep it attached to the bar to make gripping it in the vice easier.
Then the sides, again the angle grinder (big one at this point) is my friend!
After severing the head from the handle I go over the whole thing with a 40grit flapdisk on my little angle grinder. This is to tidy up the shape, even out the curves, thickness, etc The weight at this point is approx 560g (i say approx as the scales in the workshop aren't all that precise), I expect it'll lose another 10g or so when I finish it and grind the edge on.
The next step is to heat treat the head, do the final grinding and fit a handle before sharpening it up
That'll have to wait til next week!thanks for sticking with me there
 looking really good.