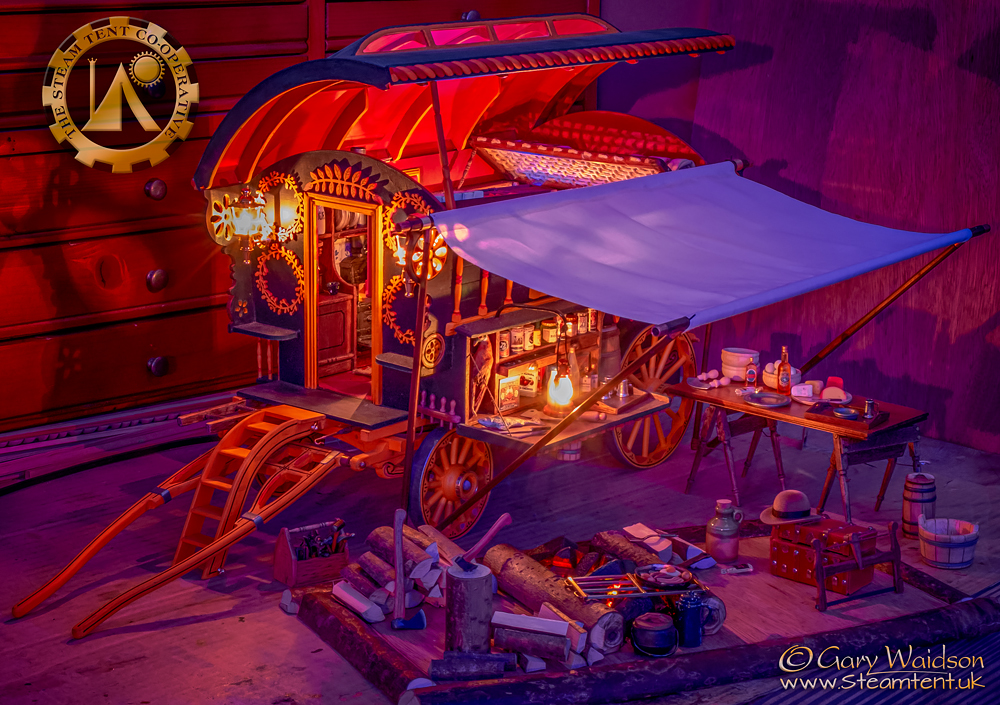
Downsizing.
- Thread starter Wayland
- Start date
-
Come along to the amazing Summer Moot (21st July - 2nd August), a festival of bushcrafting and camping in a beautiful woodland PLEASE CLICK HERE for more information.
You are using an out of date browser. It may not display this or other websites correctly.
You should upgrade or use an alternative browser.
You should upgrade or use an alternative browser.
Well I don't have your skills or tools or box of bits! But it's amazing what you can do with two tiny collar buttons and a kebab stick! Just trying to find some suitably thin wire to make the line guides and something thin enough for the line. Possibly some embroidery cotton.
Then I've got to paint the reel and handle... and bobs your grandma!
Then I've got to paint the reel and handle... and bobs your grandma!
If you have any scraps of electrical cable, especially the stuff with multiple strands of copper for flexibility rather than the single core stuff. Just strip off the insulation and you'll find loads of good wire.
I'm always salvaging cable whenever I see it.
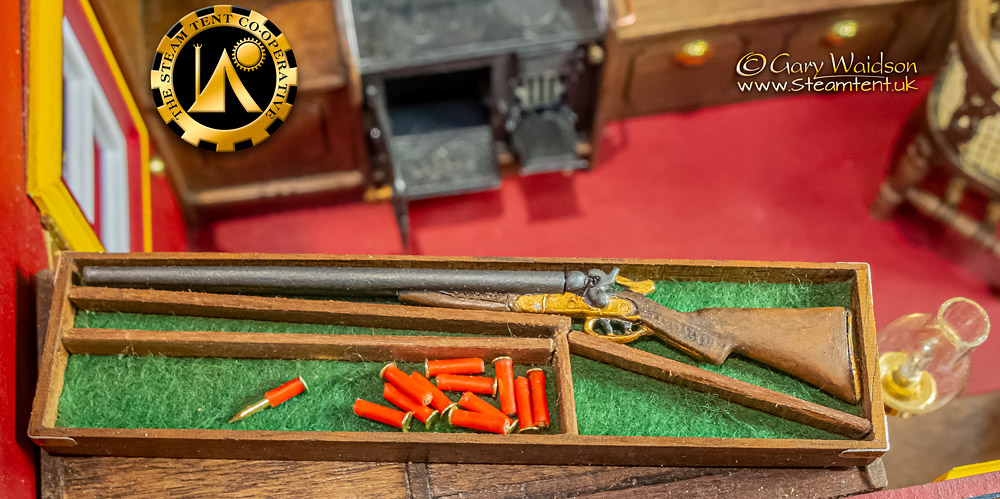
Now I've even found a use for the insulation so that's great. Take a look at the shotgun shells.
Reduce, reuse, repurpose, repair, recycle.
I'm always salvaging cable whenever I see it.

Now I've even found a use for the insulation so that's great. Take a look at the shotgun shells.
Reduce, reuse, repurpose, repair, recycle.
Last edited:
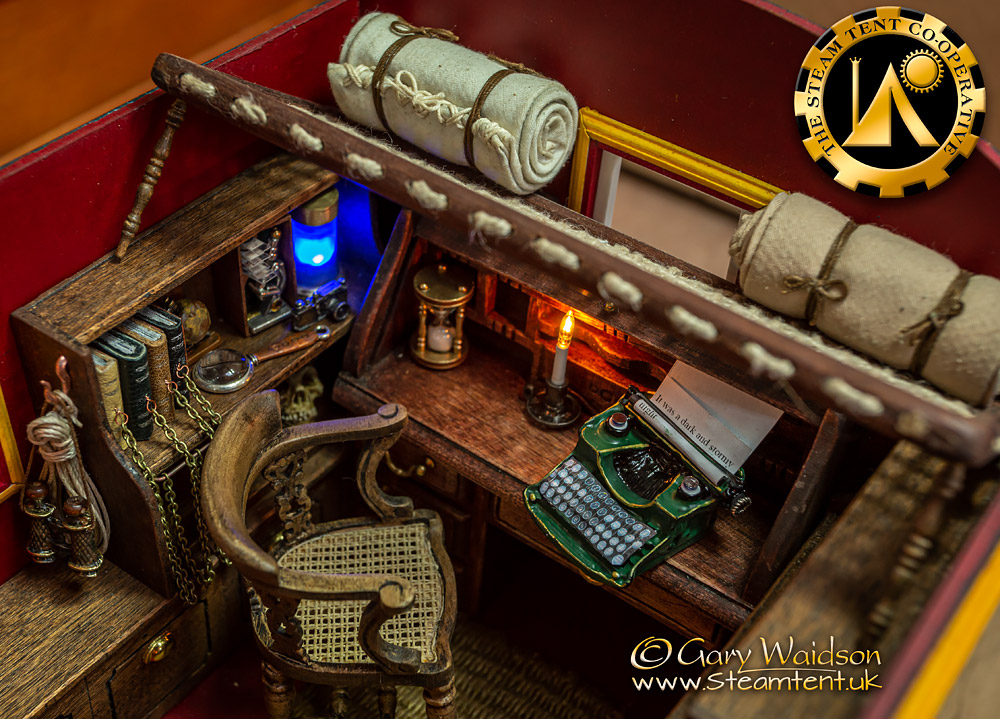
Just finished the mattress and bedding rolls for the Vardo.
I'm using bias binding for the fine weave fabric but I've stuck it to some heavier linen to bulk it out and give it body.
The bindings are just heavy thread from my leather working kit and the rope frame bed is recycled mahogany and some hemp cod line.
Last edited:
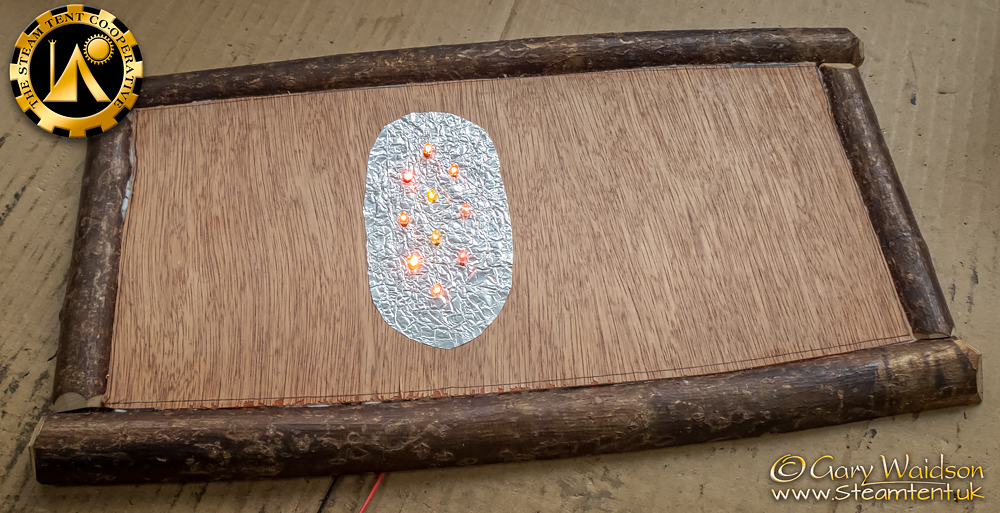
Had a little break from this but decided to start making the camp fire diorama.
The base is designed to to blend onto a table or shelf when it is displayed next to the vardo so I halved some well seasoned sticks to simulate a log perimeter and built a platform on top so I can run some wiring underneath. I will add a more earth like surface later on.
The main feature will be the fire of course so I've installed red, yellow, and orange flickering LEDs on a foil reflector ready to build everything else on top.
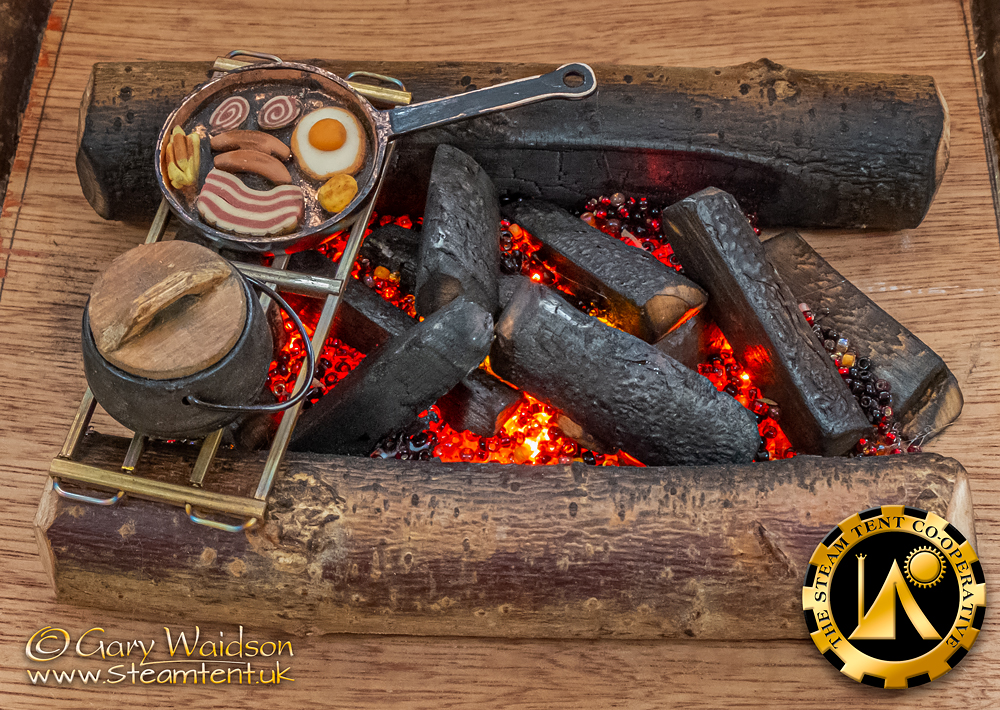
After a little tinkering, here you can see the bed of the fire laid in with scorched twigs and seed beans for the coals.
I don’t do much video but in this case I think it is justified to show how the different flickering LEDs finish the effect.
http://www.steamtent.uk/assets/multimedia/Vardo-Campfire-II.mp4
( The new site wouldn't let me embed it as media because apparently I'm not an approved site. Hey Ho...)
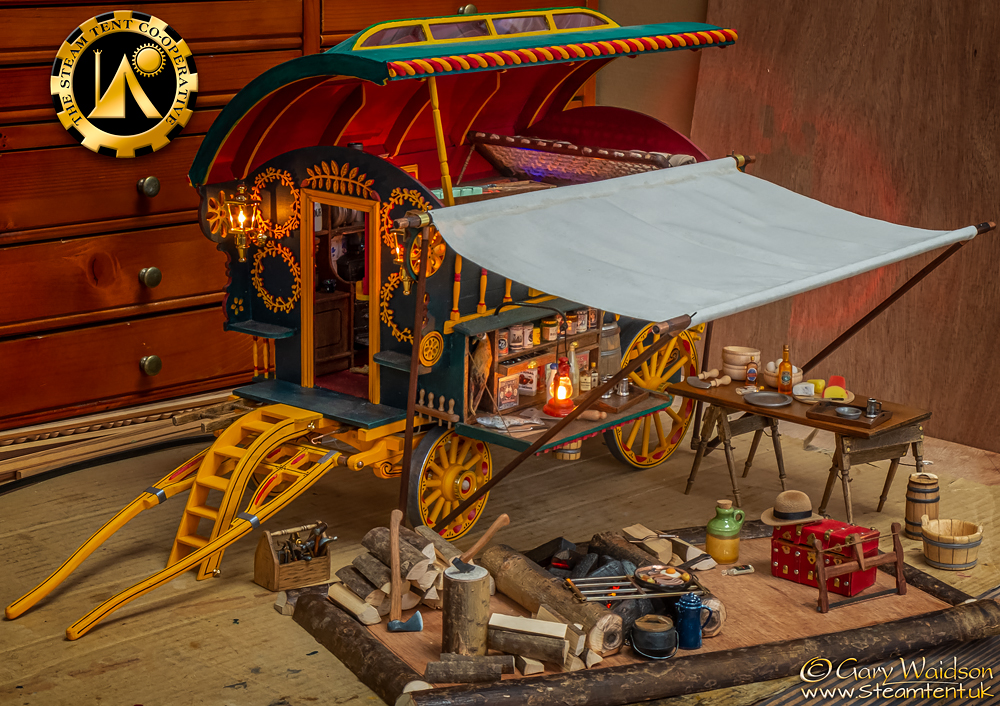
This is a long way from finished but gives you a better idea of the layout and the wider scene.
Last edited:
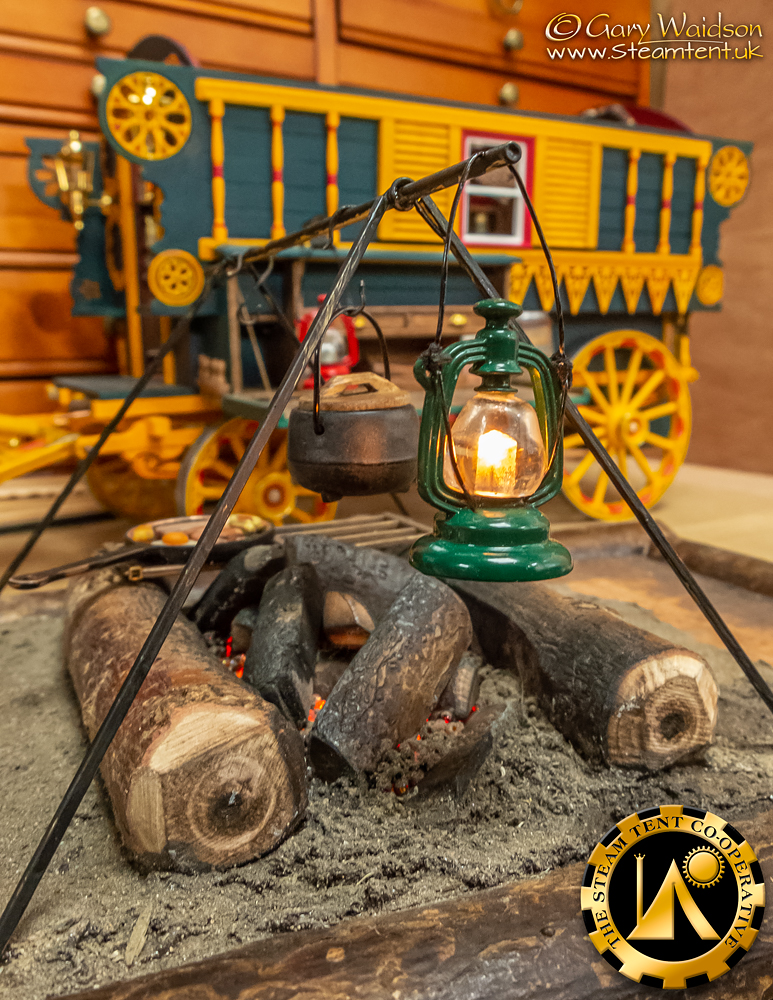
Wiring this fellow up was an interesting challenge.
It started out as a non working model of a hurricane lantern, so I drilled a 1/8th" hole up through the base and into the solid globe. This allowed me to slip a "grain of wheat" bulb into the clear resin with a drop of super glue to hold it.
I then cut the wires in the hollow base underneath so that I could solder two longer wires in their place.
I drilled a 1mm hole each side of the globe to pass the wires through and, having already removed the original wire bail handle, I took the wires up through the handle brackets and bound them in place with a little cotton thread.
The wires were now ready to replace the bail handle.
The pot support bar is actually a brass pipe, just wide enough to accept both wires.
The legs are also brass pipes but square sectioned this time and just wide enough for one wire.
So the wires from the bail now go through a slot on the top and through the bar.
The wires then exit the pipe though holes near to the joints and enter holes in the leg pipes to go down one of the legs at each end and through the base board.
Underneath, they are then soldered onto the bus bars that power the array of LEDs in the fireplace.
This is looking at the back of the diorama so you shouldn't notice the wires by the globe too much and in fact they match the lifting frame of a real lantern pretty well anyway.
no hobo stove
Now there is an idea.
I have been thinking of a smaller camping diorama. That might work for that.
It looks real
Are you entering it in a competetion?
No, this is just for my own enjoyment really.
I am making it all so that it can be portable so it might make it out to some of the Steam Tent camps.
Similar threads
- Replies
- 3
- Views
- 303
- Replies
- 4
- Views
- 366


