Making the beds........
I wanted to make this post as part of the ongoing record of our work to move towards our “self supporting life”. I hope it might make some interesting reading showing what went well and what didn’t in this phase of our journey. We have always wanted to produce more of our own food. This cottage came with a small paddock – one of the reasons we bought it. We have established some gooseberry and rhubarb beds and put in about 14 fruit and nut trees. Now was the time to start on our vegetable beds.
When we moved in the paddock was...just a little overgrown.
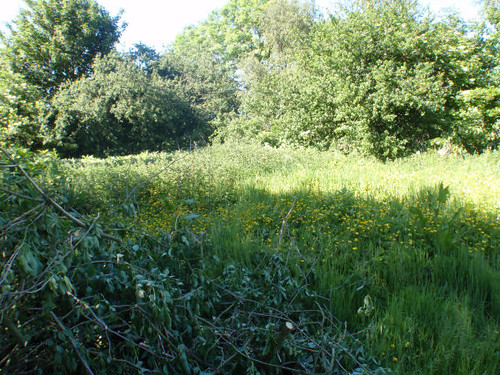 Problem Paddock
 by
British Red, on Flickr
With a lot of work we achieved a “blank canvas”
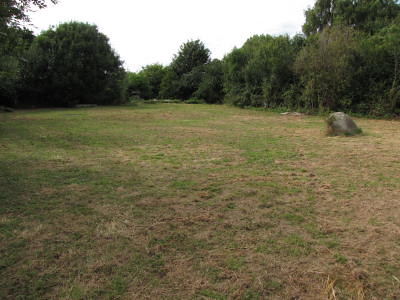 The Paddock now
 by
British Red, on Flickr
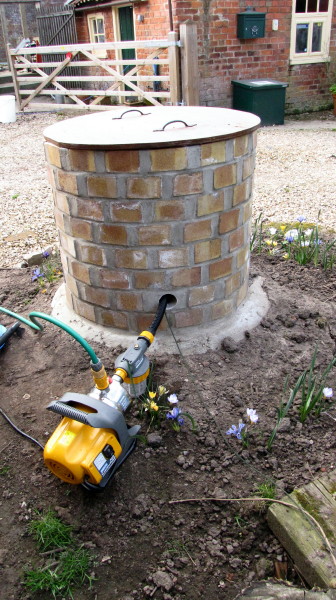
Then we had to dig it all up again to put in field drains and a new septic tank and soakaway
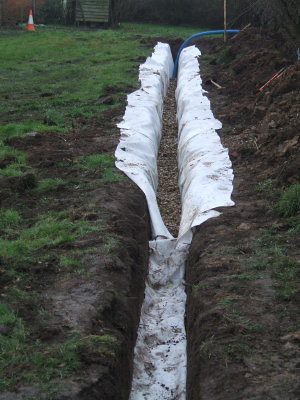 Field Drain 3
 by
British Red, on Flickr
Then we re-seeded the paddock, mowed, cut back etc. Which got us to this
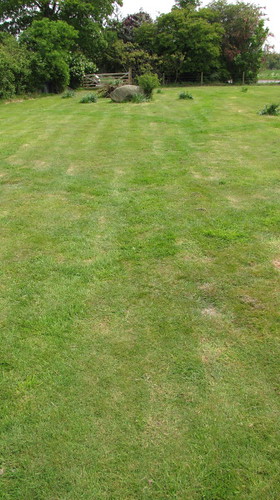 VB 1 - The Paddock
 by
British Red, on Flickr
Lessons Learned:
Don’t mess about laying out a garden until you have finished all drainage and utility work. No point digging things up twice or tidying twice.
With big work, use big tools. You can save time and money.
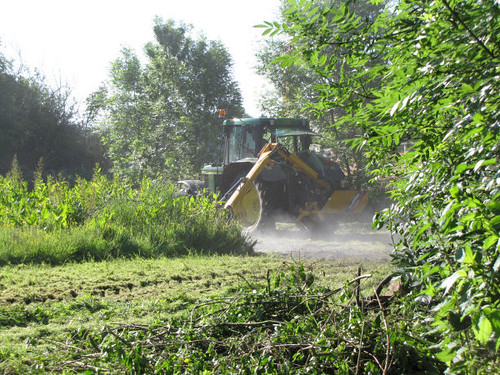 Thats the way to do it
 by
British Red, on Flickr
Now, we have put in and planted vegetable beds in the past. But we have never had the luxury of a completely “Blank Canvas”. We have read many books during our thirty years of gardening and we did want to incorporate several “principles”:
1) Have a planned “rotation cycle” to use nitrogen fixing plants, deep rooted and leafy plants to make the most of the soil in a sustainable way
2) To use narrow, long beds with walkways in between. The purpose of this is so that the beds are never stepped on (and the soil compressed) for weeding, planting or harvesting. The centre of a four foot wide bed is only an “arms length” from one side or the other.
3) To edge the beds to contain the soil. We worked our last veg beds for seven years, adding manure and compost every year. The height was considerably raised.
4) To leave room in the initial construction to work in more organic material for several years.
5) To standardise our bed size. This lets us build cloches, bird and butterfly cages etc. that can be moved from bed to bed as needed.
We decided to standardise on beds of 4’ wide by 25’ long (as discussed in the seminal work of John Seymour in “The Self Sufficient Gardener”.
The next thing we wanted to know was which side of the paddock faced South
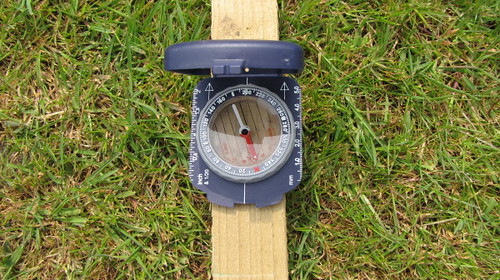 VB 2 Check South
 by
British Red, on Flickr
The right hand side of this picture faces almost due South
VB 1 - The Paddock by
British Red, on Flickr
I’m sure everyone knows this, but the South side of any plot gets the most sun.
We planned to put in five beds each of 100 square feet as our “initial” development and then add more in similar sized batches of beds. This led us to a question. Should we put the wide side of one bed on the South side of the paddock and then add more beds behind it? This would allow us to put low growing crops to the South and then put successively higher plants (sweetcorn, beans etc.) behind them. This seemed fine, until we realised that we wanted to “rotate” the beds each year. Putting the wide side to the South would mean that, eventually, tall plants would be on the South and therefore shade out lower growing plants. We settled on aligning the beds North to South. This allows us to have tall crops in any bed without shading out the rest of the beds.
Lesson Learned.
Ensure that your plan permits the maximum flexibility of moving different types of crop around before “committing”.
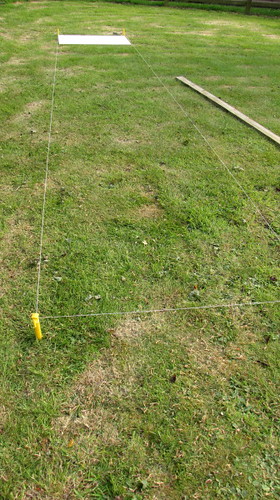
So enough thinking. Time to start pegging out the beds.
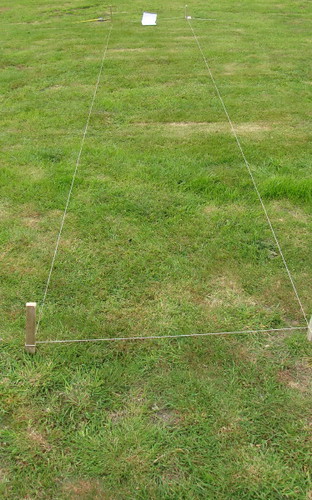 VB 3 Peg Out
 by
British Red, on Flickr
There we go. Looks neat huh? We even calculated the “corner to corner measurement” to ensure they were square (hence the notepad. You will need one).
Lesson Learned:
You will need more than one tape measure. You will also need a looong tape. I borrowed a surveyors tape (100’
")
, from a neighbour. It was an old one (feet and inches). Timber is only sold in metres now so the notepad had the measurements in both.
At this point I got very p***ed off. I could not get the beds both square and aligned. I also realised we had started in the easiest place. This is also known as the “wrong place”.
Lessons Learned:
Consider where your water and compost is / will be when locating your veg beds. You do NOT want to barrow tons of compost or move gallons of water further than you need to.
Big wooden pegs and are useless of pegging out. If the peg is an inch wide, the string can move by an inch on the peg ruining you measurements.
All the pegs were removed at this point and I went digging for old tent pegs. I also went into the “barn of much left over stuff”. Looking for wood. I found a long baulk of timber and a half sheet or plywood.
BB had a stroke of genius at this point and did some research. The type of timber we wanted to make the bed edges came in “metric” sizes. Basically it was available in multiples of 1.2m. We settled on beds that were 1.2m by 7.6m (roughly 4’ by 25’
.
Lesson Learned:
Size your beds to the material available (or sensible fractions and multiples of them).
What we also did next was work out how wide the paths had to be. As a minimum, we nedded to be able to kneel comfortably between the beds – this implied about a 3’ width. Again BB’s brain helped. She measured the width of our ride on mower and added a few inches. Interestingly this made the paths the same width as the beds (1.2m).
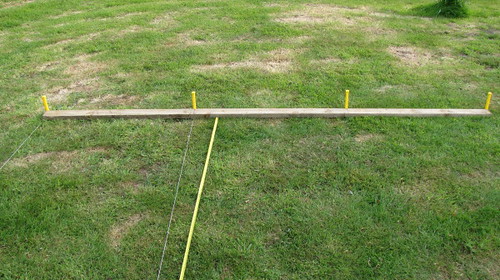
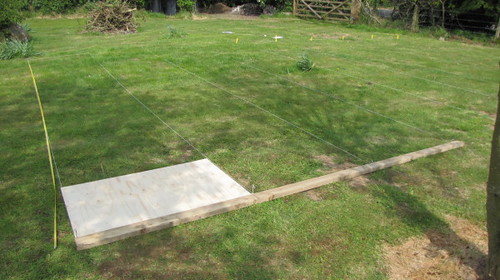
I cut the plywood off cut to exactly 1.2 across by 60cm long. This would let us lay out both pegs at one end of a bed and check the sides were parallel. I marked the long timber baulk up to show 1.2m, 2.4m and 3.6m. This would let us check that two beds and the path between them were perfectly aligned to one another.
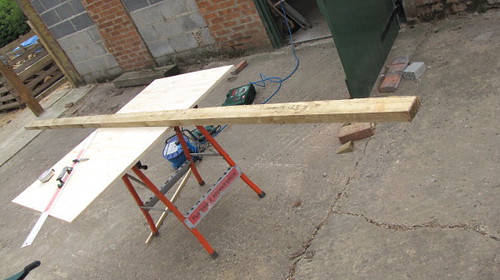 VB 6 Width board and length board
 by
British Red, on Flickr
We started properly this time. We picked a “key peg” and measured a “mowers width” from the barbed wire fence at one end of the paddock.
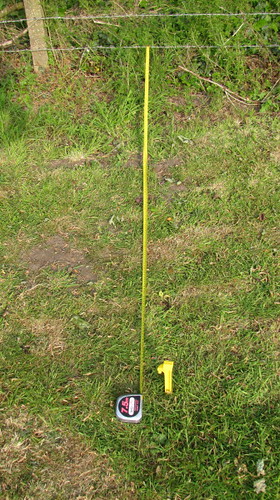 VB 7 - Key off fence
 by
British Red, on Flickr
We measured a second parallel peg from the same fence
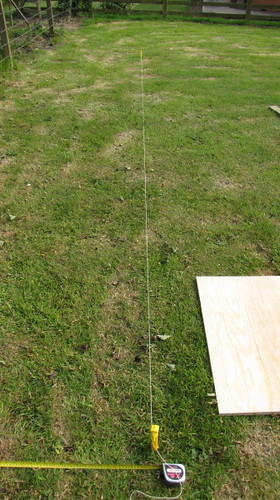 VB 8 - First Length
 by
British Red, on Flickr
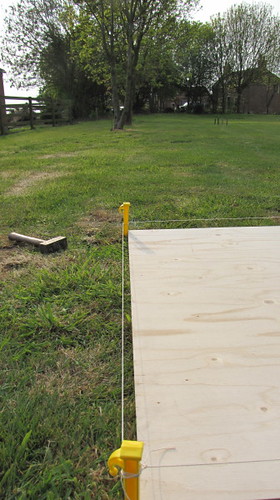
Using the ply board, we set out the other side of the bed
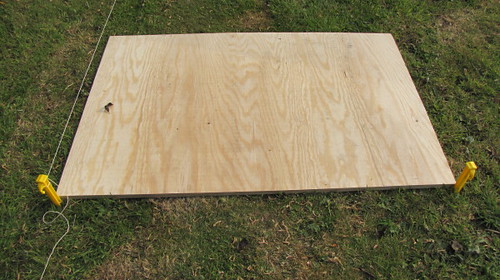 VB 9 Width Board
 by
British Red, on Flickr
 VB 10 Square
 by
British Red, on Flickr
Then, as we were getting used to, we had an “oh sh**” moment. The paddock is not square. If we continued pegging out the beds parallel – we would run into the line of “wind break” ash trees.
 VB 11 - Trees in way
 by
British Red, on Flickr
So we unpegged it all and aligned down the sides of the trees (ensuring at least a mowers width at the fence end).
Lesson Learned:
Its a pain to move pegs – but one heck of a lot easier than moving the beds!
Having pegged out the first bed that finally looked “okay”, the timber baulk came into play to align one bed to the path beside it and the next bed.
 VB12 Beds and Paths
 by
British Red, on Flickr
This gave us squarely aligned beds
 VB 13 Parallel Beds
 by
British Red, on Flickr
We continued using the board and timber baulk to align subsequent beds
 VB 14 Both Boards
 by
British Red, on Flickr
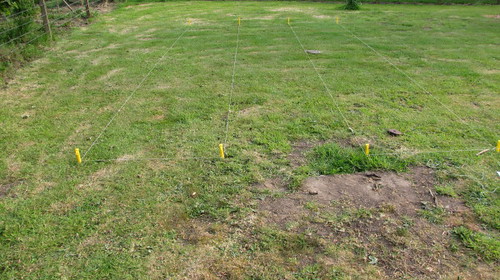
Eventually we had pegged out our five initial beds
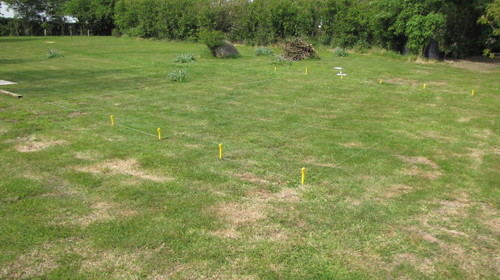 VB 15 Line of Beds
 by
British Red, on Flickr
Nest we had to remove the turf. I wanted to use a “turf cutter” or even a spade to cut the turf. We had had no rain in nine weeks at this point. I could rest my entire weight on a sharpened spade and not get it in more than half an inch. Cutting turf just wasn’t feasible. I used a fast breakdown weed killer to kill the grass off as a result.
Lesson Learned:
Cut beds in the Winter when the ground is wet and soft.
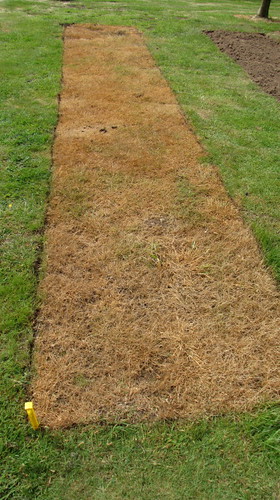
After a spray and a few days we had this
 VB 16 Grass Killed
 by
British Red, on Flickr
Once the grass was dead, we set to with “cutting in”. Tools used were a lawn edger, sharp spade, soil rake and yard brush.
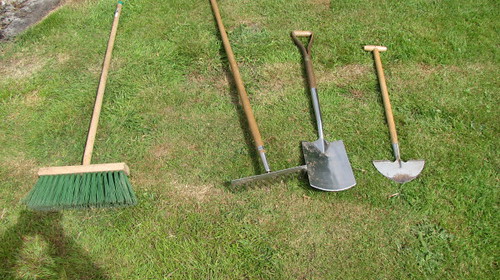 VB 17 Tools
 by
British Red, on Flickr
First the lawn edger was run down the string and stamped in to cut the turf.
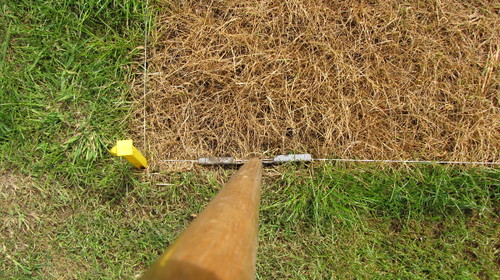 VB 19 Follow String
 by
British Red, on Flickr
The string was removed when the bed was cut all the way around
 VB 20 String off
 by
British Red, on Flickr
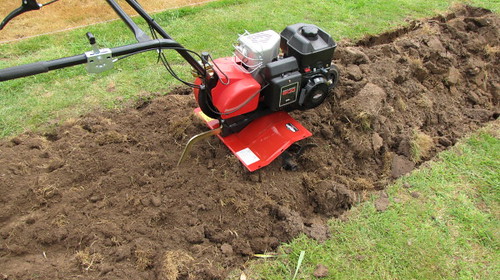
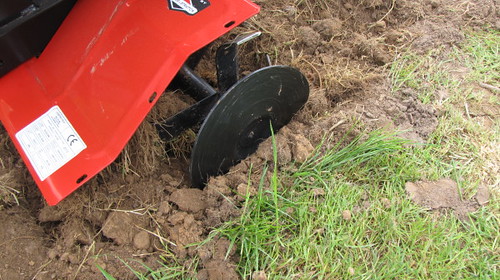
Then I wheeled out the rotovator. These can be hired, but we intend to have a fair sized number of beds so have invested in our own.
 VB 21 Rotovator
 by
British Red, on Flickr
The dead grass was rotovated under, paying particular attention to get the rotovator deeply in to the middle of the bed
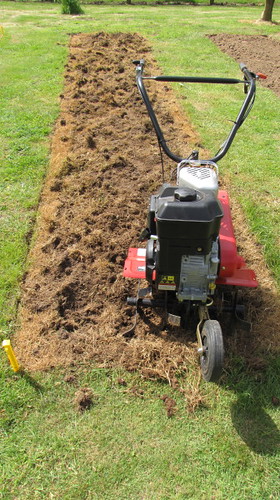 VB 22 Rotovate Middle
 by
British Red, on Flickr
To ensure the soil was uniformly broken to a fine tilth, I hand dug the edges of the bed
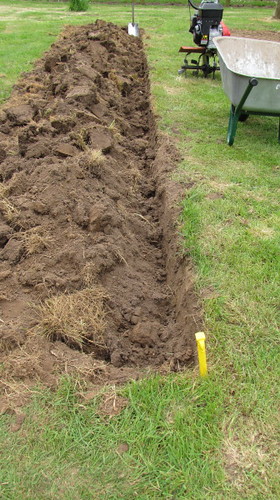 VB 23 Dig edges
 by
British Red, on Flickr
The soil was mounded up in the middle
 VB 24 Pile Up soil
 by
British Red, on Flickr
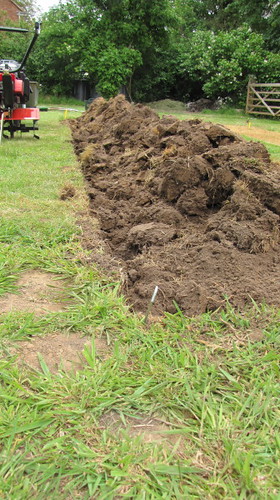
The mounded up soil from the sides was then rotovated reducing the large clumps to a fine tilth and forcing that tilth back into the trench.
 VB 25 Rotovate Pile
 by
British Red, on Flickr
Lessons Learned:
Buy a rotovator where the handles can be “offset”, allowing you to rotovate whilst walking on the path
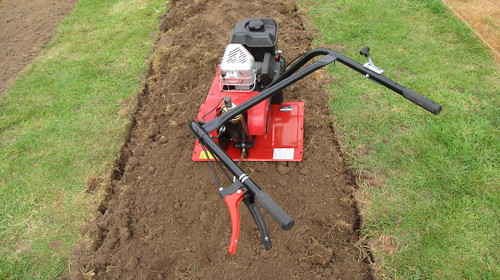 VB 26 Offset Handles
 by
British Red, on Flickr
Buy a rotovator with a reverse gear (red handle) so you can go over the same ground repeatedly and turn the rotovator without hauling it round by brute force.
Next I wanted to ensure I had got as deep as possible turning the soil at the edge of the beds. This is tricky with the normal tines as they are a “bent x” shape and its hard to see the edge when moving
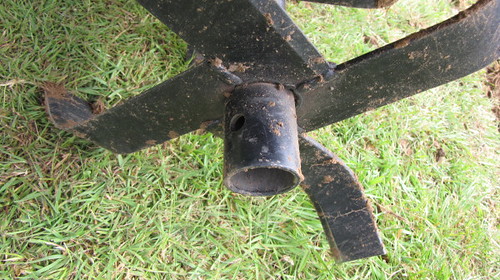 VB 27 Tines
 by
British Red, on Flickr
Fortunately I have “edge guards” which can be fitted to the blades
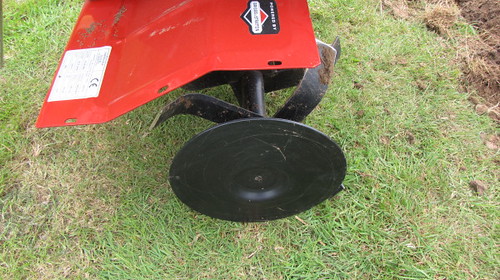 VB 28 Edge Protector
 by
British Red, on Flickr
The edge guards can be pressed against the cut edge of the bed to ensure the rotovator is getting right to the edge without tearing up the path
 VB 29 Edges
 by
British Red, on Flickr
You can see though that some tilled earth does spill out on the path. The timber edging will solve this in due course.
The beds ended up looking like this
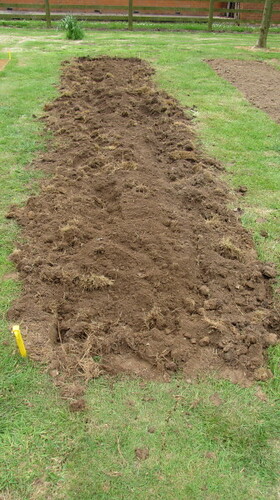 VB 30 Rotovated
 by
British Red, on Flickr
The first job was to use the yard brush to sweep the soil back into the bed
 VB 31 Swept In
 by
British Red, on Flickr
Then the soil rake was used to remove dead grass and stones
 VB 32 Raked
 by
British Red, on Flickr
Next job was to improve the soil. Last year my “horse keeping” neighbour dropped a few JCB buckets of horse manure round for me into my compost area. I layered it with grass clippings and wood ash from the stoves, covered in heavy polythene and rotted it down.
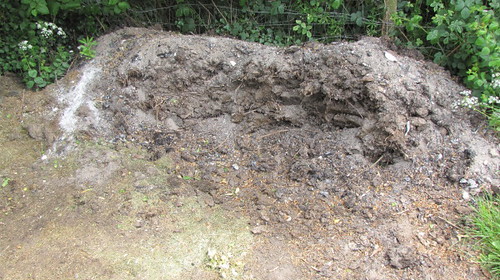 VB 33 Muck Heap
 by
British Red, on Flickr
I had about three tonnes left for these five beds – so I dug it out by hand and barrowed it on.
 VB 35 Rake Out Muck
 by
British Red, on Flickr
Lesson Learned:
When a kind neighbour offers you their mini digger, accept with thanks!
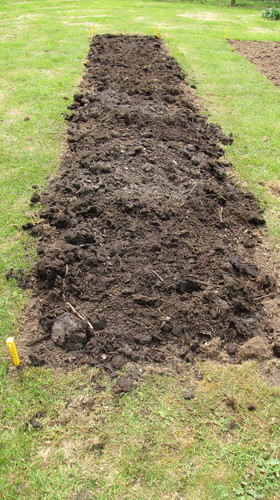
The “muck” was then rotovated in and the soil reduced to a seed bed.
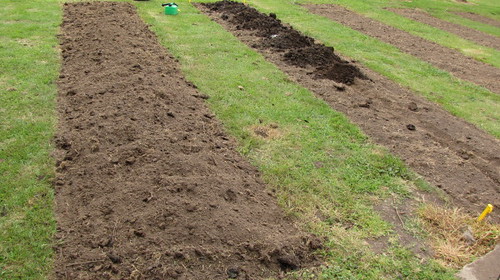 VB 36 Rotovate Muck In
 by
British Red, on Flickr
The soil was pretty much ready so it was time to buy the edge timber. I looked at all the chain store stuff. It was expensive and, frankly, rubbish. Enter BB again. “What about that local firm that supplied our gateposts and fencing” she asked? They are a few miles away so we shot round to see the guy. He remembered BB.
Lesson Learned:
Let the pretty 6’ willowy girl get the prices 
The guy asked what we wanted. 300 board feet of pressure treated 6” x 1” timber. Plus a load of 2”x 2” stakes
Did I mind long lengths? Did I mind slight “off true” timber?
No to both. A cash deal was done for really thick strong decking timber that was slightly warped in pressure treating so not quite right for decking (maybe 1” off in 12’
. Easy enough to stake it straight enough for our purposes though. The guy delivered it free the next day
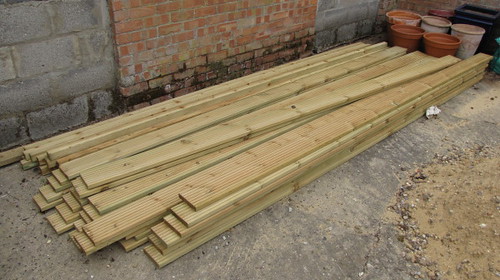 VB 36 Timber
 by
British Red, on Flickr
(apologies for the messy yard, the ballast shown is for mixing concrete for another project)
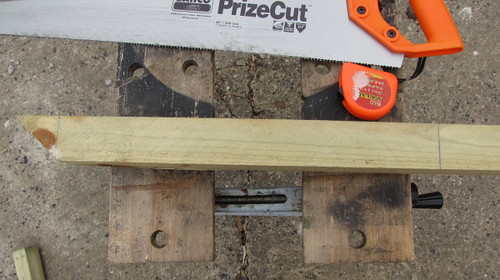
Next job was to cut the timber to size. With long lengths of timber you really need two saw benches. Other tools used were a steel rule, steel tape, carpenters pencil and panel saw.
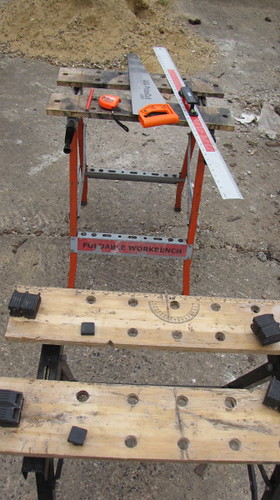 VB 37 Tools
 by
British Red, on Flickr
The first thing I did was to cut 50 stakes (each 18” long). Given I had very long length of 2x2” timber, I cut a 45 degree angle which formed points for two different stakes
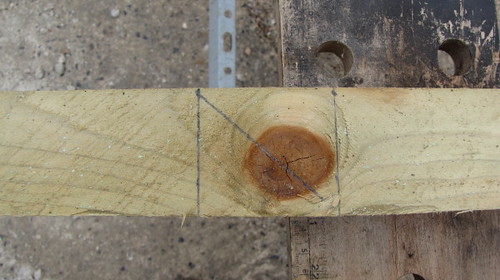 VB 38 Marking Points
 by
British Red, on Flickr
Each alternate cut was at 45 degrees and ninety degrees – this gave a sharpened stake
 VB 39 Point cut
 by
British Red, on Flickr
The planks were 3.6m long (just under 12’
. We made the beds 1.2m wide so one long plank could be converted to three “end pieces”. The beds were 7.2m long so exactly two planks long
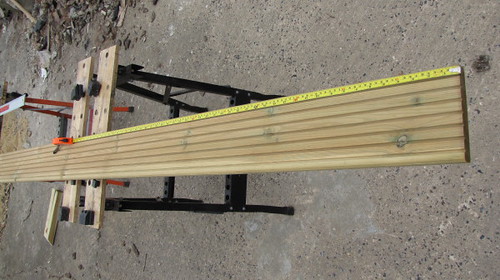 VB 40 Measure small Sides
 by
British Red, on Flickr
Given the planks were 6” wide, the stakes would go about a foot into the earth for support.
 VB 41 Size of pegs
 by
British Red, on Flickr
Having cut planks and stakes, I got wheelbarrow full of bricks
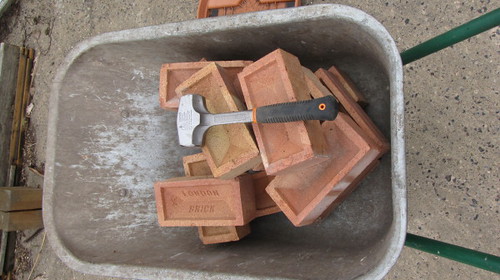 VB 42 Support Bricks
 by
British Red, on Flickr
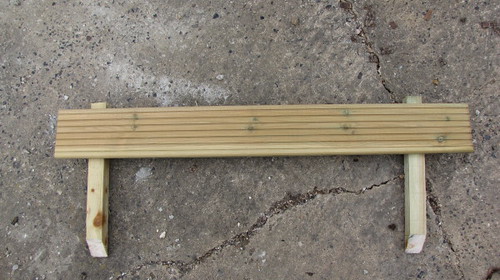
This was so that we could “prop up” the planks in place prior to hammering in the stakes
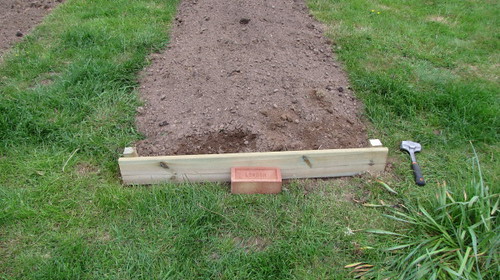 VB 43 First End
 by
British Red, on Flickr
Once one end was staked, the rest of the planks could be propped in place then staked
 VB 44 Sides "Offered Up"
 by
British Red, on Flickr
Lesson Learned:
I thought a 4lb brick hammer would be enough to drive the stakes. The ground was so hard that I switched to using a 10lb sledge hammer. Again, do this when the ground is soft!
Having staked the whole bed (and when my hands stopped vibrating!) the planks were screwed to the stakes with 3” anti corrosion deck screws. A battery drill to make pilot holes and a battery driver speeded this part up immensely over using a brace and bit and hand screwdriver.
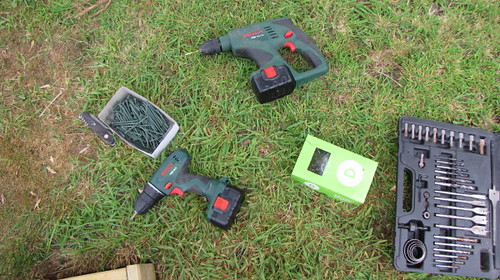 VB 45 Drill, Driver and Deck Screws
 by
British Red, on Flickr
Lesson Learned:
Battery powered tools (or petrol powered) are far more useful round “the homestead” than anything tied to the mains – and far quicker than hand tools.
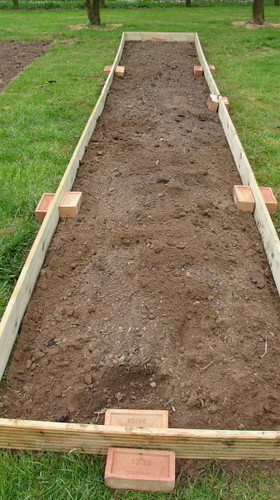
When the first bed was complete it looked like this
 VB 47 Bed 1 complete
 by
British Red, on Flickr
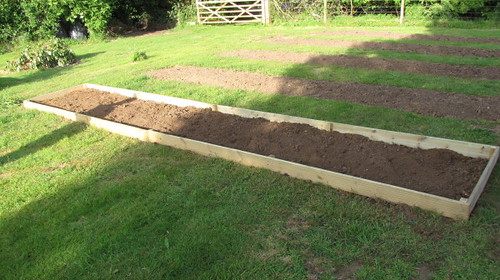
“Rinse and repeat” four more times for our first bank of five beds
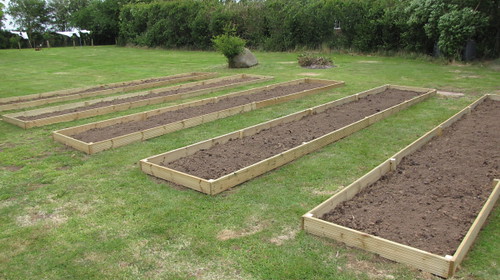 vb 48 All the beds
 by
British Red, on Flickr
Overall, my critical lessons are:
1) Do it when the ground is soft
2) Spend plenty of time planning and marking out. Consider the sun, water, overall garden plan and the position of drains, trees and shade.
3) A few powered tools make a heck of a difference.
4) You cannot have enough manure and compost.
5) Size your beds to a fraction or multiple of the available materials
6) Do it when the ground is soft!!!!!!
Hope my mistakes and lessons help the next person who is planning such a task!
Red
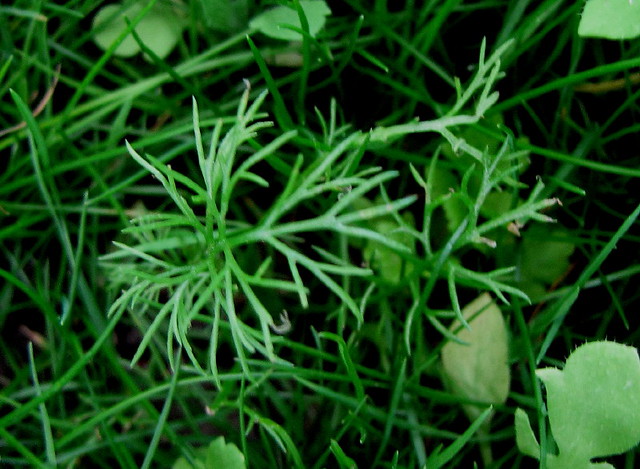
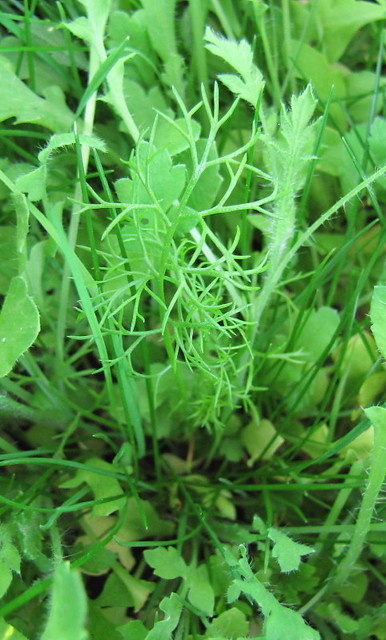

") Would you look for the tuber when they flower? If so that might happen next year.
Would you look for the tuber when they flower? If so that might happen next year.