this my favorite thread of all time,hope youboth have many many good years there. ps please keep the photos coming
Red & BBs retirement home......
- Thread starter British Red
- Start date
-
Come along to the amazing Summer Moot (21st July - 2nd August), a festival of bushcrafting and camping in a beautiful woodland PLEASE CLICK HERE for more information.
You are using an out of date browser. It may not display this or other websites correctly.
You should upgrade or use an alternative browser.
You should upgrade or use an alternative browser.
I just saw this thread and have read through from the beginning. Congratulations on your new place and I hope you spend many happy years there, it's fantastic. 
Dave
Dave
Just to make Toddy laugh...the joys of rural drainage!
Have to replace the setic tank so a lot of test pits dug reveal the water table is......4" below the surface!
So the plans for a basic "replace and extend the soak away" are on hold pending field drains! Now imagine trenching 2' down round the border of a whole paddock when the water is 4" below the surface. Its like digging in soup
See what I mean?

Still when its in it'll work
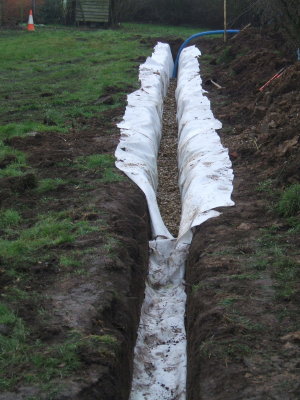
And yes....that is the outside thunder box at the top right!
Never mind, we have plenty of sykes to drain into (and a kind neighbour who let me splic into his field drain). The water has dropped six inches a week for two weeks so its working!
Put in a variety of bird boxes too whilst I was at it
Barn Owl in the ruined barn
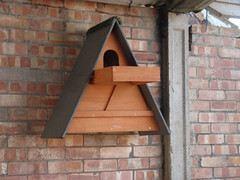
Tawny Owl in the willow
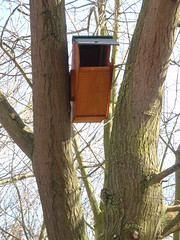
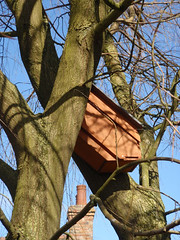
Littlw Owl in one of the elders
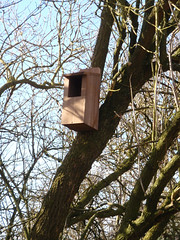
Robin box in a big old ash

Blue tit in a weed ash
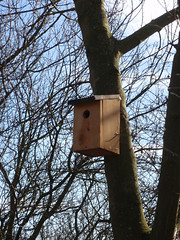
Got loads of gold finches and warblers too - must sort them out when I find the time!
Red
Have to replace the setic tank so a lot of test pits dug reveal the water table is......4" below the surface!
So the plans for a basic "replace and extend the soak away" are on hold pending field drains! Now imagine trenching 2' down round the border of a whole paddock when the water is 4" below the surface. Its like digging in soup
See what I mean?

Still when its in it'll work

And yes....that is the outside thunder box at the top right!
Never mind, we have plenty of sykes to drain into (and a kind neighbour who let me splic into his field drain). The water has dropped six inches a week for two weeks so its working!
Put in a variety of bird boxes too whilst I was at it
Barn Owl in the ruined barn

Tawny Owl in the willow


Littlw Owl in one of the elders

Robin box in a big old ash

Blue tit in a weed ash

Got loads of gold finches and warblers too - must sort them out when I find the time!
Red
Well, work is nearly complete laying in our new septic tank, soak-away and field drains.
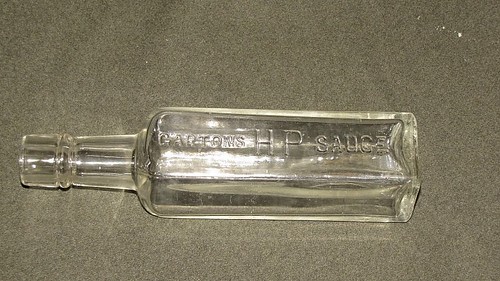
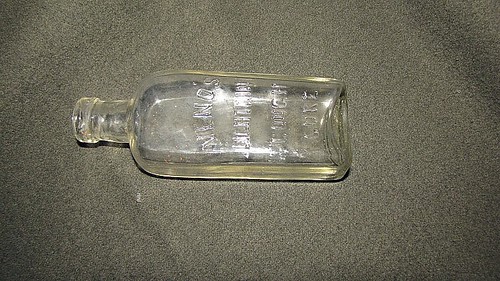
At one point when applying the back hoe, little bottles started to appear. A little google-fu indicates they ended up under the paddock about a hundred years ago.
Here are a selection
Garstons HP Sauce (worth a google to find the history of HP Sauce)
Venos Lightnin (sic) cough cure
Seedhouse concentrated beverages (no info on this one - anyone???)
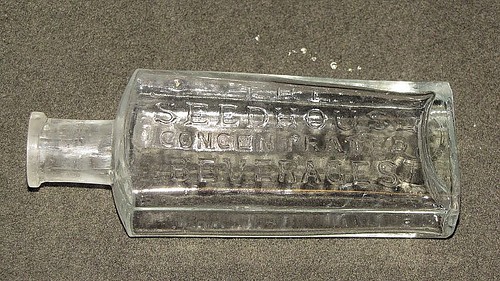
I love turning up the old horse shoes, hand made nails and staples and other stuff in this place
Silly - but there it is
Red
At one point when applying the back hoe, little bottles started to appear. A little google-fu indicates they ended up under the paddock about a hundred years ago.
Here are a selection
Garstons HP Sauce (worth a google to find the history of HP Sauce)

Venos Lightnin (sic) cough cure

Seedhouse concentrated beverages (no info on this one - anyone???)

I love turning up the old horse shoes, hand made nails and staples and other stuff in this place
Silly - but there it is
Red
Good find Red
One of our favourite haunts as a kid was in wood next to a river, on one of the bends a large sand bank had been exposed by heavy rains I expect. In that bend we must have found hundreds of different bottles which we washed in the river and then took up to my mates mum to ID. There were some real beauties from what I can remember, little green stubby square ones, loads of blue ones, some with marbles in the neck and the thing was they were all intact complete with corks in the top.
I lost touch with that mate but I can remember his mum was writing a book about the village so I'll have to try and dig it out one day.
Thought I might revive this thread as, with the spring, there are lots of plans for the outside of the cottage
Today we created a new fruit bed on an area that had previously been one of the many "dumping areas" of the previous residents. I had previously killed and dug out the nettles and couch grass, but the ground was still pretty rough.
Out came tool # 1 - our Rotovator
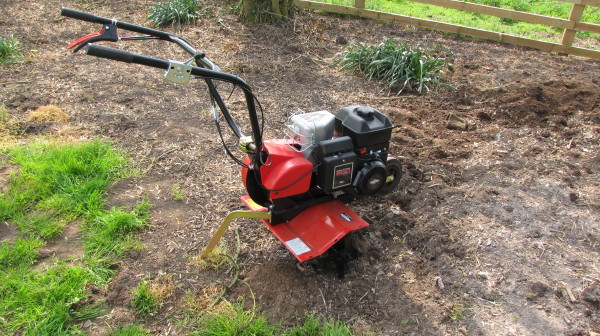
1. Rotovator by British Red, on Flickr
Tips on rotovators - but a big one and above all get one with reverse . When your rotovator blades are 6" underground, dragging it out backwards with brute strength gets really old, really fast! Rotovating is just as hard work as digging - but you get more land done faster.
When your rotovator "rides up" out of the ground, its because it has hit something hard. In this case - a huge lump of concrete (base of an old fence post). Enter tool #2 - a 6 foor floor bar (straight crowbar). With a log for a fulcrum, digging out the concrete post base was a quick job (although carring it off wasn't)
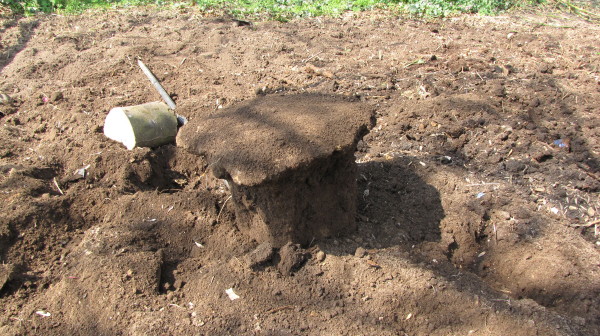
2. Fence Post by British Red, on Flickr
Having dug out three wheelbarrows of fence posts bases (2 ), brick, tile, hinges, wire, concrete and sundry rubbish, we had a nice tidy bed of soft soil
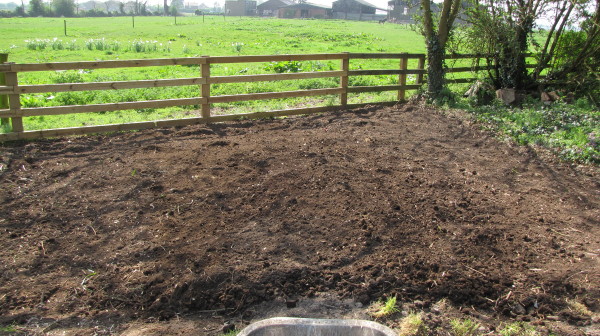
3. Cleared Bed by British Red, on Flickr
Into this bed we wanted to plant a couple of fig trees we have pot grown (well actually bucket grown) and a load of gooseberry bushers we produced as "layers" from our old hosue. The thing with fig trees is that if you don't restrict their roots, they take a century or so to fruit. Traditionally, brick lined pits were constructed for this. I could have done this, but I wanted to try a tip from a book - washing machine drums. They have holes to let moisture in, but the holes are small enough to mean large roots can't get out. We couldn't get washing machine drums - but we got a couple of drier drums from the local tip.
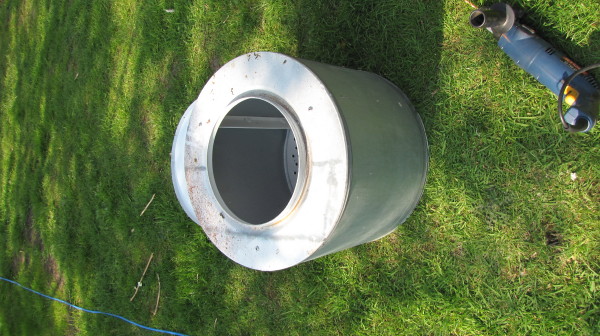
4. Drier Drum by British Red, on Flickr
Trouble with drier drums is they don't have holes! Enter tool #3 - a stonking big drill with a small metal bit.
Basically I dilled the snot out of the bottom 2/3 of the drum all the way round
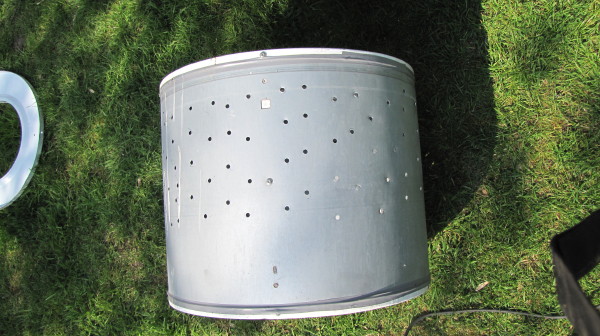
5. Holes Drilled by British Red, on Flickr
After drilling, I wanter to take off the lip from what would become the top of the drum. This is so that I can plant the tree right against one wall - for reasons that will become clear later.
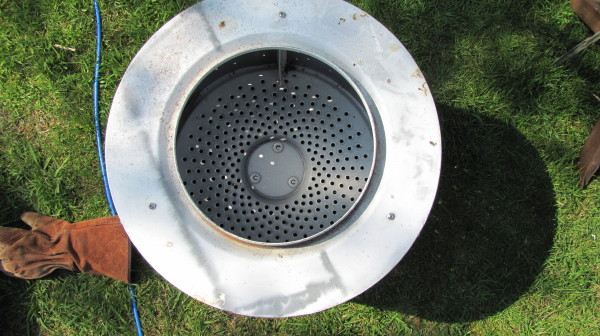
6 Lid by British Red, on Flickr
With the lip removed (just remove a few screws) we have this
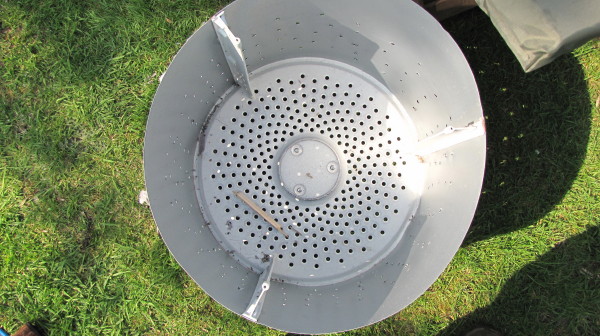
7. Lid off by British Red, on Flickr
Having done the same to a second drum, I put the drums where the trees were to go
Enter tool #4 - a Devon (long handled) spade. For digging deep holes, ditch work etc, long handled spades save your back a lot of grief! Mine is known as "poppas burying shovel"
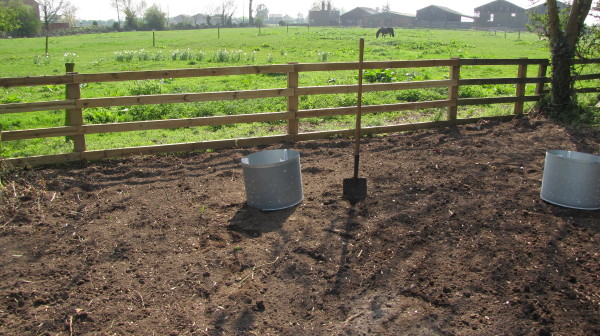
8 Long Handle Spade by British Red, on Flickr
I laid out the other tools ready for use - tree stakes, tree guards, ties, club hammer, post rammer and spirit level.
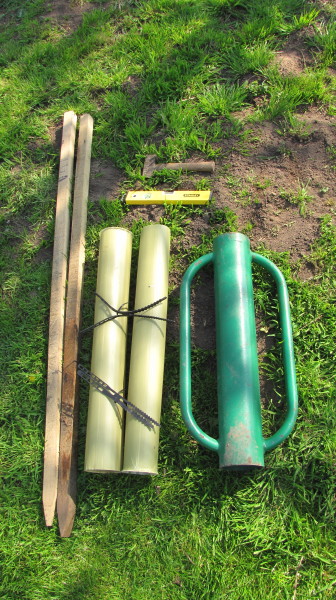
9 Tools by British Red, on Flickr
Next a hole was made slightly wider than the drum and deep enough that the drum would sit in the hole level with the soil
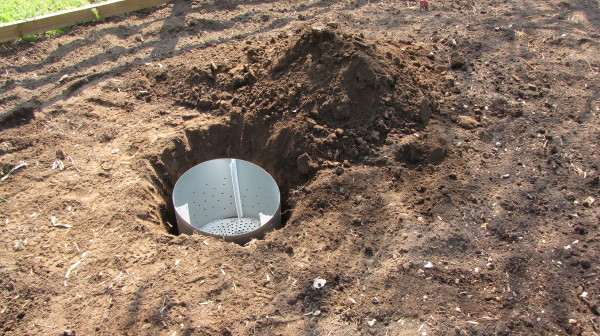
10 Level by British Red, on Flickr
The sides were back filled
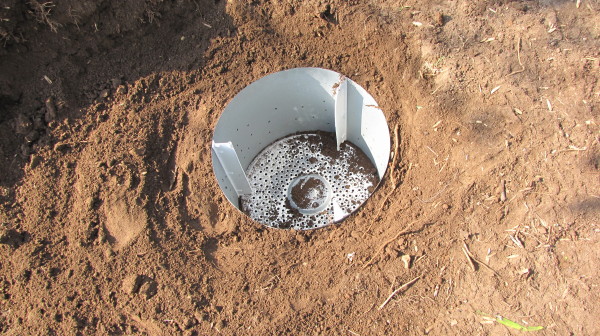
11 Back Fill by British Red, on Flickr
Some soil was placed in the bottom and washed through the holes to ensure no air pockets existed under the drum
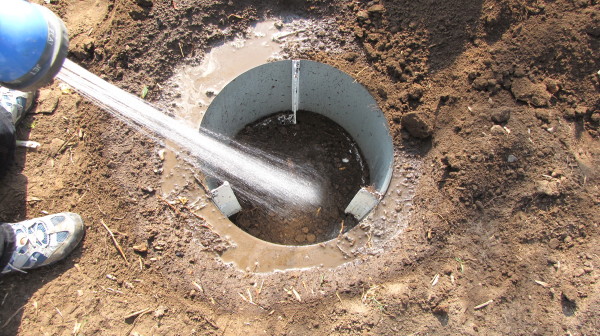
12 Wash in soil by British Red, on Flickr
This is the fruiting fig we have been pot growing for a couple of years. Bought them as "dead" twigs in the winter in a garden centre for a couple of quid apiece
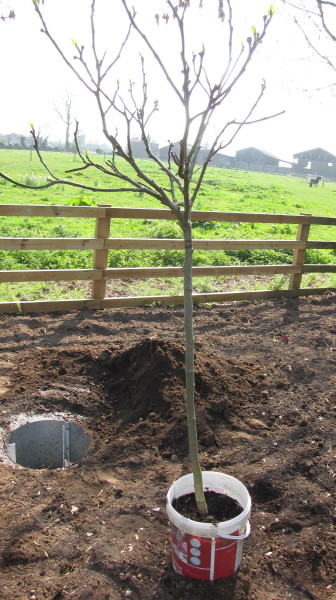
13 Pot Grown Tree by British Red, on Flickr
Testing the pot in the soil (against the wall of the drum) shows it sitting too deep. Its important not to plant fruit trees at a different level than the soil in the pot as this can mess up grafts etc.
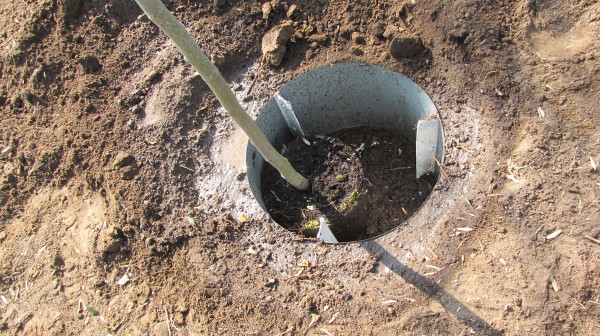
14 Against Edge by British Red, on Flickr
More soil in the bottom brought the tree to the right height
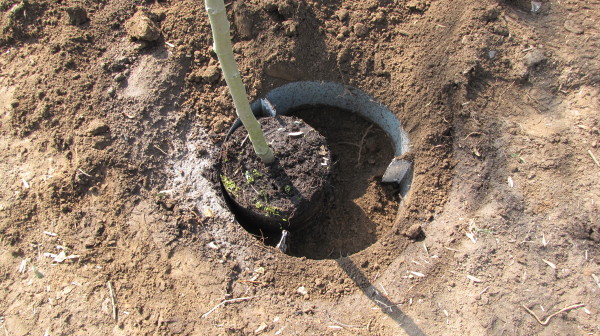
15 Plant at Edge by British Red, on Flickr
The tree is at the edge of the pot because I want to stake it. The drum would prevent the stake being knocked in deeply enough - so I will put the stake outside the drum. This is why the tree needs to be near the edge of the drum.
The drum is then filled in with rich soil and manure and watered well to prevent air pockets.

16 Infill by British Red, on Flickr
Next the tree stake is banged in about 18" with a club hammer - tool #5. A decent club hammer is invaluable around the homestead - from banging bolsters to tapping in earth bonds.
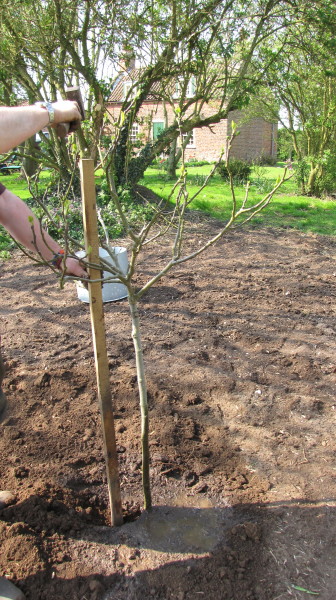
17 Tap In Stake by British Red, on Flickr
When the stake is in firm (not hard) tool #6 comes out - the spirit level. If its worth doing, its worth doing right!
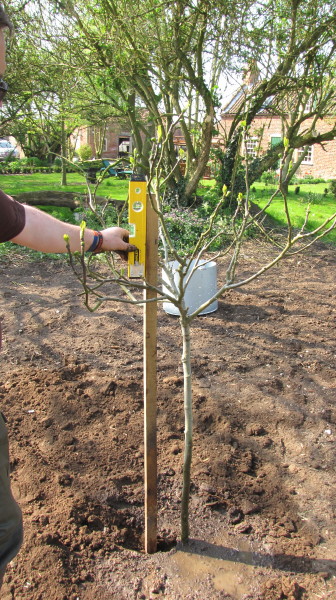
18 Spirit Level by British Red, on Flickr
Now for tool #7 - the post rammer. These are metal tubes, sealed at one end with handles on the side. Because they go over the already vertical stake, they drive straght - you cant hit the post "off centre". Because they are heavy, they drive several inches each bang. They are much easier and faster than using a sledge hammer - especially above shoulder height on big fence posts.
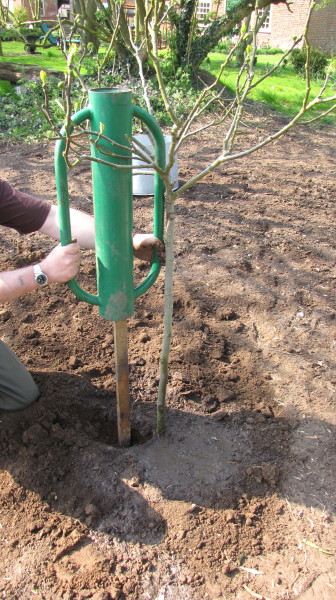
19 Post Rammer by British Red, on Flickr
Next a tree guard is put around the trunk - this stops vermin eating the tender bark and killing the tree by "ring barking"
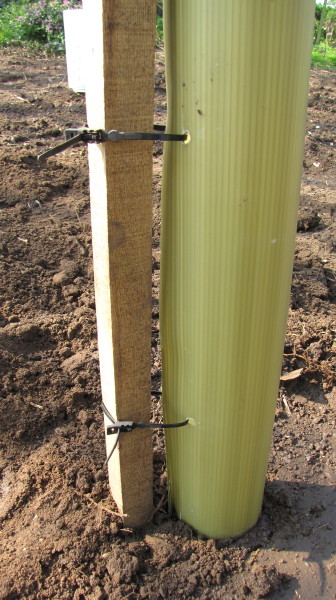
20 Tree Guard by British Red, on Flickr
After this a tree tie secures the tree to the stake to prevent wind damage. Note the "figure eight" shape (not one loop but two). This stops the tree "twanging" into the stake and damaging the bark by acting as a shock absorber
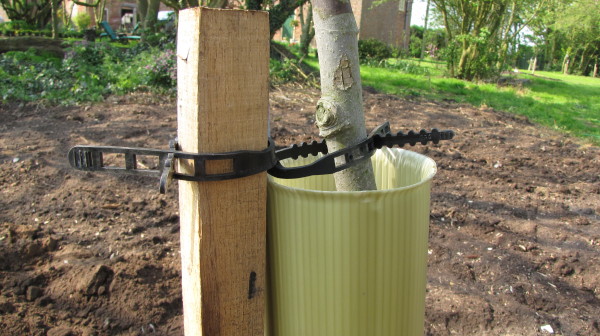
21 Tree Tie by British Red, on Flickr
Hers the finished bed - two fig trees and ten well spaced gooseberries that we will "layer" to fill the bed over the next couple of years.
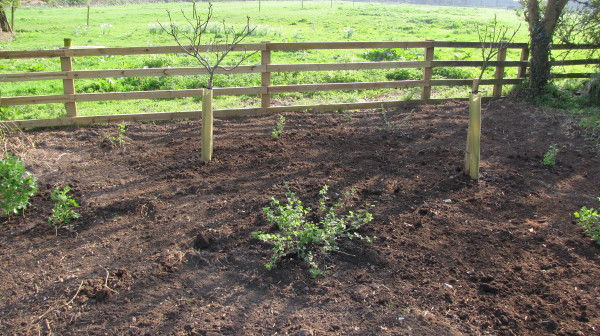
23 Finished Bed by British Red, on Flickr
I hope thats interesting to show a few tools that are interesting, general tree planting techniques and specific fig tree root restriction
Red
Today we created a new fruit bed on an area that had previously been one of the many "dumping areas" of the previous residents. I had previously killed and dug out the nettles and couch grass, but the ground was still pretty rough.
Out came tool # 1 - our Rotovator

1. Rotovator by British Red, on Flickr
Tips on rotovators - but a big one and above all get one with reverse . When your rotovator blades are 6" underground, dragging it out backwards with brute strength gets really old, really fast! Rotovating is just as hard work as digging - but you get more land done faster.
When your rotovator "rides up" out of the ground, its because it has hit something hard. In this case - a huge lump of concrete (base of an old fence post). Enter tool #2 - a 6 foor floor bar (straight crowbar). With a log for a fulcrum, digging out the concrete post base was a quick job (although carring it off wasn't)

2. Fence Post by British Red, on Flickr
Having dug out three wheelbarrows of fence posts bases (2 ), brick, tile, hinges, wire, concrete and sundry rubbish, we had a nice tidy bed of soft soil

3. Cleared Bed by British Red, on Flickr
Into this bed we wanted to plant a couple of fig trees we have pot grown (well actually bucket grown) and a load of gooseberry bushers we produced as "layers" from our old hosue. The thing with fig trees is that if you don't restrict their roots, they take a century or so to fruit. Traditionally, brick lined pits were constructed for this. I could have done this, but I wanted to try a tip from a book - washing machine drums. They have holes to let moisture in, but the holes are small enough to mean large roots can't get out. We couldn't get washing machine drums - but we got a couple of drier drums from the local tip.

4. Drier Drum by British Red, on Flickr
Trouble with drier drums is they don't have holes! Enter tool #3 - a stonking big drill with a small metal bit.
Basically I dilled the snot out of the bottom 2/3 of the drum all the way round

5. Holes Drilled by British Red, on Flickr
After drilling, I wanter to take off the lip from what would become the top of the drum. This is so that I can plant the tree right against one wall - for reasons that will become clear later.

6 Lid by British Red, on Flickr
With the lip removed (just remove a few screws) we have this

7. Lid off by British Red, on Flickr
Having done the same to a second drum, I put the drums where the trees were to go
Enter tool #4 - a Devon (long handled) spade. For digging deep holes, ditch work etc, long handled spades save your back a lot of grief! Mine is known as "poppas burying shovel"

8 Long Handle Spade by British Red, on Flickr
I laid out the other tools ready for use - tree stakes, tree guards, ties, club hammer, post rammer and spirit level.

9 Tools by British Red, on Flickr
Next a hole was made slightly wider than the drum and deep enough that the drum would sit in the hole level with the soil

10 Level by British Red, on Flickr
The sides were back filled

11 Back Fill by British Red, on Flickr
Some soil was placed in the bottom and washed through the holes to ensure no air pockets existed under the drum

12 Wash in soil by British Red, on Flickr
This is the fruiting fig we have been pot growing for a couple of years. Bought them as "dead" twigs in the winter in a garden centre for a couple of quid apiece

13 Pot Grown Tree by British Red, on Flickr
Testing the pot in the soil (against the wall of the drum) shows it sitting too deep. Its important not to plant fruit trees at a different level than the soil in the pot as this can mess up grafts etc.

14 Against Edge by British Red, on Flickr
More soil in the bottom brought the tree to the right height

15 Plant at Edge by British Red, on Flickr
The tree is at the edge of the pot because I want to stake it. The drum would prevent the stake being knocked in deeply enough - so I will put the stake outside the drum. This is why the tree needs to be near the edge of the drum.
The drum is then filled in with rich soil and manure and watered well to prevent air pockets.

16 Infill by British Red, on Flickr
Next the tree stake is banged in about 18" with a club hammer - tool #5. A decent club hammer is invaluable around the homestead - from banging bolsters to tapping in earth bonds.

17 Tap In Stake by British Red, on Flickr
When the stake is in firm (not hard) tool #6 comes out - the spirit level. If its worth doing, its worth doing right!

18 Spirit Level by British Red, on Flickr
Now for tool #7 - the post rammer. These are metal tubes, sealed at one end with handles on the side. Because they go over the already vertical stake, they drive straght - you cant hit the post "off centre". Because they are heavy, they drive several inches each bang. They are much easier and faster than using a sledge hammer - especially above shoulder height on big fence posts.

19 Post Rammer by British Red, on Flickr
Next a tree guard is put around the trunk - this stops vermin eating the tender bark and killing the tree by "ring barking"

20 Tree Guard by British Red, on Flickr
After this a tree tie secures the tree to the stake to prevent wind damage. Note the "figure eight" shape (not one loop but two). This stops the tree "twanging" into the stake and damaging the bark by acting as a shock absorber

21 Tree Tie by British Red, on Flickr
Hers the finished bed - two fig trees and ten well spaced gooseberries that we will "layer" to fill the bed over the next couple of years.

23 Finished Bed by British Red, on Flickr
I hope thats interesting to show a few tools that are interesting, general tree planting techniques and specific fig tree root restriction
Red
Coming on - put eight "bare root" fruit and nut trees in last Autumn and have planted about the same poy grown this spring. Working on the footings for greenhouses now. We have put a nice little wildlife area in with wildflower shade meadow, wood pile to rot down etc. The herb garden and formal flower beds are doing well as we stocked them with perennials last year. Got about eighteen months supply of wood in - need to work on getting that up to two years now.
Fruit cages and veg beds are next - then re-roofing one of the barns.....
Fruit cages and veg beds are next - then re-roofing one of the barns.....
Good idea red with the washer inner, I have been looking at a pile of slabs and bricks for about a year wondering where to dig them in about, that would be a much easier idea!!
Interest but no occupancy as yet. Got Little owls as regular visitors and a pair of tawnys calling. There is a local barnie but he's nesting elsewhere. We are hopeful as they weather in they might get used.
The robin and blue tit boxes were used last year and I'm pleased to see the mistle thrushes and gold finches back nesting this year. I'm pretty sure e have the beginnings of a long tailed tit nest too
The robin and blue tit boxes were used last year and I'm pleased to see the mistle thrushes and gold finches back nesting this year. I'm pretty sure e have the beginnings of a long tailed tit nest too
yay! glad to see the thread revived once more. bloody good idea using teh dryer drum there too.
Heres a few more pictures of the ongoing outside work
The herb bed we put in last year
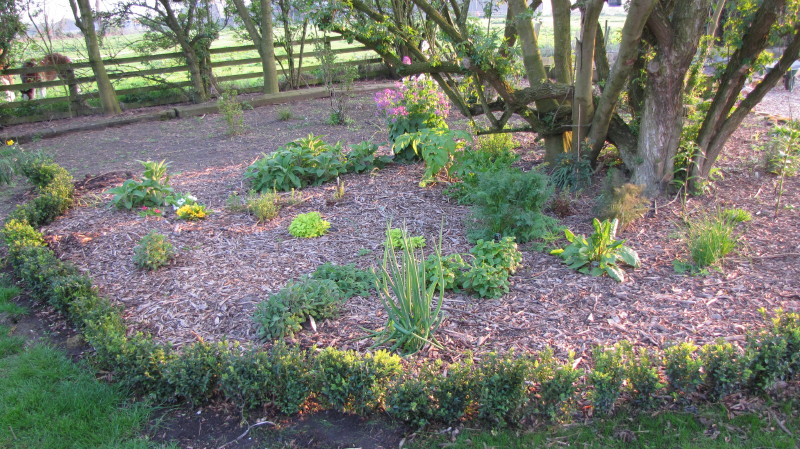
Herb Garden Spring 2011 by British Red, on Flickr
The box hedging went in as dormant bare roots in the Autumn but its well away now...hopefully it'll fill into a solid mass this year
These front beds were 5' high with weeds when we got the place. BB dug them out and planted out with cottage garden perennials.
The Lavender hedging was grown from plugs (we have to do things on the cheap).
The beds aren't at their best yet, but its great to see them springing back to life
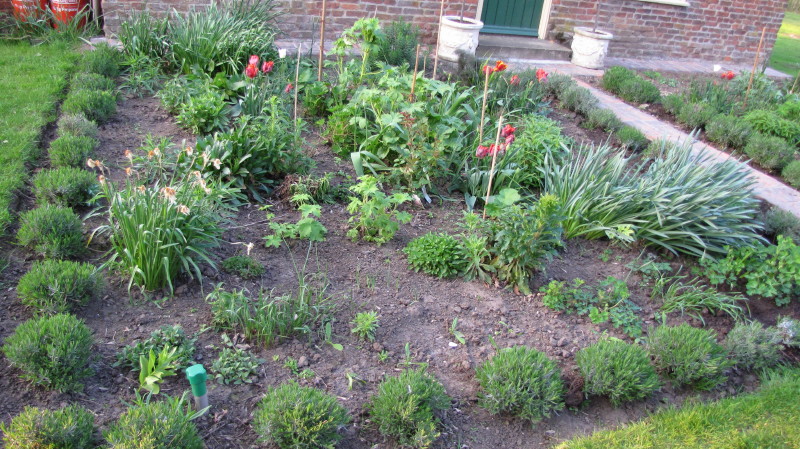
Front Beds Spring 2011 by British Red, on Flickr
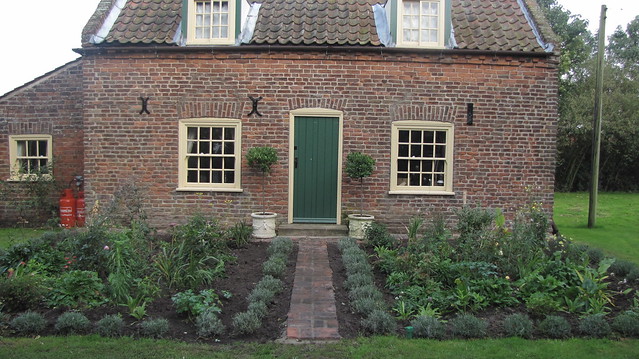
Garden with brick path by British Red, on Flickr
(The brick path is new too)
The wooded area behind I have laid to wildflower meadow this spring. The grass is up and lush now and the wildflowers starting to show. I have sewn fritillaries, bluebells, mini narcissi, ramsons and pignuts to make our own little "glade". The wooden bench you can just see is a fallen tree trunk cut to shape with my chainsaw. This area was 4' high with builders rubble and waste. We needed a JCB to dig it out.
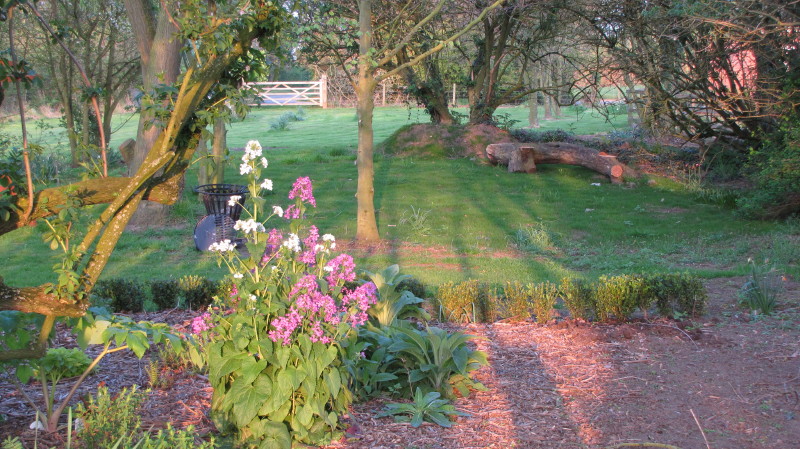
Woodland Spring 2011 by British Red, on Flickr
The well head is re-built and I am currently using an above ground pump to use well water on the new beds and trees
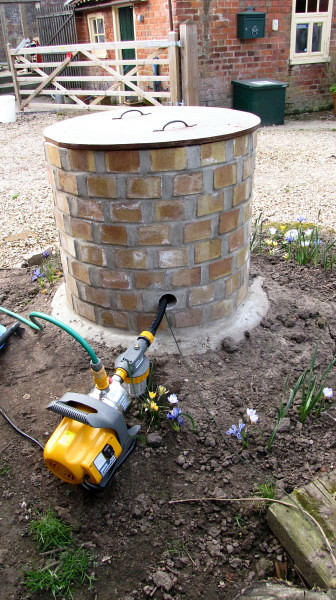
Well pump by British Red, on Flickr
I must get some photos of out little orchard which is just coming into leaf
Red
The herb bed we put in last year

Herb Garden Spring 2011 by British Red, on Flickr
The box hedging went in as dormant bare roots in the Autumn but its well away now...hopefully it'll fill into a solid mass this year
These front beds were 5' high with weeds when we got the place. BB dug them out and planted out with cottage garden perennials.
The Lavender hedging was grown from plugs (we have to do things on the cheap).
The beds aren't at their best yet, but its great to see them springing back to life

Front Beds Spring 2011 by British Red, on Flickr

Garden with brick path by British Red, on Flickr
(The brick path is new too)
The wooded area behind I have laid to wildflower meadow this spring. The grass is up and lush now and the wildflowers starting to show. I have sewn fritillaries, bluebells, mini narcissi, ramsons and pignuts to make our own little "glade". The wooden bench you can just see is a fallen tree trunk cut to shape with my chainsaw. This area was 4' high with builders rubble and waste. We needed a JCB to dig it out.

Woodland Spring 2011 by British Red, on Flickr
The well head is re-built and I am currently using an above ground pump to use well water on the new beds and trees

Well pump by British Red, on Flickr
I must get some photos of out little orchard which is just coming into leaf
Red
SimonM
Bushcrafter (boy, I've got a lot to say!)
Great pictures, a lot of hard work there and some goods thoughts about a rotovator purchase, thanks. 
I just read this from start to finish.
What an incredible job you've done with that place; I would absolutely kill to live in that environment.
You must feel like you've gone to heaven when you sit and contemplate what you've created.
Wonderful, wonderful home.
What an incredible job you've done with that place; I would absolutely kill to live in that environment.
You must feel like you've gone to heaven when you sit and contemplate what you've created.
Wonderful, wonderful home.
Thought you guys might appreciate seeing our new neighbours.
This little cutie was born in the early hours
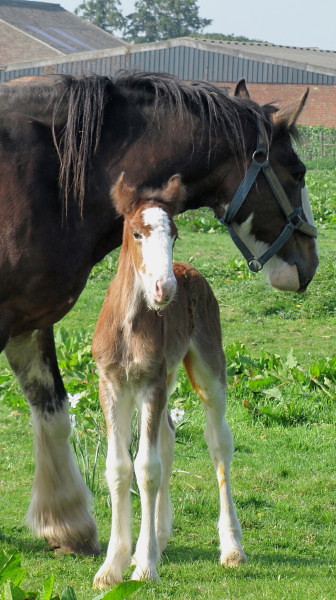
Second Shire Foal by British Red, on Flickr
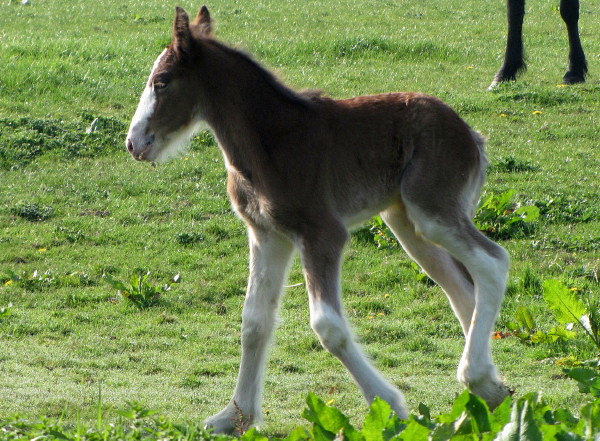
New Shire Foal by British Red, on Flickr
The first foal born this year looks on. The mares have been whickering to each other
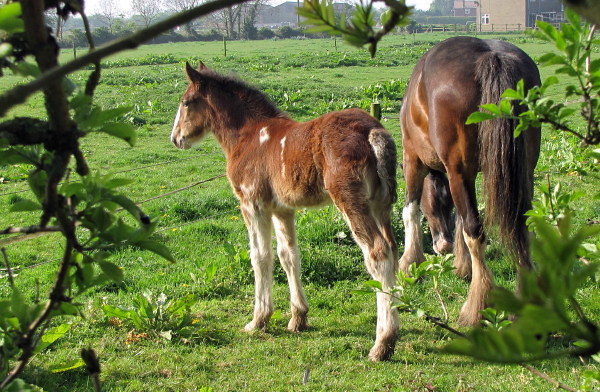
Previous foal lloks on by British Red, on Flickr
I love having the Shire stud adjoining us. Heavy horses are lovely gentle giants - and I am never short of manure for the veggies!
Red
This little cutie was born in the early hours

Second Shire Foal by British Red, on Flickr

New Shire Foal by British Red, on Flickr
The first foal born this year looks on. The mares have been whickering to each other

Previous foal lloks on by British Red, on Flickr
I love having the Shire stud adjoining us. Heavy horses are lovely gentle giants - and I am never short of manure for the veggies!
Red
Similar threads
- Replies
- 13
- Views
- 3K
- Replies
- 107
- Views
- 46K
- Replies
- 0
- Views
- 3K
- Replies
- 21
- Views
- 5K
