Grohmann boat knife kit

  • Hey Guest, Early bird pricing on the Summer Moot (29th July - 10th August) available until April 6th, we'd love you to come. PLEASE CLICK HERE to early bird price and get more information.

rapidboy

Bushcrafter (boy, I've got a lot to say!)
Jun 14, 2004
2,535
27
BB
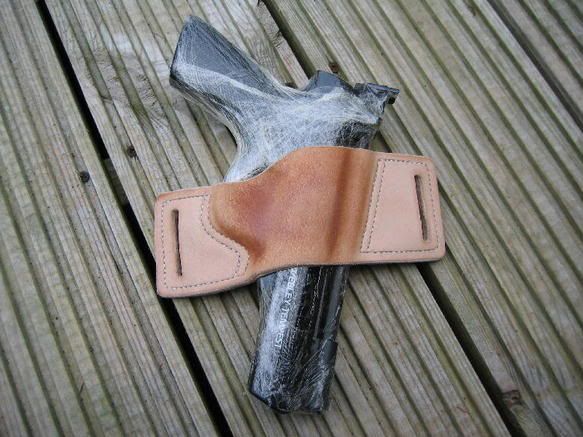
Got mine finished today
419_1951_1.jpg


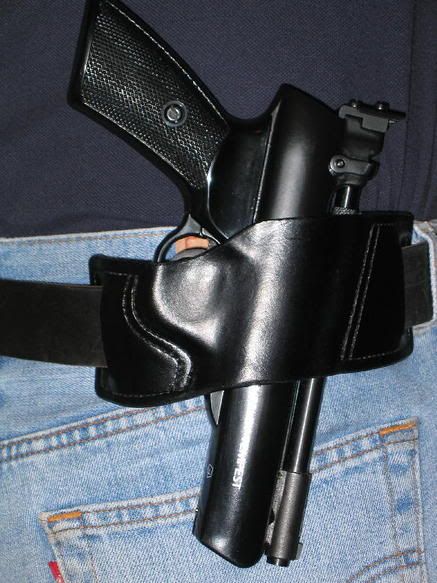
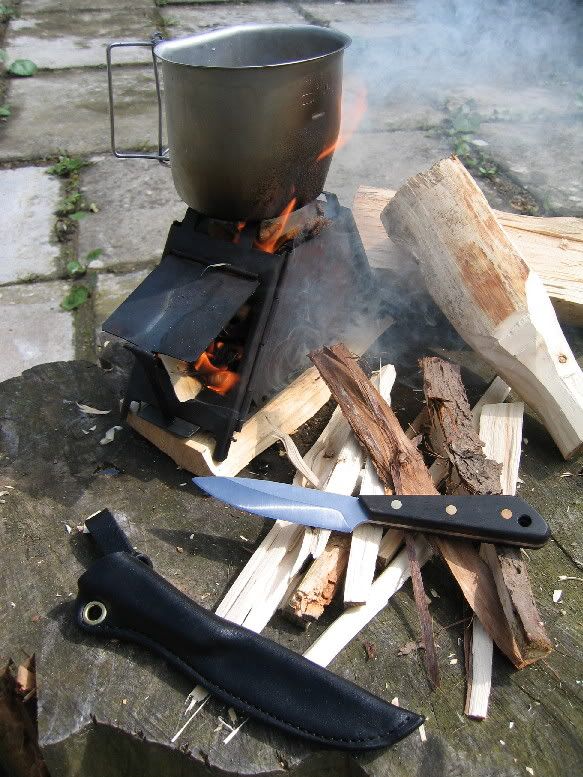
I wet formed and dyed the sheath black ,as this is my new kitchen knife i will probably remove the belt loop.
419_1954_1.jpg


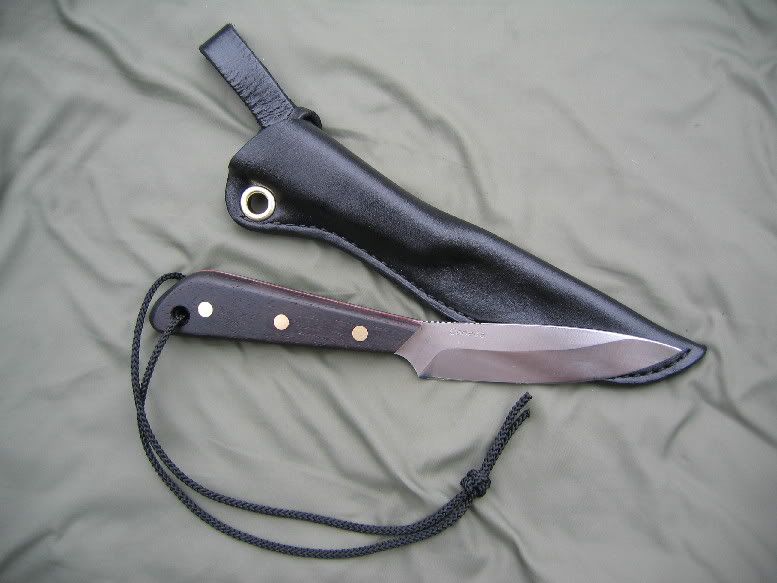
Some red spacer's added but apart from that it's assembled as per the Grohmann instructions.
419_1958crop_1.jpg


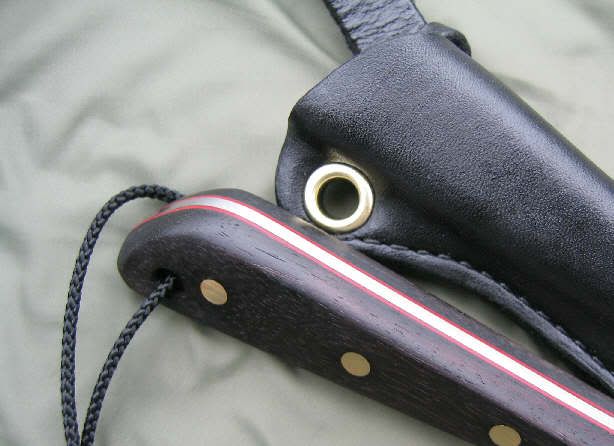
I would advise using some epoxy on the scales as well as the rivets.
I didn't because i wanted to see how the rivets alone would work out but i think a little epoxy would make for a better job.

I finished it with a 25 degree bevel and it's a little razor.

All told i spent about 3 1/2 hours on this ,it was a pretty straight forward little project with a nice knife at the end. :D

419_1979_1.jpg


How's everyone else getting on ?
Post some pic's.

rb
 

tomtom

Full Member
Dec 9, 2003
4,283
5
38
Sunny South Devon
nice work rb.. i used the scales provided (i know very un imaginative) but i want to use this one on the boat for fishing or as a leander so i figures theres not a lot of point in me going all out on it.. i found it a satisfiying projuct as results are quick and simple an im not overly paitent :rolleyes:

Great pics mate!! :D
 

Buckshot

Mod
Mod
Jan 19, 2004
6,466
349
Oxford
Nice one RB.
What did you use for the red spacers?
Mine's still in the box atm, will sort something soon though.

Mark
 

rapidboy

Bushcrafter (boy, I've got a lot to say!)
Jun 14, 2004
2,535
27
BB
It's vulcanised fiber ,i got this from a friend in the US but it's available from BRISA or maybe from Attleborough Accessories who have a lot of knife making kit in the new catalogue.
 

rapidboy

Bushcrafter (boy, I've got a lot to say!)
Jun 14, 2004
2,535
27
BB
When you have finished the handle and applied the finish you hold the sheath in a basin or warm/hot water until the air bubbles stop and the sheath starts to get soft.
Carefully push the knife into the sheath.
With a carbon blade you need to cover it with cling film but as these are stainless they are fine as they are.
Be very careful as the sheath is very delicate at this stage and you can easily push the blade straight through.
When it's in place just rub the sheath around the handle and it will start to form around it nicely.
When it's nicely formed stick it in the hot press over night and let it dry.
You might have to use a lanyard to pull it free as the leather will have shrunk a little and it will be tight.
The sheath will have started to harden but is still delicate so don't handle it much and leave it in the hot press for another day until it has dried inside and then you can apply whatever treatment you choose.
I dyed mine when wet for a nice even finish but if you want a mottled effect then dye it when it's dry.

I dont have any pics of a sheath but here are a few of a custom holster being wet formed using the same procedure..

412_1279_1.jpg

412_1283_1.jpg

412_1286_1.jpg


Again this was dyed when wet for a nice even dye job.....
413_1305_1.jpg


...but this was dyed when it was dry for a mottled effect.
413_1384_1.jpg


rb
 

Ogri the trog

Mod
Mod
Apr 29, 2005
7,182
71
60
Mid Wales UK
Heads Up Rapid,
Thats a good looking knife, the red fibre adds an eye-pleasing touch. How do you find the angle of the blade compared to the handle? ....and does that have a bearing on why you say its a kitchen knife?

I'm interested in the stove that is in the fourth picture, is it a homemade? It looks very "Kelly Kettle - esque" but a bit more versatile.

ATB

Ogri the trog
 

alick

Settler
Aug 29, 2003
632
0
Northwich, Cheshire
Going for standard build here but I've taken up the araldite idea. It's all clamped up so now I have to kick my heels for the evening and wait for the epoxy to harden. :D
 

rapidboy

Bushcrafter (boy, I've got a lot to say!)
Jun 14, 2004
2,535
27
BB
First the knife.
I like the angle of the handle ,i wanted to try one of these for ages and the kit seemed like a nice way to do it.
It works very well for kitchen duties a sit keeps your fingers out of the way for fine chopping and slicing.
I also wanted a stainless knife to use in the kitchen ,personally I like carbon better but my girlfriend is forever forgetting to dry them properly so i wanted a stainless blade that she can't destroy.
Anyway it's working out great as a kitchen knife ,i just sliced a lot of fruit and veg and dressed some steaks for tonight's dinner and it performed very well.
My girlfriend has cut herself with it twice so far which is also fine as she might actually start to use knives with some care and respect :D
I did try a little woodwork with it but the grind doesn't lend itself to that particularly well and i wouldn't like to baton with it as the blade is not overly thick so it's not going to be my outside knife but that's not why i wanted it.

Second the stove
It's a "Pocket cooker".
It folds flat and fit's in a little cordura pouch for carry.
I believe they where originally manufactured in Israel but are no longer available.
I will try to remember and take a few pics with it folded up.
There have been a few threads on them on here so a search will turn up more info.
rb
 

simonsays

Forager
Sep 9, 2004
126
0
57
sunderland
RB, thats really nice work. I think the sheath in particular looks absolutly great. My own attempt is pretty much a standard build as per the instructions. Fixing the scales and sanding them down took all of 20 minutes but I then spent a -long- time with the waterstones removing the secondary bevel and rendering it ScarySharp (tm). To be honest I was a little concerned that it wouldnt be able to hold the edge for long but after some battoning, a few fuzz sticks (It loves wood) and a full day in the kitchen it was still able to create a whole new bald patch on my arm after a couple of passes over the strop

What did you use to dye the leather? I'm inspired to do a little work on my own knife sheath.......

Cheers,
Simon
 

rapidboy

Bushcrafter (boy, I've got a lot to say!)
Jun 14, 2004
2,535
27
BB
I use Fiebing's Oil Dye and then Fiebing's Acrylic Resolene.
I got them from http://www.leprevo.co.uk/index.html along with some tools and leather.
Good guy's to deal with ,very helpful.
I have very little experience in leather work and they gave me good advice for tools and dye's and leather.
 

ChrisKavanaugh

Need to contact Admin...
WELL DONE! Grohmans #4 survival knife is a more robust 3/16" and reminiscent of the popular Nessmuck knives. It is my favourite knife for batoning. The offset handle and forward upswept spine as an anvil really work in this application. Your boating knife is very popular with the Canadian Coast Guard, and in my opinion superior to the Myerchins my old outfit loves so much ( it's scrimshawing salty images on the white micarta handles that sells them ;) ) I'm considering building a #4, leaving the tang butt exposed and having a machinist mill a bowdrill divot into it.
 

Stew

Bushcrafter through and through
Nov 29, 2003
6,456
1,294
Aylesbury
stewartjlight-knives.com
Motorbike Man said:
I must admit, I'm still waiting for inspiration to strike with this one :rolleyes: I am tempted to simply finish it off as it comes, but with out glue so I can re do the scales at a later date. Nice job dying the sheath RB, and the red spacers are a nice touch as well

You can do better than that! :D

You could even just use a different wood such as Zebrano - you've got a template already.
 

Brian

Settler
Nov 6, 2003
609
1
52
Saltburn
Tomtom,

I've been away for a couple of weeks and it was great to come back to my new knife, thank you. I made it yesterday, nothing fancy, just as it said on the instructions, with linseed oil on the handle. The sheath needs a bit of a tweak to fit the blade a bit better, but all in all I'm very pleased. Thank you once again for sorting this out for us.

Brian
 

Buckshot

Mod
Mod
Jan 19, 2004
6,466
349
Oxford
Managed to sort mine out now.
I'm really pleased with the result seeing as it's my first try at anything like this :D
The knife is as standard except I epoxy'd the scale as well as pinning them. I deliberately left the secondary bevel. Sanded the handle to 600 grit, that's fine for me - it's going to be my user rather than saleable quality - and several coats of linseed oil.

The sheath is wet formed, very easy to do. Bung it in warm water for a min, put the knife in (wrapped in clingfilm) and push the leather tight around the knife. I used a 3 inch nail with the pointy bit smoothed to take out the corners... Then several coats of a good quality leather dressing to bring out the natural colour.

Gohromknife5.jpg


Cheers

Mark
 

BCUK Shop

We have a a number of knives, T-Shirts and other items for sale.

SHOP HERE