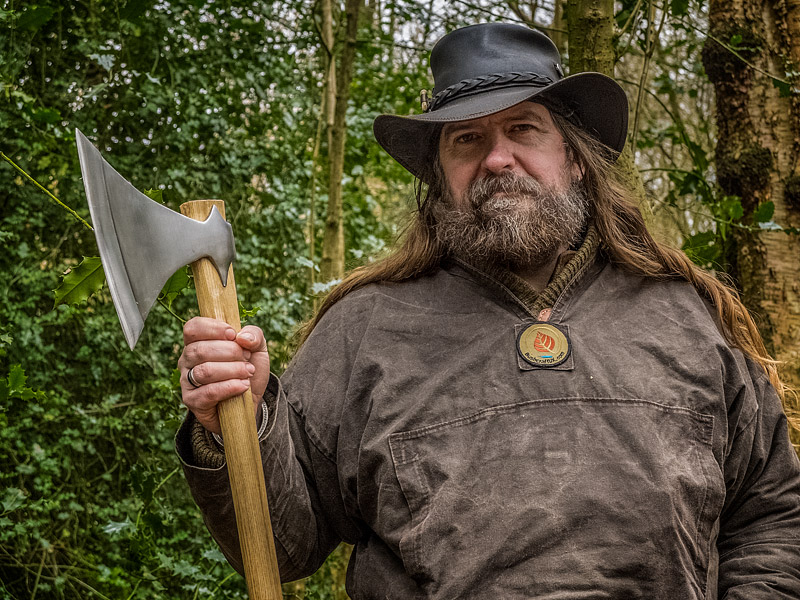
One of our illustrious membership asked me to make him a full sized, real Dane Axe last year. So over the winter it has been on my mind to get on with, but like so many of these projects more urgent orders crept in and took my time. With the new year hitting I thought I should make a start, since it was going to be bigger and potentially more complex to make than any axe I had previously made. Not only would I need to find a larger bit of metal to begin with, but I would need to find a longer straight piece of ash for the handle and due to the larger dimensions I would need to make at least one new drift (a tapered bar used to shape the eye).
Apologies for the crappy pics, they were taken in haste between showers!
As a starting point for reference, my normal small axes are made from a single piece of spring steel (EN9) measuring either 25x25x100mm or lager hatchets from 20x40x120mm. The largest axes I make are the bearded axes, which start as an L-shape of mild steel measuring 20x80x120mm (along the legs), with a higher carbon steel edge (normally 8x30x80mm) welded in. These axes called for something a bit bigger....
First trial piece was to find out how large an axe made from a new stock size that I bought last year would produce. This is a piece of EN9 measuring 25x50x120mm. No special treatment to the stock, just bang out an axe of an appropriate shape for a Viking warrior. I used existing tools and went on as I normally would.


edge length: 130mm
head length: 160mm
thickness behind edge: 4mm
Clearly, not a Dane axe!
Next trial, to see what size I could squeeze out of the 25x50mm stock by upsetting the end. Upsetting is process of heating one end up and forging the bar back into itself to swell the mass on one end, same as when hammering a rivet to spread it and stop it coming out. Something this size would require a proper power hammer or a helper with a sledge hammer.I started with a piece about 160mm long (from memory), which is about as tall as I could fit under my hammer. My power hammer is tiny and doesn't do much of any use most of the time, certainly not when I'm making axes, but I was able to upset one end to about 30x70mm. The drift used before was too small for the soon to be larger head, so I had to make another. This is done by forging a large bar of steel down to a tapering spike of the right shape to form the eye that you want. The largest stock I had to d this with was 40mm square and just big enough to make this new drift, but hard work.
Here is how it turned out:


Edge Length: 220mm
Head Length: 170mm
thickness behind edge: 3.5mm
The shape is good, the size is getting there and is a viable Dane Axe. Pretty happy for a first go. On the down side though the distance from edge to handle is a little small for my tastes and while this cross section blade (viewed from the top) is one of the styles seen, both myself and the customer prefer the look of another style. The other style has a thickened edge rather than a tapering thin blade. With the extra mass required for the edge and my baby hammer maxed out with the length required for the second head, I had to change tactics....
The other option open to me was to weld a cutting edge into a mild body as I do for my bearded axes. That would require me to have a lump of mild steel large enough to forge the body, something like 40x80x140mm would probably do it, but I don't have that sort of size! The largest stock I have of mild steel is either 40mm square, or 20x80mm flat. So that is where I started for number three. I took two pieces of 20x80 and forged out Y- shaped pieces, with the portion for the eye forged thinner (about 8mm thick) and the langets (pointy cheek bits either side of the eye) extruded a little. I prepared the eye area and langets to allow me to do as little hard forging to the area later when I would be putting strain on my welds. At this point I really wish I had taken pictures, it's hard to describe these things!
Once the modified Y-shapes had been prepared, they were tacked together with an arc welded and firewelded into a solid lump in the forge. Mostly I did that with my fly press because 2000 technology it is more reliable than my modern air hammer! I now had a single Y-shape measuring about 35mmx90x180mm, with a 20x45mm slot in the small end for the eye (again measurements from memory). It all seemed solid enough, so on to drifting the eye to the proper shape and size, also thinning and drawing the langets out. At this point I saw that my new drift was far too small for this beast, so I made another. The second drift was the slightly longer(top to bottom of finished eye), but slightly slimmer, this allowed me to get a larger shape from the same 40mm bar stock. More heavy hand forging and grinding...
Drift still not big enough!!! The slot that I forged to make the eye from was too long to open fully with this drift, so I needed a larger one. No steel, time, energy or inclination to do that So I modified that one temporarily by arc welding a strip of 6x30mm to the back of the drift, effectively enlarging the whole thing by 6mm in each direction
  I shall take a picture of these in a few days if folk want.
So the eye was shaped suitably and the welded body didn't split open (always a risk!). Next step to draw the blade out a bit to gain some more length along the edge before fitting the edge steel in. Again, the flypress was used, since i have long since given up on the power hammer for effective forging of axes. Once the edge had grown to about 20x120mm, I split the edge end open to receive the edge steel. The steel edge is a knife (proper V-shaped blade, not those scandi things) shaped bar of steel with teeth cut into the thin edge, so they grip in the cut of the body prior to firewelding. The edge on my bearded axes comes from a piece of steel about 6x25mm, so normal knife size stock; this edge came from 20x40mm EN9! With the edge steel fitted to the body via the teeth cut in, the whole was firewelded into a single lump and the axe head forged out.
I now had a problem with the forging. Normally with axes I prefer to use my gas forge as I can heat everything uniformly over a large area so I don't have to worry about the hot side of the eye stretching more than the cool side as with a coke or charcoal forge (this can be useful too sometimes though). It also means that I can't burn anything (like the thin eye area) whilst working on the thicker body. By the time the edge was welded into the body, I could no longer get it into my gas forge! (incidentally, the above axe would just fit in through the opening on the diagonal and with a little guiding around the corner!). So I had to ditch the easy forge and switch over to coke. Hey ho, not really a problem, until I came to straighten and true everything up. At that point I realised that I was almost at the limit of the size I could get in there too! Forging the thickened edge in whilst keeping the thinner area behind it straight and in the right place was a real challenge, and would benefit from some extra tooling being made, maybe next time.
After the forging with these shiny axes comes the grinding. It is scary to see how much metal piles up on the floor as dust at this point. I trued the profile and cross section up whilst trying to keep the edge thickness. I had forged the blade area closer than I would like for safety (wiggle room in grinding true), simply to try and maximise the blade size with the steel to hand.
Next up is the heat treating. I do this in temperature controlled gas furnace, basically a giant poorly insulated gas forge with a stainless steel shelf hanging inside to place the blades on. The axe head wouldn't go in through the door of my furnace. So I had to make a new front end to the furnace. Then I discovered it wouldn't fit on the shelf either! So I had to make a quick trivet to sit the head on instead. By this point I think I've spent as much time making and modifying tools than I have making the actual axe! well nearly")
After heat treating, more grinding, polishing, sharpening. and hope the long thing edge hasn't warped in the heat treat. All fine. Onto the handle. Slight issue here as Dane Axes have very long handles, the sort that you lean your armpit on when stood around chatting. I harvest all of my own ash and generally my axe handles are made from pieces that are rejected as bow staves. It is a plan that works well, if a 6 foot length of ash is too bent for a bow, then I can still get two or three decent sized axes from it. I had three full staves left in my seasoned stack and only ONE was straight enough to work for this handle, assuming it was large enough in girth.
Shaping and fitting the handle was pretty much the same as any other time but the fact that it was three times my normal size presented some challenges! Mostly the fact that I kept knocking things over with the far end of it whilst working near one end. As I took more and more wood away, the axe (all in fact, but especially this one) became much more lively and felt right. I may well have been able to take more wood off and improve its manoeuvrability even further, but without any more wood available I didn't want to risk it.
Anyway, the third head. I'm pretty happy with how it has turned out. I would prefer to have more curve and maybe slightly larger, but I will have to source some other steel before I make another, I am not making it this way again if I can help it. Also a decent power hammer would be good since I had to do this entirely by my own muscle


Edge Length: 235mm
Head Length: 215mm
Thickness behind edge: 3mm, but swelling to 6.5mm
And a shot of all three with their handles (the others were from the other two shorter or more bent bow staves).

Vital stats of all axes then:
Small (its all relative!): Edge 13cm, Handle length 91cm (96cm tip to tip), 1.2kg total weight
Medium: Edge 22cm, Handle length 103cm (110cm tip to tip), 1.45kg total
Large: Edge 23.5cm, Handle length 156cm (164cm tip to tip), 2.4kg
I'll be taking these to TORM (the original reenactors market) in a couple of weeks. None have sheaths as yet.
Thanks for looking.
Apologies for the crappy pics, they were taken in haste between showers!
As a starting point for reference, my normal small axes are made from a single piece of spring steel (EN9) measuring either 25x25x100mm or lager hatchets from 20x40x120mm. The largest axes I make are the bearded axes, which start as an L-shape of mild steel measuring 20x80x120mm (along the legs), with a higher carbon steel edge (normally 8x30x80mm) welded in. These axes called for something a bit bigger....
First trial piece was to find out how large an axe made from a new stock size that I bought last year would produce. This is a piece of EN9 measuring 25x50x120mm. No special treatment to the stock, just bang out an axe of an appropriate shape for a Viking warrior. I used existing tools and went on as I normally would.
edge length: 130mm
head length: 160mm
thickness behind edge: 4mm
Clearly, not a Dane axe!
Next trial, to see what size I could squeeze out of the 25x50mm stock by upsetting the end. Upsetting is process of heating one end up and forging the bar back into itself to swell the mass on one end, same as when hammering a rivet to spread it and stop it coming out. Something this size would require a proper power hammer or a helper with a sledge hammer.I started with a piece about 160mm long (from memory), which is about as tall as I could fit under my hammer. My power hammer is tiny and doesn't do much of any use most of the time, certainly not when I'm making axes, but I was able to upset one end to about 30x70mm. The drift used before was too small for the soon to be larger head, so I had to make another. This is done by forging a large bar of steel down to a tapering spike of the right shape to form the eye that you want. The largest stock I had to d this with was 40mm square and just big enough to make this new drift, but hard work.
Here is how it turned out:
Edge Length: 220mm
Head Length: 170mm
thickness behind edge: 3.5mm
The shape is good, the size is getting there and is a viable Dane Axe. Pretty happy for a first go. On the down side though the distance from edge to handle is a little small for my tastes and while this cross section blade (viewed from the top) is one of the styles seen, both myself and the customer prefer the look of another style. The other style has a thickened edge rather than a tapering thin blade. With the extra mass required for the edge and my baby hammer maxed out with the length required for the second head, I had to change tactics....
The other option open to me was to weld a cutting edge into a mild body as I do for my bearded axes. That would require me to have a lump of mild steel large enough to forge the body, something like 40x80x140mm would probably do it, but I don't have that sort of size! The largest stock I have of mild steel is either 40mm square, or 20x80mm flat. So that is where I started for number three. I took two pieces of 20x80 and forged out Y- shaped pieces, with the portion for the eye forged thinner (about 8mm thick) and the langets (pointy cheek bits either side of the eye) extruded a little. I prepared the eye area and langets to allow me to do as little hard forging to the area later when I would be putting strain on my welds. At this point I really wish I had taken pictures, it's hard to describe these things!
Once the modified Y-shapes had been prepared, they were tacked together with an arc welded and firewelded into a solid lump in the forge. Mostly I did that with my fly press because 2000 technology it is more reliable than my modern air hammer!
I now had a single Y-shape measuring about 35mmx90x180mm, with a 20x45mm slot in the small end for the eye (again measurements from memory). It all seemed solid enough, so on to drifting the eye to the proper shape and size, also thinning and drawing the langets out. At this point I saw that my new drift was far too small for this beast, so I made another. The second drift was the slightly longer(top to bottom of finished eye), but slightly slimmer, this allowed me to get a larger shape from the same 40mm bar stock. More heavy hand forging and grinding... Drift still not big enough!!! The slot that I forged to make the eye from was too long to open fully with this drift, so I needed a larger one. No steel, time, energy or inclination to do that
So I modified that one temporarily by arc welding a strip of 6x30mm to the back of the drift, effectively enlarging the whole thing by 6mm in each direction I shall take a picture of these in a few days if folk want.So the eye was shaped suitably and the welded body didn't split open (always a risk!). Next step to draw the blade out a bit to gain some more length along the edge before fitting the edge steel in. Again, the flypress was used, since i have long since given up on the power hammer for effective forging of axes. Once the edge had grown to about 20x120mm, I split the edge end open to receive the edge steel. The steel edge is a knife (proper V-shaped blade, not those scandi things) shaped bar of steel with teeth cut into the thin edge, so they grip in the cut of the body prior to firewelding. The edge on my bearded axes comes from a piece of steel about 6x25mm, so normal knife size stock; this edge came from 20x40mm EN9! With the edge steel fitted to the body via the teeth cut in, the whole was firewelded into a single lump and the axe head forged out.
I now had a problem with the forging. Normally with axes I prefer to use my gas forge as I can heat everything uniformly over a large area so I don't have to worry about the hot side of the eye stretching more than the cool side as with a coke or charcoal forge (this can be useful too sometimes though). It also means that I can't burn anything (like the thin eye area) whilst working on the thicker body. By the time the edge was welded into the body, I could no longer get it into my gas forge! (incidentally, the above axe would just fit in through the opening on the diagonal and with a little guiding around the corner!). So I had to ditch the easy forge and switch over to coke. Hey ho, not really a problem, until I came to straighten and true everything up. At that point I realised that I was almost at the limit of the size I could get in there too!
Forging the thickened edge in whilst keeping the thinner area behind it straight and in the right place was a real challenge, and would benefit from some extra tooling being made, maybe next time. After the forging with these shiny axes comes the grinding. It is scary to see how much metal piles up on the floor as dust at this point. I trued the profile and cross section up whilst trying to keep the edge thickness. I had forged the blade area closer than I would like for safety (wiggle room in grinding true), simply to try and maximise the blade size with the steel to hand.
Next up is the heat treating. I do this in temperature controlled gas furnace, basically a giant poorly insulated gas forge with a stainless steel shelf hanging inside to place the blades on. The axe head wouldn't go in through the door of my furnace. So I had to make a new front end to the furnace. Then I discovered it wouldn't fit on the shelf either! So I had to make a quick trivet to sit the head on instead. By this point I think I've spent as much time making and modifying tools than I have making the actual axe! well nearly
After heat treating, more grinding, polishing, sharpening. and hope the long thing edge hasn't warped in the heat treat. All fine. Onto the handle. Slight issue here as Dane Axes have very long handles, the sort that you lean your armpit on when stood around chatting. I harvest all of my own ash and generally my axe handles are made from pieces that are rejected as bow staves. It is a plan that works well, if a 6 foot length of ash is too bent for a bow, then I can still get two or three decent sized axes from it. I had three full staves left in my seasoned stack and only ONE was straight enough to work for this handle, assuming it was large enough in girth.
Shaping and fitting the handle was pretty much the same as any other time but the fact that it was three times my normal size presented some challenges! Mostly the fact that I kept knocking things over with the far end of it whilst working near one end. As I took more and more wood away, the axe (all in fact, but especially this one) became much more lively and felt right. I may well have been able to take more wood off and improve its manoeuvrability even further, but without any more wood available I didn't want to risk it.
Anyway, the third head. I'm pretty happy with how it has turned out. I would prefer to have more curve and maybe slightly larger, but I will have to source some other steel before I make another, I am not making it this way again if I can help it. Also a decent power hammer would be good since I had to do this entirely by my own muscle
Edge Length: 235mm
Head Length: 215mm
Thickness behind edge: 3mm, but swelling to 6.5mm
And a shot of all three with their handles (the others were from the other two shorter or more bent bow staves).
Vital stats of all axes then:
Small (its all relative!): Edge 13cm, Handle length 91cm (96cm tip to tip), 1.2kg total weight
Medium: Edge 22cm, Handle length 103cm (110cm tip to tip), 1.45kg total
Large: Edge 23.5cm, Handle length 156cm (164cm tip to tip), 2.4kg
I'll be taking these to TORM (the original reenactors market) in a couple of weeks. None have sheaths as yet.
Thanks for looking.
")