Hobo Stove Gallery (Probably picture heavy)

  • Hey Guest, Early bird pricing on the Summer Moot (29th July - 10th August) available until April 6th, we'd love you to come. PLEASE CLICK HERE to early bird price and get more information.
Mar 3, 2010
8
0
Scotland
Hello folks this is my first post on here, and would like to submit my pictures, the funny thing I have noticed is just how many people use the IKEA stainless steel utensil pot :)

more pics at http://www.flickr.com/photos/sparkplug1982/

4406895245_79e8bd8a96_b.jpg


4406894169_b2fa023c0f_b.jpg


Ideally I want to use wood as a fuel source but it can use meths and solid fuel blocks as an alternative.

so far its only been tested in the garden I hope to use it out in the scrub soon (hopefully weekend)
 

Survivalmike

Forager
Jan 25, 2010
214
0
Austria
@JonS: nice set up!
Where did you get this "claws" as a pot holder?
Are they anything special and can be buyed in a DIY-store or did you made them your own?

I´ll show my hobo set up, when I´ve finished all parts of it and have together what I´m thinking for.

greetings from Austria
Mike
 
Dontthink ive put this in here :rolleyes::D
but ive been working on a burner system ( ooooo a system :lmao:hark at him )
Its not quite finished yet but fairly close and some of these pics are dotted about in other threads ive linked to them where i can :rolleyes:

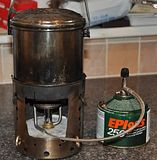
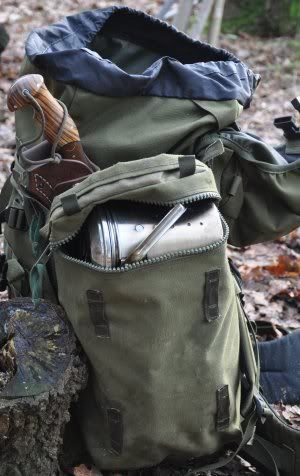
Ive based it on a 12cm Zebra Billy (really think the 10cm is to small and I carry a crusader mug as well) its a very good size cooking lots for one and ample for 2 and fits my pack nicely. I also like the 14cm.

I havent cut the bail off i like it like this its a better handle and you can take teh lid on and off etc when suspended over a fire etc it would save little weight and as you can see (below) where i pack it its not a problem.

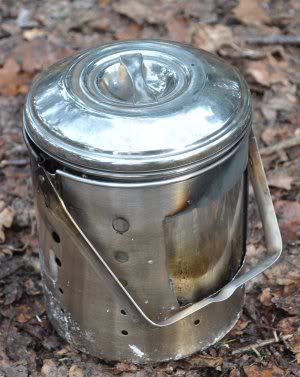
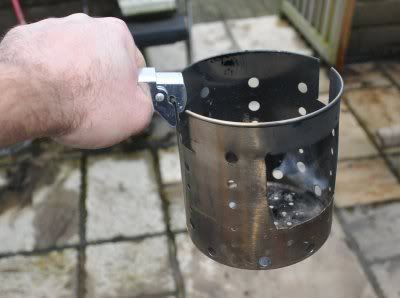
So we need a wood burner bit. I dont like putting burners all sotty etc or any fuel in side my billy for storage so it has to fit on the outside the IKEA one is to small 11.5cm ( I think). Fro ma heads up on here I got one From ASDA for £3 which is 12.5cm and perfect (unfortunatly they seem to have only had one stock of them as no one can find any more :()

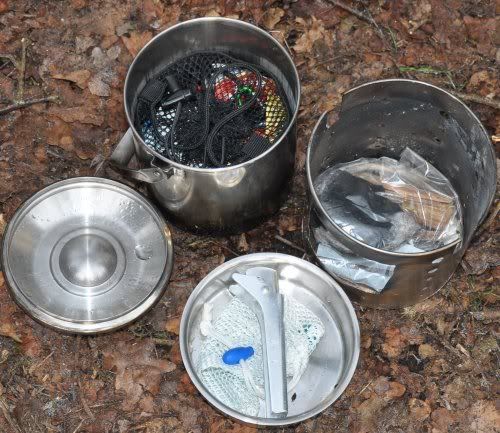
wit ha couple of slots cut for the bail arm points it slides in leaving about 3/4" gap in the bottom so is pretty much zero space as this is where i store the dirty bits of the stove ie pegs and grate plus a tinder and steel set

In the main billy i have a custom made (By Woody a guy i met at the Cornish RV last year) bucket bag which fits the space under the secondary pan exactly this has condements and brew kit plus a Ferro Rod and stiker this lifts in and out and keeps its shape so easy to use and pack up etc ( i hate spending hours packing little bits in the right order and place etc :rolleyes:) in the secondary pan I have a cut down to fit pot handle which is invaluble for pouring etc and can be used to move the burner as well. Theres still a bit of space here im deciding what to put in

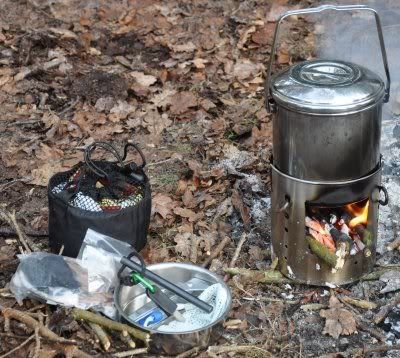
so in use (for the light weight guys this weighs in at 1.5kg :lmao: no fuel but does have brew kit etc as below)
Hobo4.jpg


first level of packing up
Hobo3.jpg


fully packed
Hobo2.jpg


fits here in the top of my side pouch on top of my Hennesy hammock
hobo1.jpg


pot handle with burner

Hobo5.jpg


thumbnails from now on
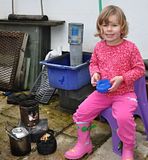
my 
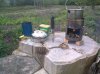
3yr old using for her first brew


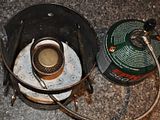
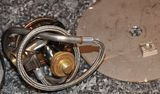
as well as Wood / Charcoal / Meths burner / Hexi block Ive now got it to take a trangia gas burner :eek: and it woild also fit a multifuel burner to if you wanted to spend out.
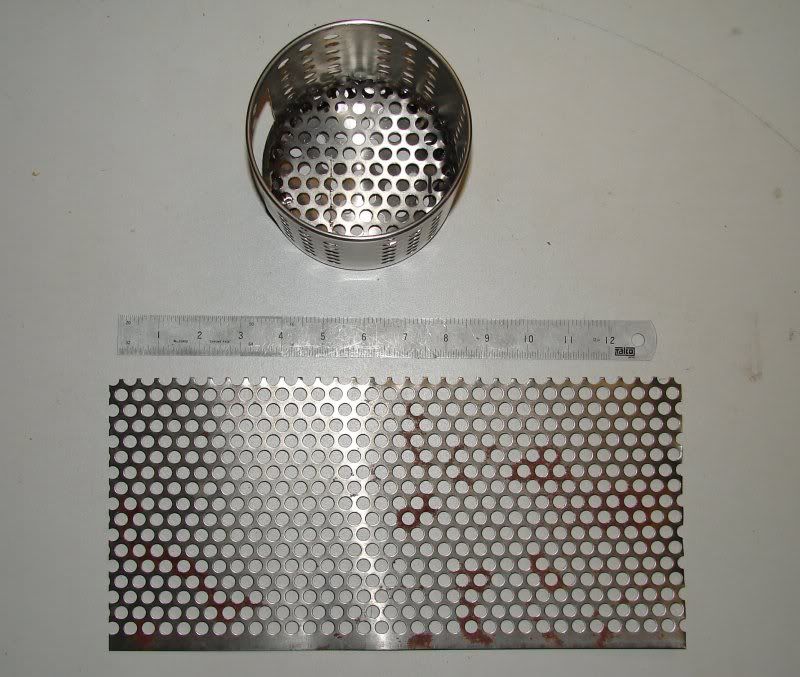
this required a shelf /grate which i now also use for the wood to lift the fire of the base and get better airflow under


I wanted to use the Stove burner to cook other stuff and used ot carry a mini Wok in my kit on exercise so dug out one i had in the loft these where fro ma local chinese supermarket for a few quid on my original I had re done the handle as detachable and will MOD this one later
Stirfry can be used for most anything sauces are light and easy to carry etc plus it was invented to use little fuel
heres a authentic chinese potato bacon sausage n egg fry up :eek:
potshobo.jpg


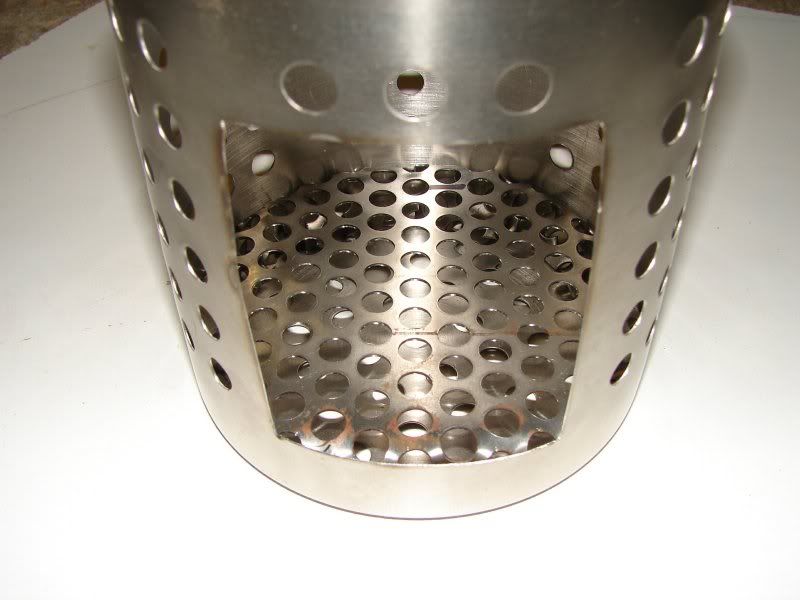
I also wanted to sort out what to do with the secondary pan as a lot of peeps drill em as strainers which seems a waste . I have seen some use them as mini ovens to do Bannock etc but on a normal open fire which you can bury it in teh embers and get all round heat. I wanted to do it on the hobo where you get all the heat on the bottom.
teh first one i did filled the pan and was bout 1.5" thick :rolleyes: it burnt a fair bit onthe bottom and i ended up breaking it into small chunks to cook it
was with choc powder and rasins as was tastey :D


so tho thick and no heat on top thinner was easier just mix less :rolleyes: 
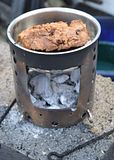
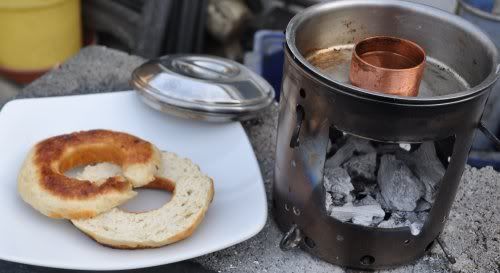
then i thought if you put a chimney in the middle it should let teh heat up to teh top and keep the bread of the hottest bit the middle of the pan
i founs a bit of 1.5" copper tube and ended up with a bit of oil with a Bushcraft Begal :D


after 10 mins turned it over


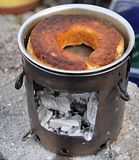
for a further 5 mins
hoboBAn5.jpg


it worked well tho my dough making needs a lot of practice and i used charcoal as the fuel for a controlable even heat I think with wood its going to take a bit of practice to get teh emebers right :D
 
Last edited:
Mar 3, 2010
8
0
Scotland
@JonS: nice set up!
Where did you get this "claws" as a pot holder?

funnily enough they came from a utensil rack that is no longer being used I think it came from IKEA not 100% sure as I found them in the garden shed and claimed them as my own :D

they seem to be stainless steel, unfortunately no tried this set up with a billy can yet but hope to soon (hence the hooks) it does however work with military mess tins.
 

Nat

Full Member
Sep 4, 2007
1,476
0
York, North Yorkshire
Figured it was time i posted up what has taken me nigh on 3 years to get around to making :D

SS biscuit barrel with L-brackets as legs


Utensil Colander with a trangia burner


The last one now has folding hinges to facilitate packing :D
 

Globetrotter.uk

Bushcrafter (boy, I've got a lot to say!)
Jan 24, 2008
2,063
5
Norwich UK
Thanks to Wayland and others here I have modified my Hobo and here's the video.

[video=youtube;jImXSIDgdmk]http://www.youtube.com/watch?v=jImXSIDgdmk[/video]

Just waiting for the material to make the windshield
 
Last edited by a moderator:

shaggystu

Bushcrafter (boy, I've got a lot to say!)
Nov 10, 2003
4,345
33
Derbyshire
My wilko cookset (hobo stove if you like).

All unpacked showing contents:
Coffee caddy billy with hacksaw blade bail
Tea caddy billy (this has a rubber O-ring sealing the lid, makes a pretty good seal and stops rattling if nothing else, I just have to remember to remove it before I use the billy)
Sugar stove (similar to a honey stove but much much cheaper!)
Tuna can meths burner stand/pre-heater
Tea-light
Dove can meths burner
Ferro rod and striker
Disposable lighter and innertube
Meths bottle
Piece of wire mesh (used as a stand for the bigger billy when I’m using the stove as a woodburner, the piece of mesh just lifts the billy up a gnats and increases air flow)
Plastic container (keeps things neat for packing and keeps my lighter dry)
Cotton stuff sack
Leather stuff sack
29z2dsl.jpg


the Russian doll bit
2me36dz.jpg

28incd0.jpg

m91rfq.jpg

33ttu2e.jpg

14l7hfk.jpg


all packed away
24biudx.jpg


set up for meths
zn7km9.jpg


set up for wood
4uf7m0.jpg


the whole lot weighs just under 850grams

cheers for looking

stuart
 
Last edited:
After spending quite some time soaking up the information on this site, I thought I'd post some images of my hobo, inspired by the members of this very website.

It consists of a Wilkos stainless steel biscuit tin (note: the old ones are slightly taller, around 1.25" - this is the newer, shorter one), and 12cm Zebra Billy Can, Wilkos skewers cut down to size, a trangia burner, and trangia pot handle.

Theres probably a few things I could work on and improve, such as the bail handle, and the scewers, but so far it works well when tested.

The parallel alignment of the scewers allows for easy stoking of a fire, and also aids lighting/extinguishing the meths burner (in my first attempt the scewers were crossed at 45degrees which was useless in my opinion!)

The lower set of holes are for use with the meths burner, while the higher set of holes are for use with a normal fire etc.

Just as a side note - the easiest way to get 4 equally spaced holes around a diameter as the multiply the diameter by pi (3.142), this gives you the circumference, then cut a piece of masking tape to that length, next all you need to do is divide your answer by 4 and mark these intervals on your masking tape and then stick it round your can and mark them out.

In the case of the biscuit tin the circumference is 424mm, with intervals of 106mm.

Just thought it might be a handy hint to someone.

IMG_0553.jpg

IMG_0554.jpg

IMG_0556.jpg

IMG_0557.jpg

IMG_0559.jpg

IMG_0561.jpg

IMG_0563.jpg

IMG_0566.jpg

IMG_0549.jpg
 

Nat

Full Member
Sep 4, 2007
1,476
0
York, North Yorkshire
Nice one, do you have enough air holes in it though? Just a thought as the rest of us seem to have "shotgunned" our hobos :lmao:

What are those damn wire crimpers called?
 
Thanks Ocean, it was quite fun!

Nat, I did notice some others have rather more air holes. I plan to try the stove shortly using a natural fire so will see how it performs, but using the meths burner seems to work very well indeed.

Those wire crimpers - I'm guessing you mean the brass ones holding the wire rope together - They are the terminals from an electrical terminal block (or choc box as some like to call them), but with the plastic casing stripped away, then, when they were tightened I ground off the screw heads.

The brass curls around the bottom wire rope is simply heavy gauge electrical cable wrapped around tightly to stop the handle slipping and causing the billy to tip. I might try and do some soldering to make a more permanent joint.

Another idea is to use picture hanging 'D' rings riveted onto the sides of the billy - this I only realised thismorning as I have hundreds of them, so may try that next.

Glad you like it though
 

Silverhill

Maker
Apr 4, 2010
909
0
41
Derbyshire
I wondered how long it would be before you got some pics up mate! Looking good as well, should serve you well next weekend! For the benefit of the thread, I may as well beast a cheeky couple of snaps of mine up as well.
 

Attachments

  • Images 020.jpg
    Images 020.jpg
    97.6 KB · Views: 394
  • Images 021.jpg
    Images 021.jpg
    96.8 KB · Views: 386

Biker

Bushcrafter (boy, I've got a lot to say!)
Hi Folks,
Didn't know where else to put this posting but this seemed the best place for it.

Yesterday I picked up an Ikea stainless steel utensil thingy for €1 at a bootfair here in France (yeah, what are the chances eh? :D)

Anyway I cut a window in the side today and got thinking about air flows and such and thought it'd be a neat idea to incoporate a sort of airspace underneath the fire to help with the air flow etc. (Legs will be fitted at a later date)
So this is what I did with a piece of mild steel "mesh" that I had left over from some radiator grills I had to make. Have a gander at the pix and see what you think.


Hobo1.jpg


Hobo2.jpg


So here's my proposal anyone want a piece of this mesh to add to their own stove? If so, I can cut the piece that's shown in the 2nd picture into three pieces (approx 4 inch x 5 inch)

The first 3 people to PM me with thier address gets it in the post sometime this month. FOR FREE Nope, it's no some scam. There are no strings attached, I'm just trying to help out with some gear I have kicking about that might be useful to someone else here.

Thanks for the inspiration for these stoves. Having seen them here I thought it'd be months before I was able to lay my hands on a decent stainless steel pot. Nabbed two coffee jars while in the UK recently from Wilkinsons which are the biz but that Ikea doodah is the cherry on top.

Thanks for reading.
 

BCUK Shop

We have a a number of knives, T-Shirts and other items for sale.

SHOP HERE