I've been meaning to post a few of my projects for a while now and ended up stockpiling a few, so I'm going to try and post a new one each day.
Enjoy and please comment
Project #1
I convinced myself that I needed a small scandi knife for small tasks around camp and to generally use for bushcraft, not so sure how convinced I am now that its done but I can figure that out in 2021.
I began with a blade blank, some imitation ivory for a handle and a nickle (or stainless steel?) bolster (the bit in-between the blade and the handle).
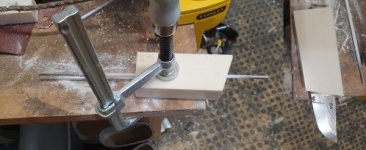
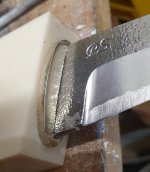
I can honestly say the handle material is some of the worst I've ever worked with, the smell alone is bad (like burnt plastic) but it also causes skin irritation, luckily once worked and sanded it seems to be fine. I drilled out the center from the handle block and filed the circle hole into a long slot matching the stick tang of the blade, this took a lot of sanding and test fitting until I got the blade, bolster and block to all fit together flush, if you look at the picture you might notice that everything had to be at an angle to match the blade.
After getting everything flush I decided I wanted the blade to fit into the bolster, not just sit on top of it, to do this I took a small file and then a dremel tool to the bolster to grind out a seat for the blade to slot into but not go the whole way through, this enables the blade to still hold the bolster against the handle.
Having done that I started on the shape of the handle, I had a general idea but wanted to check and alter it on the way to find something comfortable.

I roughed out the handle on the belt sander and found a shape that seemed comfortable, albeit a little odd looking.
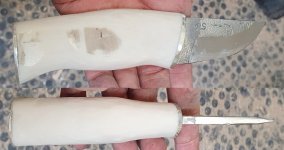
I took a few days sanding the handle down, and BOOM (pause for applause)

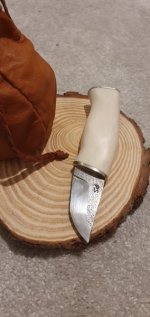
I sanded the filth off the blade and spent some time on the whetstone, I then took a while finding various "bushcraft" type items to make myself look like I know what I'm doing.
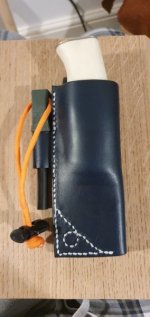
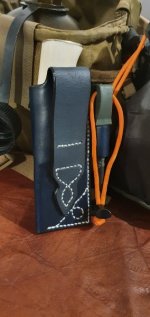
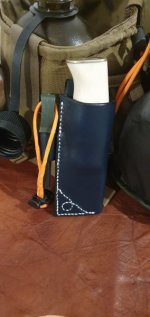
After finding out I had done my sharpening job a little too well I decided a sheath was in order, this time I decided a plan was probably a good thing.
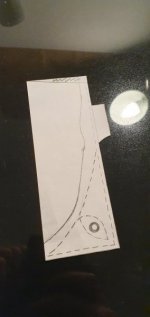
when drawing this out I quickly realised I had made a design for a left handed sheath, when making the actual sheath I just turned the paper over to trace around and pretended that was my intention all along.
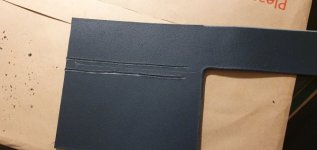
And queue image that looks nothing like the design, yes, after realising that my design was essentially a rectangle without the firesteel loop I decided to ditch the paper masterplan. To make a sheath you essentially just need the above, a L shaped piece , twice the length of the knife (the bit going off right) to form the belt loop and a flap (going off bottom) that folds over and forms the front of the sheath. Now that its been half explained please see the finished product being made below.
Stitching the back:
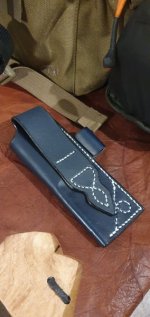
Stitching the front to the welt and the fire-steel loop:
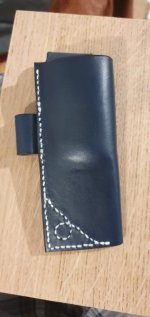
And done, so does it fit? (check the comments, as I can only upload 10 images)
Enjoy and please comment

Project #1
I convinced myself that I needed a small scandi knife for small tasks around camp and to generally use for bushcraft, not so sure how convinced I am now that its done
 but I can figure that out in 2021.
I began with a blade blank, some imitation ivory for a handle and a nickle (or stainless steel?) bolster (the bit in-between the blade and the handle).
I can honestly say the handle material is some of the worst I've ever worked with, the smell alone is bad (like burnt plastic) but it also causes skin irritation, luckily once worked and sanded it seems to be fine. I drilled out the center from the handle block and filed the circle hole into a long slot matching the stick tang of the blade, this took a lot of sanding and test fitting until I got the blade, bolster and block to all fit together flush, if you look at the picture you might notice that everything had to be at an angle to match the blade.
After getting everything flush I decided I wanted the blade to fit into the bolster, not just sit on top of it, to do this I took a small file and then a dremel tool to the bolster to grind out a seat for the blade to slot into but not go the whole way through, this enables the blade to still hold the bolster against the handle.

Having done that I started on the shape of the handle, I had a general idea but wanted to check and alter it on the way to find something comfortable.

I roughed out the handle on the belt sander and found a shape that seemed comfortable, albeit a little odd looking.

I took a few days sanding the handle down, and BOOM (pause for applause)


I sanded the filth off the blade and spent some time on the whetstone, I then took a while finding various "bushcraft" type items to make myself look like I know what I'm doing.
After finding out I had done my sharpening job a little too well I decided a sheath was in order, this time I decided a plan was probably a good thing.

when drawing this out I quickly realised I had made a design for a left handed sheath, when making the actual sheath I just turned the paper over to trace around and pretended that was my intention all along.

And queue image that looks nothing like the design, yes, after realising that my design was essentially a rectangle without the firesteel loop I decided to ditch the paper masterplan. To make a sheath you essentially just need the above, a L shaped piece , twice the length of the knife (the bit going off right) to form the belt loop and a flap (going off bottom) that folds over and forms the front of the sheath. Now that its been half explained please see the finished product being made below.
Stitching the back:

Stitching the front to the welt and the fire-steel loop:

And done, so does it fit? (check the comments, as I can only upload 10 images)

