I was looking to add something to a post I was sure I had started somewhere only to discover that I don't seem to have posted about this here.
This came about from an idea I had on the first winter trip I made to the Arctic.
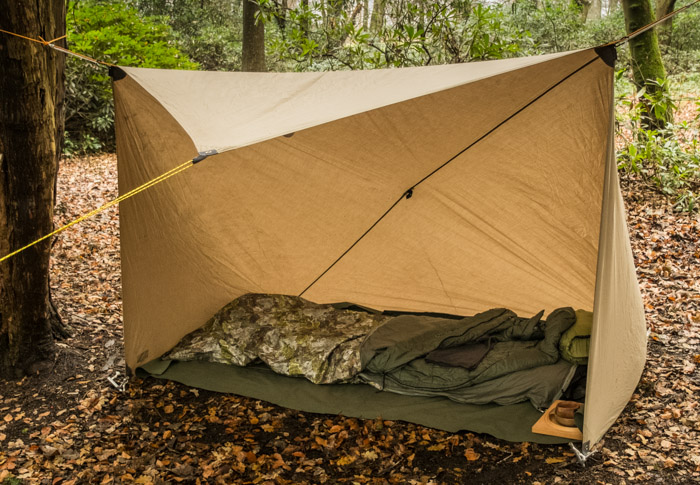
For some time now I have been using a square cotton tarp, set up on the diagonal, to build a simple lean to shelter for Winter use when I'm not using a hammock. This works well and has been dubbed by some as the Adirondack pitch, due to a resemblance to the public shelters built along the famous trail there.
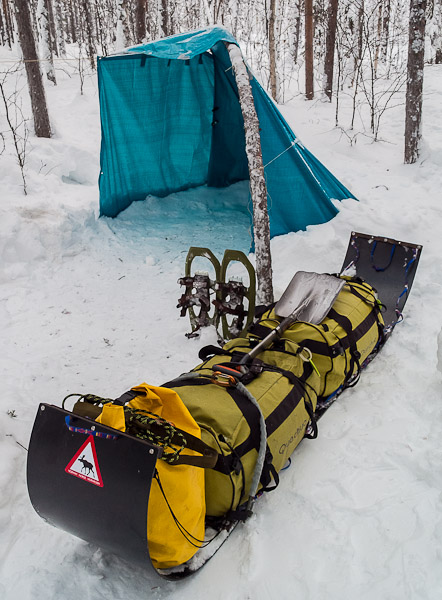
When using this shelter in snow conditions, I tend to attach a small extra tarp sheet on one side of the front to form an annex and reduce the spindrift that enters from that side. This also works well, but requires careful attachment to make a good seal and is prone to coming apart in strong wind.
The first time I travelled to the Norwegian Arctic in Winter I was hit by repeated thaw/freeze conditions which effectively turned this cotton tarp into a stiff unmanageable sheet of ice and canvas and adding considerably to the flight weight on the return journey. This prompted me to use a poly builders tarp on my next trip which was so cheap that I didn't even bother flying back with it, donating it to a local camping centre in Jokkmokk instead.
The background was set then for me starting to think about ways to improve this basic set up and after experimenting with some scissors, a sheet of paper and a roll of tape I was ready to make this extended version of my Winter shelter.
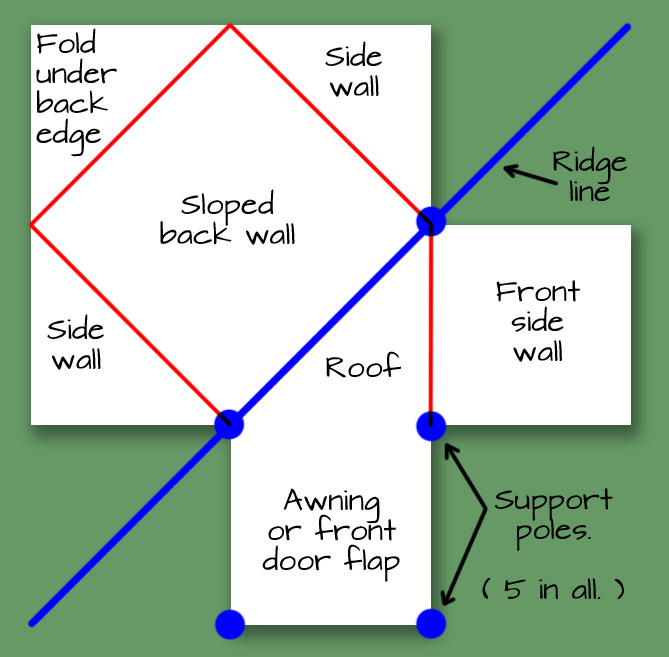
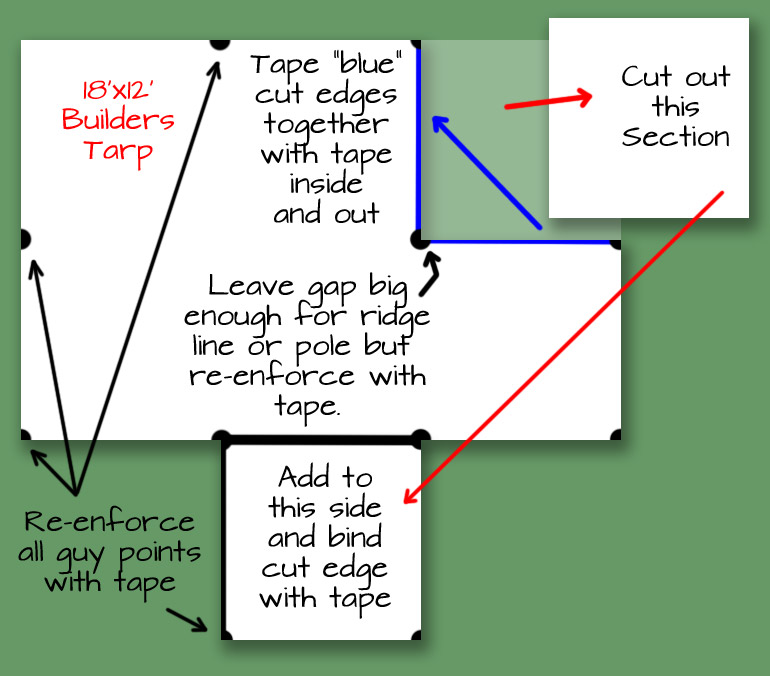
The construction is made from an 18'x12' poly tarp which is a fairly standard size and requires a 6'x6' section to be cut from one corner. This section is then re-attached onto another edge to form an additional awning that can be folded down to cover the front opening if necessary, much like a traditional Baker tent.
The raw cut edges where the section was removed are taped together, leaving a small hole for a ridge line or pole at the top. This forms a much stronger version of the walled annex that I found so useful by adding a second sheet in snow conditions.
The seams are joined using waterproof gaffa tape, which is again cheap and easy to obtain. This is also used to re-enforce any raw cut edges, the guying and support points to reduce the risk of the tarp tearing in windy conditions.
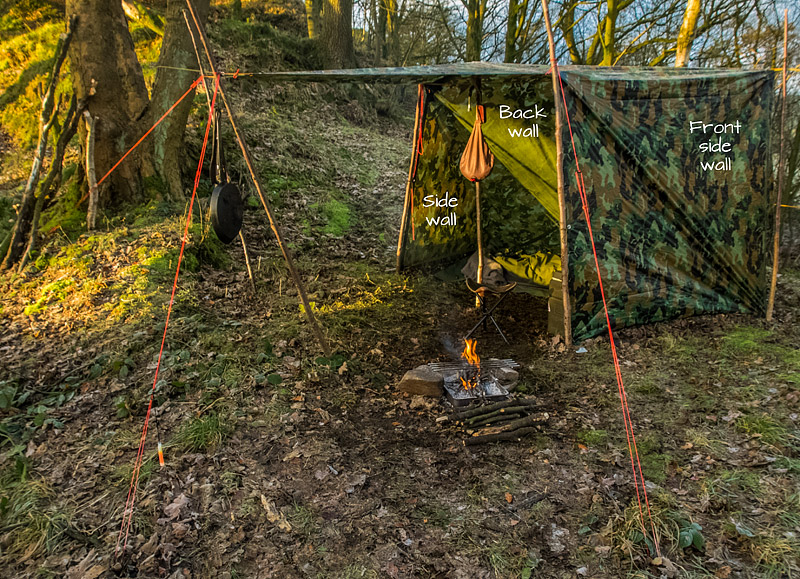
It had a fairly good testing for this weakness on the Peak District meet with Rob as I set myself up on an exposed ridge with the back of the shelter facing into the prevailing wind.
Somewhat predictably, the poly tarp was a bit noisy in the wind, hail and rain that we had that weekend but the structure remained standing and the tarp suffered no damage.
I filled in the gaps along the bottom edges with loose leaves much as I would use snow in the Arctic and this made it cosy and draft free to the extent that Rob dubbed it the “Wayland Shed”
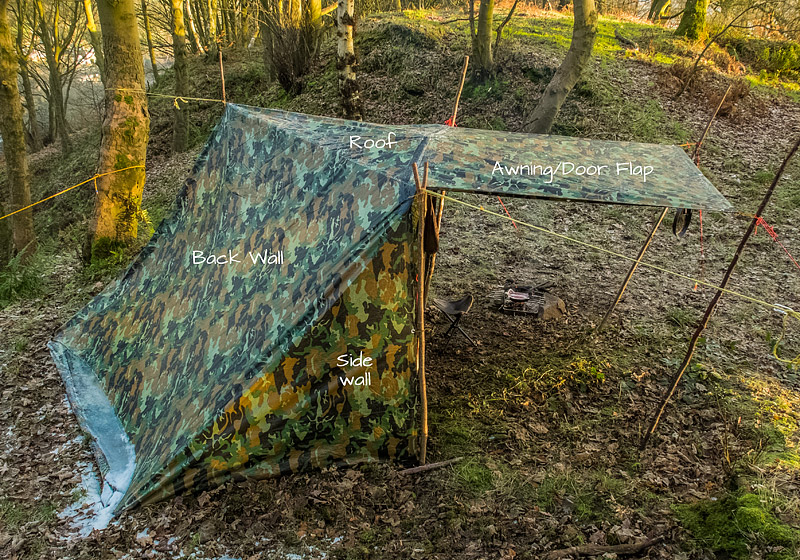
As an idea of costs the tarp was delivered for about £17 and I used a £2 roll of gaffa tape in the construction. All the cordage was stuff I had lying around and though I took the poles with me on this occasion, in most Boreal forests, finding poles suitable for the supports would not be a significant problem or in many cases it could be built on lines strung between trees.
All in all, a cosy, secure shelter for around £20 can't be that bad and is easily repairable on site with a bit of gaffa tape on hand.
For trips abroad, where I often return with more than I left with, it's also not the end of the world if I do not fly home with it. There is always someone who can find a use for a spare builders tarp.
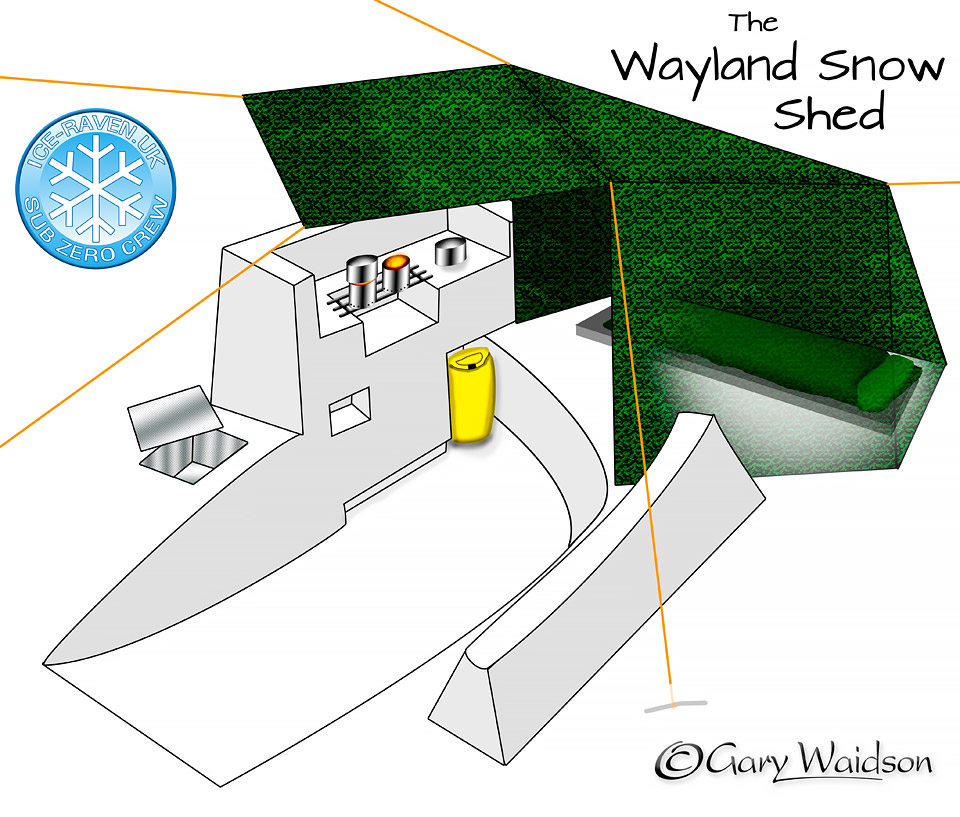
For our next planned trip to Kittilä, I’m hoping to be able to pitch it on some deeper snow and take advantage of the snowpack to make life even more comfortable by digging a footwell and kitchen bench.
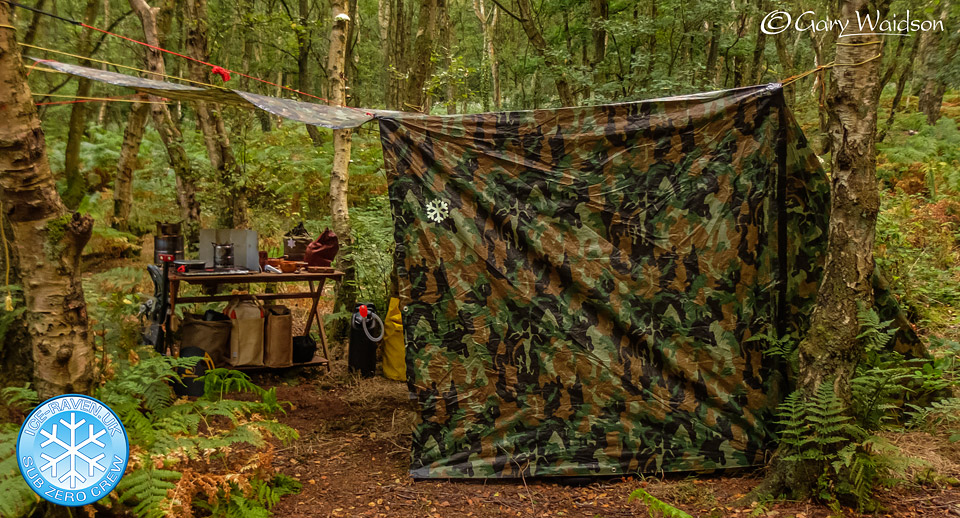
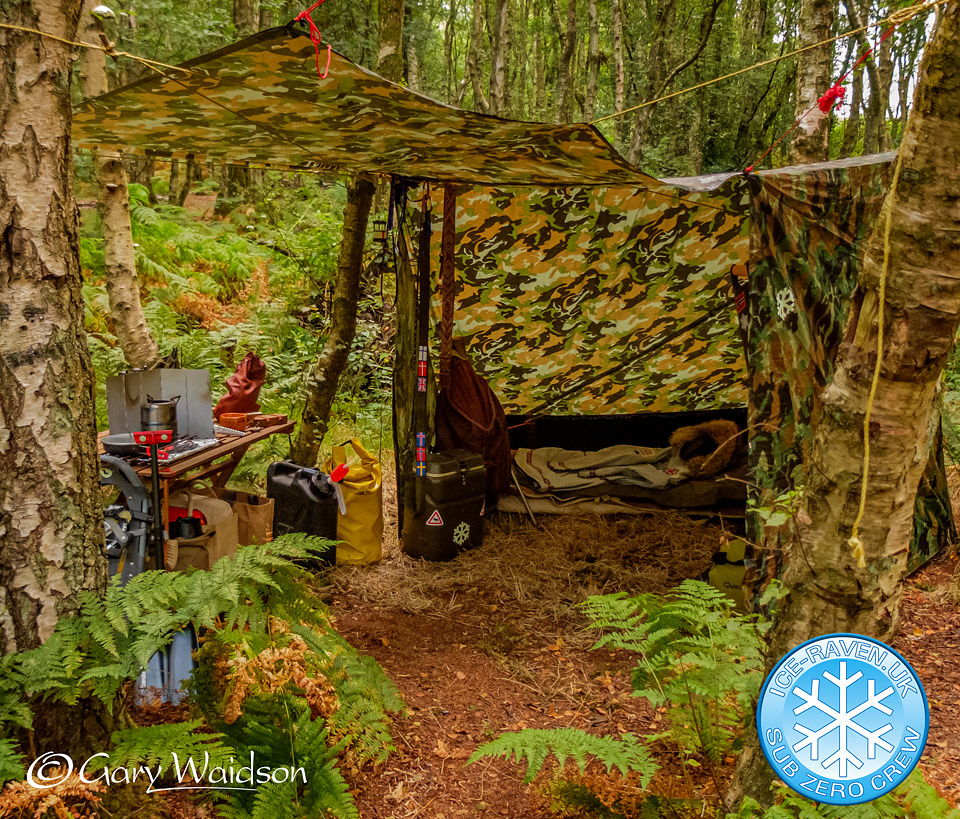
A weekend camp in August gave me a chance to check out the full kit for our Kittilä trip and importantly an opportunity to set up the Wayland Shed, something I don't have the space to do at home.
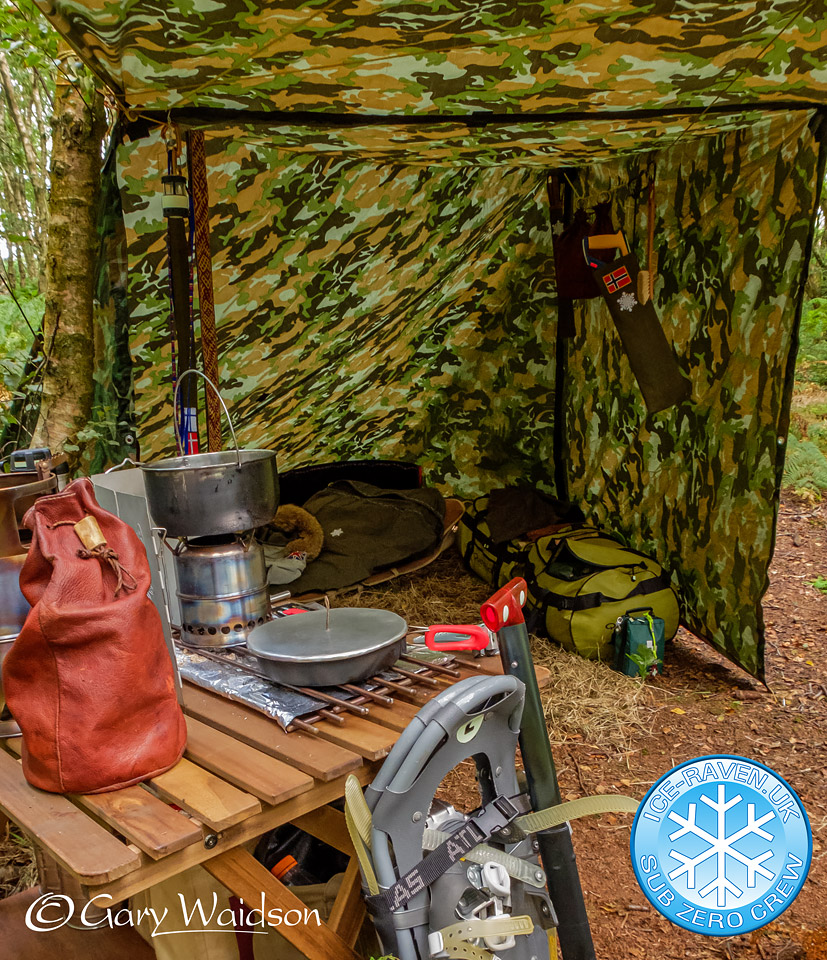
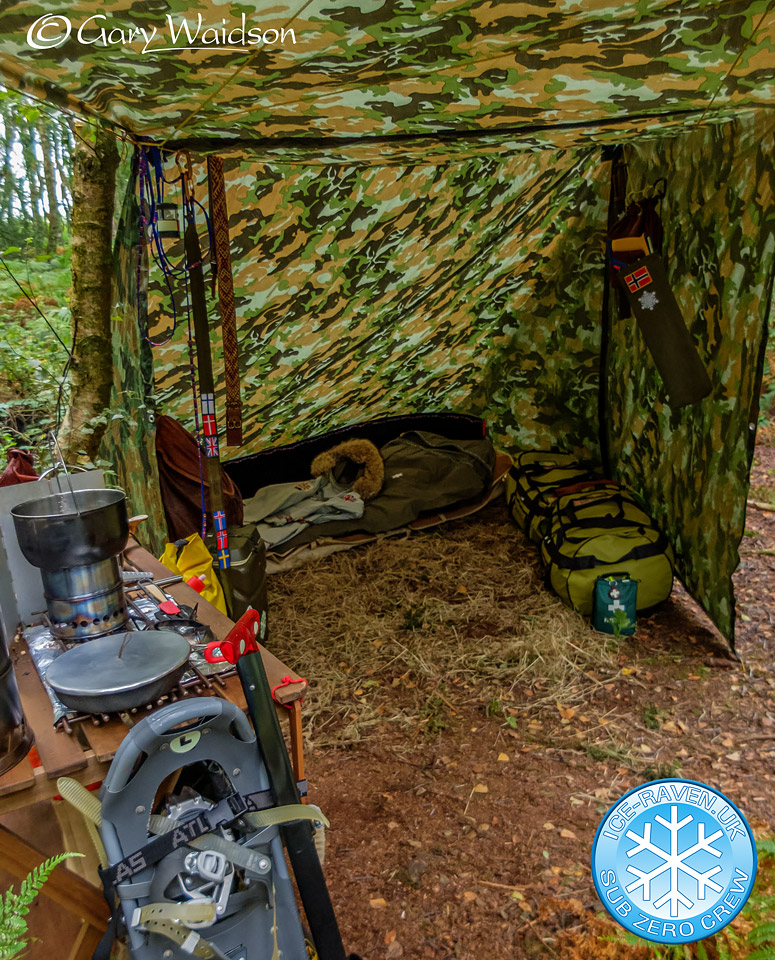
Obviously, building in snow was not an option here so I took a table to substitute for the food preparation area.
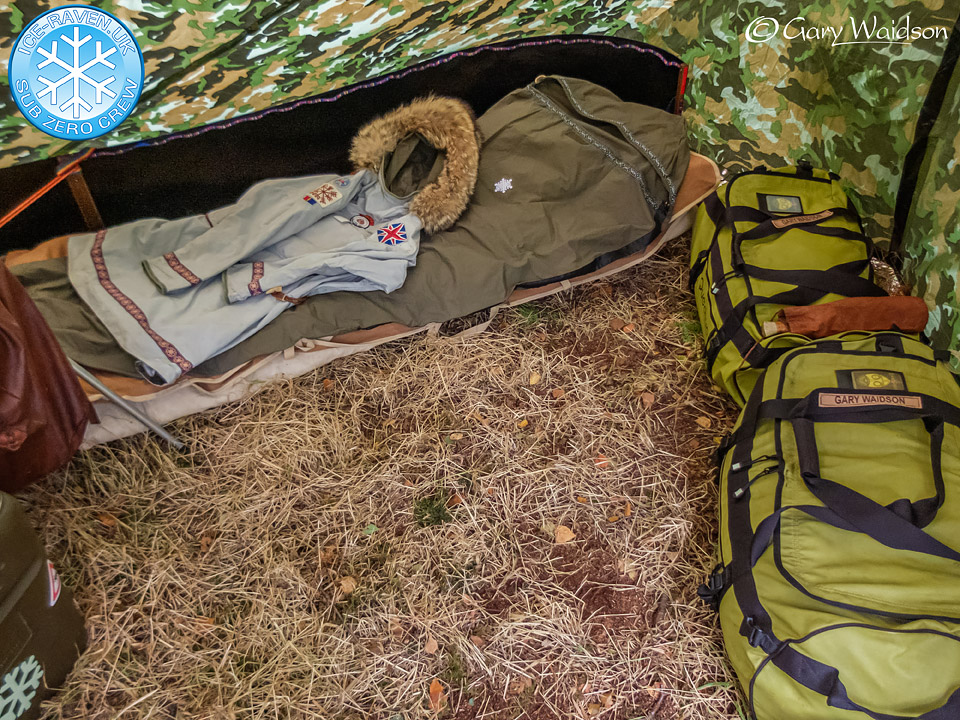
I would have also sweltered in my Sub Zero sleeping system so I just used my bedroll in it's place as well
The floor area will be excavated into the snow providing a cold well and extra head room.
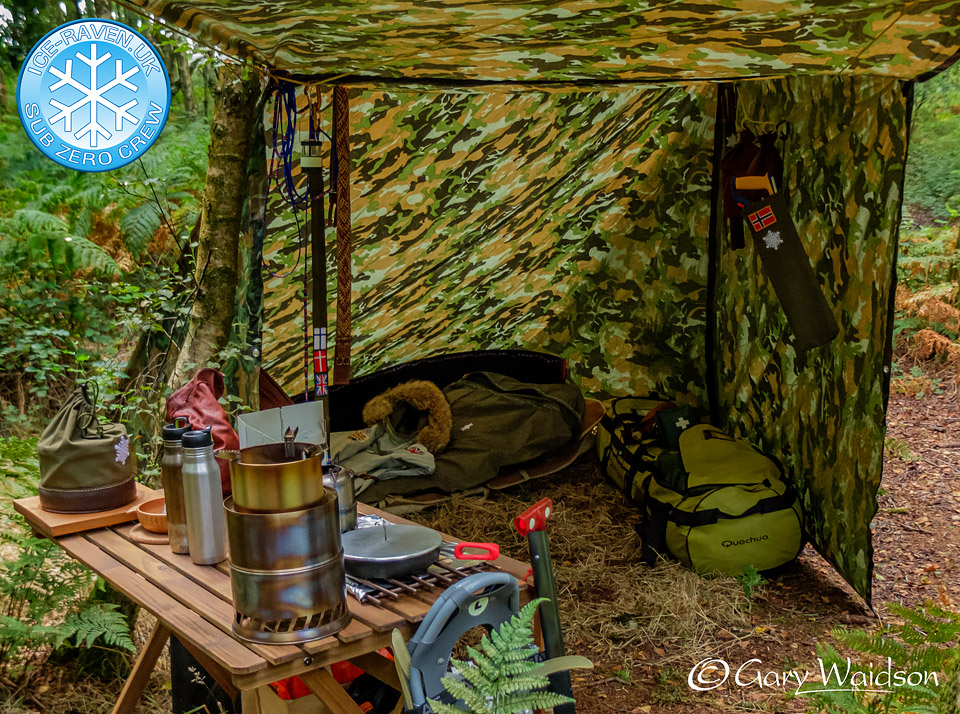
There is plenty of storage space against the front wall and useful hanging space above.
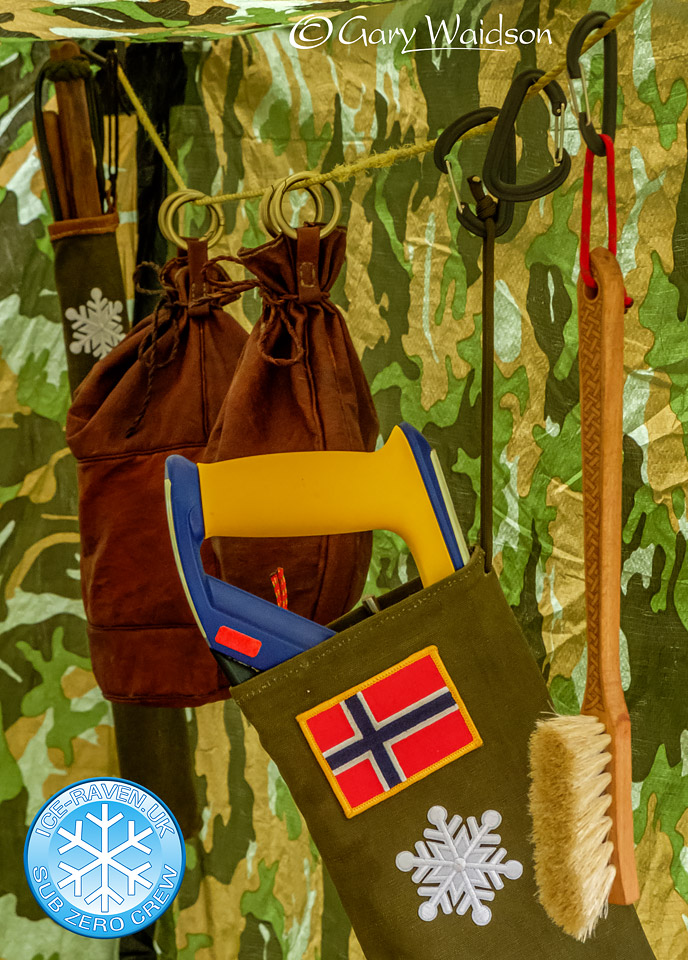
It highlighted a couple of very minor modifications that need to be made before the trip.
Mainly slight tweaks to the rigging.
Overall I think it is going to suit my needs very well.
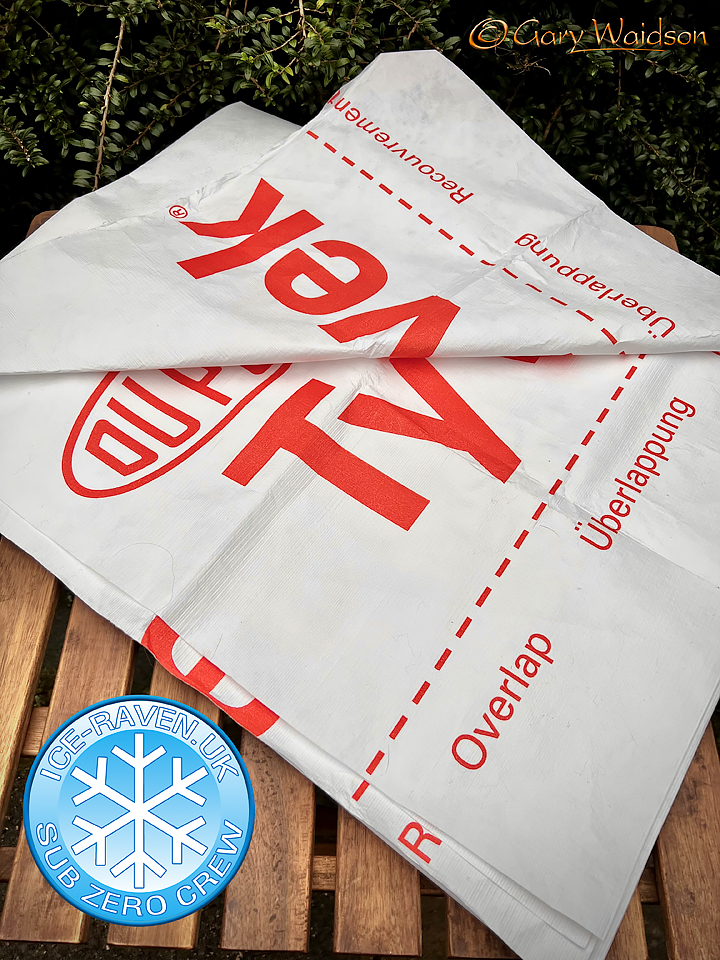
Today, following up an interesting tip I picked up from a book on ultralight camping, I have now added a Tyvek groundsheet for the sleeping area.
I had already come to appreciate the properties of Tyvek from the boot covers I recommended elsewhere, but hadn’t thought of it for this use.
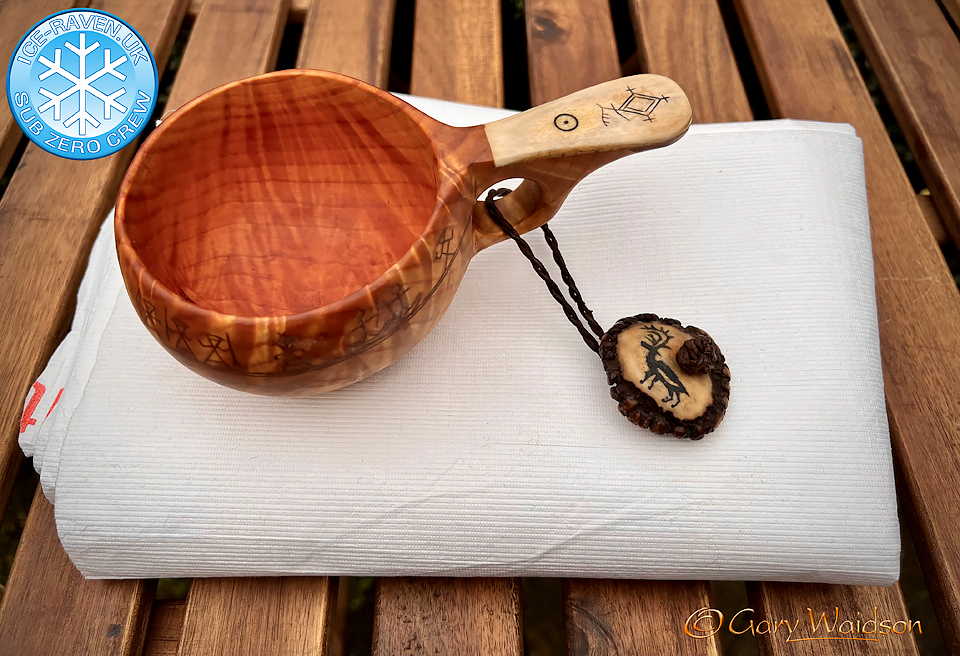
There are two types used in the building industry apparently and this is the softer handling type. Pretty robust, strongly water resistant and plain white on the top side. It packs pretty small too as you can see.

I added some brass eyelets in the corners for pegging down and the whole thing weighs in at 338g to cover the 8’ sq footprint of the Wayland Shed.
That’ll do nicely and give me a bit more dry space to work with.
This came about from an idea I had on the first winter trip I made to the Arctic.

For some time now I have been using a square cotton tarp, set up on the diagonal, to build a simple lean to shelter for Winter use when I'm not using a hammock. This works well and has been dubbed by some as the Adirondack pitch, due to a resemblance to the public shelters built along the famous trail there.

When using this shelter in snow conditions, I tend to attach a small extra tarp sheet on one side of the front to form an annex and reduce the spindrift that enters from that side. This also works well, but requires careful attachment to make a good seal and is prone to coming apart in strong wind.
The first time I travelled to the Norwegian Arctic in Winter I was hit by repeated thaw/freeze conditions which effectively turned this cotton tarp into a stiff unmanageable sheet of ice and canvas and adding considerably to the flight weight on the return journey. This prompted me to use a poly builders tarp on my next trip which was so cheap that I didn't even bother flying back with it, donating it to a local camping centre in Jokkmokk instead.

The background was set then for me starting to think about ways to improve this basic set up and after experimenting with some scissors, a sheet of paper and a roll of tape I was ready to make this extended version of my Winter shelter.

The construction is made from an 18'x12' poly tarp which is a fairly standard size and requires a 6'x6' section to be cut from one corner. This section is then re-attached onto another edge to form an additional awning that can be folded down to cover the front opening if necessary, much like a traditional Baker tent.
The raw cut edges where the section was removed are taped together, leaving a small hole for a ridge line or pole at the top. This forms a much stronger version of the walled annex that I found so useful by adding a second sheet in snow conditions.
The seams are joined using waterproof gaffa tape, which is again cheap and easy to obtain. This is also used to re-enforce any raw cut edges, the guying and support points to reduce the risk of the tarp tearing in windy conditions.

It had a fairly good testing for this weakness on the Peak District meet with Rob as I set myself up on an exposed ridge with the back of the shelter facing into the prevailing wind.
Somewhat predictably, the poly tarp was a bit noisy in the wind, hail and rain that we had that weekend but the structure remained standing and the tarp suffered no damage.
I filled in the gaps along the bottom edges with loose leaves much as I would use snow in the Arctic and this made it cosy and draft free to the extent that Rob dubbed it the “Wayland Shed”

As an idea of costs the tarp was delivered for about £17 and I used a £2 roll of gaffa tape in the construction. All the cordage was stuff I had lying around and though I took the poles with me on this occasion, in most Boreal forests, finding poles suitable for the supports would not be a significant problem or in many cases it could be built on lines strung between trees.
All in all, a cosy, secure shelter for around £20 can't be that bad and is easily repairable on site with a bit of gaffa tape on hand.
For trips abroad, where I often return with more than I left with, it's also not the end of the world if I do not fly home with it. There is always someone who can find a use for a spare builders tarp.

For our next planned trip to Kittilä, I’m hoping to be able to pitch it on some deeper snow and take advantage of the snowpack to make life even more comfortable by digging a footwell and kitchen bench.

A weekend camp in August gave me a chance to check out the full kit for our Kittilä trip and importantly an opportunity to set up the Wayland Shed, something I don't have the space to do at home.

Obviously, building in snow was not an option here so I took a table to substitute for the food preparation area.

I would have also sweltered in my Sub Zero sleeping system so I just used my bedroll in it's place as well
The floor area will be excavated into the snow providing a cold well and extra head room.

There is plenty of storage space against the front wall and useful hanging space above.

It highlighted a couple of very minor modifications that need to be made before the trip.
Mainly slight tweaks to the rigging.
Overall I think it is going to suit my needs very well.


Today, following up an interesting tip I picked up from a book on ultralight camping, I have now added a Tyvek groundsheet for the sleeping area.

I had already come to appreciate the properties of Tyvek from the boot covers I recommended elsewhere, but hadn’t thought of it for this use.
There are two types used in the building industry apparently and this is the softer handling type. Pretty robust, strongly water resistant and plain white on the top side. It packs pretty small too as you can see.

I added some brass eyelets in the corners for pegging down and the whole thing weighs in at 338g to cover the 8’ sq footprint of the Wayland Shed.
That’ll do nicely and give me a bit more dry space to work with.


