My first try in a sort of tutorial. If you find that some bits are missing or ill explained just let me know. I will then try to do better
This design is a very basic scandi-styled sheath, relatively easy to work with, and very easily improved/modded or variated to any desire.
First off: materials choice!
I generally allways use halftanned leather, as this, with its untanned core suits my needs the best.
You can use any material you would like to use, this "tutorial" is based upon halftanned leather though.
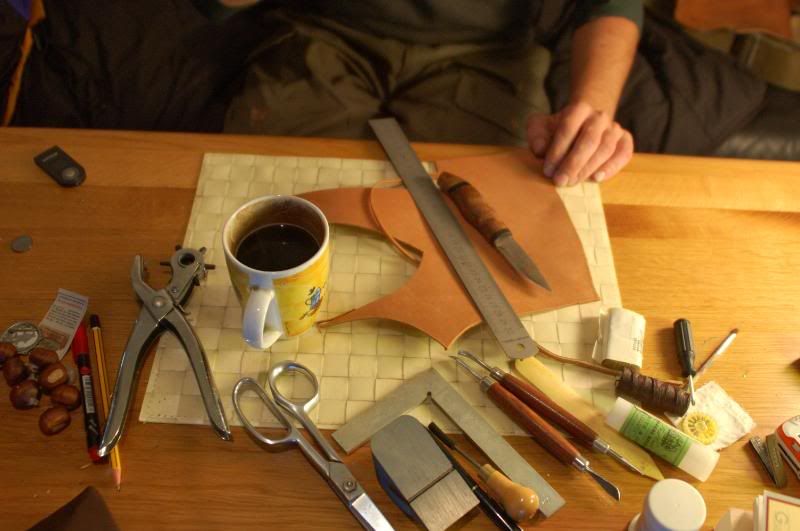
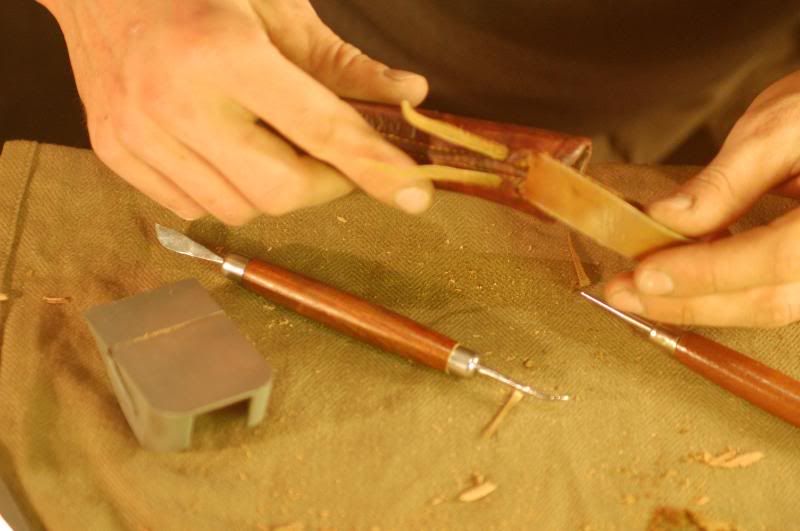
Tools of the trade
A sheath is supposed to fit 100% to the knife. This means you will have to measure and draw to begin with.
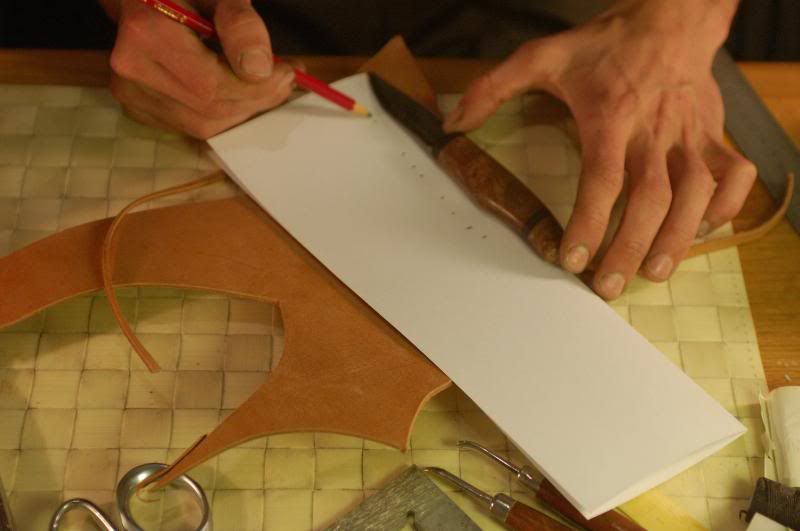
Start of with a folded piece of paper and make a small dot where the tip begins, and where you wish the sheath to stop. (Make it a little longer than you want. 2-3 mm or so)
Establish 5-8 places where you will make your measurements. A soft pencil will do on paper aswell as on the knife so you won't forget where to measure. (Generally everywhere where the knife has sudden changes.)
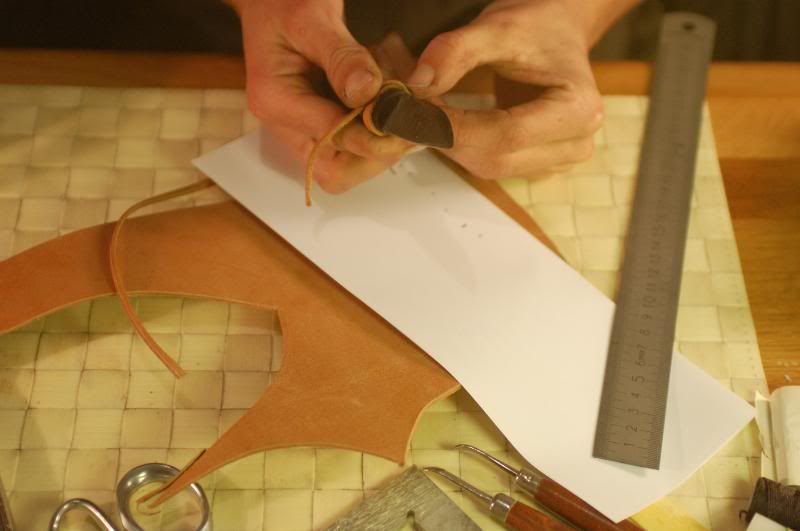
For measuring use a simple piece of the leather you are going to use. This way you are sure that the measurements are correct.
The measurement you have taken will need to be halfed, and transferred from the fold of the paper inwards.
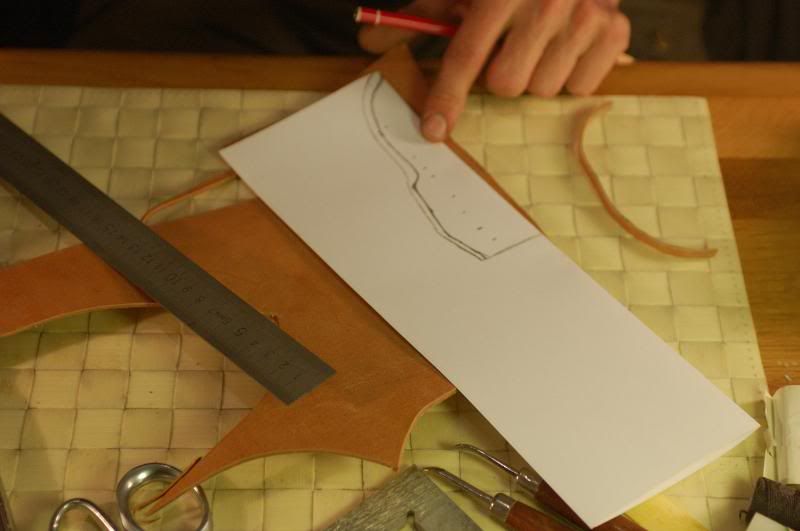
After transfering all measurements, join them up with a soft touch.
You will need a bit extra for the stitches, so after joining the first dots up, make a new line following the first with approx 2-3 mm space on the handlepart and 5 mm on the blade part. It should look somewhat like this.
(If you wish to make a more samistyled tip to the sheath, simply make the tip long on the drawing. It will then bow more or less correctly when finished. (will be seen on the leather, because i did do so in the end))
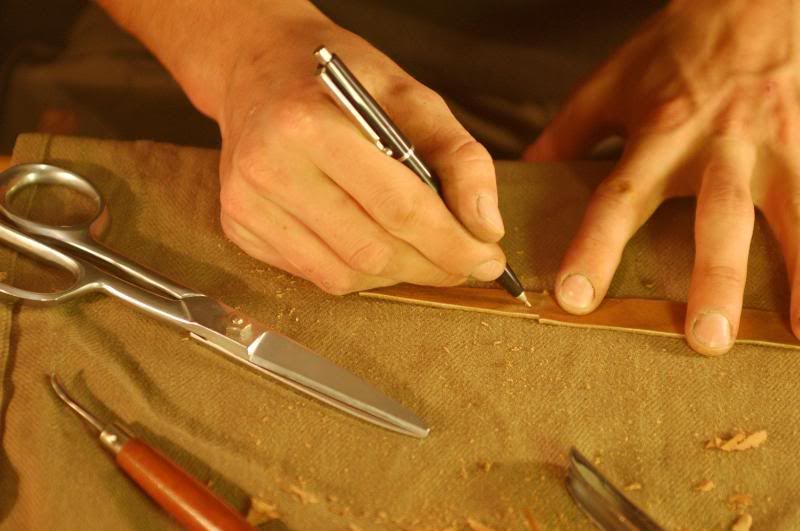
Transfer the mock-up to the leather
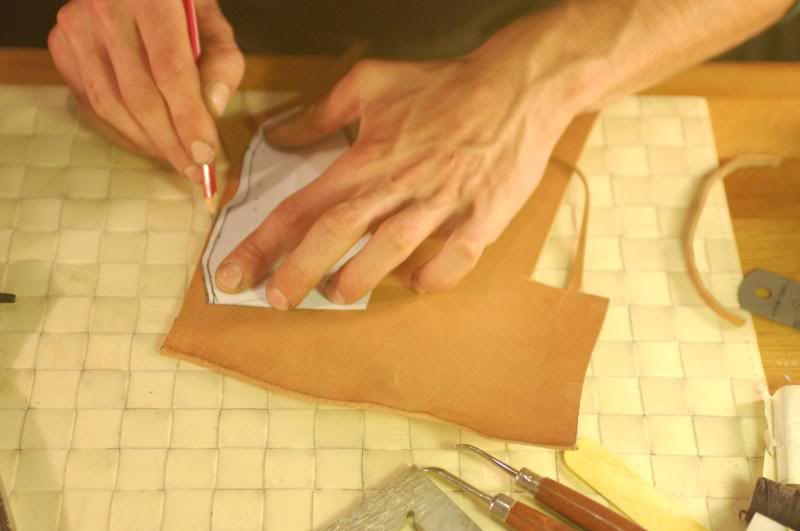
Cut out the leather, with more angle to your knife, then what generally would be considered "normal"
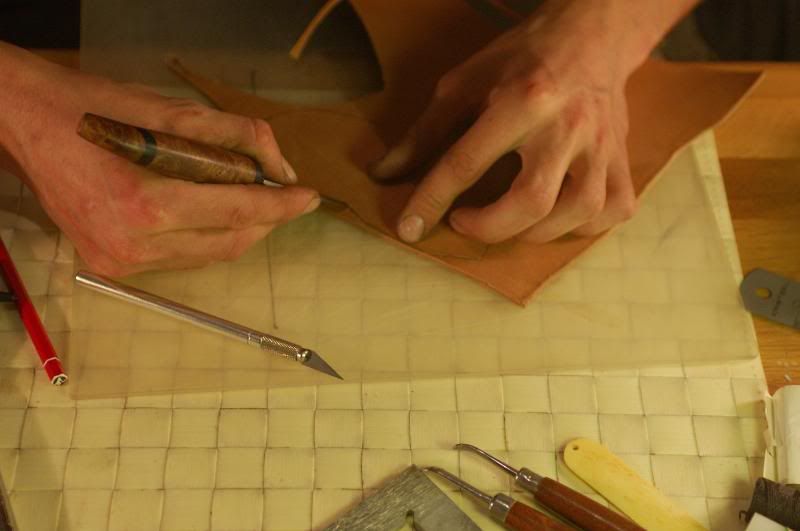
If its too hard to cut, put it in cold water for 20-30 minutes or so. But remember: wet leather is very easily damaged!!
There you go. Angle all way around
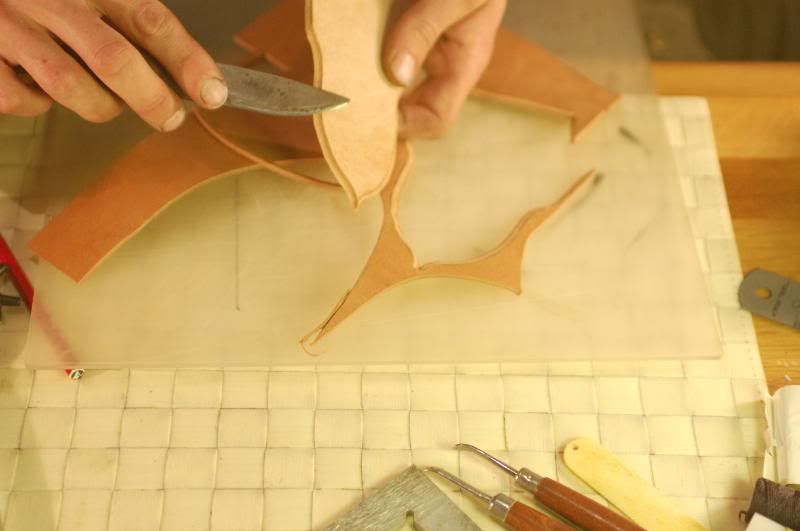
By now the leather must be wet. Give it 20-30 minutes or so in cold water, and be gentle with the smooth side from now on. It won't take any damage or imprints very well from now on.
Mark out needleholes with a markingwheel or whatever you have, but be accurate. I would keep a distance of 2-3 mm to the edge.
Then take your awl, and start making holes in an angle. Remember this is halftanned. We want to go under the untanned part, but still stay within the angled surface.
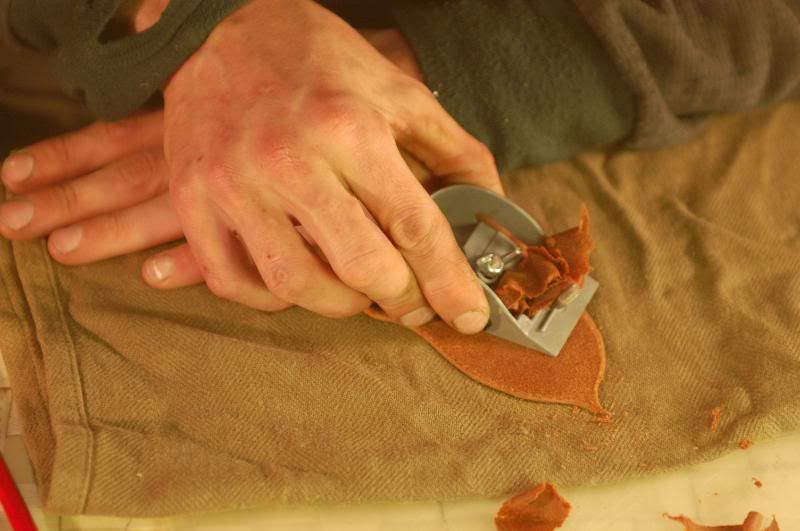
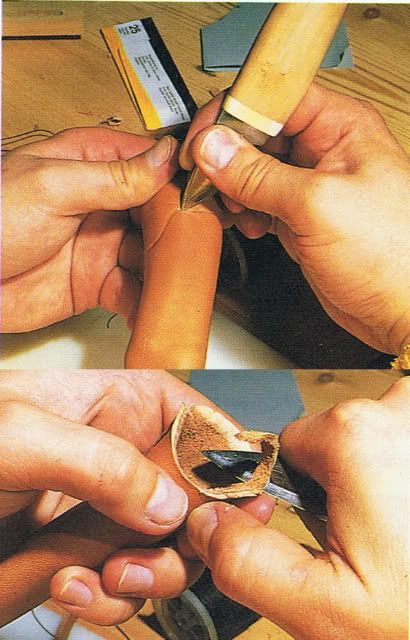
Shave down the blade-part of the leather. This could be done before making holes, but i am used to doing it afterwards. Habits don't die easily.
How much to be shaved off? Dont get it paperthin, but do not think that you can fold a piece of leather more than 1½-2 mm thick so that it looks good either. Leave more material at the handle end, and make the tip of the sheath thinner than the rest ( i generally do n shave the handle part of the sheath). Just do not shave the untanned core away, as this is the "backbone" of this sheathtype.
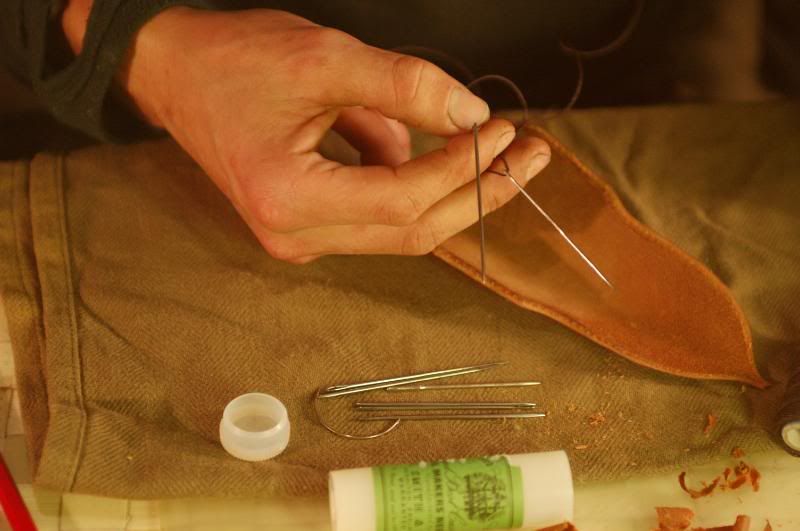
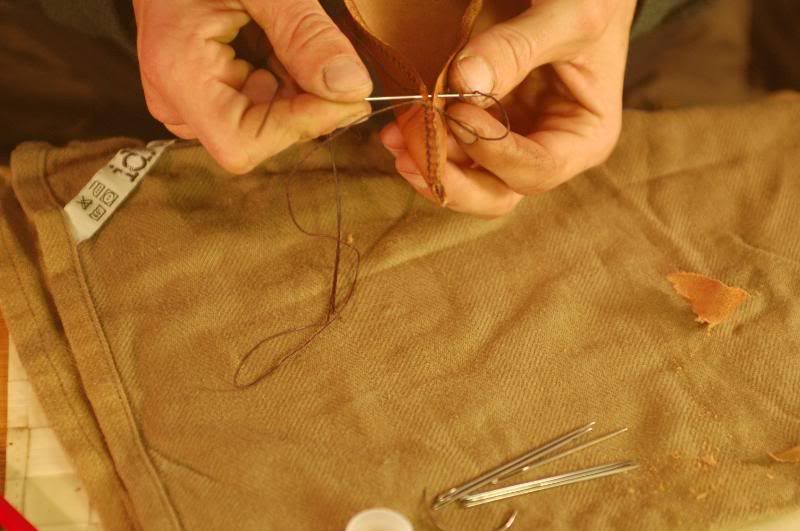
Now for the stitching. I always use a saddlestitch. Meaning that you sew with 2 needles, and that you "cross" the thread, thus making a singleknot, in every hole.
This is the "cross". Make sure you get the knot tied the same way around every time. Otherwise it will be noticable afterwards.
As soon as you have done the entire sheath, you will have to lock the stitching. Easy: Just go backwards a few holes eg. 3-4
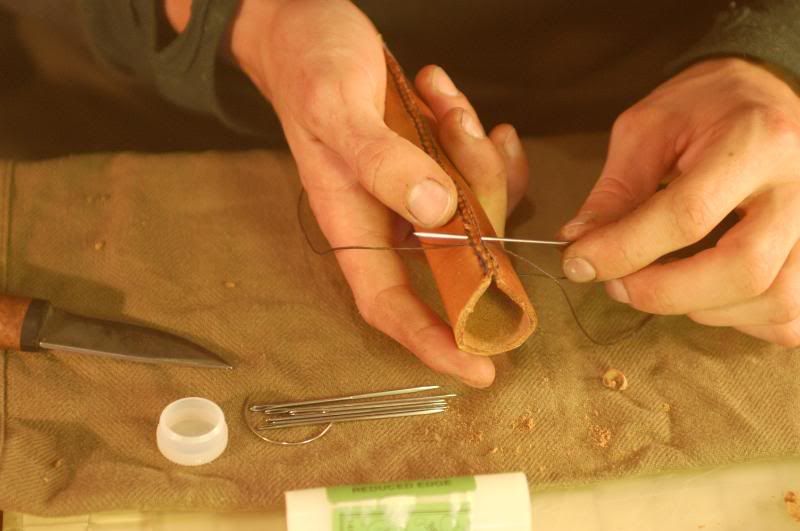
Its stitched and hopefully still wet. If not, give it a few minutes in water again.
EDIT: Missing pics are now here accompanied by appropriate text.
Now is the time to mark out how the rim should look like with a blunt edged tool or a pencil.
Then you will wan’t to trim/shave the leather down in an angle of approx 45degrees (the surface made would then normally reach a full centimetre down inside the sheath), cutting from the inside and out. Do not make cuts into the coarse side of the leather, other than the plain smooth surface you leave from shaving it down, as this will make the leather somewhat fragile with a tendency to rip.
Try to get the rim as thin as possible, but leave as much of the untanned core to most of the shaved area, as this will stiffen it out when dry.
Dangler/beltloop
You need to make a few holes for the beltloop/dangler in the sheath. 6 to be excact.
Placed on either side of the stitching. The holes are placed next to stitch number 4, 7 and 9, and are made big enough for the legs of the beltloop go through, but not too big. A “snug” fit is recommended. (this pic is borrowed)

The beltloop is done to fit into the holes in the sheath, and reaching deep down inside the sheath. Shave the legs of the loop down to a reasonable level, and cut the legs to form “needles” on the tips for ease of pushing them through the holes.
(”blueprint” of the shape of a beltloop, see the drawing at the end of this tutorial)
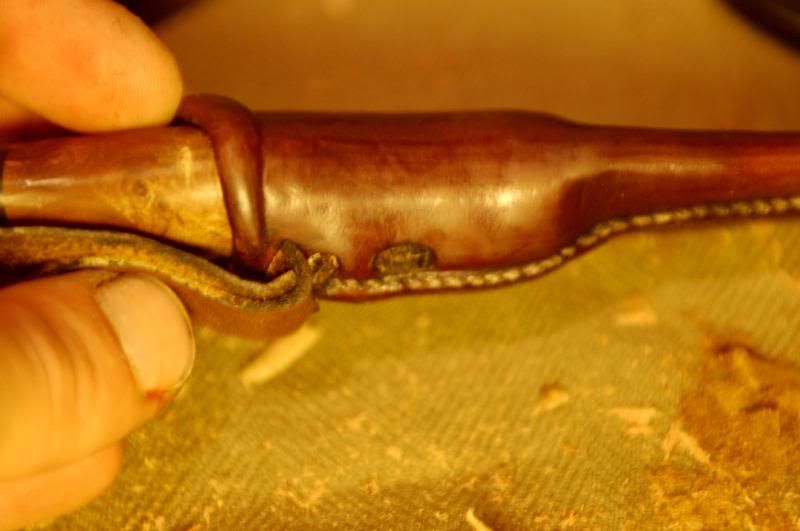
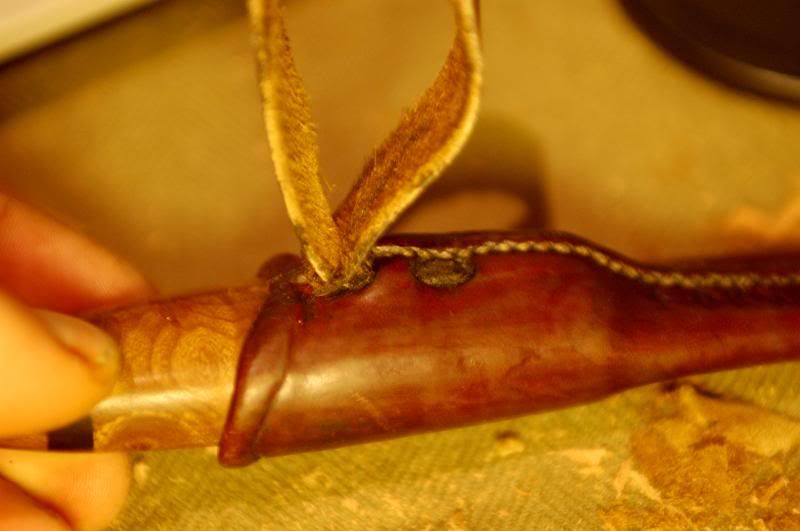
Fit the dangler/beltloop onto the sheath.
A pair of flat pliers might be needed to pull the legs of the beltloop tight. It must be fed through the upper hole, out of the second hole, and into the third and last hole. If done correctly, nothing will loosen, and it will help keeping the knife in place aswell.
It should end up look something like this.
It is now you can start pushing the hide around on the sheath, and with a bit of endurance and muscle, you’d be surprised how far you can move it.
Wrap the knife in vitawrap or anything that will keep the acids of the leather from the knife, and stick the knife into the sheath before you start tooling.
Pay extra attention to the folded rim, and the part right above the bolster or the thickest part of the handle, as this will require a bit of work to get right. If its done right, the knife should "klick" into the dry sheath. this "klick" is what we use to measure good craftsmanship on. If its not there, its probably poor work.

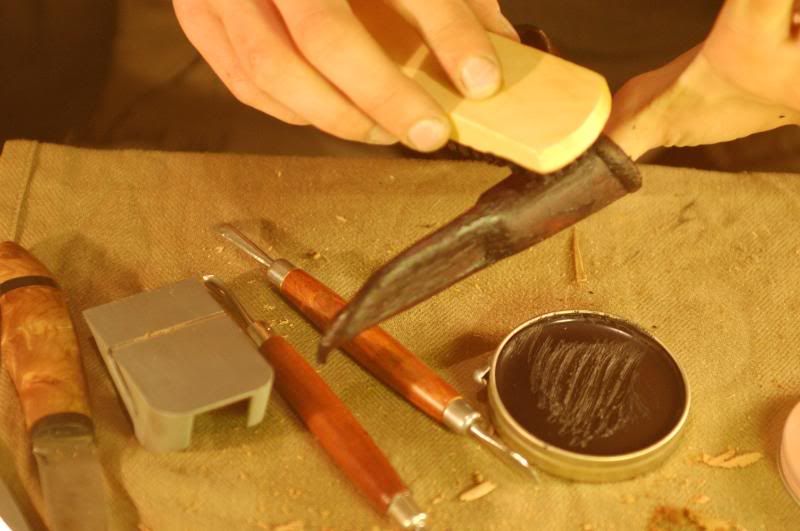
Now all done, you only need to treat the leather with some high quality leatherwax, leathersoap or even varnish (although the halftanned leather does go very stiff, varnish will make it even stiffer)
Perhaps you have a favourite leathertreatment, if so, go for it, try it out.
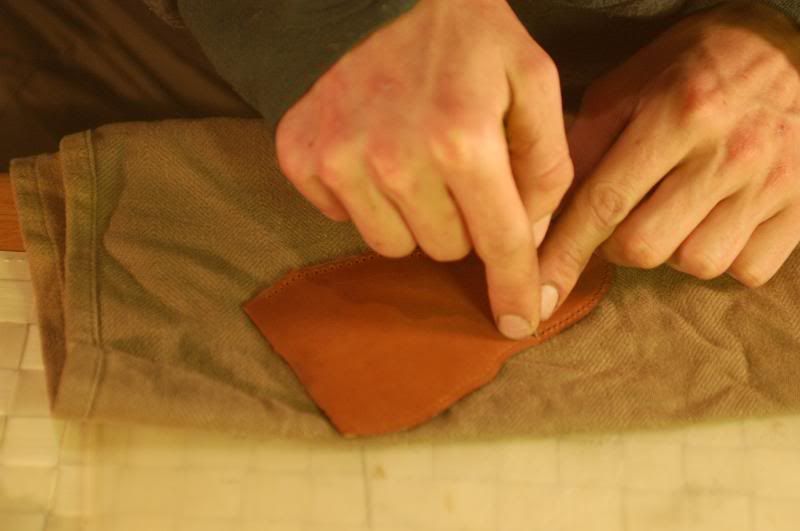
Finished result of my resheathing, wich took me all in all about 2½ hours of little intensive work
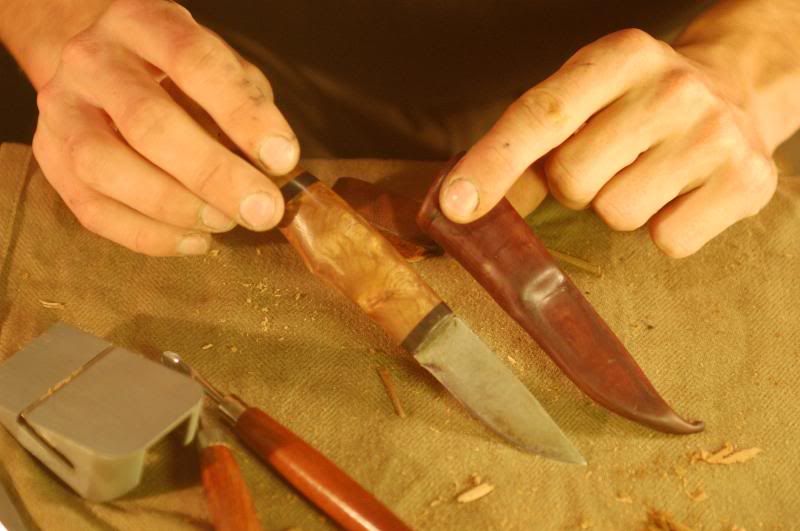
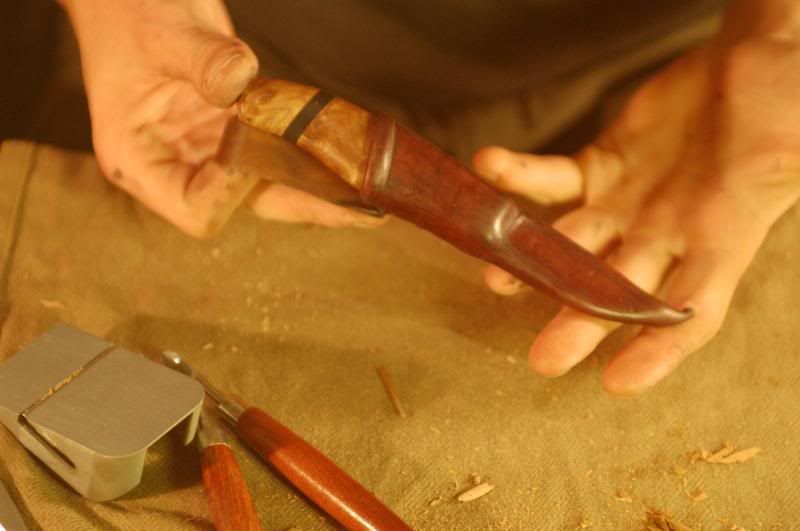
All I need now is for the leatherwax with colour in it to soak through, so I can polish it up to a medium glanze.
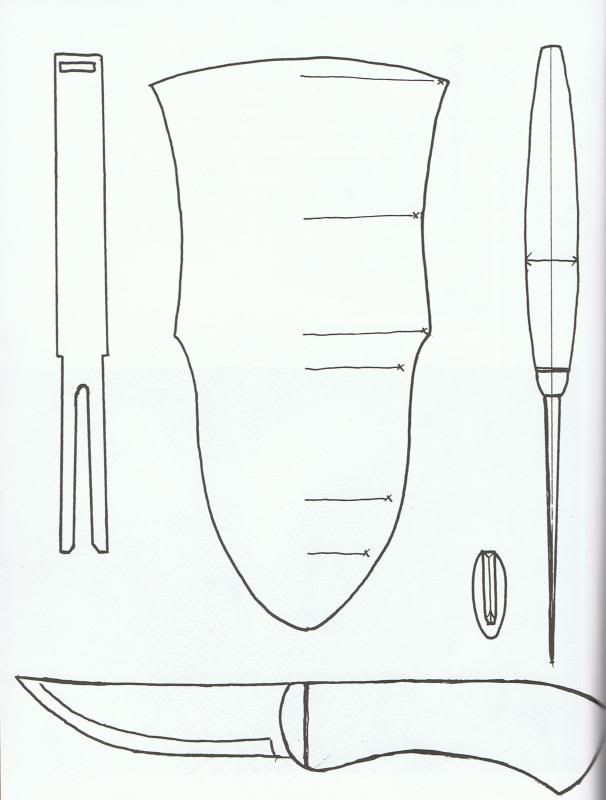
Blueprint for the leatherwork for a standard knife and a standard sheath of this type. Just for showing beltloop, do not think this is the knife in this tutorial
That’s it. I hope I have not forgotten anything important, feel free to use this tutorial as you see fit, and if I have forgotten anything, please do fill the odds and ends out for me, or tell me about them so I can do it myself.
Happy working
This design is a very basic scandi-styled sheath, relatively easy to work with, and very easily improved/modded or variated to any desire.
First off: materials choice!
I generally allways use halftanned leather, as this, with its untanned core suits my needs the best.
You can use any material you would like to use, this "tutorial" is based upon halftanned leather though.
Tools of the trade
A sheath is supposed to fit 100% to the knife. This means you will have to measure and draw to begin with.
Start of with a folded piece of paper and make a small dot where the tip begins, and where you wish the sheath to stop. (Make it a little longer than you want. 2-3 mm or so)
Establish 5-8 places where you will make your measurements. A soft pencil will do on paper aswell as on the knife so you won't forget where to measure. (Generally everywhere where the knife has sudden changes.)
For measuring use a simple piece of the leather you are going to use. This way you are sure that the measurements are correct.
The measurement you have taken will need to be halfed, and transferred from the fold of the paper inwards.
After transfering all measurements, join them up with a soft touch.
You will need a bit extra for the stitches, so after joining the first dots up, make a new line following the first with approx 2-3 mm space on the handlepart and 5 mm on the blade part. It should look somewhat like this.
(If you wish to make a more samistyled tip to the sheath, simply make the tip long on the drawing. It will then bow more or less correctly when finished. (will be seen on the leather, because i did do so in the end))
Transfer the mock-up to the leather
Cut out the leather, with more angle to your knife, then what generally would be considered "normal"
If its too hard to cut, put it in cold water for 20-30 minutes or so. But remember: wet leather is very easily damaged!!
There you go. Angle all way around
By now the leather must be wet. Give it 20-30 minutes or so in cold water, and be gentle with the smooth side from now on. It won't take any damage or imprints very well from now on.
Mark out needleholes with a markingwheel or whatever you have, but be accurate. I would keep a distance of 2-3 mm to the edge.
Then take your awl, and start making holes in an angle. Remember this is halftanned. We want to go under the untanned part, but still stay within the angled surface.
Shave down the blade-part of the leather. This could be done before making holes, but i am used to doing it afterwards. Habits don't die easily.
How much to be shaved off? Dont get it paperthin, but do not think that you can fold a piece of leather more than 1½-2 mm thick so that it looks good either. Leave more material at the handle end, and make the tip of the sheath thinner than the rest ( i generally do n shave the handle part of the sheath). Just do not shave the untanned core away, as this is the "backbone" of this sheathtype.
Now for the stitching. I always use a saddlestitch. Meaning that you sew with 2 needles, and that you "cross" the thread, thus making a singleknot, in every hole.
This is the "cross". Make sure you get the knot tied the same way around every time. Otherwise it will be noticable afterwards.
As soon as you have done the entire sheath, you will have to lock the stitching. Easy: Just go backwards a few holes eg. 3-4
Its stitched and hopefully still wet. If not, give it a few minutes in water again.
EDIT: Missing pics are now here accompanied by appropriate text.
Now is the time to mark out how the rim should look like with a blunt edged tool or a pencil.
Then you will wan’t to trim/shave the leather down in an angle of approx 45degrees (the surface made would then normally reach a full centimetre down inside the sheath), cutting from the inside and out. Do not make cuts into the coarse side of the leather, other than the plain smooth surface you leave from shaving it down, as this will make the leather somewhat fragile with a tendency to rip.
Try to get the rim as thin as possible, but leave as much of the untanned core to most of the shaved area, as this will stiffen it out when dry.
Dangler/beltloop
You need to make a few holes for the beltloop/dangler in the sheath. 6 to be excact.
Placed on either side of the stitching. The holes are placed next to stitch number 4, 7 and 9, and are made big enough for the legs of the beltloop go through, but not too big. A “snug” fit is recommended. (this pic is borrowed)
The beltloop is done to fit into the holes in the sheath, and reaching deep down inside the sheath. Shave the legs of the loop down to a reasonable level, and cut the legs to form “needles” on the tips for ease of pushing them through the holes.
(”blueprint” of the shape of a beltloop, see the drawing at the end of this tutorial)
Fit the dangler/beltloop onto the sheath.
A pair of flat pliers might be needed to pull the legs of the beltloop tight. It must be fed through the upper hole, out of the second hole, and into the third and last hole. If done correctly, nothing will loosen, and it will help keeping the knife in place aswell.
It should end up look something like this.
It is now you can start pushing the hide around on the sheath, and with a bit of endurance and muscle, you’d be surprised how far you can move it.
Wrap the knife in vitawrap or anything that will keep the acids of the leather from the knife, and stick the knife into the sheath before you start tooling.
Pay extra attention to the folded rim, and the part right above the bolster or the thickest part of the handle, as this will require a bit of work to get right. If its done right, the knife should "klick" into the dry sheath. this "klick" is what we use to measure good craftsmanship on. If its not there, its probably poor work.
Now all done, you only need to treat the leather with some high quality leatherwax, leathersoap or even varnish (although the halftanned leather does go very stiff, varnish will make it even stiffer)
Perhaps you have a favourite leathertreatment, if so, go for it, try it out.
Finished result of my resheathing, wich took me all in all about 2½ hours of little intensive work
All I need now is for the leatherwax with colour in it to soak through, so I can polish it up to a medium glanze.
Blueprint for the leatherwork for a standard knife and a standard sheath of this type. Just for showing beltloop, do not think this is the knife in this tutorial
That’s it. I hope I have not forgotten anything important, feel free to use this tutorial as you see fit, and if I have forgotten anything, please do fill the odds and ends out for me, or tell me about them so I can do it myself.
Happy working
