Toboggan Build

Dave

Hill Dweller
Sep 17, 2003
6,019
11
Brigantia
Dave, would it not be more efficient to attach the pulling straps to the 2nd cross support rather than the first? The first is bent back and attached to the second anyway, so rather than put the stress on the first, why not pull directly from the second?

Or am I looking at it wrong?

No, some do it that way.

If you look at how a canoe is laced around the edges.

IMG_0968_zpscd3aace3.jpg


That canoe has grab handles on the front and back. but they are directly connected to the lacing which goes around the whole canoe. So you could not give it a yank, and pull the front plastic of the canoe off. The energy of your pull is distributed through the whole lacing system.

The manner in which you've described, puts all the pulling pressure on one cross bar. Which people do. So it must work.

To answer your question, I am missing a strut, between the two you have mentioned.

If you look HERE Page 8, 3.0, to the right, you will see a hand drawn diagram, with the cross bars present.

I am missing CB2 Hauling CB.

They attach that strut the same as the others, but then drill two more holes in it, and put the pulling lines through that.

Which is the way Ive decided to do it.
 
Last edited:

dewi

Full Member
May 26, 2015
2,647
13
Cheshire
Makes sense :)

There is definitely more storage on it than I thought there was going to be... despite having seen the promo pictures, expected it to be smaller somehow.

You enjoyed building it so far?
 

Dave

Hill Dweller
Sep 17, 2003
6,019
11
Brigantia
Yeh i have I guess. I've just had enough of it at the moment. Ive got to take it all apart, every nut and bolt, then about 10mm from the bolt hole, route a 1mm line, on both sides of each strut, then add another strut, then varnish etc etc.....
Then Ive got to start on my snowshoes, which really are a fiddly bugger.
And then theres a few other things as well, to get ready.
 

dewi

Full Member
May 26, 2015
2,647
13
Cheshire
I thought when they said it was a kit, it would all be predrilled and prepped ready to go... sounds like a lot of work!

Bright side, it'll be worth it :D
 

Dave

Hill Dweller
Sep 17, 2003
6,019
11
Brigantia
You can buy kits, that are all predrilled etc, from black river sleds, or lure of the north. I think the one from LOTN is $270, plus $130 postage, then customs duties, clearance fees, VAT on top......
 

dewi

Full Member
May 26, 2015
2,647
13
Cheshire
Surprised at that price that nobody makes them over here... you know the plastic sheet, does it have a waxy sort of finish?
 

Dave

Hill Dweller
Sep 17, 2003
6,019
11
Brigantia
Yes its very slippy stuff, most plastic cracks in the cold but this can withstand temperatures down to -200˚C
I havent worked out how much it cost me, but it probably cost around a third, or less, of what it would do to order a kit from the USA.
Why, are you thinking of having a go Dewi?
 

dewi

Full Member
May 26, 2015
2,647
13
Cheshire
lol Not likely... I've already had to forgo being in the woods this weekend because I'm so far behind with my work... spent an hour and a half today tidying my desk (and its still a mess) and probably the same posting on here, which isn't really getting the work out of the way.

Once my work is done, I have my extra-curricular design stuff to do (which I'm months behind with)... got to get the cnc machine up and running as I've had a cunning plan... clear a space for my leather working obsession and... well, you get the idea. Never ending.

Maybe its something to look at in the distant future Dave :D

Edit... reason I asked with the plasticy stuff, I think its the same material I use for cutting mats. Its tough with like a waxy feel to it, a lot more expensive than the other plastics I buy.
 

Robson Valley

On a new journey
Nov 24, 2014
9,959
2,672
McBride, BC
I had a couple of traditional Canadian wooden toboggans. The abrasive snow gradually wears off the varnish finish on the underside. In use, the toboggan is still sliding on a thin film of compression-created water. But the minute I stop, that freezes to the raw wood. Repeated varnish coatings would work. The other plan was to scribble some sort of wax all over the bottom and melt that into the surface with a low temp clothes iron. The wax is a lot softer than the original varnish, abrades easily, so the fix is really temporary.

Dave's toboggan will never stick/freeze to the snow. Snow crystal ice abrasion may roughen the surface but freeze/stick? Can't happen.
 

matt_uk

Member
Oct 16, 2015
13
0
Sutton Coldfield
Fascinating project... Thanks for the link to the Snow Walkers ... It was long but well worth it and I've found something new for my bucket list! Tagging along for the ride on this thread to see how it all turns out :)
 

Dave

Hill Dweller
Sep 17, 2003
6,019
11
Brigantia
Ok. Final installment. All finished, [with the exception of one or two tweeks perhaps]

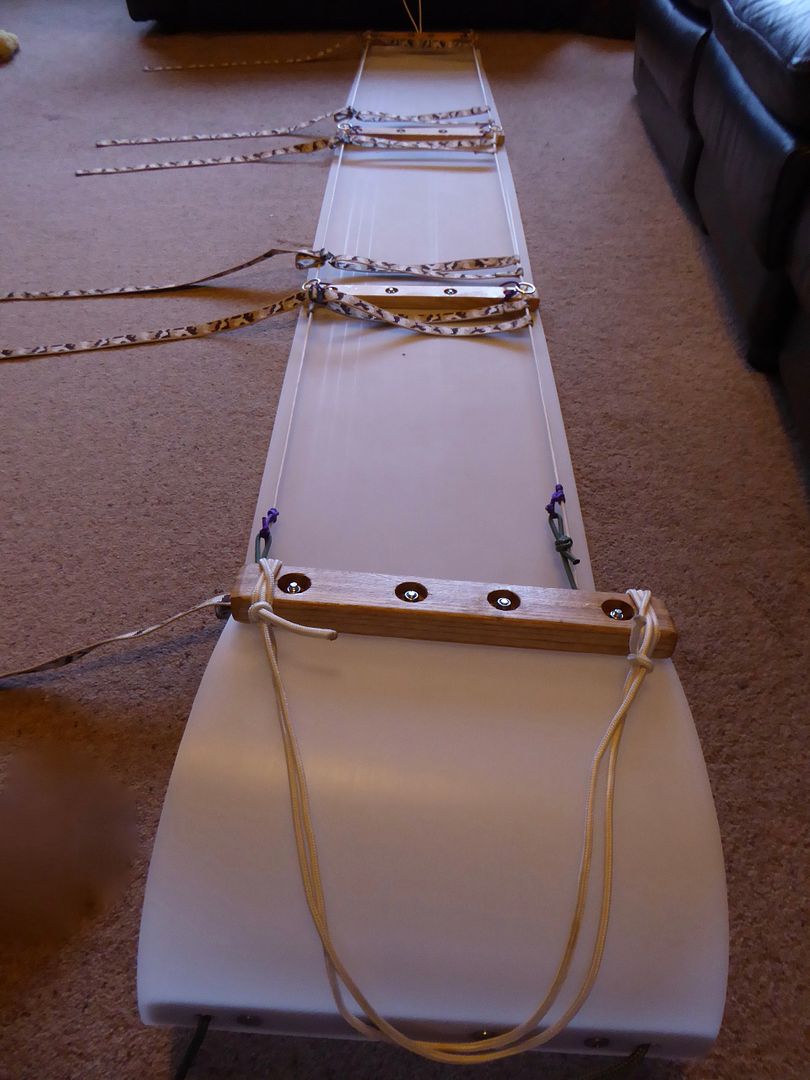
This is what the crossbars look like now:
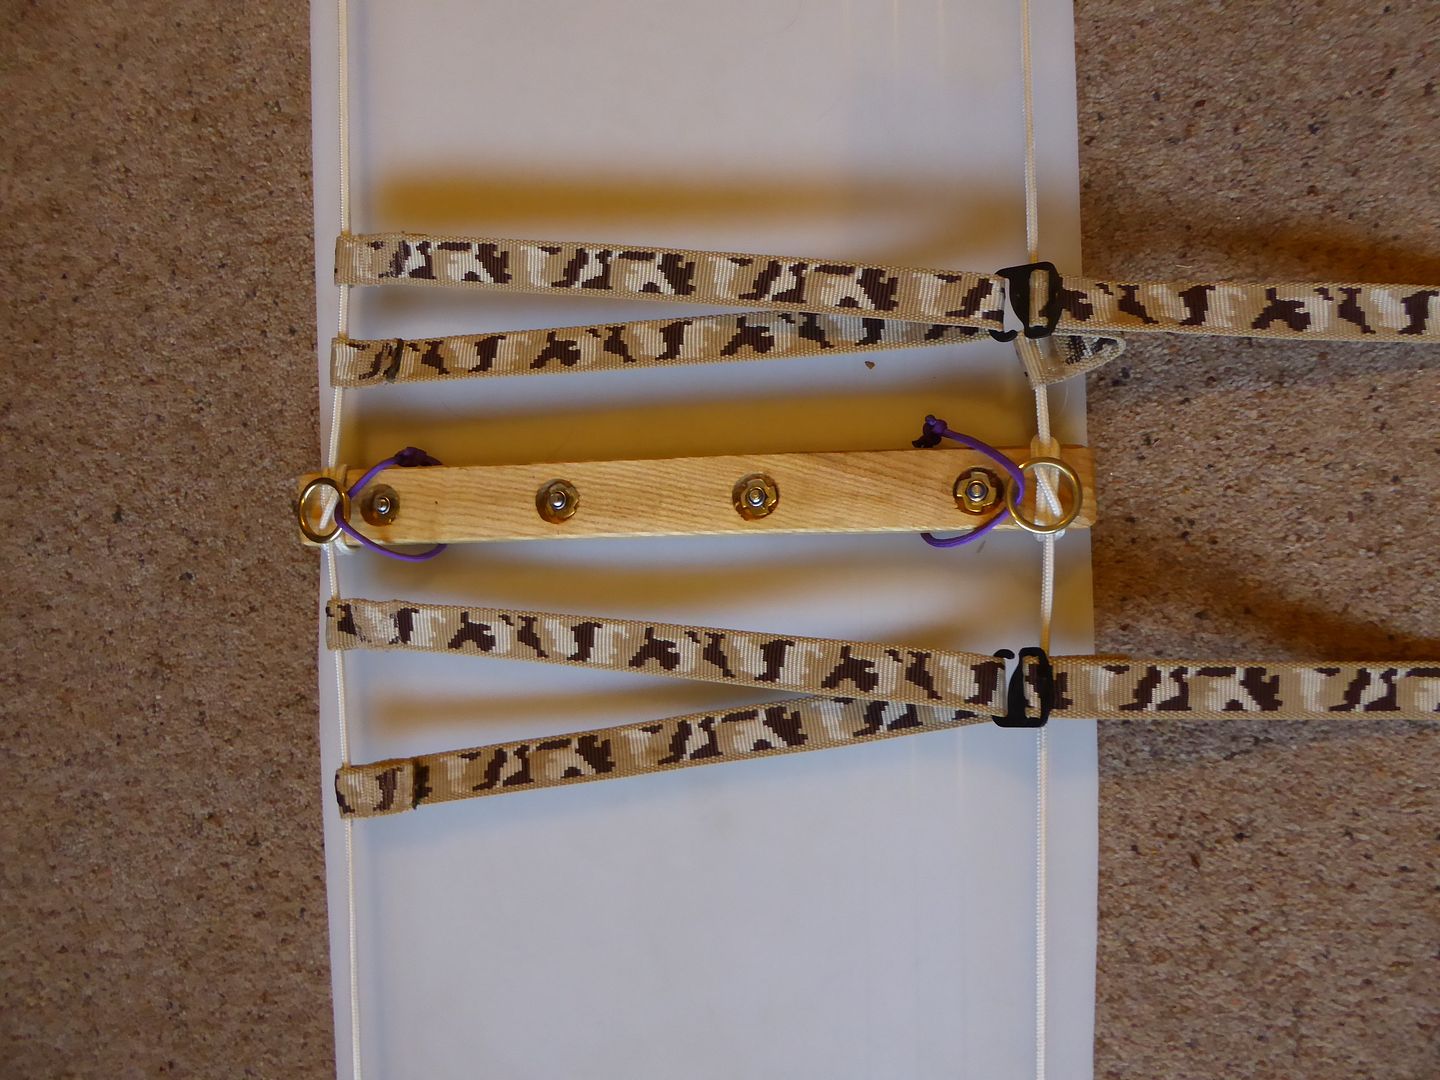

The white 5mm running line goes across the tops of the crossbars, tied in a clove hitch. I routed the cross bars, underneath, on the inside of the outside nut and bolts.
through that is placed 3mm purple paracord, attached to cast brass loops. On both sides of the white running line, are adjustable camo tape straps, placed on either side of the crossbar. Reason for this, is that if you do not cinch your bags tight near the cross bars, your plastic may bow upwards. Cross bars are white ash.

You can see here the router cut, on the underside of the crossbar where the purple paracord goes through. More on the brass loops at the end.
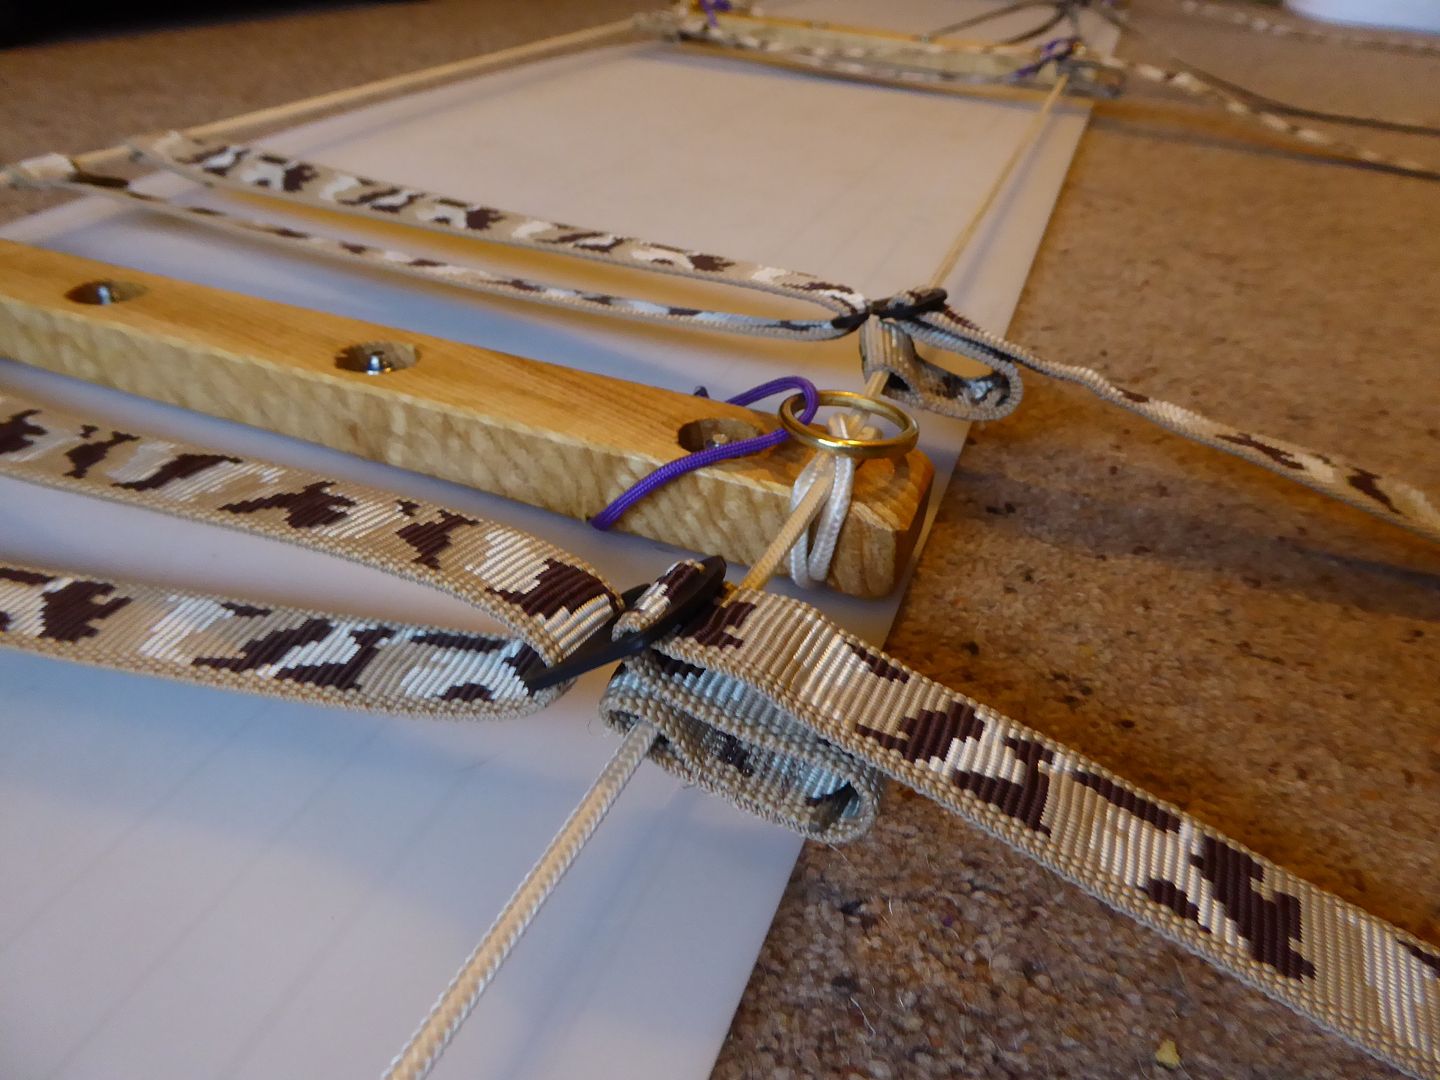


Below is the back strut, with the grab handle, which forms the beginning of the running line, which runs along the inside of the back crossbar, and then up both sides of the boggan, connected to each crossbar with a clove hitch.
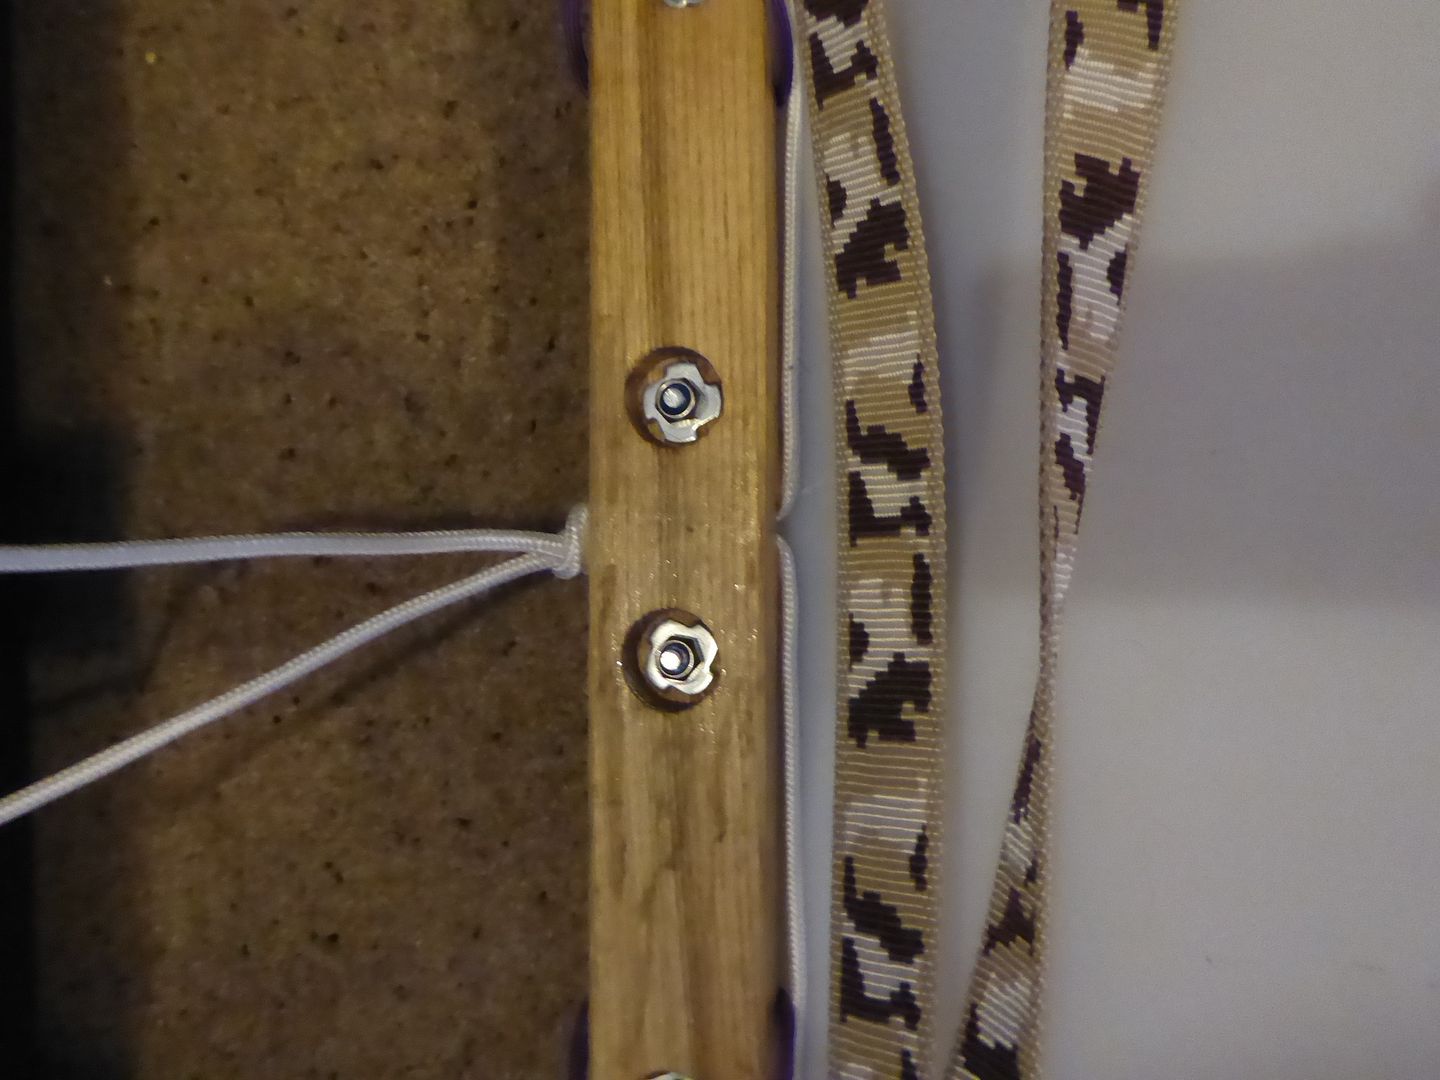


....until it finally reaches the last cross bar, at the front of the boggan, and is tied with another clove hitch to the front inside crossbar, then up to the outside front crossbar, to curve the front of the boggan.
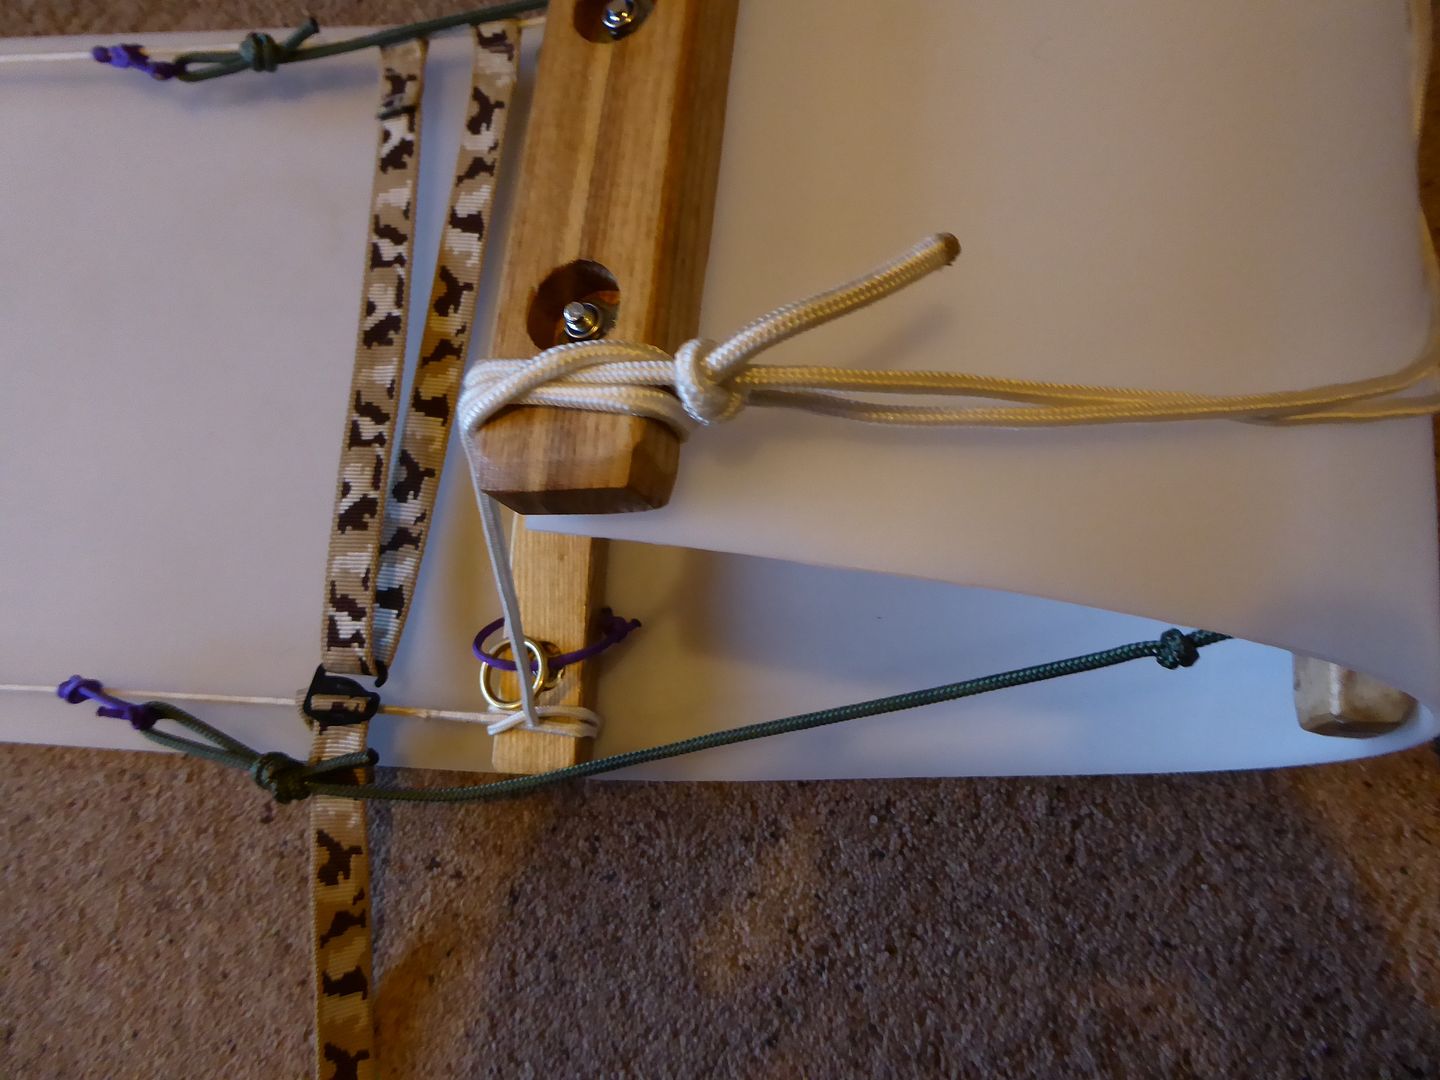


Also note in the above pic, my green pulling line, 8 feet long, with a double overhand knot, connected to 3mm purple paracord adjustable prussic, attached to the running line.


In the photo below you can see the white running line, attached from either side, with a couple of simple overhand knots, crossing each other. This forms the front grab handle.
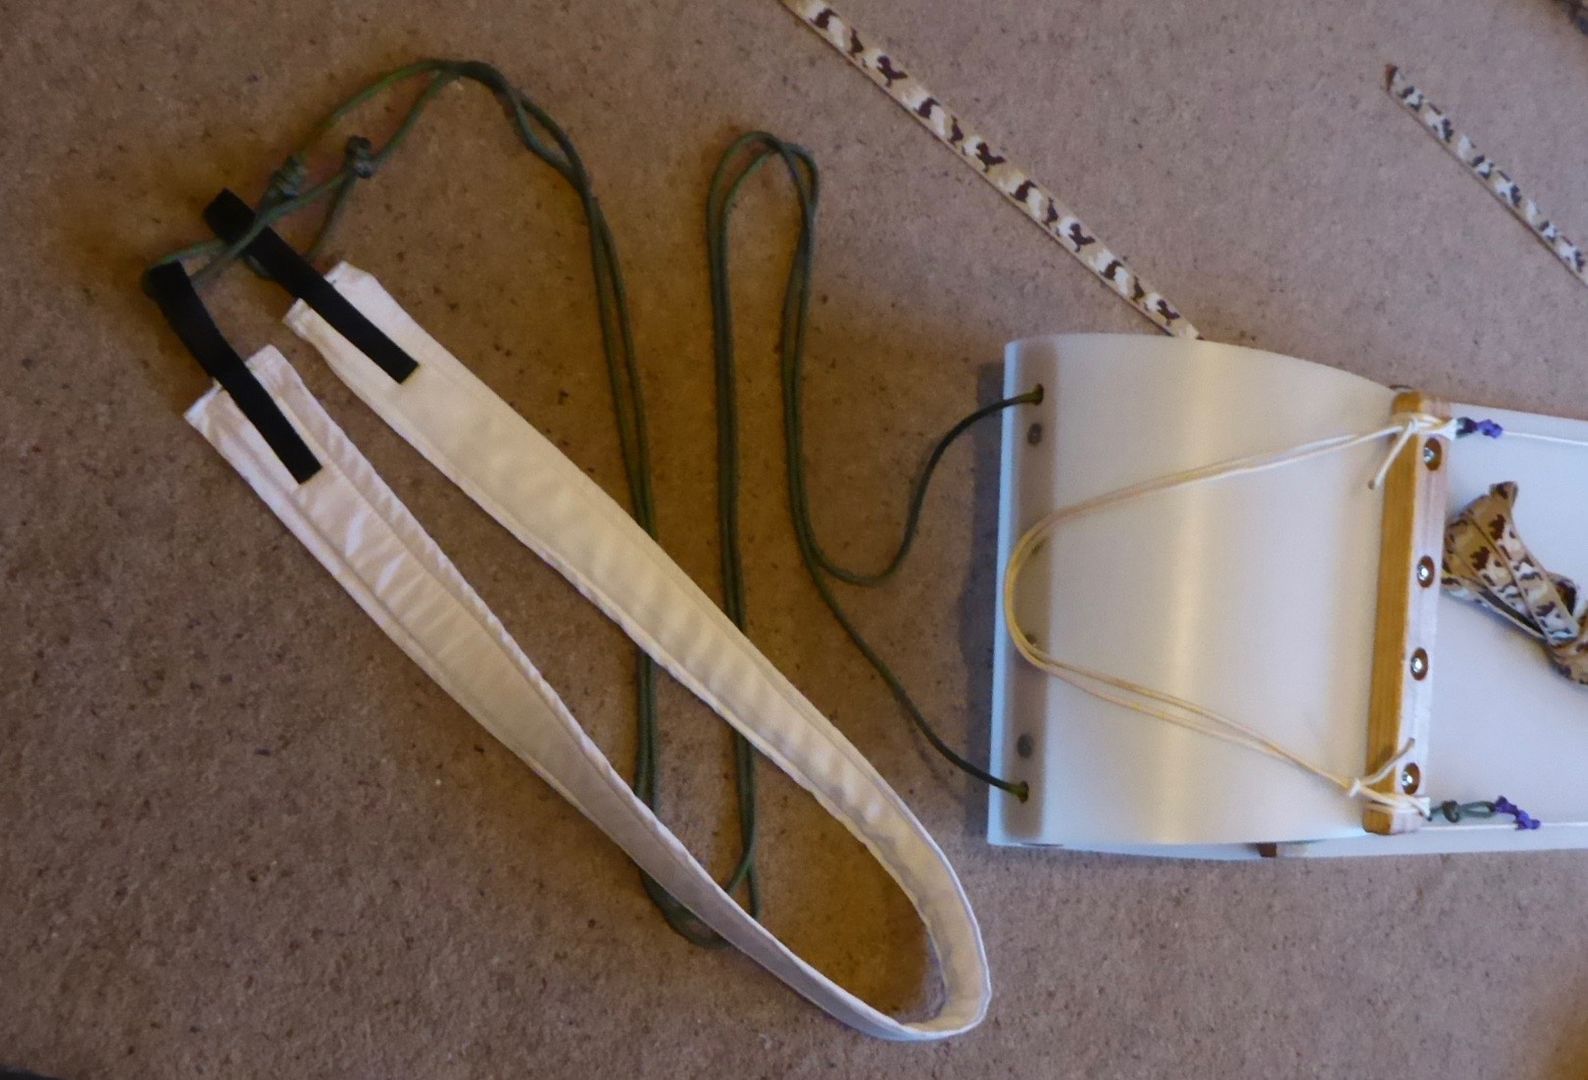

You can also see the hauling thwart i added, which is easily adjustable, higher or lower, more, or less curve, by simply using the green pulling line, attached to the purple prussic paracord, attached to the white running line, and /or the clove hitch attached to the outside frontside crossbar. The holes in the plastic where the strap line comes through, are slightly bigger than the holes in the cross bar, so that the green pulling line does not rub the plastic. They are also, on the outside holes, as close to the edge as possible. To make them as close to shoulder width as possible.

Mac made me the pulling strap, which has foam inside, and is slightly padded, out of the same material as my arctic anorak.
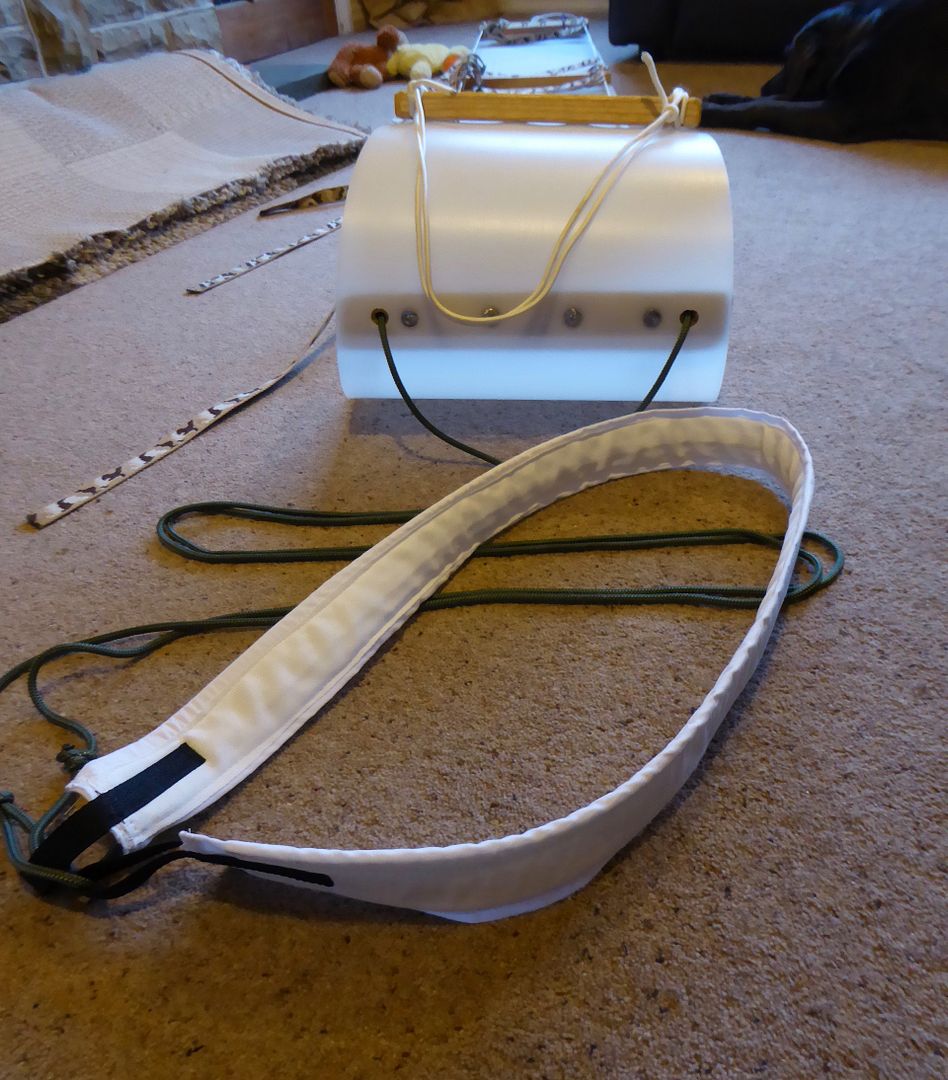

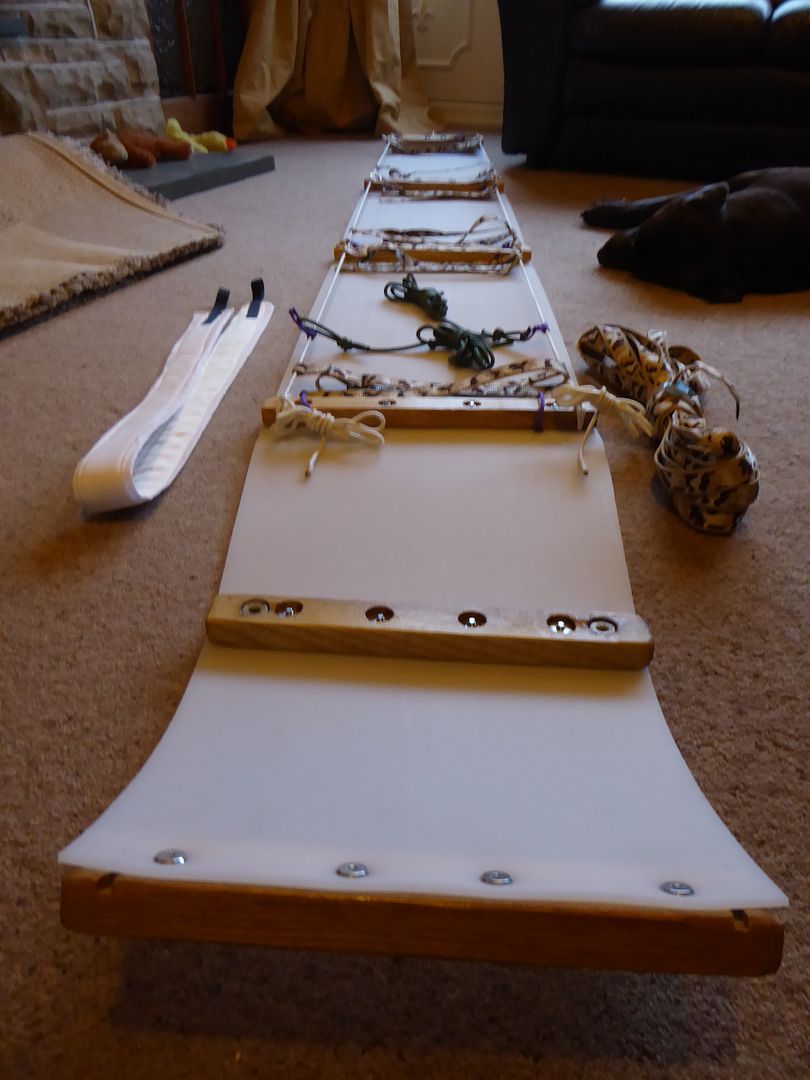
To take it down for transport, is very easy. Simply undo the front grab handle, and clove hitch from the outside front cross bar, and detach the strap/tump, then roll up.

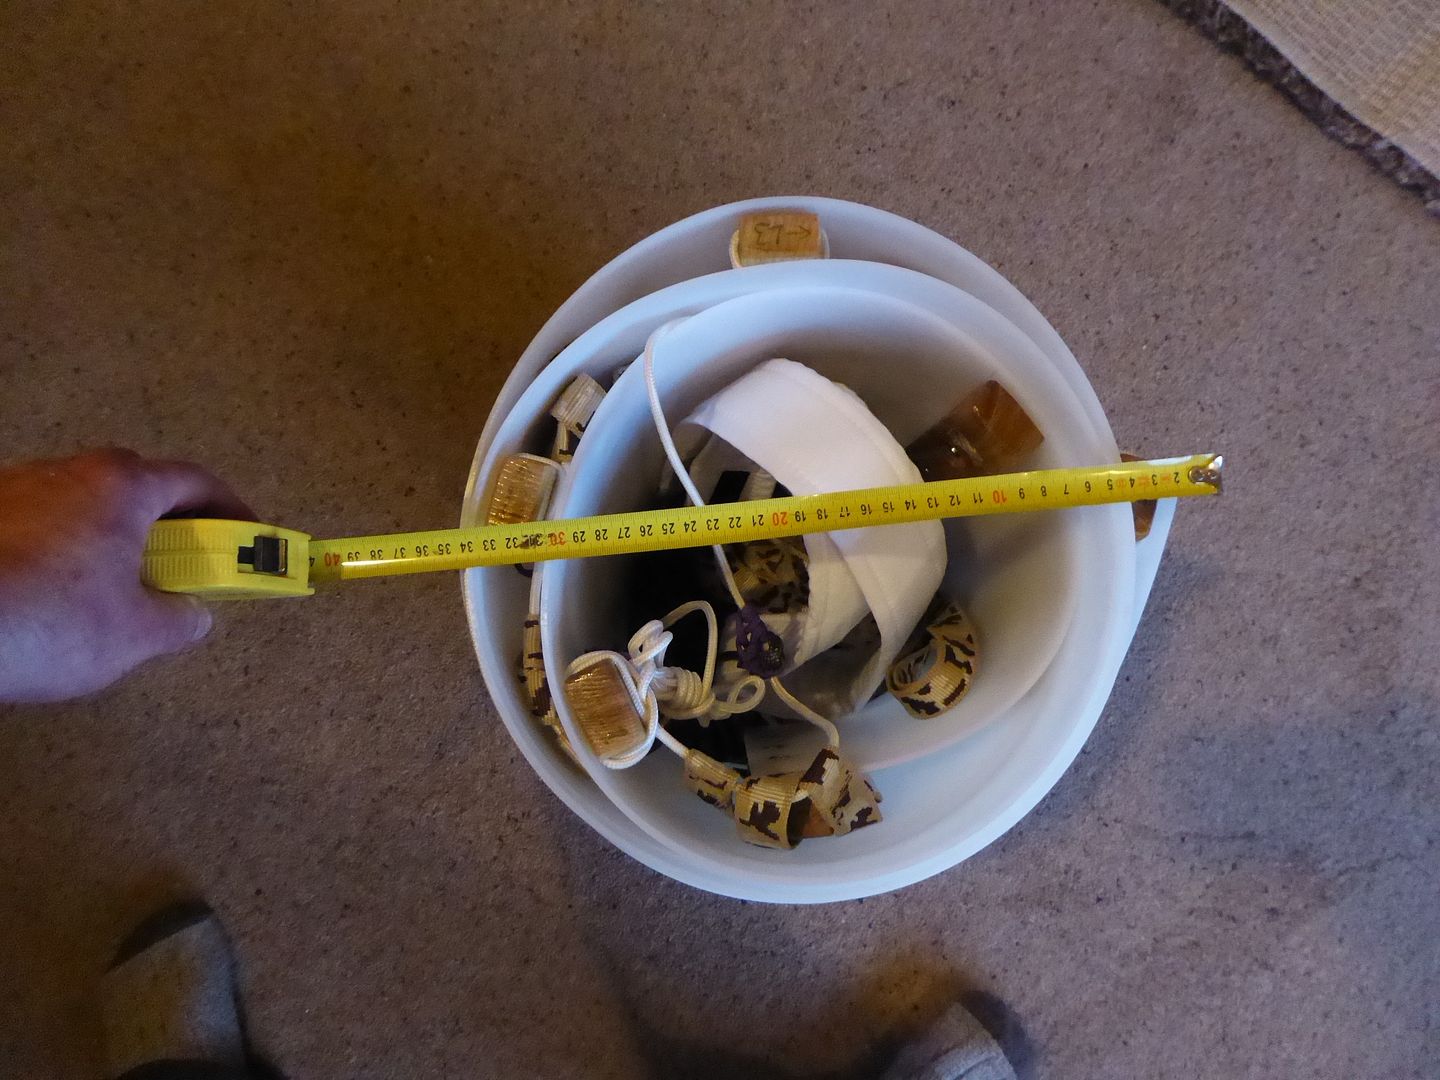
35cm here, but It should roll up to about 30cm diameter, and 40cm height. Easily fit into a bag. Someone mentioned the 9.8feet length. Theyre designed skinny, so that when you are walking in your snowshoes in front of the toboggan, the boggan fits into your foot trail.
]

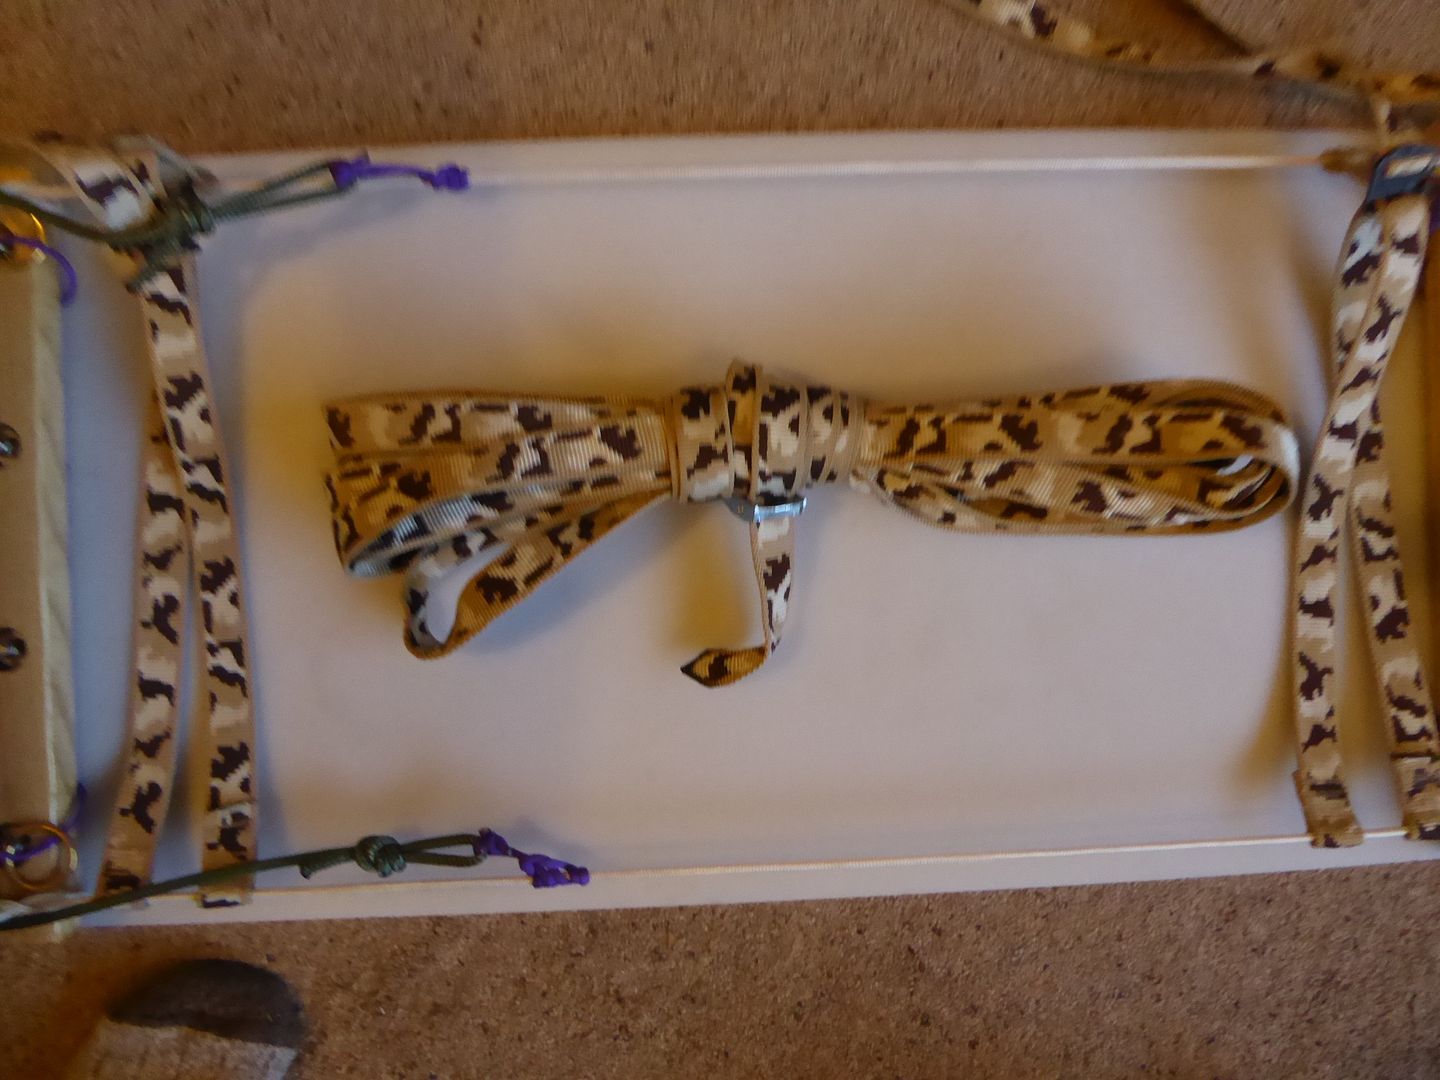
This extra load of tape below, is used to go through the brass loops once your bags are cinched in with the cross straps.
It zigzags, from the front to the back, through the brass loops on each cross bar, all the way down, then all the way back up, over the top of your luggage, and also enables you to add a top bag, or wood etc if required.

The End!


Ready to be rolled up for transport.
 
Last edited:

Goatboy

Full Member
Jan 31, 2005
14,956
18
Scotland
Wow, even though the word taboggan sets my mind off on the Billy Connelly dinner party scetch your thread has got me rivited.
Quite a meld of materials, thought and skill to end up with a crackin' snow sled.
I'm impressed mate, cant wait to see pictures of it in action.

Sent via smoke-signal from a woodland in Scotland.
 

Dave

Hill Dweller
Sep 17, 2003
6,019
11
Brigantia
I had a couple of traditional Canadian wooden toboggans. The abrasive snow gradually wears off the varnish finish on the underside. In use, the toboggan is still sliding on a thin film of compression-created water. But the minute I stop, that freezes to the raw wood. Repeated varnish coatings would work. The other plan was to scribble some sort of wax all over the bottom and melt that into the surface with a low temp clothes iron. The wax is a lot softer than the original varnish, abrades easily, so the fix is really temporary.

Dave's toboggan will never stick/freeze to the snow. Snow crystal ice abrasion may roughen the surface but freeze/stick? Can't happen.

Hey, I'd love to see a photo of those old beauties. ;) You cant beat those old wooden ones for style and looks.

Fascinating project... Thanks for the link to the Snow Walkers ... It was long but well worth it and I've found something new for my bucket list! Tagging along for the ride on this thread to see how it all turns out :)
It's a thing of functionally symmetrical beauty :cool:

Thanks Matt, Very kind, its pretty good video isnt it?

Cracking stuff Dave! Nicely done :)

Cheers Cameron. ;)

Wow, even though the word taboggan sets my mind off on the Billy Connelly dinner party scetch your thread has got me rivited.
Quite a meld of materials, thought and skill to end up with a crackin' snow sled.
I'm impressed mate, cant wait to see pictures of it in action.

Wel thankyou kindly sir. Bob's taking a gopro I believe, as Im sure the Canadians will be doing. So we'll probably be on youtube this time.
[Still feeling like I was run over by a taxi.....in fact I think I was...or bounced off one:stretcher::goodnight:]

I am pleased with how its turned out. It feels bombproof. Although will probably encourage me to take more gear now!

'Algonquin winter bushcraft' is worth a search on youtube. Dont think Ive found a vid yet, where its warmer than -30˚C......:hatscarf:
 

Robson Valley

On a new journey
Nov 24, 2014
9,959
2,672
McBride, BC
As the time gets closer to the trip, Google theweathernetwork.ca and enter the name of the nearest reasonable-sized town
in your travels. They're pretty good with the 7 and 14 days forecasts. In eastern Canada, the Jet Stream slides down
sort of diagonally from the Yukon. Probably the best predictor of discomfort.

I've got the Rockies as my back wall and fairly consistent inshore flow from the warmer Pacific.
El Nino might give us the warmest winter in 20 years.


Hey! When it's -30C or colder, stand back about 10' from a tree and spit at it.
That's far enough and cold enough that the spittle solidifies and bounces off!

Key thing is to get out of the wind. Outer clothing shell and shelter.
 

Quixoticgeek

Full Member
Aug 4, 2013
2,483
25
Europe
Fantastic build, looks stunning. I hope to build my own when I can afford it, if it looks half as good as yours I'll be pleased.

Couple of questions tho.

Why are the grooveson the undersides of the bars not straight but have a slight kink? to better anchor the cord?

Any reason for choosing brass rings over steel?

Where did you get the metal clips for the tape?

Thanks

Julia
 

Dave

Hill Dweller
Sep 17, 2003
6,019
11
Brigantia
As the time gets closer to the trip, Google theweathernetwork.ca and enter the name of the nearest reasonable-sized town
in your travels. They're pretty good with the 7 and 14 days forecasts. In eastern Canada, the Jet Stream slides down
sort of diagonally from the Yukon. Probably the best predictor of discomfort.

I've got the Rockies as my back wall and fairly consistent inshore flow from the warmer Pacific.
El Nino might give us the warmest winter in 20 years.


Hey! When it's -30C or colder, stand back about 10' from a tree and spit at it.
That's far enough and cold enough that the spittle solidifies and bounces off!

Key thing is to get out of the wind. Outer clothing shell and shelter.

Will do. I dont trust long term forecasts. They always get it wrong.

Fantastic build, looks stunning. I hope to build my own when I can afford it, if it looks half as good as yours I'll be pleased.

Couple of questions tho.

Why are the grooveson the undersides of the bars not straight but have a slight kink? to better anchor the cord?

Any reason for choosing brass rings over steel?

Where did you get the metal clips for the tape?

Thanks

Julia

Hi Julia.

You need a special table/stencil for a router really which I dont have, so thats what happens when you use one hanging off the edge of workmate. But yeh, as soon as I did the first one, I thought that might help it, and just carried on.

Nope. Just bought the brass.

Sure, got mine here; http://www.tactical-kit.co.uk/itw-mash-g-hook-5951-p.asp
 

dewi

Full Member
May 26, 2015
2,647
13
Cheshire
Looks brilliant Dave, see what you mean about the pulling strap thingy on the second bracer. Surprised how wide it is rolled up, are you going to have to make a custom bag for it to transport it across the pond?
 

BCUK Shop

We have a a number of knives, T-Shirts and other items for sale.

SHOP HERE