Restoring a Mangle
- Thread starter British Red
- Start date
-
BushMoot: Come along to the amazing Summer Moot 31st July - 5th August (extended Moot : 27th July - 8th August), a festival of bushcrafting and camping in a beautiful woodland PLEASE CLICK HERE for more information.
You are using an out of date browser. It may not display this or other websites correctly.
You should upgrade or use an alternative browser.
You should upgrade or use an alternative browser.
Oh I had stuffed up the post above showing the "key" - so here it is - a little loose rectangle of steel that locks the cog onto the axle
Retaining key on cog / handle by British Red, on Flickr
Retaining key on cog / handle by British Red, on Flickr
Its a long old job - particularly when I lack all mechanical skill ") Hopefully it'll get there in the end though!
Hopefully it'll get there in the end though!
Hopefully it'll get there in the end though!Sorry to be an engineering pedant, but a woodruff key is semicircular shaped. A plain rectangular one as far as I recall doesn't have a specific name other than 'key'.A great "Lazarus" thread and an interesting read............I think the little key is properly known as a Woodruff key
I'll do a longer post when I have the time - but I got a finish coat of varnish on the table top today so I thought we would have our first "before and after" shot
Before
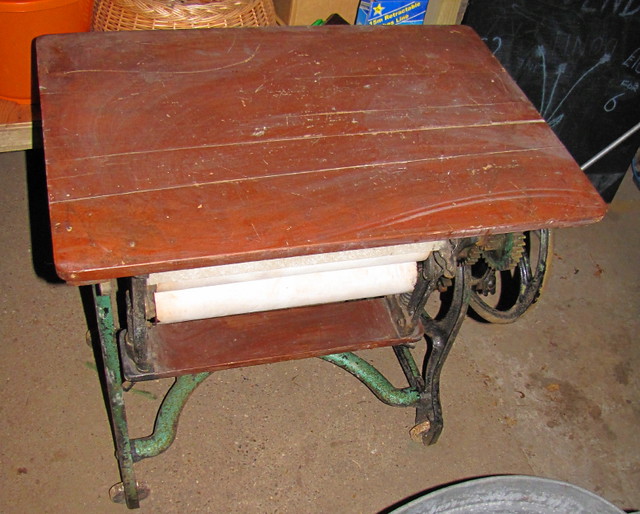
Mangle closed with lid down by British Red, on Flickr
After

IMG_1555 by British Red, on Flickr
On an allied subject, does anyone know the proper name for the thing at the bottom left in this picture?

Partially Stripped Cogs by British Red, on Flickr
Its a round collar with a grub screw that slides over a pivot to hold things in place. Feels like it should have a fancy term!
Before
Mangle closed with lid down by British Red, on Flickr
After
IMG_1555 by British Red, on Flickr
On an allied subject, does anyone know the proper name for the thing at the bottom left in this picture?
Partially Stripped Cogs by British Red, on Flickr
Its a round collar with a grub screw that slides over a pivot to hold things in place. Feels like it should have a fancy term!

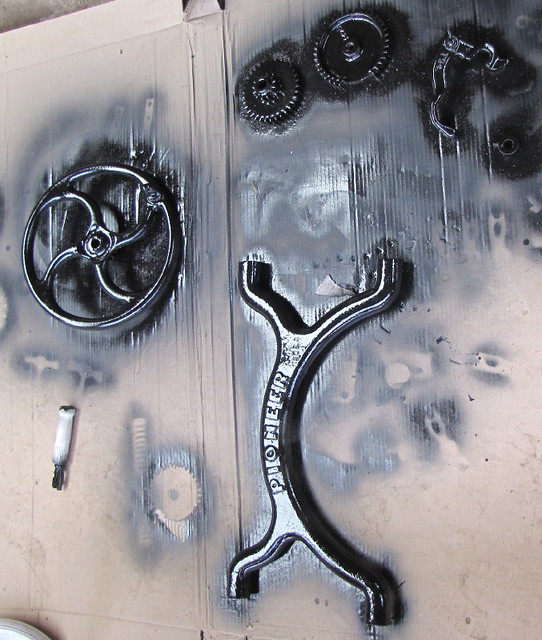
Well I started today off with completing the stripping of the parts I broke down earlier in the week and then got a first sprayed coat of metal paint on them
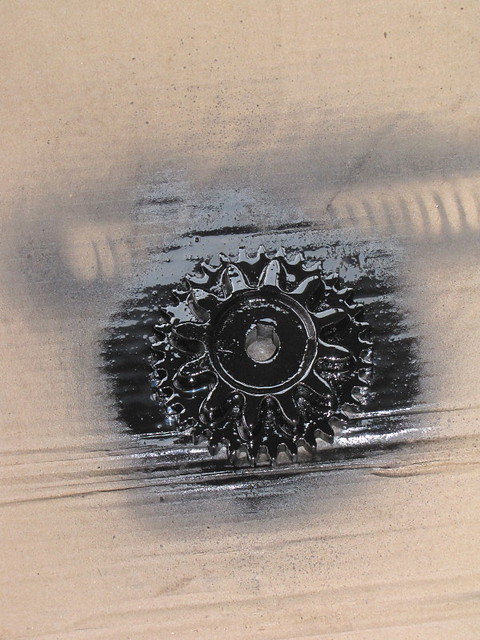
Sprayed Cog by British Red, on Flickr

Mangle wheel sprayed by British Red, on Flickr
I then hit a point where I needed to continue the disassembly. This meant breaking down the frame of the mangle. So I needed the big socket set
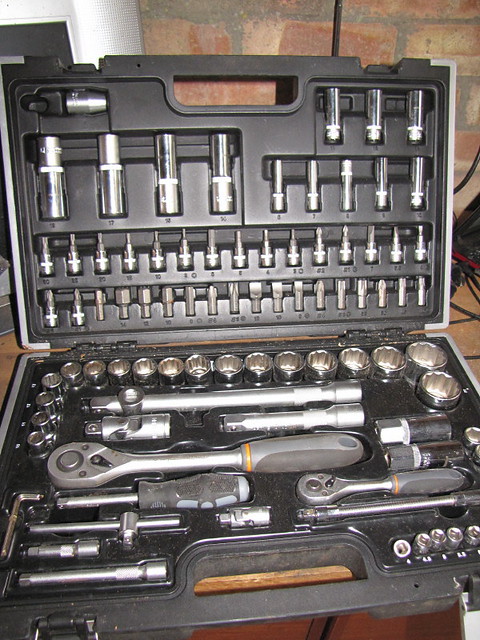
Socket set by British Red, on Flickr
Step 8 - Disassembling the Mangle Frame
Having got all smug about having the large sockets - it was inevitable that the first nut I tried to remove from the axle / pivot that allows the mangle to rotate beneath the table, I had no socket to fit
I do however have a very large adjustable spanner. I don't need it often - but I'm glad to have it when I do
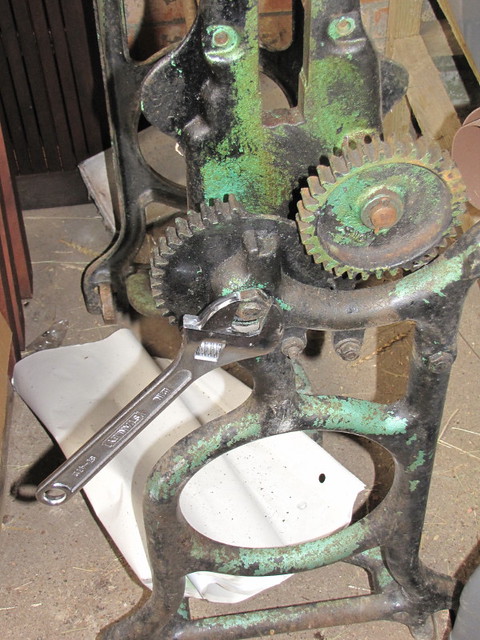
Large adjustable spanner by British Red, on Flickr
Having been pleased with myself on that score, the nut on the other end of the pivot was completely siezed. I broke out the blow torch to loosen it - and was careful not to be smug. I'm not sure if it was burning paint, shifting rust or expanding the metal that released the nut, but release it did.

Heating siezed nut with blow torch by British Red, on Flickr

Remove nut holding mangle pivot axle by British Red, on Flickr
Having got the outer bolt off - I noticed there is also an inner nut
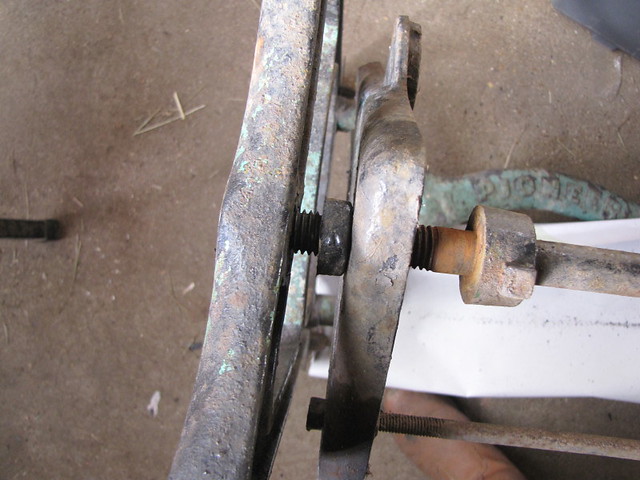
Spacer nut on mangle assembly pivot axle by British Red, on Flickr
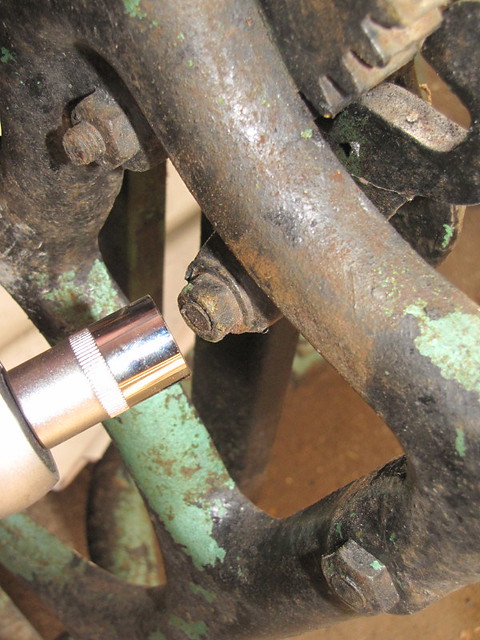
Even with both nuts removed, I could not slide out the pivot - there were collars with grub screws at each end of the pivot preventing it from sliding in either direction. You can see the collar at the bottom right
Mangle assembly pivot axle by British Red, on Flickr
The grub screw had a weird square head - but fortunately a pair of mole grips released it
Retaining washer with grub screw loosened. by British Red, on Flickr
Even with the collars released, the axle was held in place by the end panels of the mangle frame. So I decided to remove the other bars holding the two sides together.

Cog retained by cotter pin by British Red, on Flickr
First I pulled the cotter pin and took off the upper cog

Cog removed by British Red, on Flickr
The "Oil" lubrication spot made me smile - its been a long time since this saw any oil!

Cog and cotter pin gone by British Red, on Flickr
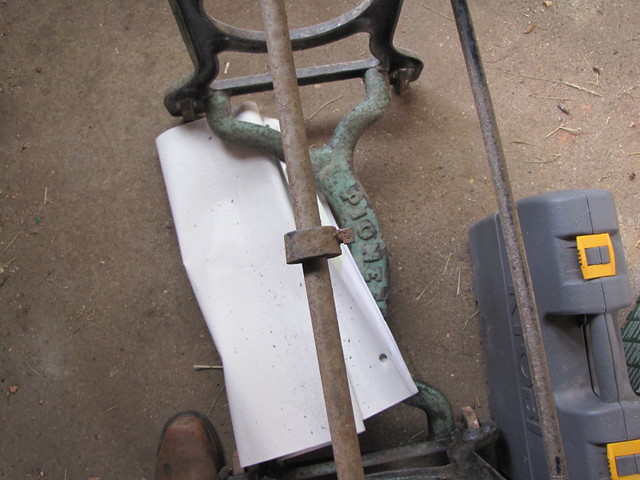
Having removed that, I unbolted the catch that secures the mangle assembly and prevents it from turning down under the table
Unbolt mangle retaining catch by British Red, on Flickr
Having removed the catch, there was still a cross member holding the two sides together

Two nuts still in place by British Red, on Flickr
I unbolted this

Unbolt cross member by British Red, on Flickr
Then I took the big cast iron stretcher off the bottom
Unscrew coach bolts from stretcher by British Red, on Flickr

Stretcher removed from Mangle Frame by British Red, on Flickr
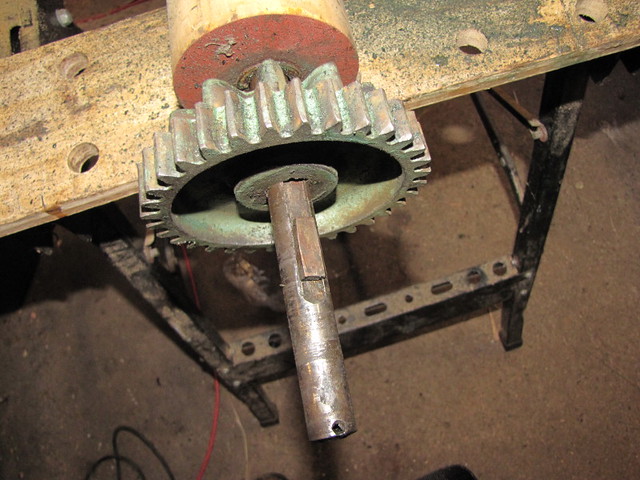
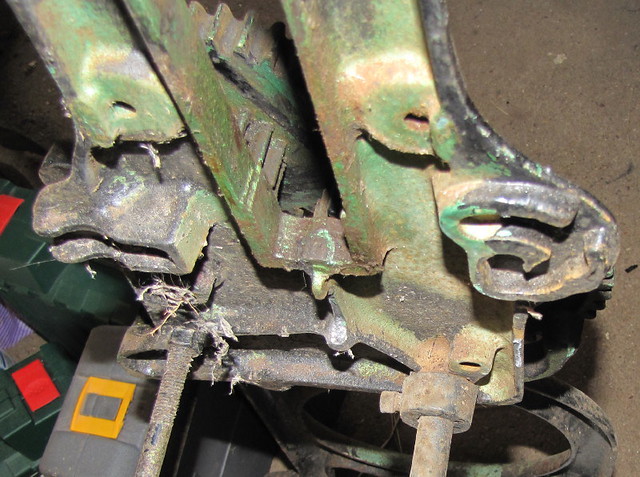
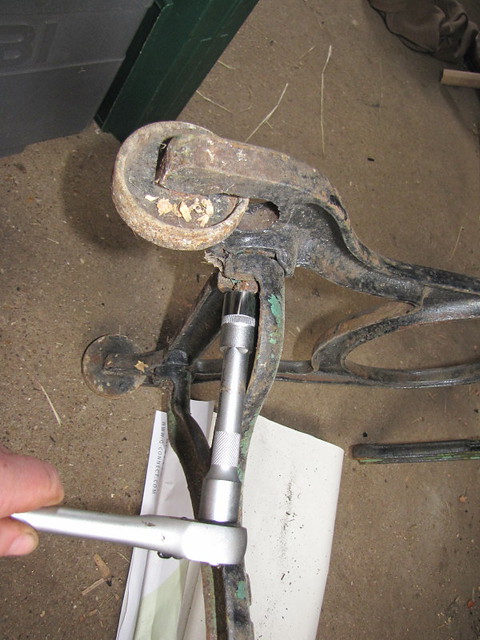
Only the pivot secured the two sides now. There was also a strannge bolt shown centrally locking the cog against the frame side

Coach bolt retaining cog and axle by British Red, on Flickr
I removed this
Remove Coach bolt securing cog on mangle assembly axle by British Red, on Flickr
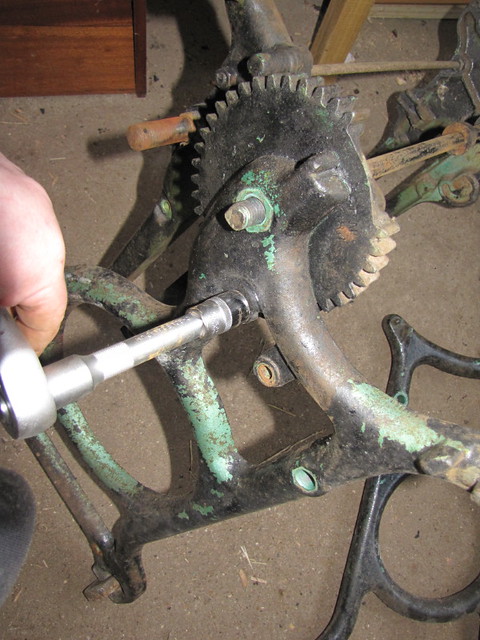
I then found that this cog was actually threaded onto the axle - a vice was needed to remove it

Unscrew cog from axle by British Red, on Flickr
That removed the last of the small parts

Partially Stripped Cogs by British Red, on Flickr
and the large parts were fully broken down for stripping and re-finishing

Disassembled Mangle Frame by British Red, on Flickr
So there we are - the whole mangle is now broken down into the individual cast pieces. I will need to take a while now to strip, clean and re-finish each part. Then we can see if all these photos and notes helps me put it back together again
Sprayed Cog by British Red, on Flickr
Mangle wheel sprayed by British Red, on Flickr
I then hit a point where I needed to continue the disassembly. This meant breaking down the frame of the mangle. So I needed the big socket set
Socket set by British Red, on Flickr
Step 8 - Disassembling the Mangle Frame
Having got all smug about having the large sockets - it was inevitable that the first nut I tried to remove from the axle / pivot that allows the mangle to rotate beneath the table, I had no socket to fit
I do however have a very large adjustable spanner. I don't need it often - but I'm glad to have it when I do
Large adjustable spanner by British Red, on Flickr
Having been pleased with myself on that score, the nut on the other end of the pivot was completely siezed. I broke out the blow torch to loosen it - and was careful not to be smug. I'm not sure if it was burning paint, shifting rust or expanding the metal that released the nut, but release it did.
Heating siezed nut with blow torch by British Red, on Flickr
Remove nut holding mangle pivot axle by British Red, on Flickr
Having got the outer bolt off - I noticed there is also an inner nut
Spacer nut on mangle assembly pivot axle by British Red, on Flickr
Even with both nuts removed, I could not slide out the pivot - there were collars with grub screws at each end of the pivot preventing it from sliding in either direction. You can see the collar at the bottom right
Mangle assembly pivot axle by British Red, on Flickr
The grub screw had a weird square head - but fortunately a pair of mole grips released it
Retaining washer with grub screw loosened. by British Red, on Flickr
Even with the collars released, the axle was held in place by the end panels of the mangle frame. So I decided to remove the other bars holding the two sides together.
Cog retained by cotter pin by British Red, on Flickr
First I pulled the cotter pin and took off the upper cog
Cog removed by British Red, on Flickr
The "Oil" lubrication spot made me smile - its been a long time since this saw any oil!
Cog and cotter pin gone by British Red, on Flickr
Having removed that, I unbolted the catch that secures the mangle assembly and prevents it from turning down under the table
Unbolt mangle retaining catch by British Red, on Flickr
Having removed the catch, there was still a cross member holding the two sides together
Two nuts still in place by British Red, on Flickr
I unbolted this
Unbolt cross member by British Red, on Flickr
Then I took the big cast iron stretcher off the bottom
Unscrew coach bolts from stretcher by British Red, on Flickr
Stretcher removed from Mangle Frame by British Red, on Flickr
Only the pivot secured the two sides now. There was also a strannge bolt shown centrally locking the cog against the frame side
Coach bolt retaining cog and axle by British Red, on Flickr
I removed this
Remove Coach bolt securing cog on mangle assembly axle by British Red, on Flickr
I then found that this cog was actually threaded onto the axle - a vice was needed to remove it
Unscrew cog from axle by British Red, on Flickr
That removed the last of the small parts
Partially Stripped Cogs by British Red, on Flickr
and the large parts were fully broken down for stripping and re-finishing
Disassembled Mangle Frame by British Red, on Flickr
So there we are - the whole mangle is now broken down into the individual cast pieces. I will need to take a while now to strip, clean and re-finish each part. Then we can see if all these photos and notes helps me put it back together again
Just a quick post today - most of these posts are a "photographic map" so that I can remember how to reassemble the mangle. Given disassembly is now complete, I will be spending a good while stripping and re-finishing the major components. Each will go through a similar process to the smaller parts - paint strip, scrape, wire brush, spray
I did the stretcher today and some of the last of the smaller parts

Stretcher stripped of paint by British Red, on Flickr
First coat on stretcher by British Red, on Flickr
Each piece needs to be sprayed. left to dry, turned, repeated on the back. Then start again on the next coat. I won't bore people with that happening on every piece. I will show anything interesting like the re-finish on the rollers when I get to that and eventual re-assembly
Red
I did the stretcher today and some of the last of the smaller parts
Stretcher stripped of paint by British Red, on Flickr
First coat on stretcher by British Red, on Flickr
Each piece needs to be sprayed. left to dry, turned, repeated on the back. Then start again on the next coat. I won't bore people with that happening on every piece
. I will show anything interesting like the re-finish on the rollers when I get to that and eventual re-assemblyRed
Section 7 - Restoring the rollers
All the major parts have now been cleaned and repainted, so its time to address the rollers
There are a couple (literally) of woodworm holes
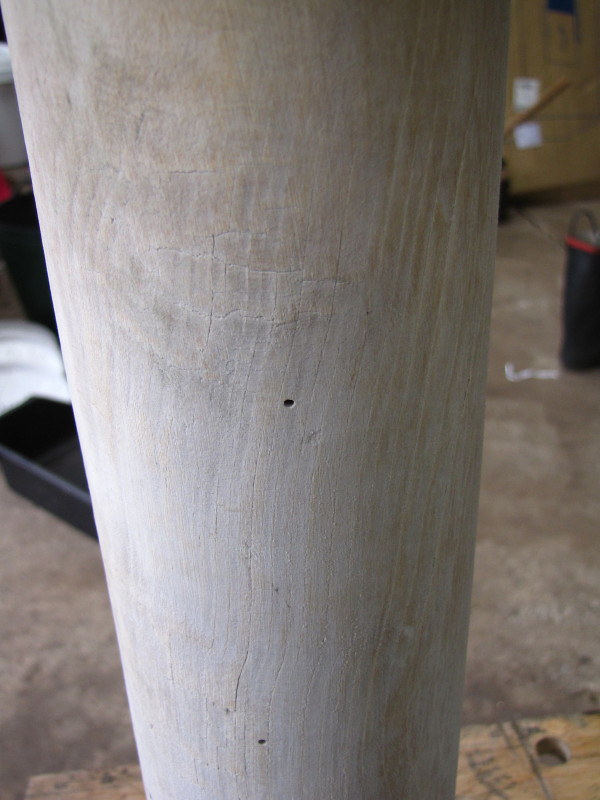
Woodworm in roller by British Red, on Flickr
So two coats of woodworm treatment before it goes any further

Woodworm treatment painted on by British Red, on Flickr
Then I filled the holes and ribbed down - notice how the paint came off?
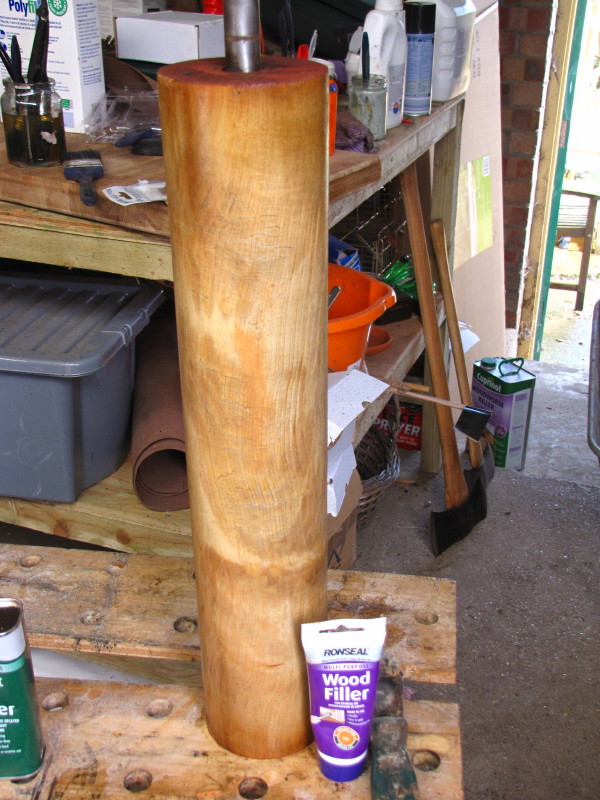
Filler by British Red, on Flickr
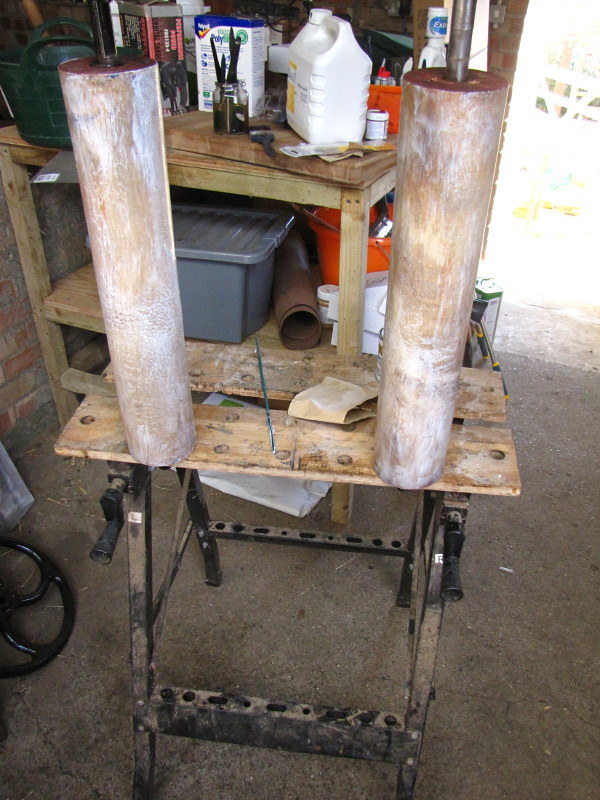
After filling I applied a liberal coat of wood hardener to stabilise a couple of soft patches. Notice how shiny the wood is (the hardener is dry)
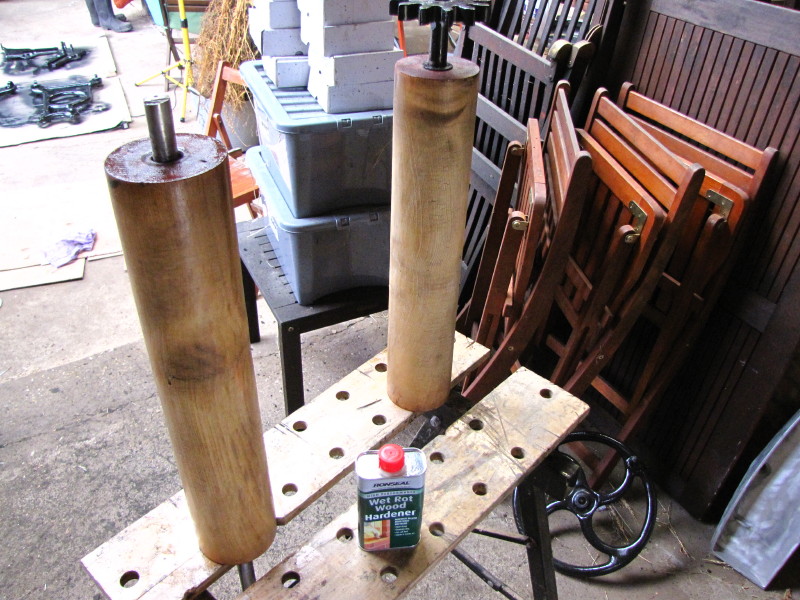
Wood Hardener by British Red, on Flickr
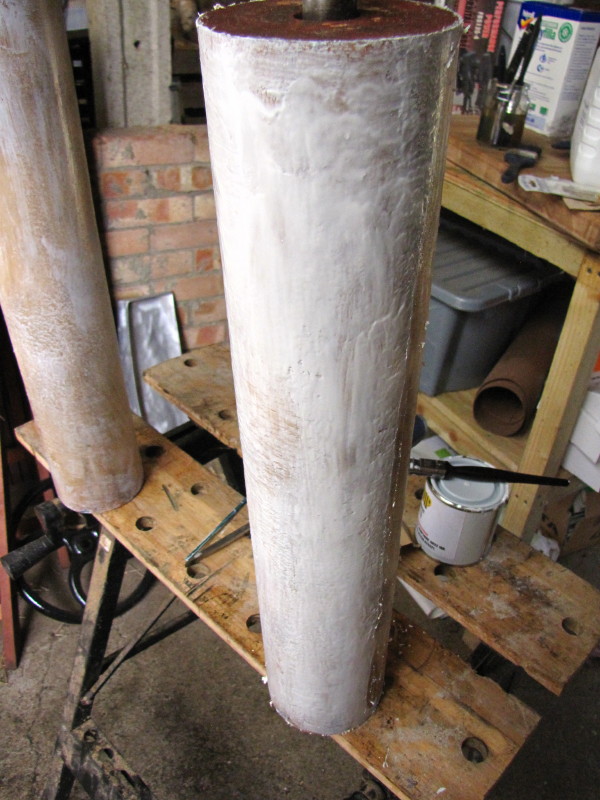
At this point I got all scientific. I wanted waterproofed grippy rollers. So one of these latex or rubber paints must be ideal
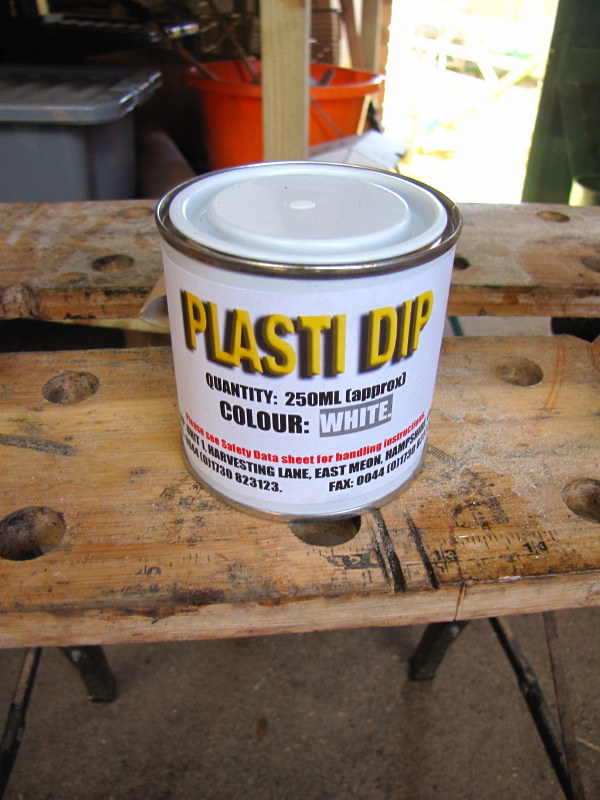
Latex Paint by British Red, on Flickr
On it goes - quite streaky and thin on the first coat
First Coat by British Red, on Flickr
Second coat will improve it no doubt
Second coat by British Red, on Flickr
Wrong!
I think either it could not adhere to the hard smooth rollers - or reacted with one of the many chemicals on them.
It had to go
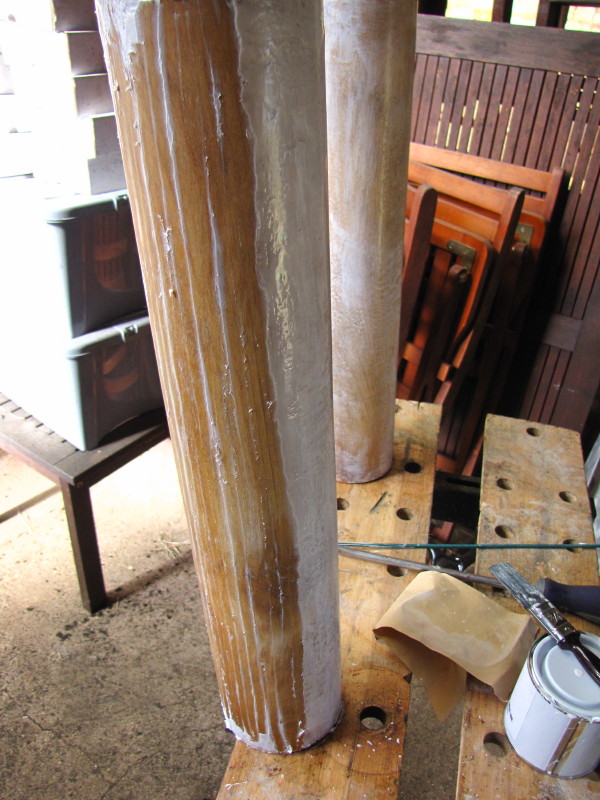
Scraping Off by British Red, on Flickr
The rollers are now finished in a more traditional tough varnish
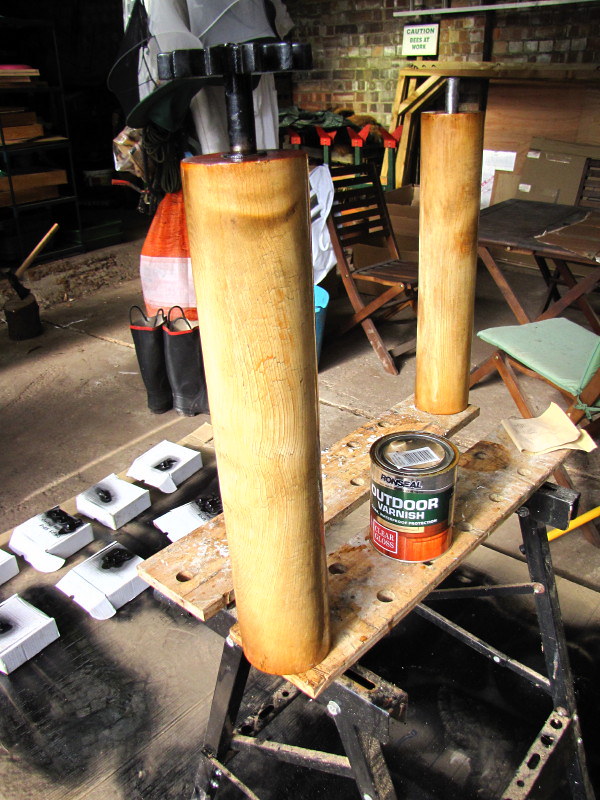
Varnish Rollers by British Red, on Flickr
Ahh well - something had to go wrong
All the major parts have now been cleaned and repainted, so its time to address the rollers
There are a couple (literally) of woodworm holes
Woodworm in roller by British Red, on Flickr
So two coats of woodworm treatment before it goes any further
Woodworm treatment painted on by British Red, on Flickr
Then I filled the holes and ribbed down - notice how the paint came off?
Filler by British Red, on Flickr
After filling I applied a liberal coat of wood hardener to stabilise a couple of soft patches. Notice how shiny the wood is (the hardener is dry)
Wood Hardener by British Red, on Flickr
At this point I got all scientific. I wanted waterproofed grippy rollers. So one of these latex or rubber paints must be ideal
Latex Paint by British Red, on Flickr
On it goes - quite streaky and thin on the first coat
First Coat by British Red, on Flickr
Second coat will improve it no doubt
Second coat by British Red, on Flickr
Wrong!
I think either it could not adhere to the hard smooth rollers - or reacted with one of the many chemicals on them.
It had to go
Scraping Off by British Red, on Flickr
The rollers are now finished in a more traditional tough varnish
Varnish Rollers by British Red, on Flickr
Ahh well - something had to go wrong
Section 8 - Restoring the Fasteners
Having done all the hard work of cleaning and stripping and grinding and spraying and painting and sanding and varnishing....
I really didn't want to put the mangle back together with these
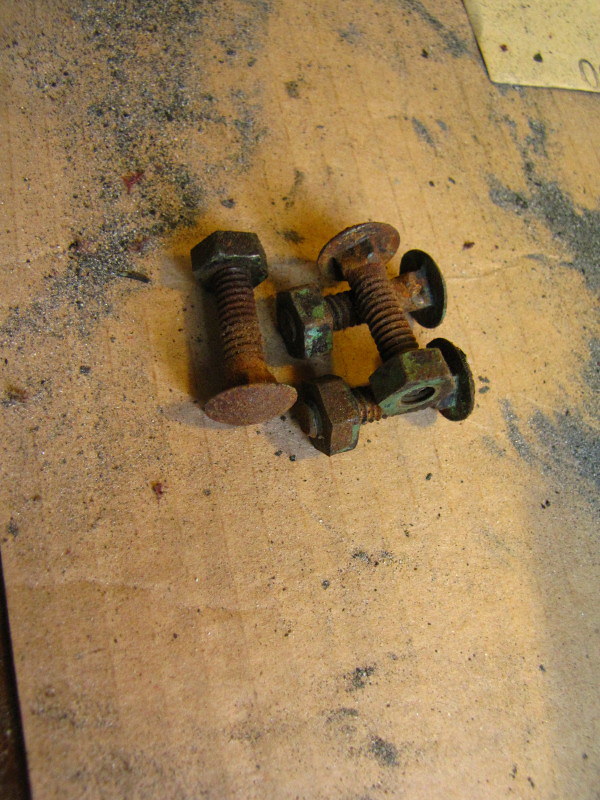
Rusty fastenings by British Red, on Flickr
I probably could get imperial sized replacements, but the metal is sound - just surface rust. So out with an abrasive wheel
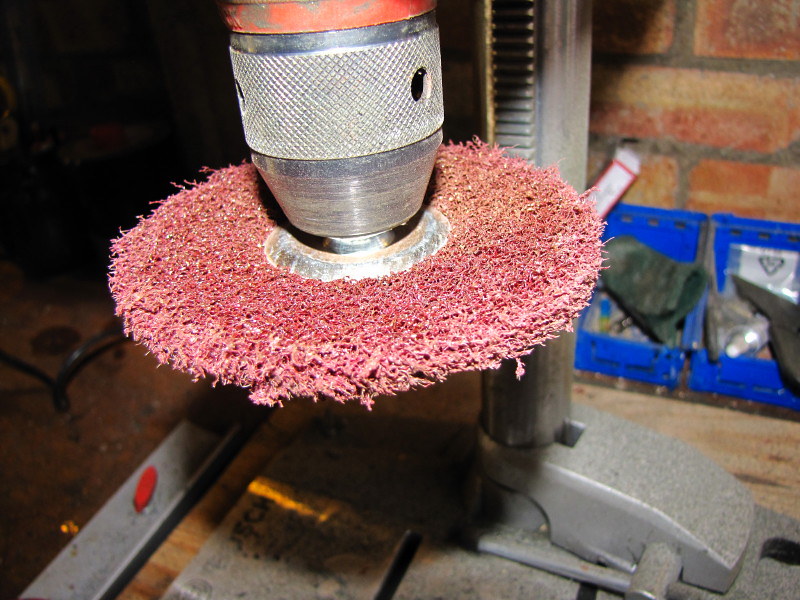
Abrasive Wheel in drill press by British Red, on Flickr
They cleaned up quite well

Cleaned bolt by British Red, on Flickr
A quick spray to ensure they don't rust again
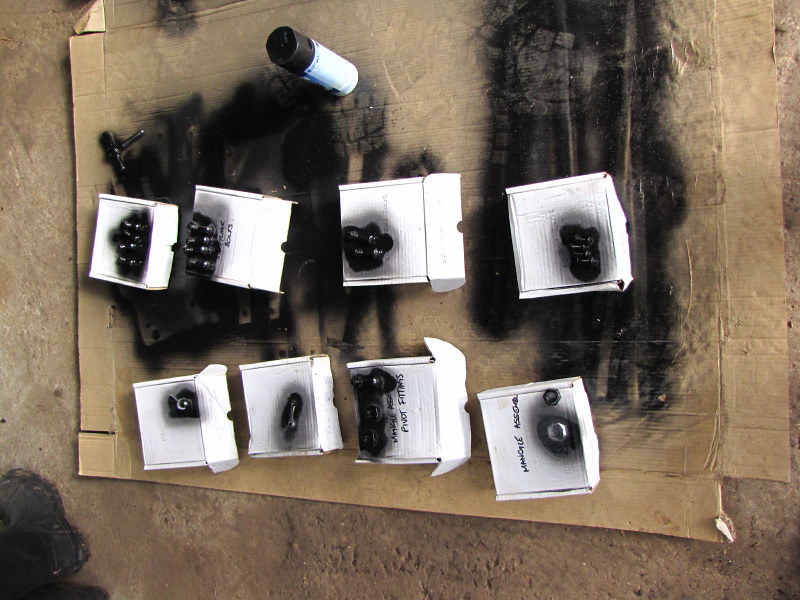
Spraying fasteners by British Red, on Flickr
The screws though, I'm not prepared to put back - the heads and threads are too far gone. I have measured them
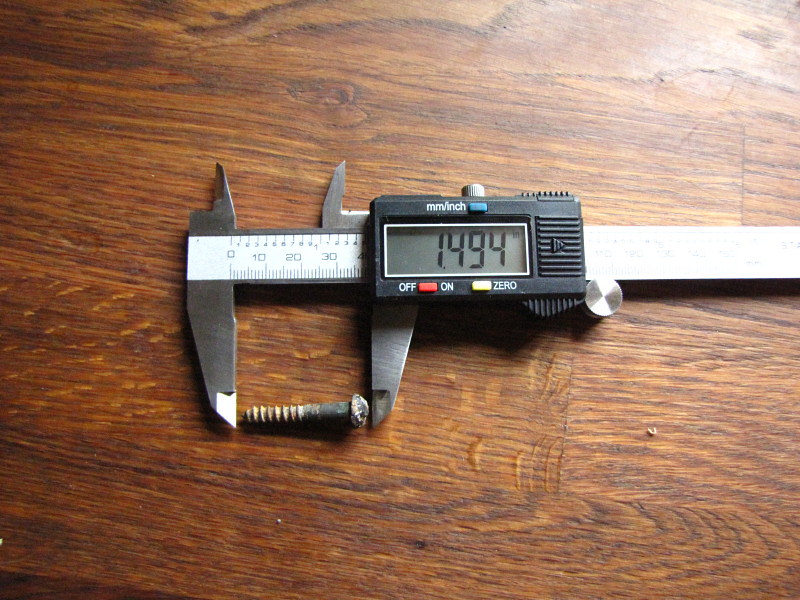
Micrometer measuring screw by British Red, on Flickr
and will replace with correctly sized imperial screws -
Having done all the hard work of cleaning and stripping and grinding and spraying and painting and sanding and varnishing....
I really didn't want to put the mangle back together with these
Rusty fastenings by British Red, on Flickr
I probably could get imperial sized replacements, but the metal is sound - just surface rust. So out with an abrasive wheel
Abrasive Wheel in drill press by British Red, on Flickr
They cleaned up quite well
Cleaned bolt by British Red, on Flickr
A quick spray to ensure they don't rust again
Spraying fasteners by British Red, on Flickr
The screws though, I'm not prepared to put back - the heads and threads are too far gone. I have measured them
Micrometer measuring screw by British Red, on Flickr
and will replace with correctly sized imperial screws -
...and is finished
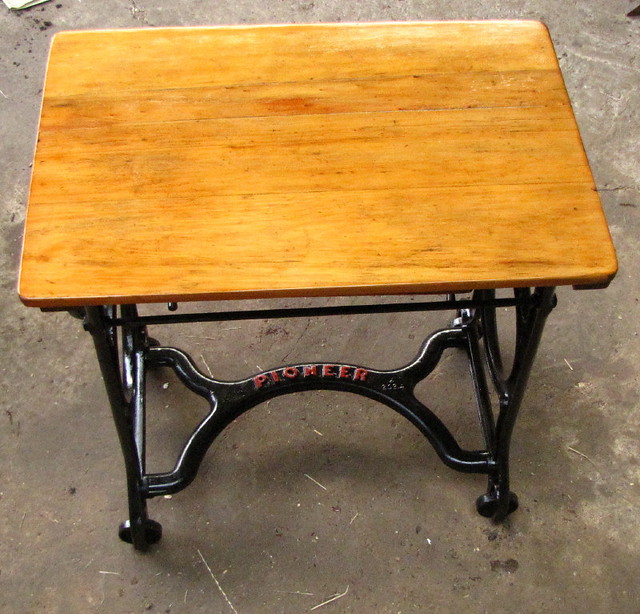
Completed Mangle as table by British Red, on Flickr
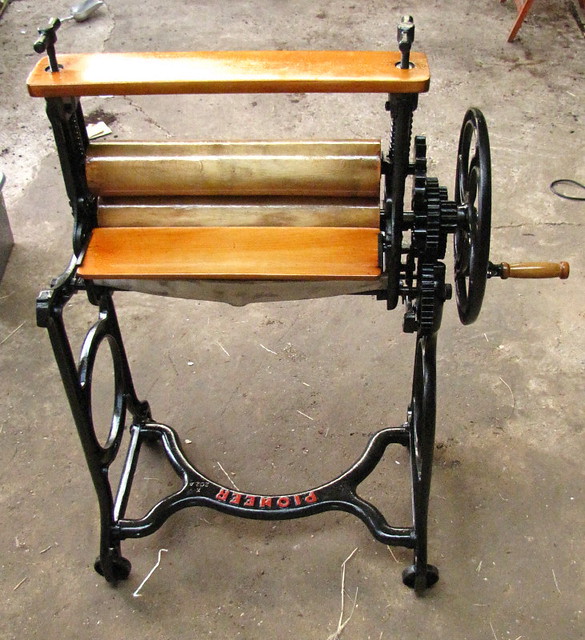
Completed Mangle by British Red, on Flickr
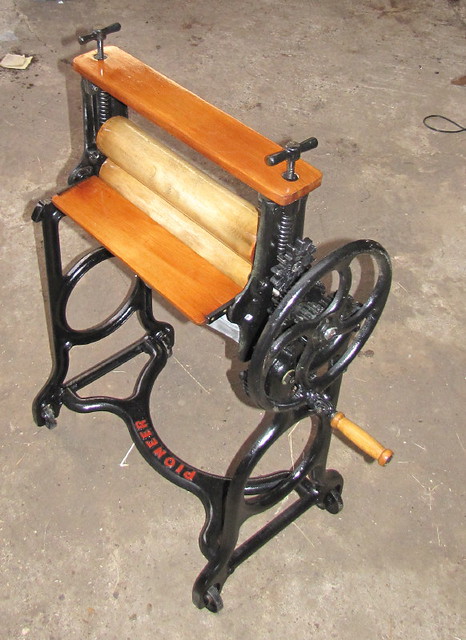
Completed Mangle in Laundry Mode by British Red, on Flickr
Completed Mangle as table by British Red, on Flickr
Completed Mangle by British Red, on Flickr
Completed Mangle in Laundry Mode by British Red, on Flickr
Similar threads
- Replies
- 7
- Views
- 375
- Replies
- 18
- Views
- 1K
- Replies
- 0
- Views
- 156
- Replies
- 30
- Views
- 513
- Replies
- 19
- Views
- 1K