Restoring a Mangle

  • Hey Guest, Early bird pricing on the Summer Moot (29th July - 10th August) available until April 6th, we'd love you to come. PLEASE CLICK HERE to early bird price and get more information.

British Red

M.A.B (Mad About Bushcraft)
Dec 30, 2005
26,715
1,961
Mercia
This thread leads on from my "quest for a self sufficient laundry".

http://www.bushcraftuk.com/forum/showthread.php?t=115534

It is part "personal journal" and part "voyage of discovery" into the exiting world of the clothes mangle (and mostly a yearning hope it will tell me how to reassemble the thing!)

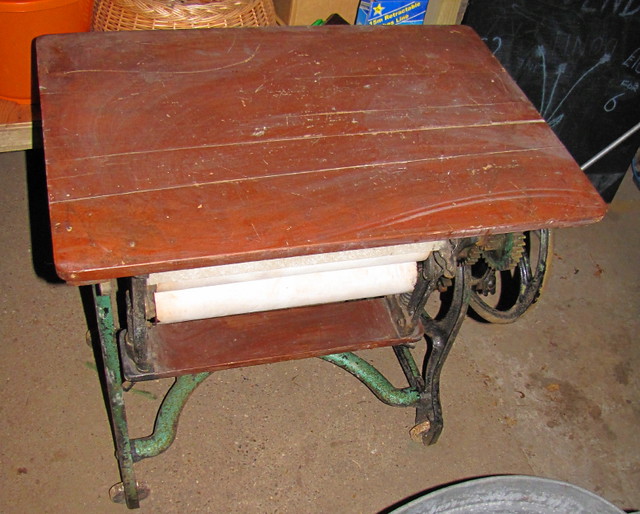
I have wanted a mangle for a while to be part of the "off grid laundry" and found this one


Mangle closed with lid down by British Red, on Flickr


Mangle folded lid up by British Red, on Flickr


Mangle unfolded lid up by British Red, on Flickr


Mangle ready for use by British Red, on Flickr

(NB I already had the "tin bath". I suspect its purpose was never a bath and was to fit this type of mangle - it fits the cut out in the "stretcher" on the base near perfectly)

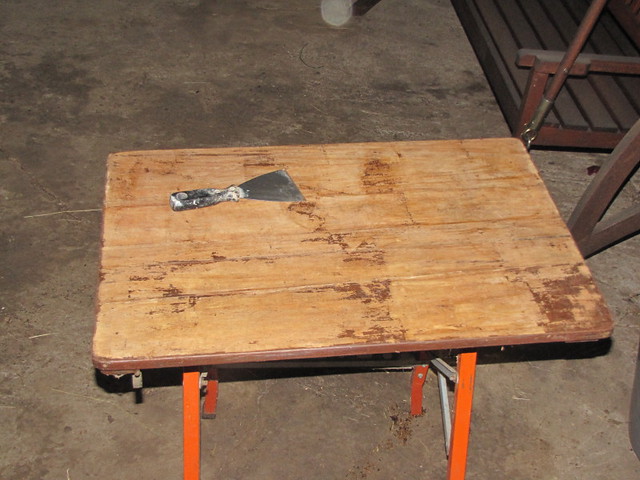
The mangle works, the handle turns etc. Its in need of considerable TLC though. Problems include

1) Some of the wood has a small amount of wood worm. I need to treat this before it spreads.

2) The wood has been painted at least twice and varnished to boot. The paint is cracked in places and the varnish (which I suspect was the original finish) has worn away. If I were to use it now, the wood would get soaked in short order and then probably go mouldy and rub that mould onto laundry.

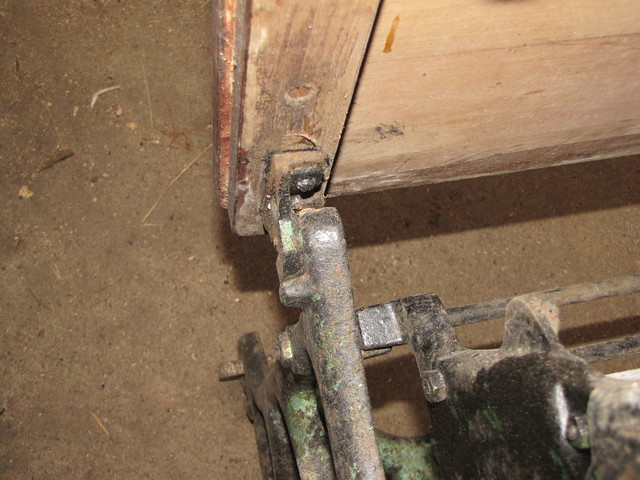
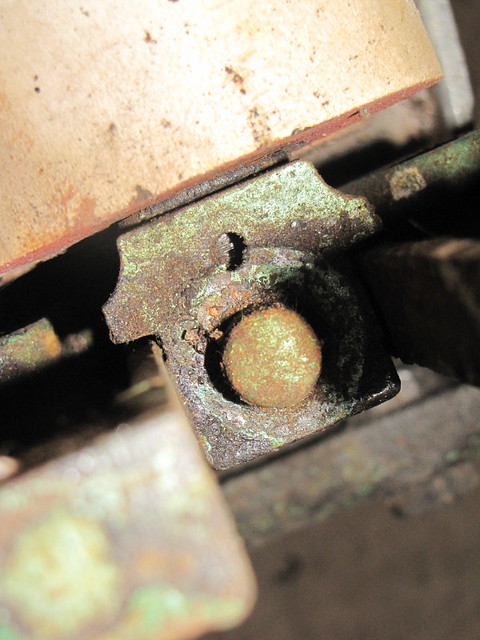
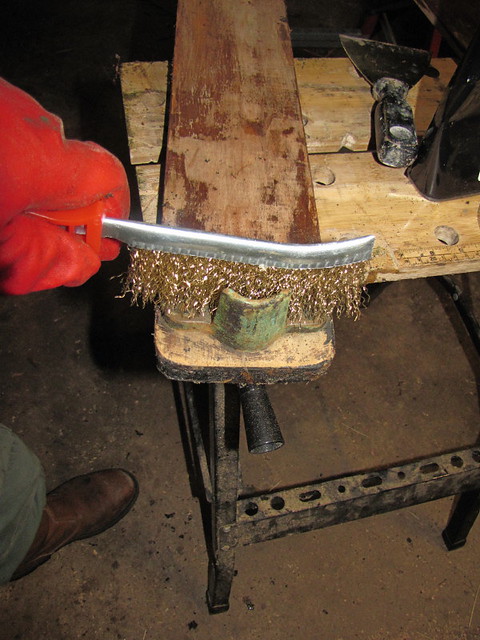
3) The metal work has been over painted at least twice. Recently in flat black which is wearing away and a fetching minty green under that.

4) The gears and other moving parts have old grease and dirt caked around them. They seem to move freely but all the old paint and grease needs to be stripped away and refinished for both cleanliness and protection from water.

5) The rollers seem sound, there is slight wear in the middle and the grain is lifting in places. The paint needs to be stripped away, rubbed back, stabilised if required and a water repellent coating applied.

I suspect this will be a labour of love and a long old job - but its a fascinating item and I'm looking forward to it.
 

British Red

M.A.B (Mad About Bushcraft)
Dec 30, 2005
26,715
1,961
Mercia
Step 1 - Removing the Woodwork

The first thing I need to do here is to remove all the woodwork and strip any existing finished. I can then assess if any parts need replacing or whether they can be treated and re-finished.

So, first the table top

There is a catch underneath the table top that must be depressed (seen on the upper left hand side) to release the table top. The table top can then be lifted into an upright position


Mangle with table top raised by British Red, on Flickr

When in the upright position, the hinges are not "captured" but if the whole table top is lifted vertically, it comes right off


Table top hinge by British Red, on Flickr


Table top on work bench by British Red, on Flickr

I suspect this function was so that the mangle could serve as a table when not in use, but the top really needs to be removed to operate the mangle with, for example, bedding being fed in from one side and pulled through the other.

After removal, close inspection shows the suspect woodworm holes


Woodworm on table top by British Red, on Flickr

Next the roller shelf.


Roller shelf by British Red, on Flickr

The roller shelf if pivoted to the vertical just lifts clear.

Finally there is a shelf at the top of the mangle which holds the screw tensioners that adjust the pressure on the mangles rollers


Scre shelfw tenisioner by British Red, on Flickr

The screw tensioners first have to be unscrewed


Screw tenisioners removed by British Red, on Flickr

Then there are brackets underneath the shelf with two coach bolts each side holding the shelf to the frame of the mangle


Screw tensioner shelf brackets by British Red, on Flickr

Here we hit a problem - all my socket sets and spanners are metric. The mangle was made in the days of imperial bolts! Fortunately a metric socket was a close enough fit


Bolts removed from Screw tensioner brackets by British Red, on Flickr

Note to self - all "old fashioned" gear likely to be useful in an "off grid" situation is likely to be imperial. I should get myself a set of imperial sockets and spanners.

Note to self - consider replacing all fastenings with stainless coach bolts - if I can find any in imperial sizes.

Years of accumulated crud means a light tap was required to remove the shelf


Tap shelf free by British Red, on Flickr

An interesting thing was revealed after removing the shelf - the spring had a solid rubber cap above it


Rubber Spring cap by British Red, on Flickr


Rubber Spring cap removed by British Red, on Flickr

What I realised is the "Spring tensioner bolts" don't screw into the springs. There is a captive nut contained in the shelf I just removed. When the bolt is wound through this nut the end of the bolt puts pressure on the rubber cap, which in turn puts tension on the spring.
 
Last edited:

British Red

M.A.B (Mad About Bushcraft)
Dec 30, 2005
26,715
1,961
Mercia
Step 2 - Removing the Springs and Top Roller

I had planned to stop with removing the woodwork - but having taken the shelves off, the rubber stops and springs were loose so, to avoid losing parts, I proceeded a little further with the disassembly.

The first thing I did was lift off the springs - as you can see they simply sit on a stud which protruded from the top roller


Spring removed by British Red, on Flickr

(By the way I hope you can see the amount of grease and crud that had accumulated in these workings - imagine pulling your laundry past that!)

This is the Spring stud


IMG_1289 by British Red, on Flickr

With the springs removed the whole top roller simply lifts clear


Top roller by British Red, on Flickr

Here you can see the spring stud at the "non handle" end


Spring stud on top roller by British Red, on Flickr

The stud is actually a loose fitting - it simply lifts off the roller axle


Spring stud removed from top roller axle by British Red, on Flickr

The Spring stud at the "handle end" sits between the roller and the cog which is attached to the roller axle.


Spring stud and gear on top roller by British Red, on Flickr

This too simply lifts clear


Spring stud removed from gear on top roller by British Red, on Flickr

Thats as far as I need to go with disassembly for now

I have stored all the parts in a bucket prior to cleaning and stripping them.


Parts BinStriping by British Red, on Flickr

I suspect as the built progresses I will use separate labelled boxes to store the parts for each assembly.
 
Last edited:

British Red

M.A.B (Mad About Bushcraft)
Dec 30, 2005
26,715
1,961
Mercia
Step 3 - Stripping the woodwork

Okay so I got the three shelves off :roll:

I set them up on a couple of workmates (somewhere between the potatoes chitting on the left and seeds drying on the right!)


Parts laid out for paint stripping by British Red, on Flickr

The paint stripper I'm using is Wilkos version of "Nitromors". Effective - but nasty stuff. So I'm going to be wearing heavy gloves. I find a variety of shapes and types of stripper useful for this sort of job


Parts laid out for paint stripping by British Red, on Flickr

Put the stuff on thick and leave for half an hour


Paint stripper on table top by British Red, on Flickr

Comes off a treat


Stripping progress by British Red, on Flickr

Although after first stripping, some evidence of stubborn paint and older finishes can be seen


Basic strip complete by British Red, on Flickr

You can see how smaller tools are needed around the metal work


Stripping Spring bracket by British Red, on Flickr

I plan on removing all the metal fittings - but having them still screwed down is helpful for the first strip


Using wire brush in tight areas by British Red, on Flickr


Upper Spring bracket by British Red, on Flickr

That's as far as I got today - tomorrow - on with the stripping!
 
Hi all,
how cool. My nan had one of them in her kitchen. We used to eat our meals of the table. On washing day her kitchen was like a Turkish baths. Ah the good or bad old days.
Red make sure that you wear a dust mask when removing all that old paint, it more than likely contains lead, due to its age.
Regards Chris.
 

Toddy

Mod
Mod
Jan 21, 2005
38,979
4,625
S. Lanarkshire
Y'know ? It looks manky, but I think it's actually very sound. Everything needs taken back to base, but you might find that it all goes together again very well indeed :D Built to last :)

The 'tabletop' was used to store the laundry basket with the nearly dried linens for ironing :) and the metal work was like the black on the handles of old scissors....hammerite ? that kind of thing.
I do remember wooden boards on old ones with no paint or varnish. The wood got wet, but it wasn't left wet, iimmc.

My brother repairs the wood work in old Victorian houses. Lot of people tear that down, rip it out and built in new stuff.
He says that's a travesty, and the original woodwork is as crucial a part of the authenticity of the building as the stone and plaster mouldings. Nowadays chemical stabilisation means that almost any wood, in almost any condition can be made sound.
Don't know if it's worth it for the mangle wood though :dunno:

I don't know what the wood was, so I went a googling, and I didn't find out, but I did find this page :D
http://hubpages.com/hub/Working-Class-life-in-the-1940s-Wash-Day

Nice bit of work there Hugh :) interesting to see it come back to life.

atb,
M
 

British Red

M.A.B (Mad About Bushcraft)
Dec 30, 2005
26,715
1,961
Mercia
I'd love to keep it all original Mary. Some of the wood is split or coming away from cross members and I suspect some of the screws may be shot. I think the wood is salvageable if I can get the screws out ....cross your fingers for me!
 
Nov 29, 2004
7,808
22
Scotland
Excellent work! I look forward to watching your progress.

I have an old mangle, not as old though, in the shed, it isn't a floor standing one but sits between two large Belfast sinks. A future project for me. :)
 
Last edited:

treadlightly

Full Member
Jan 29, 2007
2,692
3
65
Powys
My mum used one of those, it lived in the outside wash house and I would help her use it as a small boy on Mondays, which was the washing day. Good luck with the restoration Red.
 

dave53

On a new journey
Jan 30, 2010
2,993
11
70
wales
my gran had one of them used to turn it for her when doing the washing great little bit of history regards dave
 

British Red

M.A.B (Mad About Bushcraft)
Dec 30, 2005
26,715
1,961
Mercia
What are you going to use to boil your water?

Right now an 8 gallon saucepan, but I have a dream of locating a proper wash copper and wash dolly pan. I have outbuildings with chimneys - one of which was, I'm sure, the "outside wash house" treadlightly refers to. I would love to fully restore that but also then to use it as a still room.
 

British Red

M.A.B (Mad About Bushcraft)
Dec 30, 2005
26,715
1,961
Mercia
Red make sure that you wear a dust mask when removing all that old paint, it more than likely contains lead, due to its age.
Regards Chris.

I always wear a half mask don't worry. That said my current one is not as good as I would like (rubbish clip on the straps mainly making it hard to adjust).

Do the craftsman have any recommendations for a half face mask with reasonable particulate protection? I was going to go for a 3M just because its an okay brand but I have no great knowledge
 
Nov 29, 2004
7,808
22
Scotland

British Red

M.A.B (Mad About Bushcraft)
Dec 30, 2005
26,715
1,961
Mercia
+1 to this

I find that the disposable masks end up being so uncomfortable in use they often end up simply hanging around my neck, a decent half mask with appropriate filters usually stays in place throughout a job. Somewhere like RS components or Screwfix are worth a look.

I have a half mask - you can see it hanging in the background


Screw tensioner shelf brackets by British Red, on Flickr

Its just the straps are rubbish frankly. If you guys have used the Sundstrom ones - I'll give them a try!
 

oldtimer

Full Member
Sep 27, 2005
3,201
1,826
82
Oxfordshire and Pyrenees-Orientales, France
As a small boy it used to be my job to turn the handle while my Grandma used to feed the washing through. The water expressed was caught in a tin bath exactly like the one you show. The water had a special chracteristic smell which I still recall. I uses to empty the bath onto the flower beds outside the outhouse and grew up thinking the hollyhocks grew high because of washing water! I sometimes used to play with the tighener screws to increase the pressure as I thought that this would get rid of more water and save running garments through twice. I also remember being in trouble for doing this when the increased pressure setting crushed pearl buttons on shirts and blouses. I guess this is where the term "mangled" came from. This meant yet another laundry day job of sewing replacement buttons on. It's turned out to be a useful skill to have. It also explained to my satisfaction why Navy issue boiler suits used to have special buttons that could be removed before the washing process.
 

British Red

M.A.B (Mad About Bushcraft)
Dec 30, 2005
26,715
1,961
Mercia
I'm guessing that the removable buttons picks up on something similat Toddy mentioned earlier. Does anyone have any further information on these things (and perhaps any knowledge if they can still be obtained)

Things are proceeding in the meantime. Second coat of paint stripper has been scraped off and the metal fittings removed. Sadly nit all the screws wanted to play easily :(
 

British Red

M.A.B (Mad About Bushcraft)
Dec 30, 2005
26,715
1,961
Mercia
Hi all,
how cool. My nan had one of them in her kitchen. We used to eat our meals of the table.
Regards Chris.

That was, apparently, the idea of this particular model.....or so the advert said!

Im192901GHK-Pioneer.jpg
 

BCUK Shop

We have a a number of knives, T-Shirts and other items for sale.

SHOP HERE