Restoring a Mangle
- Thread starter British Red
- Start date
-
BushMoot: Come along to the amazing Summer Moot 31st July - 5th August (extended Moot : 27th July - 8th August), a festival of bushcrafting and camping in a beautiful woodland PLEASE CLICK HERE for more information.
You are using an out of date browser. It may not display this or other websites correctly.
You should upgrade or use an alternative browser.
You should upgrade or use an alternative browser.
I hope you'll allow me a little digression, especially as it's on a subject close to your heart BR. All this talk of tin baths and coppers reminds me of the few days I spent in the Victorian Farm Cottage over New Year a few years back.
The outhouse had a copper and I lit a fire to heat water for my (tin) bath. The air temp in the outhouse was 2C, - made for an invigorating experience. My only regret was that there was no Ruth to give my back a scrub.
The outhouse had a copper and I lit a fire to heat water for my (tin) bath. The air temp in the outhouse was 2C, - made for an invigorating experience. My only regret was that there was no Ruth to give my back a scrub.
Chuckle - the subject of Ruth (the thinking man's pin up) helping out with a tin bath would indeed be close to my heart - digress away (actually I love thread drift so anyone else wants to ramble about anything washing related - have at it) ")
I am currently cursing the name of whoever allowed Black Hammerite to penetrate softwood :tapedshut
I also managed to find my stud extractors - next to the centre punch tin (of course). Tempted fate talking to Toddy last night I think
I am currently cursing the name of whoever allowed Black Hammerite to penetrate softwood :tapedshut
I also managed to find my stud extractors - next to the centre punch tin (of course). Tempted fate talking to Toddy last night I think
Step 4 Removing the Metal Fittings from the Woodwork
In order to complete the stripping of accumulated paint and grime, the metal fittings need to be removed.
Before I did that I moved the parts already removed to a box
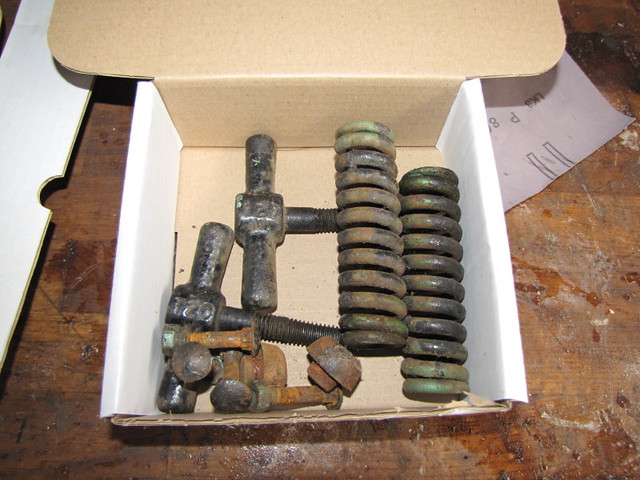
Roller Springs boxed up by British Red, on Flickr
and labelled the box
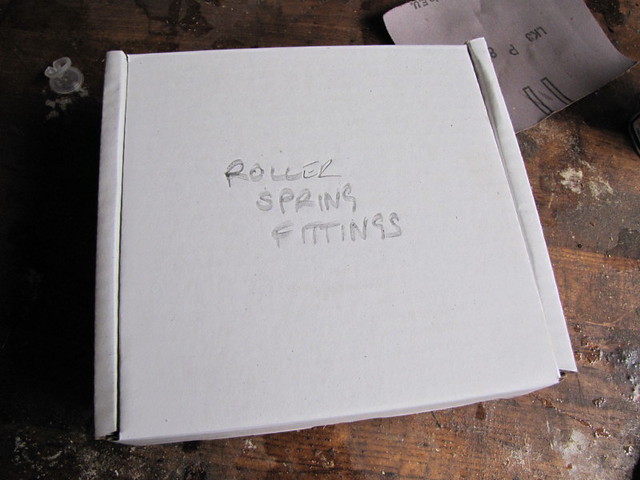
Roller Spring box labelled by British Red, on Flickr
Then I photographed what goes where on the table top
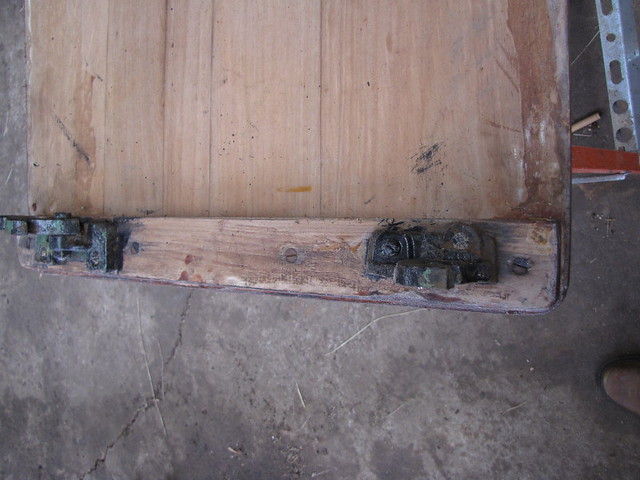
Fitting left side of table top by British Red, on Flickr
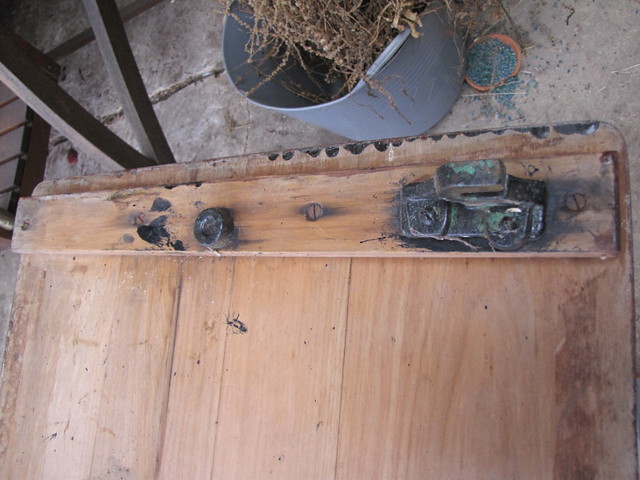
Fittings right side of table top by British Red, on Flickr
Then I took a good look at the screws round head slotted screws full of accumulated gunk and a bit damaged from previous removals
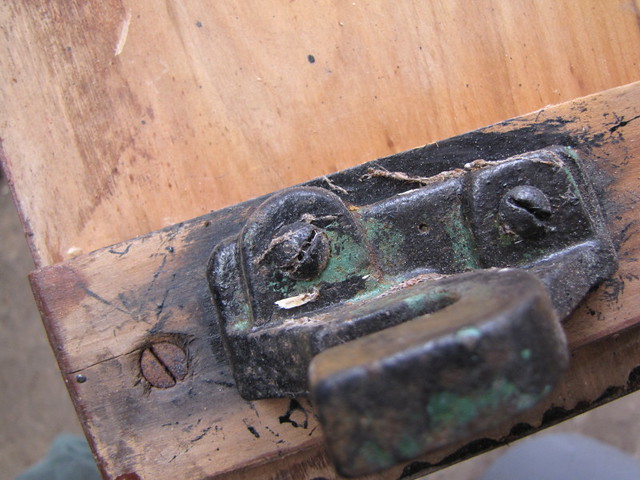
Manky screw head by British Red, on Flickr
This gave me fear that the screw driver would slip in trying to remove them so I trod carefully
I chased all the paint, grease and grime out of the slot
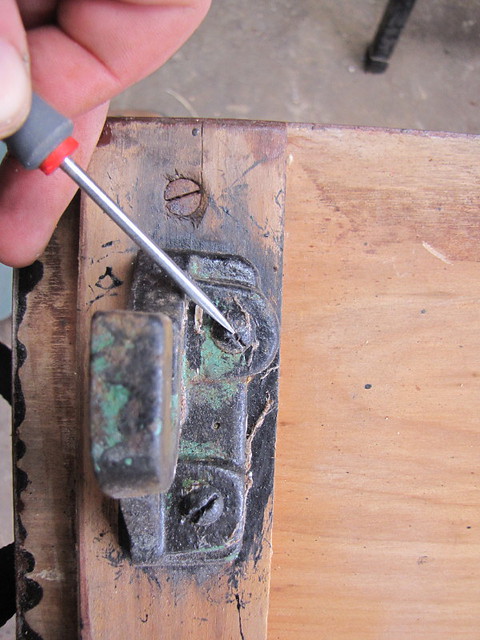
Chase out slotted screw head by British Red, on Flickr
Then I used the correct sized screw driver and delivered a sharp tap to the screwdriver before attempting to move the screw. Clearly this shows why I stripped some paint first - it removes the paint "sticking" the screw down. If screw removal was problematic I would also apply a blow torch - both to burn off paint and expand the metal.

Hammer to tap screw by British Red, on Flickr
Happily these fittings came off with a little persuasion - I know the screwdriver may look long there - but its wide enough to "fill" the slot
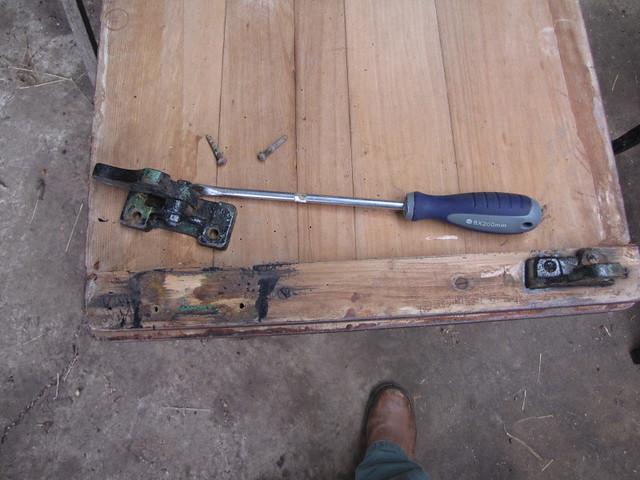
Screws removed by British Red, on Flickr
The table top fittings were boxed separately
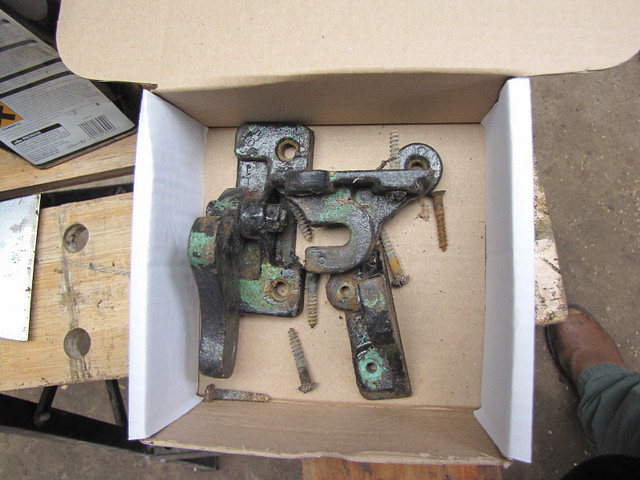
Table top fittings boxed by British Red, on Flickr
The fittings for the spring tensioning bolts also came free okay
Spring compression fittings by British Red, on Flickr
A third box was called into play
Spring compression fittings boxed by British Red, on Flickr
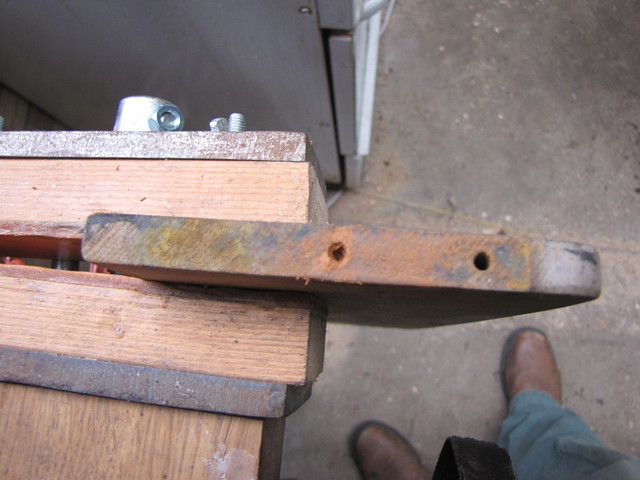
The roller shelf proved more troublesome - the right hand screw seen here is okay - the left hand slot is both shallow and damaged. I have clamped the shelf in a padded woodworking vice to give it some support
Roller shelf in padded vice by British Red, on Flickr
I cleaned up the slot as well as I could
Cleaning out slotted counter sunk screw by British Red, on Flickr
Gave the screw a really good tap - even heated it - no dice

Tap counter sunk screw by British Red, on Flickr
Out came the high speed steel drill bits
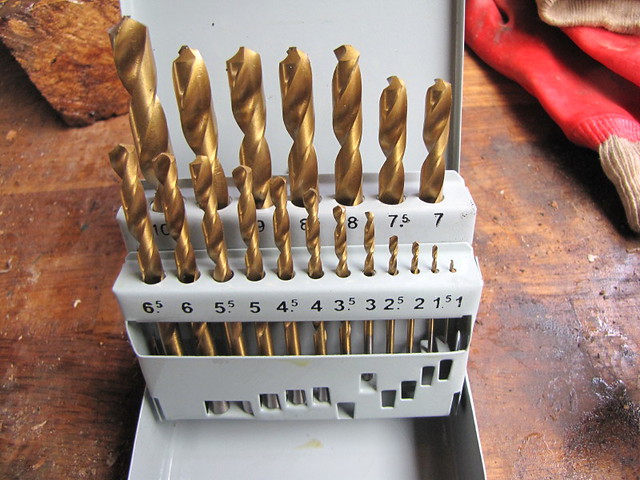
HSS Drill bits by British Red, on Flickr
Then I hunted up my centre punches
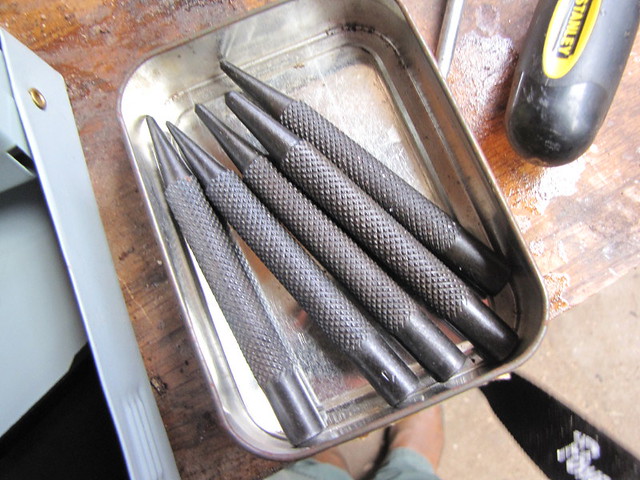
Centre punches by British Red, on Flickr
I centre punched the middle of the screw head I needed to remove and then drilled out the screw head. Centre punching anything metal stops the drill skidding off to one side
Centre punch screw by British Red, on Flickr
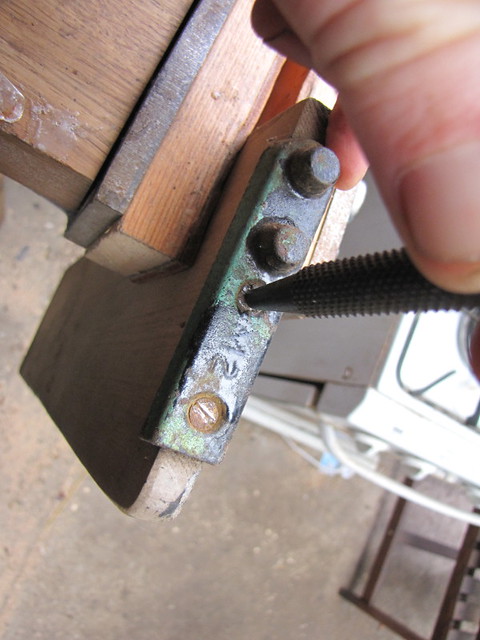
I used a finer centre punch on the stub
Screw stub by British Red, on Flickr
Matched an HSS bit to one of the screws I had removed and drilled out the stub
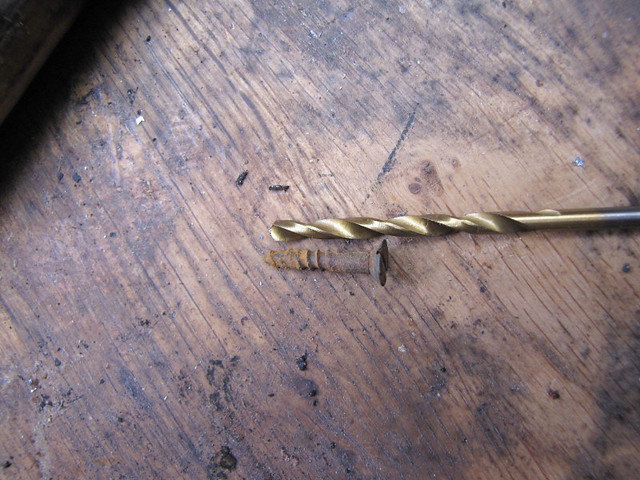
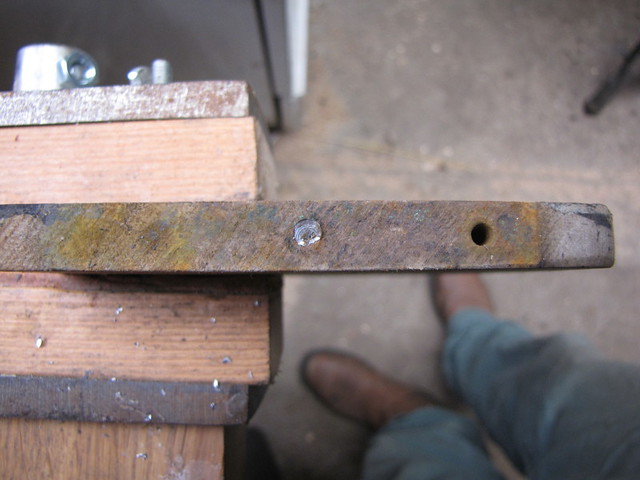
Measure drill bit by British Red, on Flickr
Stub drilled out by British Red, on Flickr
I did have a set of stub extractors on standby - thankfully they weren't needed
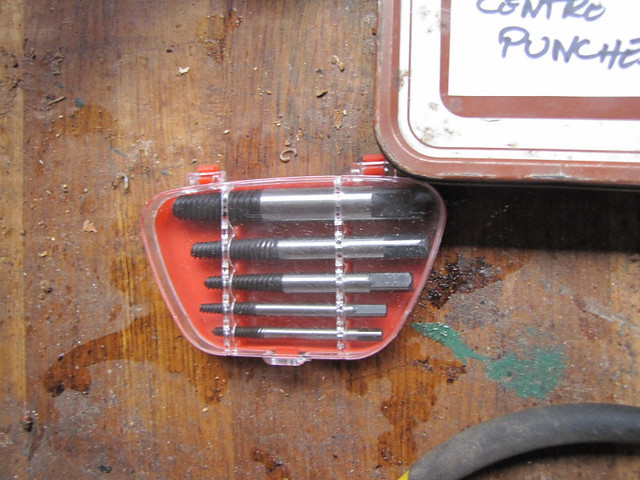
Stub extractor by British Red, on Flickr
Another box of bits
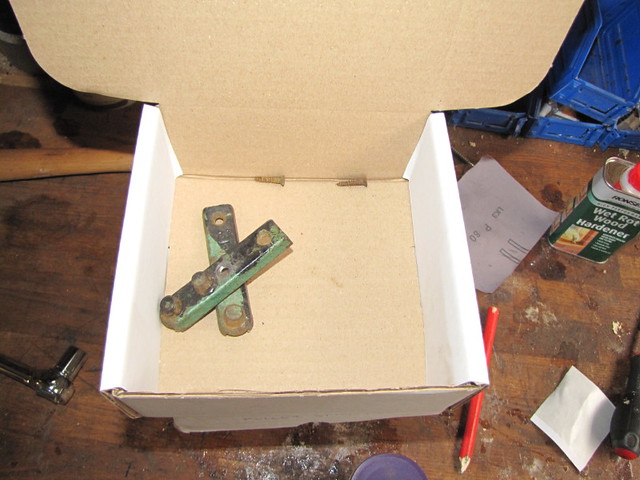
Roller shelf fittings boxed up by British Red, on Flickr
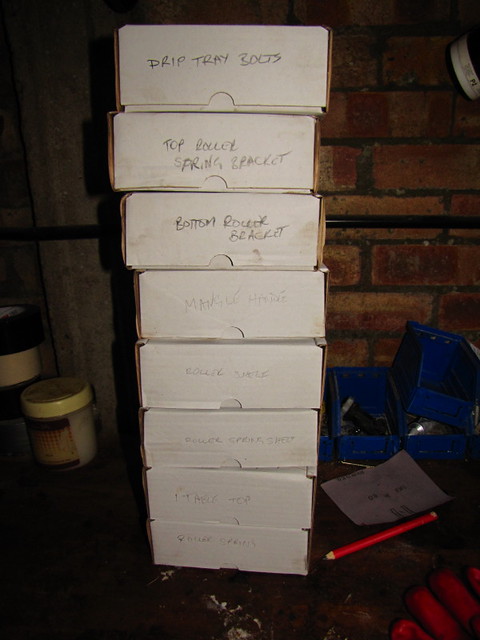
By this stage I was amassing a nice collection of carefully labelled boxes. I know its uptight the way I do this but I'm rubbish at remembering what goes where otherwise!
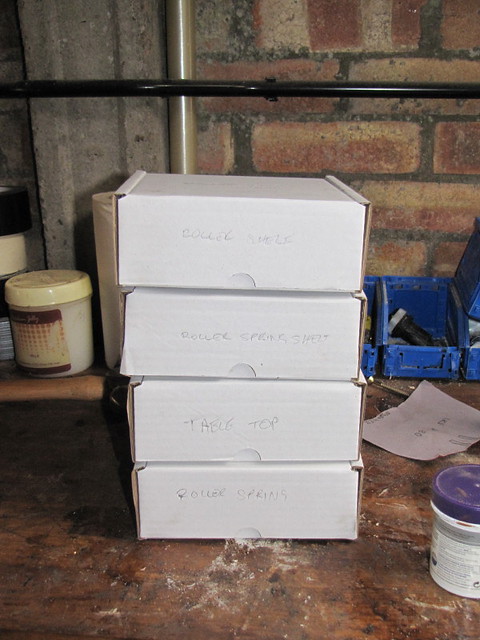
Fittings boxes by British Red, on Flickr
That was all the metal fittings removed - so on to the next stage!
In order to complete the stripping of accumulated paint and grime, the metal fittings need to be removed.
Before I did that I moved the parts already removed to a box
Roller Springs boxed up by British Red, on Flickr
and labelled the box
Roller Spring box labelled by British Red, on Flickr
Then I photographed what goes where on the table top
Fitting left side of table top by British Red, on Flickr
Fittings right side of table top by British Red, on Flickr
Then I took a good look at the screws round head slotted screws full of accumulated gunk and a bit damaged from previous removals
Manky screw head by British Red, on Flickr
This gave me fear that the screw driver would slip in trying to remove them so I trod carefully
I chased all the paint, grease and grime out of the slot
Chase out slotted screw head by British Red, on Flickr
Then I used the correct sized screw driver and delivered a sharp tap to the screwdriver before attempting to move the screw. Clearly this shows why I stripped some paint first - it removes the paint "sticking" the screw down. If screw removal was problematic I would also apply a blow torch - both to burn off paint and expand the metal.
Hammer to tap screw by British Red, on Flickr
Happily these fittings came off with a little persuasion - I know the screwdriver may look long there - but its wide enough to "fill" the slot
Screws removed by British Red, on Flickr
The table top fittings were boxed separately
Table top fittings boxed by British Red, on Flickr
The fittings for the spring tensioning bolts also came free okay
Spring compression fittings by British Red, on Flickr
A third box was called into play
Spring compression fittings boxed by British Red, on Flickr
The roller shelf proved more troublesome - the right hand screw seen here is okay - the left hand slot is both shallow and damaged. I have clamped the shelf in a padded woodworking vice to give it some support
Roller shelf in padded vice by British Red, on Flickr
I cleaned up the slot as well as I could
Cleaning out slotted counter sunk screw by British Red, on Flickr
Gave the screw a really good tap - even heated it - no dice
Tap counter sunk screw by British Red, on Flickr
Out came the high speed steel drill bits
HSS Drill bits by British Red, on Flickr
Then I hunted up my centre punches
Centre punches by British Red, on Flickr
I centre punched the middle of the screw head I needed to remove and then drilled out the screw head. Centre punching anything metal stops the drill skidding off to one side
Centre punch screw by British Red, on Flickr
I used a finer centre punch on the stub
Screw stub by British Red, on Flickr
Matched an HSS bit to one of the screws I had removed and drilled out the stub
Measure drill bit by British Red, on Flickr
Stub drilled out by British Red, on Flickr
I did have a set of stub extractors on standby - thankfully they weren't needed
Stub extractor by British Red, on Flickr
Another box of bits
Roller shelf fittings boxed up by British Red, on Flickr
By this stage I was amassing a nice collection of carefully labelled boxes. I know its uptight the way I do this but I'm rubbish at remembering what goes where otherwise!
Fittings boxes by British Red, on Flickr
That was all the metal fittings removed - so on to the next stage!
Step 5 - completing the strip down of the woodwork
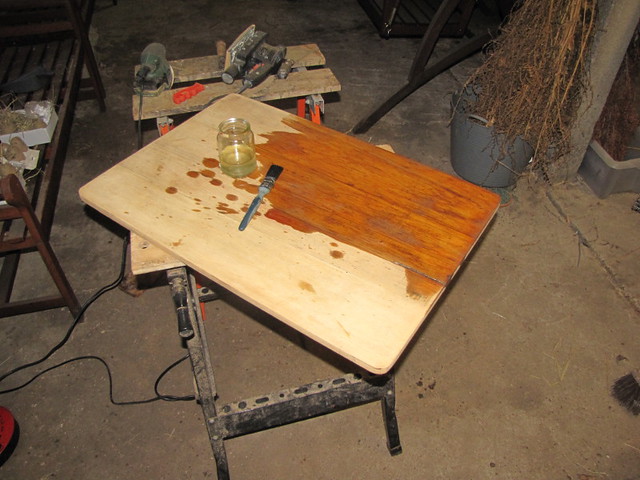
So having removed all the metal work from the wood, we are left with this

Woodwork with fittings removed by British Red, on Flickr
A lot better - but still badly stained in places
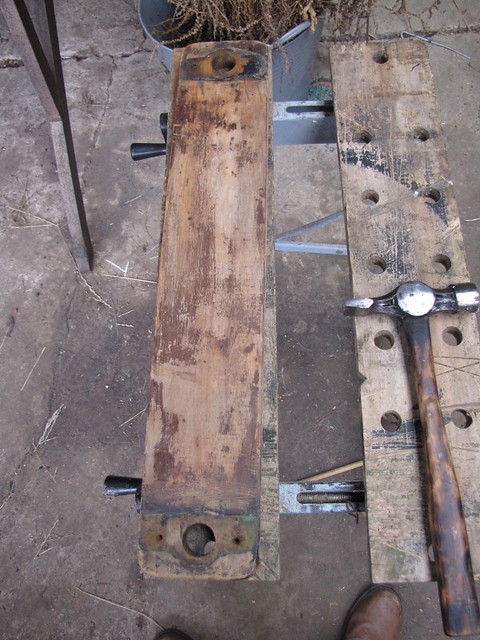
Roller Spring Shelf with fittings removed by British Red, on Flickr
Each piece of wood was given a second thick coat of stripper

Second coat of paint stripper by British Red, on Flickr
After 20 minutes this could be seen working on the gunk where the metal fittings had been

Gunk from fittings by British Red, on Flickr
Scraping away the stripper revealed considerably more staining removed
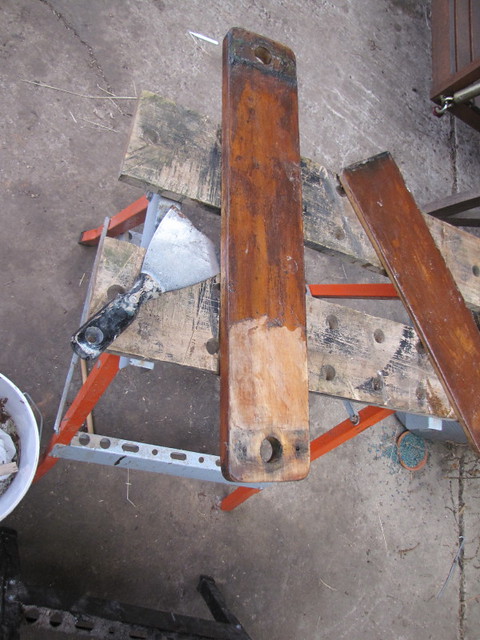
Scraping off second coat of paint stripper by British Red, on Flickr
A putty knife is good for getting into the detail areas
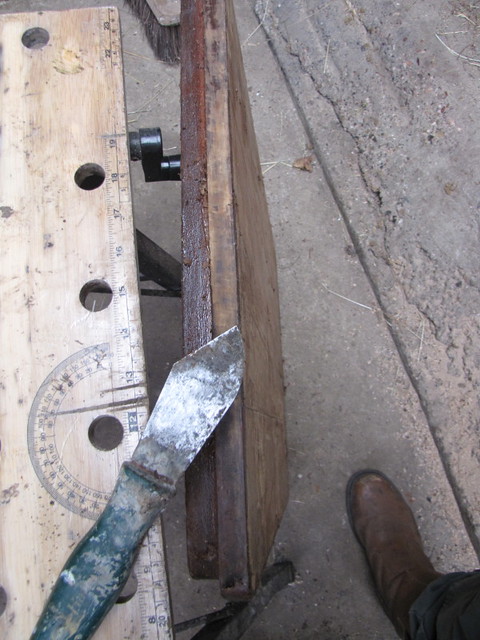
Stripping detail areas by British Red, on Flickr
Getting off the top layer showed how that brown gloss paint had been only painted on the top of each shelf - but had dripped :evil:
Careless paint drips by British Red, on Flickr
This is as good as I could get it with paint stripper
Then I remembered I had missed a bit of wood
Mangle handle by British Red, on Flickr
So I removed that and stripped the paint
Mangle handle stripped by British Red, on Flickr
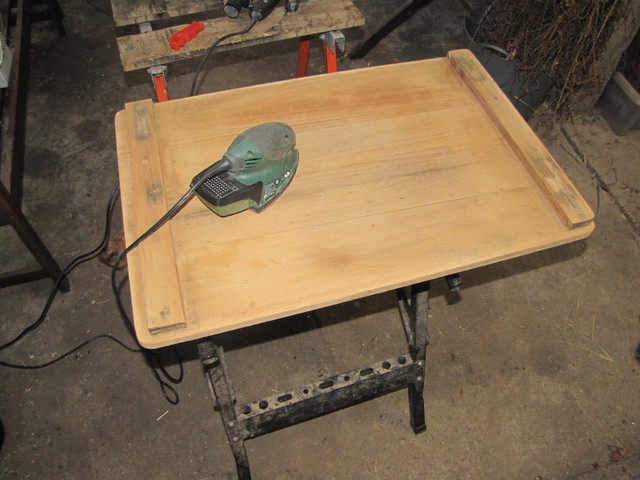
Then its on to the next step of refinishing - sanding off what the paint stripper left. I used an orbital sander that takes a third of a sheet of paper and a detailed sander. I used only coarse (40 grit) sandpaper at this stage. A breathing mask is a must or you cough this gunk up for days!
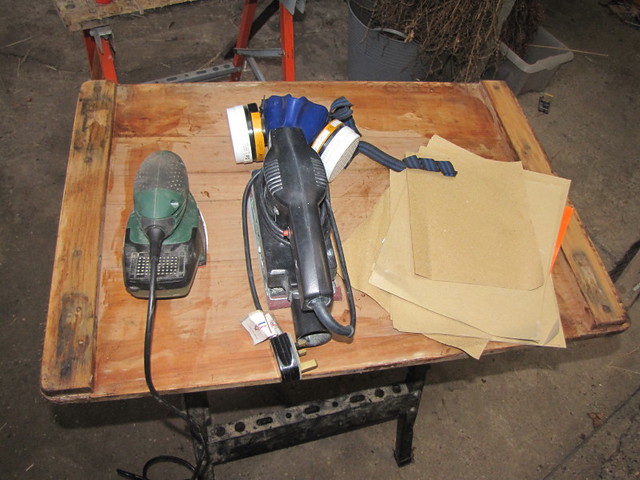
Sanders by British Red, on Flickr
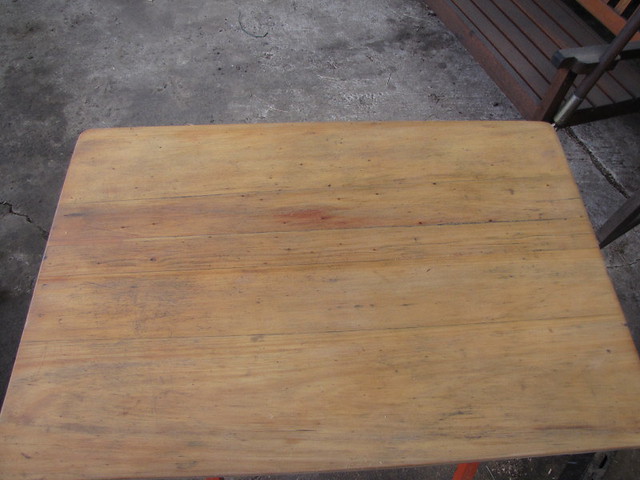
This is the bottom of the table top after coarse sanding
Bottom of table top rough sanded by British Red, on Flickr
I took this photo of the top during the sanding process - I think it shows the effect of sanding quite well
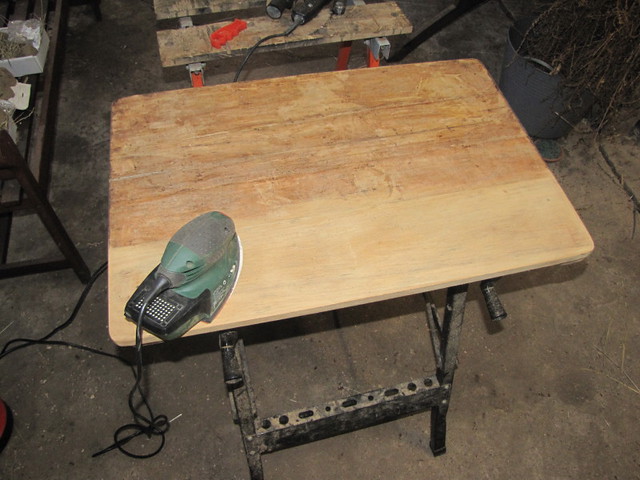
Top of table being rough sanded by British Red, on Flickr
...and the completion of the table top
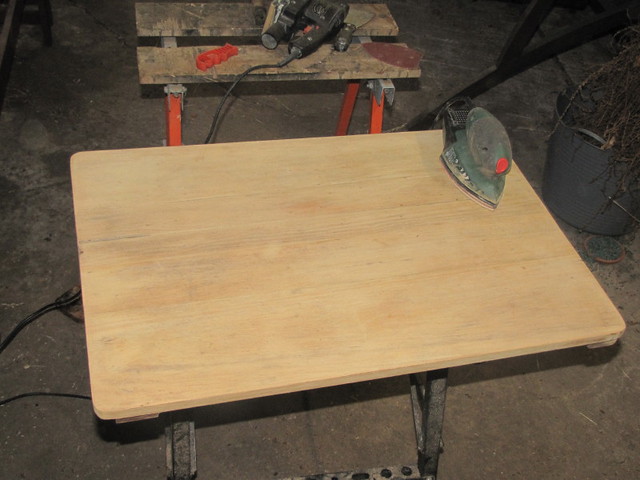
Top of table rough sanded by British Red, on Flickr
Having removed all of the gunk I can get at the wood and sort the woodworm out - three dousing coats of this stuff will sort it right out!
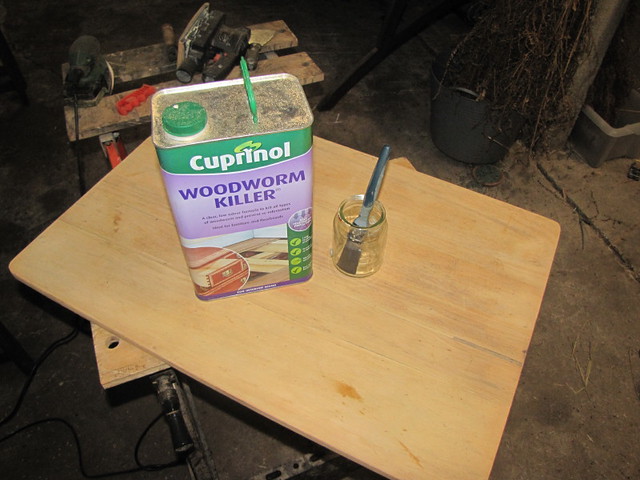
Woodworm killer by British Red, on Flickr
Woodworm killer being drenched on by British Red, on Flickr
The first coat is on - I'll do the rest over the next couple of days and give it a real chance to penetrate.
That's it for now!
Red
So having removed all the metal work from the wood, we are left with this
Woodwork with fittings removed by British Red, on Flickr
A lot better - but still badly stained in places
Roller Spring Shelf with fittings removed by British Red, on Flickr
Each piece of wood was given a second thick coat of stripper
Second coat of paint stripper by British Red, on Flickr
After 20 minutes this could be seen working on the gunk where the metal fittings had been
Gunk from fittings by British Red, on Flickr
Scraping away the stripper revealed considerably more staining removed
Scraping off second coat of paint stripper by British Red, on Flickr
A putty knife is good for getting into the detail areas
Stripping detail areas by British Red, on Flickr
Getting off the top layer showed how that brown gloss paint had been only painted on the top of each shelf - but had dripped :evil:
Careless paint drips by British Red, on Flickr
This is as good as I could get it with paint stripper
Then I remembered I had missed a bit of wood
Mangle handle by British Red, on Flickr
So I removed that and stripped the paint
Mangle handle stripped by British Red, on Flickr
Then its on to the next step of refinishing - sanding off what the paint stripper left. I used an orbital sander that takes a third of a sheet of paper and a detailed sander. I used only coarse (40 grit) sandpaper at this stage. A breathing mask is a must or you cough this gunk up for days!
Sanders by British Red, on Flickr
This is the bottom of the table top after coarse sanding
Bottom of table top rough sanded by British Red, on Flickr
I took this photo of the top during the sanding process - I think it shows the effect of sanding quite well
Top of table being rough sanded by British Red, on Flickr
...and the completion of the table top
Top of table rough sanded by British Red, on Flickr
Having removed all of the gunk I can get at the wood and sort the woodworm out - three dousing coats of this stuff will sort it right out!
Woodworm killer by British Red, on Flickr
Woodworm killer being drenched on by British Red, on Flickr
The first coat is on - I'll do the rest over the next couple of days and give it a real chance to penetrate.
That's it for now!
Red
Thank you Tengu & Steve - that's very kind (and I'm touched its worthy of a Drewism!)
There is a looong way to go yet - and plenty of time for me to stuff the job up
Sadly I am remarkably unskilled and don't have a craftsman's bone in my body
There is a looong way to go yet - and plenty of time for me to stuff the job up
Sadly I am remarkably unskilled and don't have a craftsman's bone in my body
Good choice - that's pretty much what I have decided - exterior grade gloss varnish in fact (gloss so any cloth sliding over it slips easily. exterior grade so that water doesn't penetrate).
Not a huge amount of progress today as other chores had focus. I did get a second coat of woodworm killer on though - it is changing the wood colour (although not in a bad way). Pictures to follow when treatment is complete.
In a half hour at the end of the day, I also managed to get a little more disassembly done
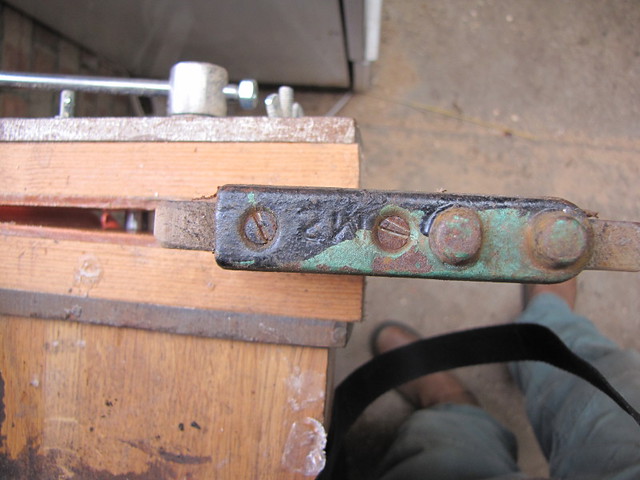
You will recall I have already removed the top roller. The bottom roller is held in place by crescent brackets shown here
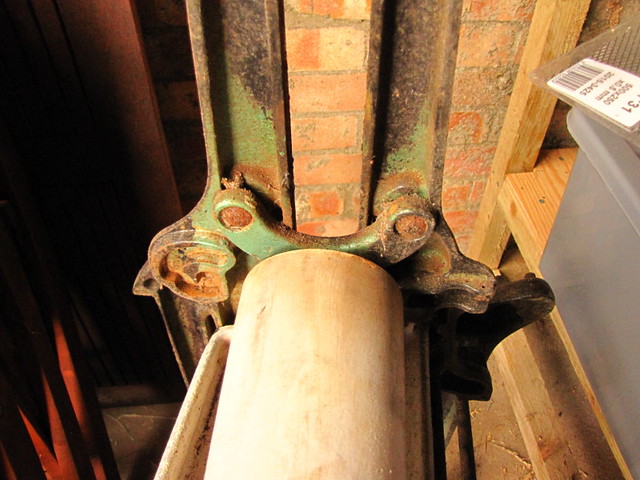
Bottom Roller Bracket by British Red, on Flickr
The nuts securing the coach bolts that hold these brackets in place are inconveniently situated behind the gears at the handle end
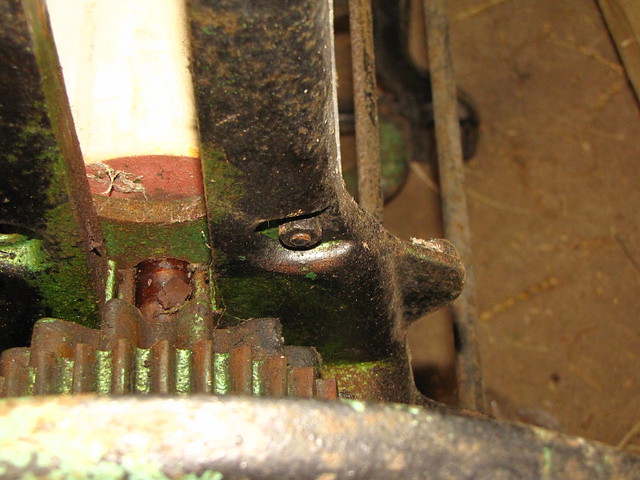
Bottom Roller Bracket Nut by British Red, on Flickr
Thankfully, with an extension bar on the socket set, I can just about reach them
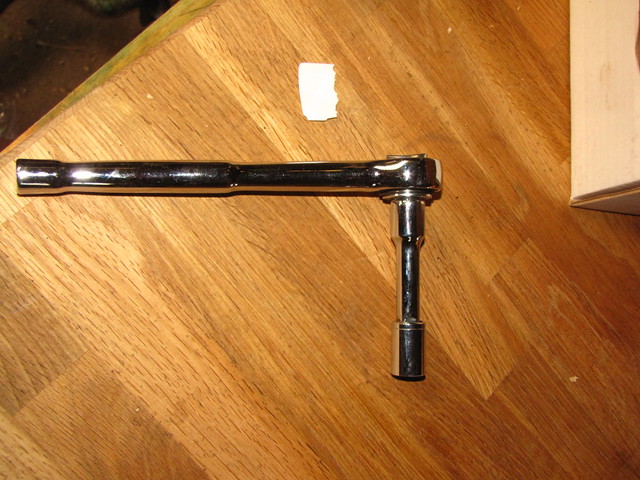
Socket set with extension bar by British Red, on Flickr
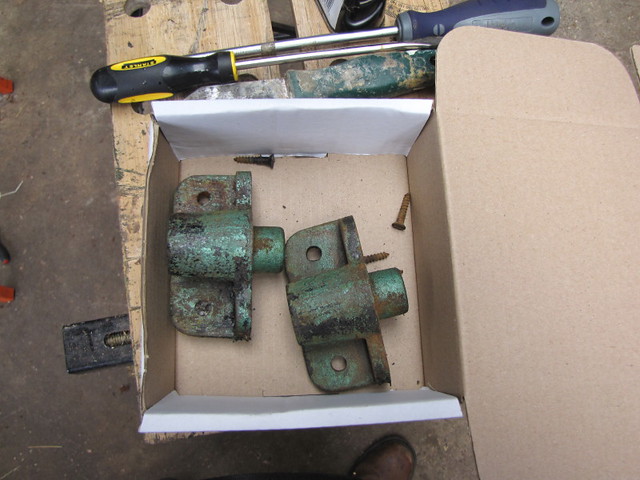
The brackets came away easily. You may notice they are stamped "M20". I'm fairly convinced that M is for Mangle and 20 is a standardised part number used by the "Pioneer Iron Works" owned by the Whittaker brothers from Accrington who made this beast.
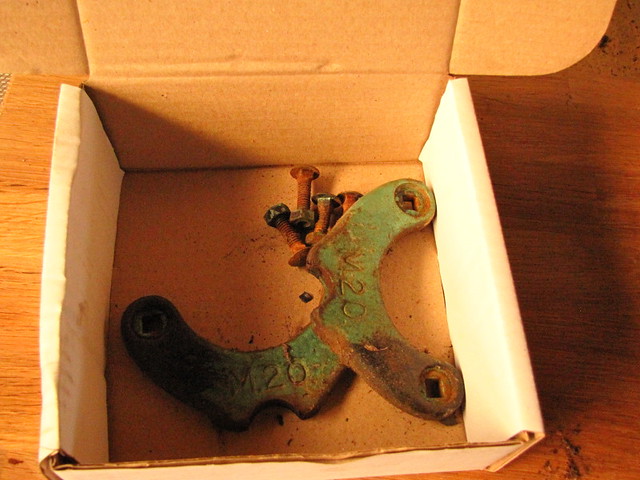
Bottom Roller Brackets by British Red, on Flickr
Both rollers and their attached cogs could now be lifted clear. Further disassembly of the rollers will be required later
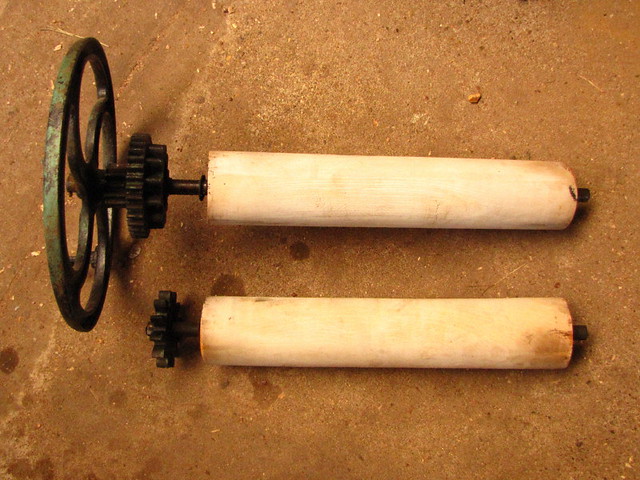
Rollers Removed by British Red, on Flickr
Interestingly, tapping the non geared end of the axle revealed that the section of axle inside the roller is square meaning that the wood "bites" on the metal and turns with the axle. With a decent lathe and a long enough drill bit, re-manufacturing the wood should be a straightforward task.
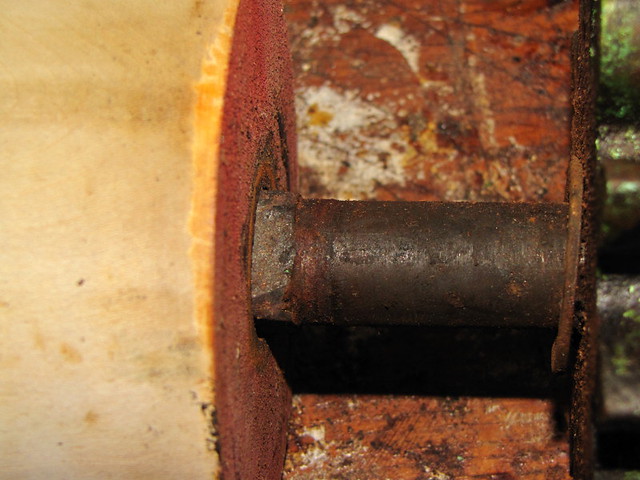
Roller attached to wood via square section by British Red, on Flickr
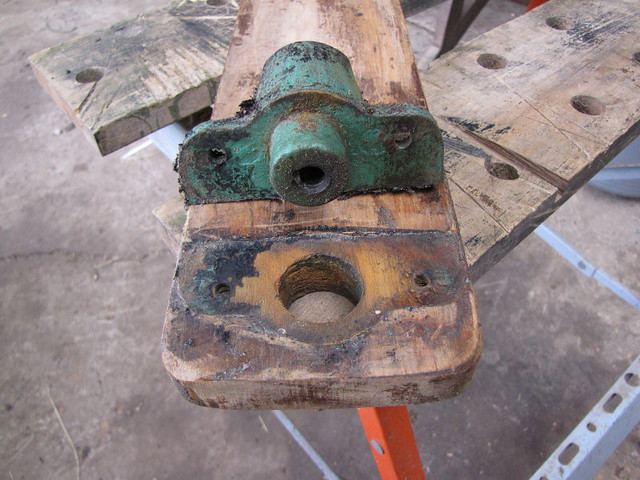
The bottom roller sits in an axle support that just lifts clear of the mangle frame
Bottom Roller Axle Support by British Red, on Flickr
Bottom Roller Axle Support removed by British Red, on Flickr
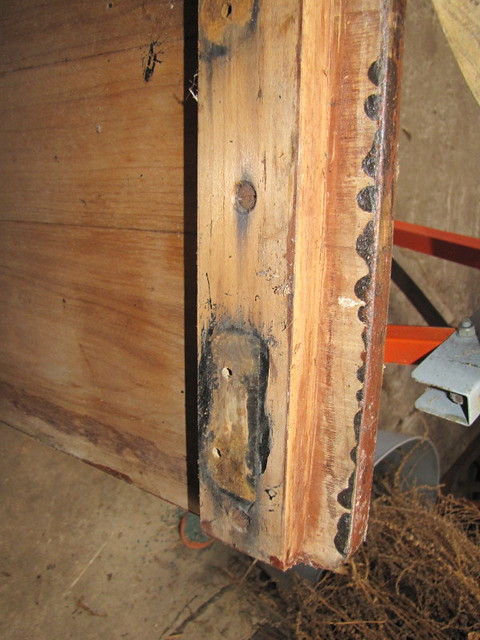
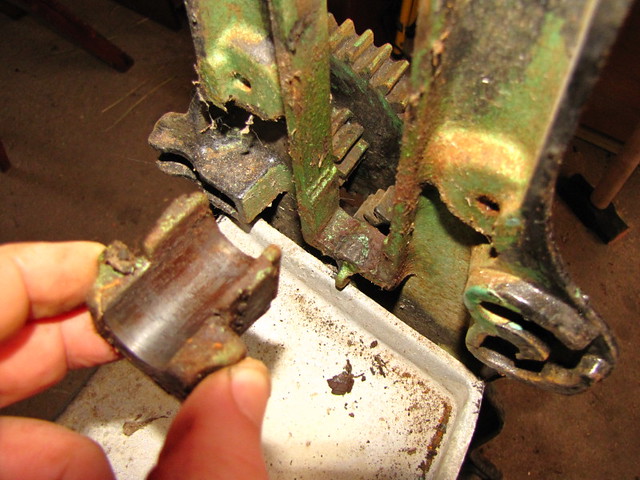
Underneath the bottom roller is the drip tray
Drip Tray by British Red, on Flickr
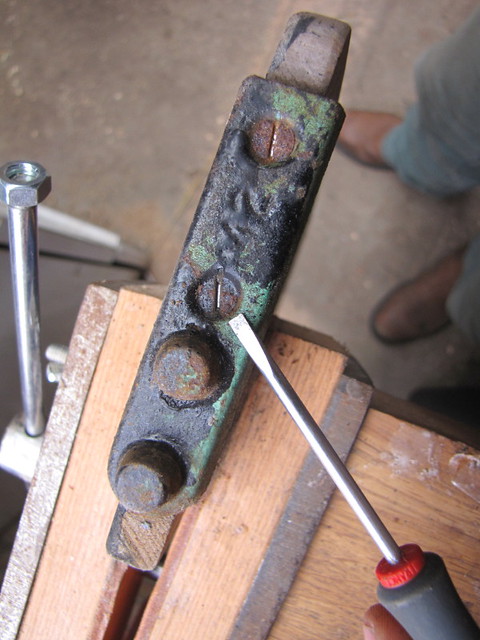
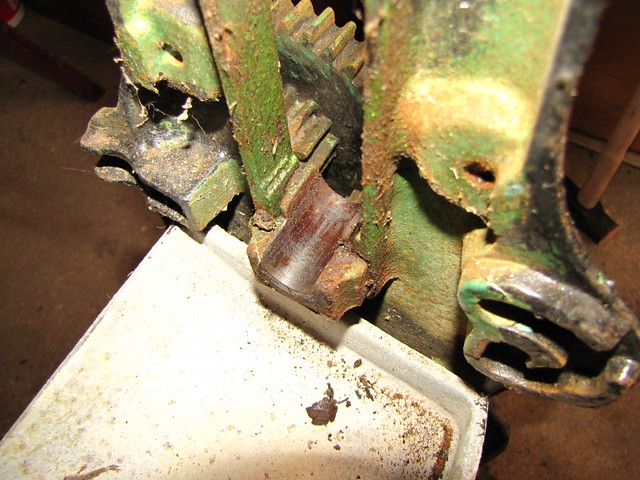
This is held in place by two coach bolts - in an even more awkward position!
You can probably just see the nut with a spanner attached here
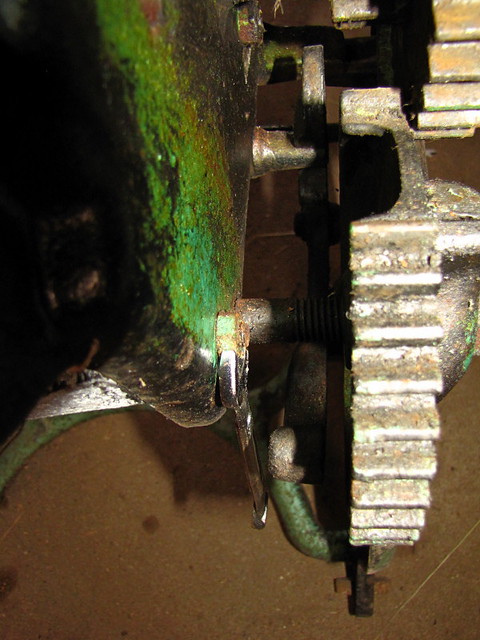
Coach Bolt Position for drip tray by British Red, on Flickr
Close up

Drip Tray coach bolt shown by spanner by British Red, on Flickr
It is doable with spanners - but would be impossible to reach with sockets
Note to self - get a set of imperial spanners as well!
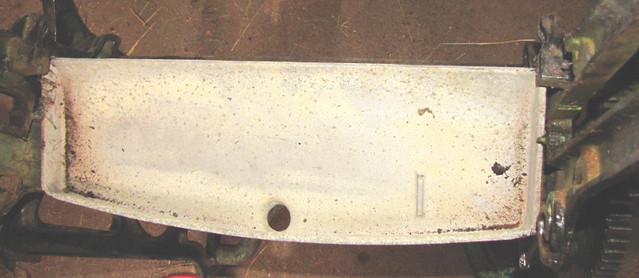
The drip tray eventually came out though
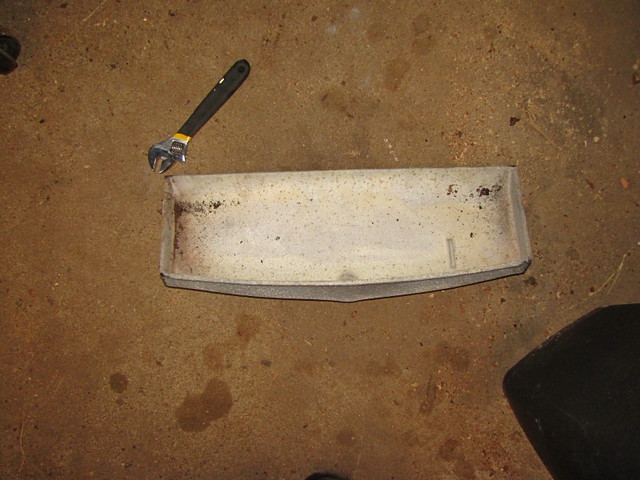
Drip Tray by British Red, on Flickr
The mangle carcass now looks like this
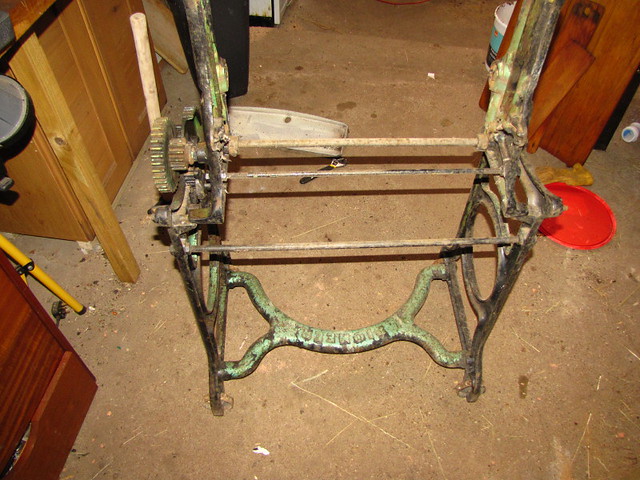
Mangle Carcas by British Red, on Flickr
...and the pile of component boxes is growing
Parts Boxes by British Red, on Flickr
Red
In a half hour at the end of the day, I also managed to get a little more disassembly done
You will recall I have already removed the top roller. The bottom roller is held in place by crescent brackets shown here
Bottom Roller Bracket by British Red, on Flickr
The nuts securing the coach bolts that hold these brackets in place are inconveniently situated behind the gears at the handle end
Bottom Roller Bracket Nut by British Red, on Flickr
Thankfully, with an extension bar on the socket set, I can just about reach them
Socket set with extension bar by British Red, on Flickr
The brackets came away easily. You may notice they are stamped "M20". I'm fairly convinced that M is for Mangle and 20 is a standardised part number used by the "Pioneer Iron Works" owned by the Whittaker brothers from Accrington who made this beast.
Bottom Roller Brackets by British Red, on Flickr
Both rollers and their attached cogs could now be lifted clear. Further disassembly of the rollers will be required later
Rollers Removed by British Red, on Flickr
Interestingly, tapping the non geared end of the axle revealed that the section of axle inside the roller is square meaning that the wood "bites" on the metal and turns with the axle. With a decent lathe and a long enough drill bit, re-manufacturing the wood should be a straightforward task.
Roller attached to wood via square section by British Red, on Flickr
The bottom roller sits in an axle support that just lifts clear of the mangle frame
Bottom Roller Axle Support by British Red, on Flickr
Bottom Roller Axle Support removed by British Red, on Flickr
Underneath the bottom roller is the drip tray
Drip Tray by British Red, on Flickr
This is held in place by two coach bolts - in an even more awkward position!
You can probably just see the nut with a spanner attached here
Coach Bolt Position for drip tray by British Red, on Flickr
Close up
Drip Tray coach bolt shown by spanner by British Red, on Flickr
It is doable with spanners - but would be impossible to reach with sockets
Note to self - get a set of imperial spanners as well!
The drip tray eventually came out though
Drip Tray by British Red, on Flickr
The mangle carcass now looks like this
Mangle Carcas by British Red, on Flickr
...and the pile of component boxes is growing
Parts Boxes by British Red, on Flickr
Red
Not decided yet Steve, may just use paint stripper and a wire brush...
Think my mate has a grit blaster though.....its a good thought!
Think my mate has a grit blaster though.....its a good thought!
I'm guessing that the removable buttons picks up on something similat Toddy mentioned earlier.
If you pm me an address, I'll put one in the post. No idea where to get them, my boiler suit is at least 50 years old.
Step 6 - Filling Woodworm Holes
The woodworm treatment is complete now, so its time to "make good" the woodwork. The woodworm treatment had raised the grain of the wood so first step was to rub back the wood to 120 grit

Sand to 120 by British Red, on Flickr
When you see the dust like that, you understand why you must wear respiratory protection
I selected antique pine coloured wood filler (given this is antique pine)
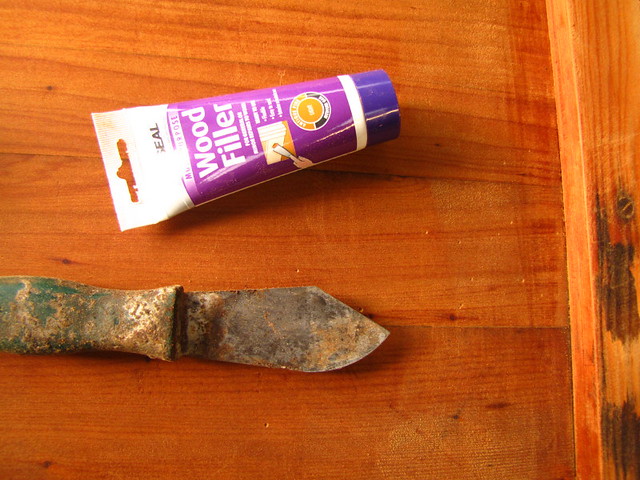
Fill woodworm holes by British Red, on Flickr
A light smear was pushed over each hole and left to dry
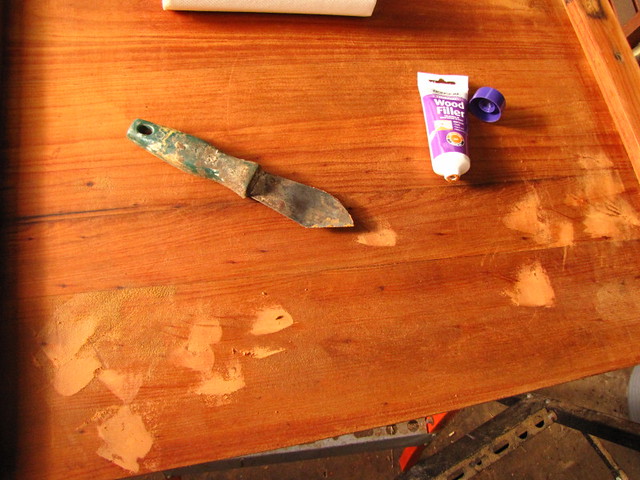
Woodworm holes filled by British Red, on Flickr
The wood was then sanded back to 240 grit
Sanded back to 240 by British Red, on Flickr
The wood was then brushed off and wiped down with white spirit
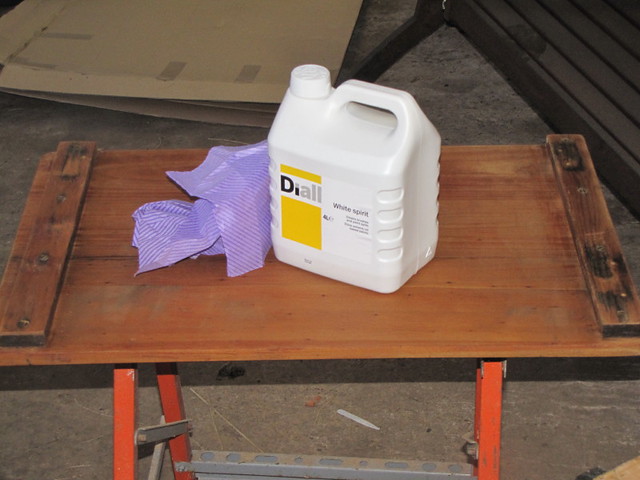
Wipe down with white spirit by British Red, on Flickr
As you can see from the rag, despite a good brush, dust still adheres. The white spirit degreases well too.
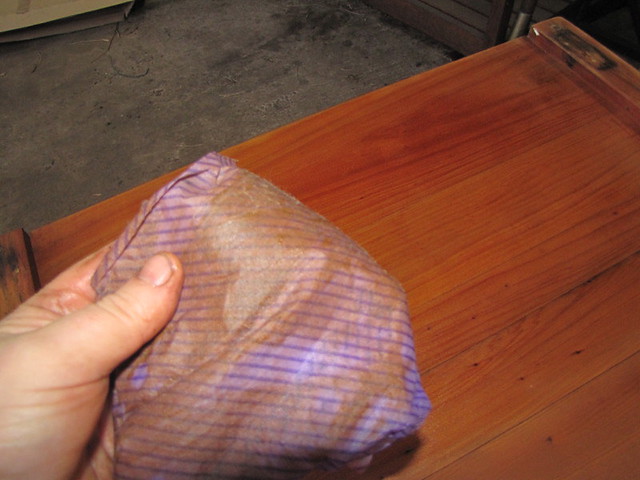
Wood dust lifted by British Red, on Flickr
I have put a light coat of exterior grade varnish on the wood and left to dry overnight (sorry about the lighting - I was working under site lights)
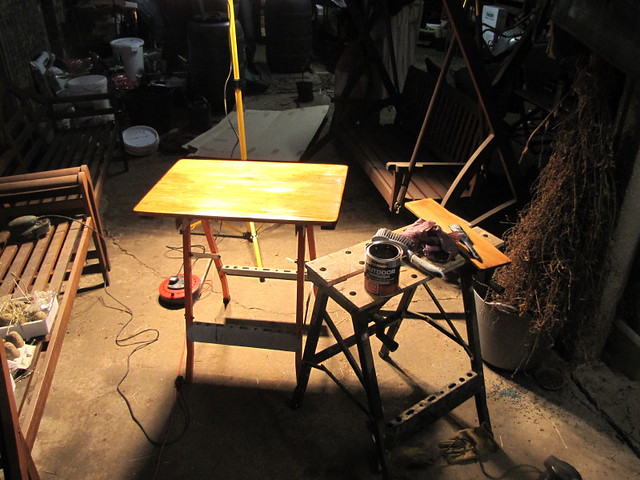
First coat of varnish by British Red, on Flickr
The woodworm treatment is complete now, so its time to "make good" the woodwork. The woodworm treatment had raised the grain of the wood so first step was to rub back the wood to 120 grit
Sand to 120 by British Red, on Flickr
When you see the dust like that, you understand why you must wear respiratory protection
I selected antique pine coloured wood filler (given this is antique pine
)Fill woodworm holes by British Red, on Flickr
A light smear was pushed over each hole and left to dry
Woodworm holes filled by British Red, on Flickr
The wood was then sanded back to 240 grit
Sanded back to 240 by British Red, on Flickr
The wood was then brushed off and wiped down with white spirit
Wipe down with white spirit by British Red, on Flickr
As you can see from the rag, despite a good brush, dust still adheres. The white spirit degreases well too.
Wood dust lifted by British Red, on Flickr
I have put a light coat of exterior grade varnish on the wood and left to dry overnight (sorry about the lighting - I was working under site lights
)First coat of varnish by British Red, on Flickr
Step 7 - Cleaning up small metal parts
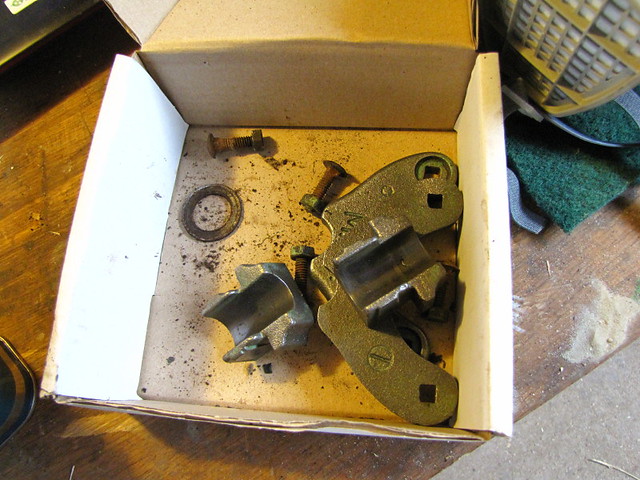
Whilst the filler was drying on the woodwork, I had time to clean up some of the smaller metal parts that I had already removed
The first step was to use a degreaser to remove any grease and filth
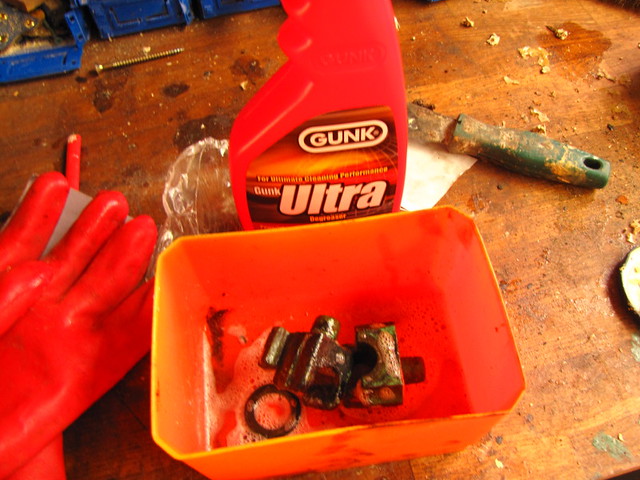
Degreasing with gunk by British Red, on Flickr
The parts were then covered in strong paint stripper and left for 30 minutes

Paintstripper on spring brackets by British Red, on Flickr
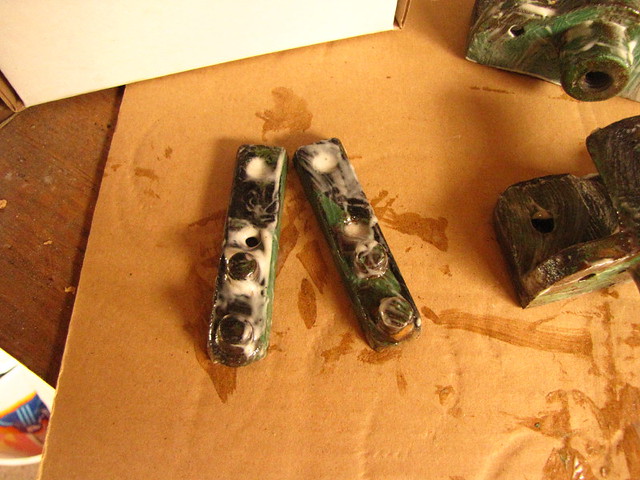
Paintstripper on shelf brackets by British Red, on Flickr
Blistered paint was scraped off with a shaped paint scraper - these are great tools, the combination of straigh, convex, concave edges and points helps hug the contours of the parts
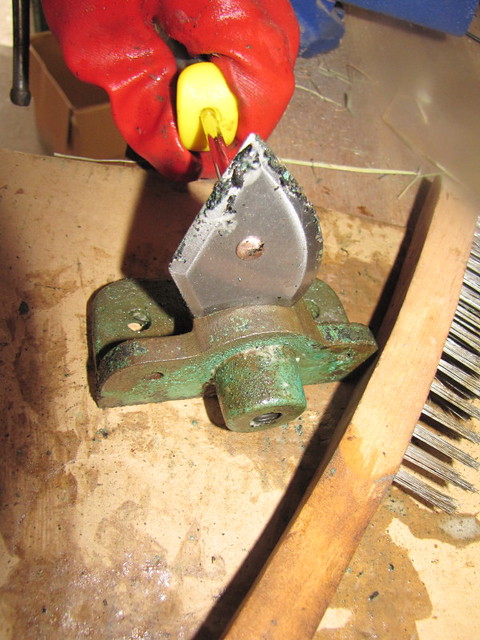
Shaped paint scraper by British Red, on Flickr
A variety of wire brushes also help to get into nooks and crannies
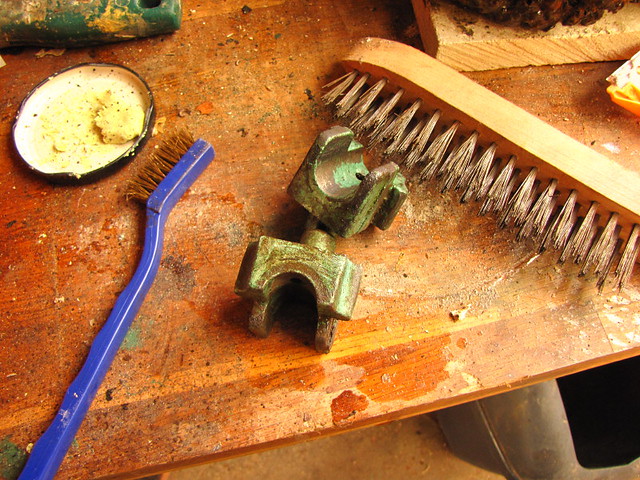
Wire brushing by British Red, on Flickr
When all the blistered paint was removed, the parts were washed in hot soapy water. I then fitted a wire wheel to my drill press

Wire wheel in pillar drill by British Red, on Flickr
This is great for removing all the stubborn green primer
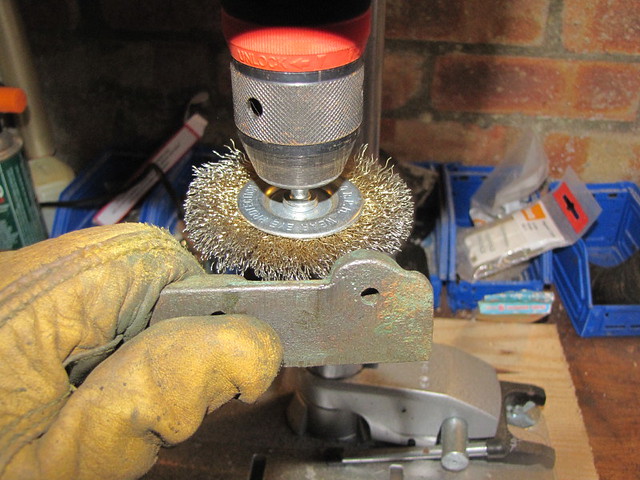
Removing paint and rust by British Red, on Flickr

Paint removed from spring bracket by British Red, on Flickr
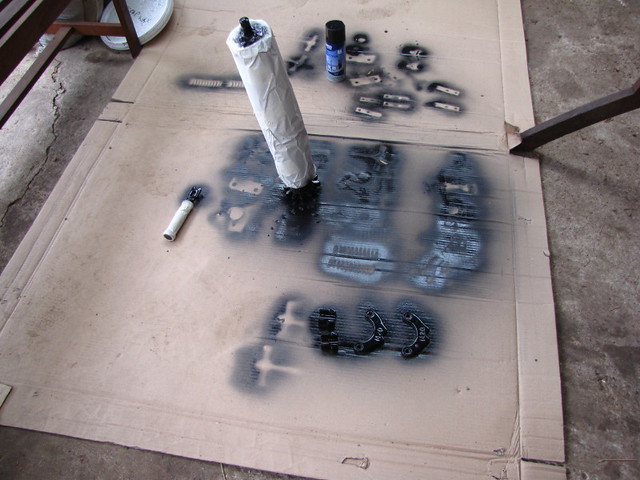
Having taken these parts back to bare metal, they were laid out on some cardboard
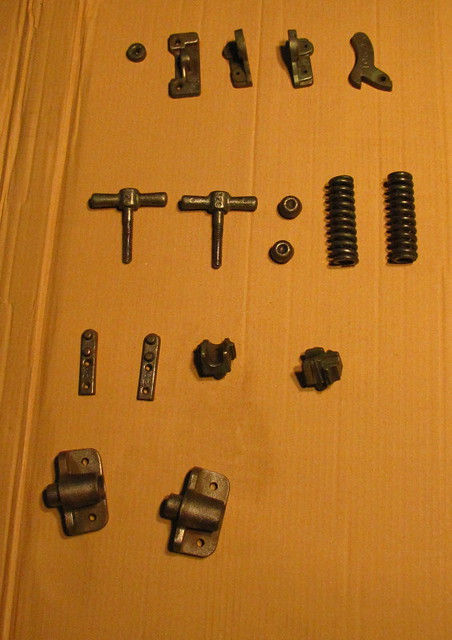
Bare metal parts laid out for spraying by British Red, on Flickr
...and given a first spray of black metal paint (and left to dry overnight)
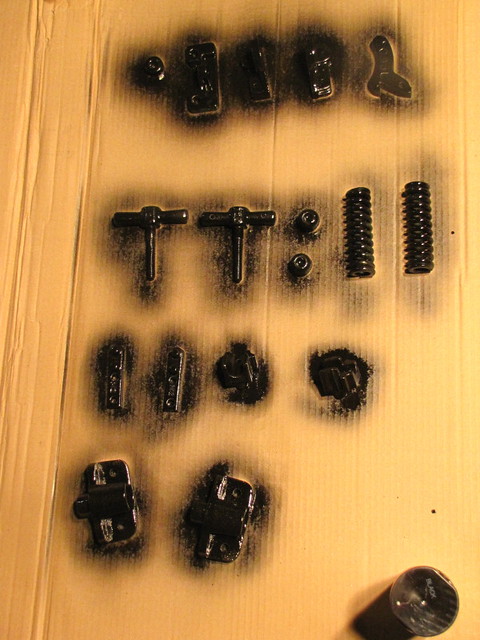
First coat sprayed by British Red, on Flickr
Its now a question of spraying multiple coats of metal paint and painting on coats of varnish onto the woodwork before re-assembling the wooden parts - I can then proceed with stripping the next parts down.
Red
Whilst the filler was drying on the woodwork, I had time to clean up some of the smaller metal parts that I had already removed
The first step was to use a degreaser to remove any grease and filth
Degreasing with gunk by British Red, on Flickr
The parts were then covered in strong paint stripper and left for 30 minutes
Paintstripper on spring brackets by British Red, on Flickr
Paintstripper on shelf brackets by British Red, on Flickr
Blistered paint was scraped off with a shaped paint scraper - these are great tools, the combination of straigh, convex, concave edges and points helps hug the contours of the parts
Shaped paint scraper by British Red, on Flickr
A variety of wire brushes also help to get into nooks and crannies
Wire brushing by British Red, on Flickr
When all the blistered paint was removed, the parts were washed in hot soapy water. I then fitted a wire wheel to my drill press
Wire wheel in pillar drill by British Red, on Flickr
This is great for removing all the stubborn green primer
Removing paint and rust by British Red, on Flickr
Paint removed from spring bracket by British Red, on Flickr
Having taken these parts back to bare metal, they were laid out on some cardboard
Bare metal parts laid out for spraying by British Red, on Flickr
...and given a first spray of black metal paint (and left to dry overnight)
First coat sprayed by British Red, on Flickr
Its now a question of spraying multiple coats of metal paint and painting on coats of varnish onto the woodwork before re-assembling the wooden parts - I can then proceed with stripping the next parts down.
Red
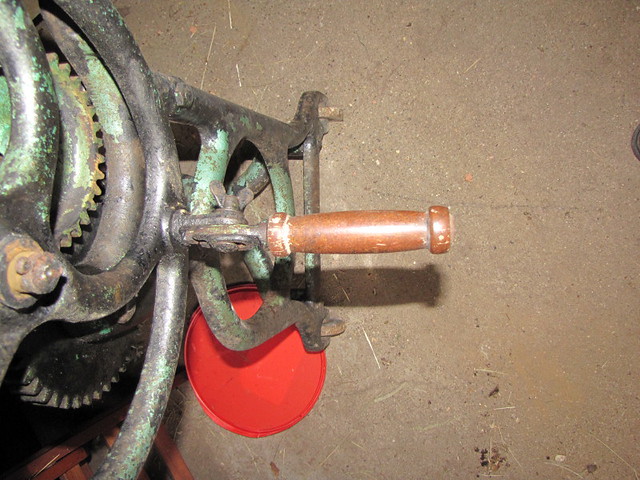
Got to spend a little more time on this today, stripping apart the rollers and cleaning up the metal work
Bottom roller brackets by British Red, on Flickr

Mangle handle stripped by British Red, on Flickr
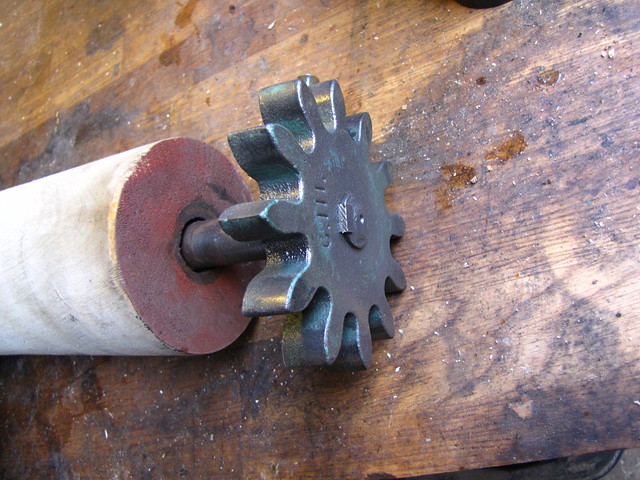
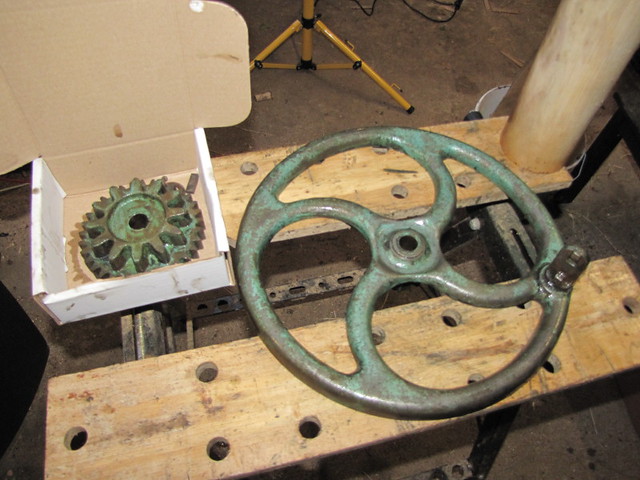
Top roller cog by British Red, on Flickr
This is the roller with the wood all masked with paper for spraying

Roller masked for spraying by British Red, on Flickr
...and masking tape on the handle woodwork
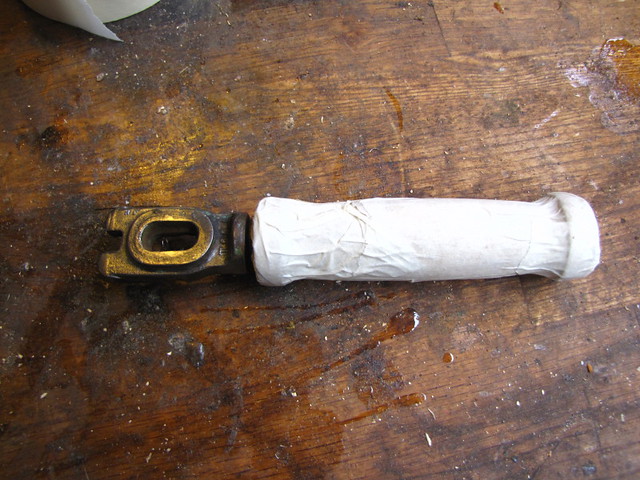
Mangle handle masked up by British Red, on Flickr
Again paint was holding parts together...so out with paint stripper
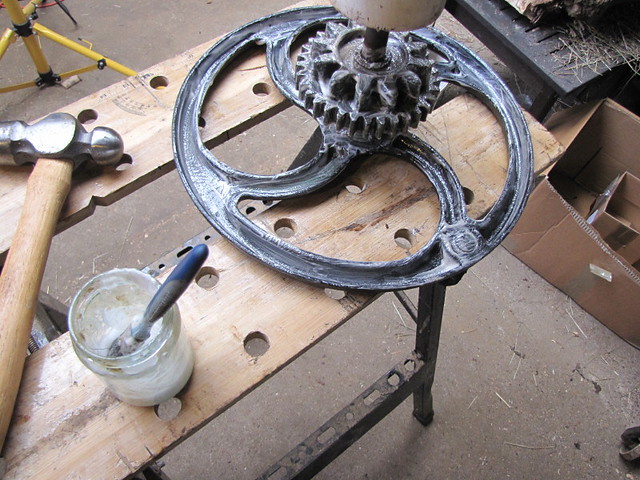
Paint stripper on mangle handle by British Red, on Flickr
Pull the cotter pin
Part stripped mangle handle by British Red, on Flickr
Retaining key on cog / handle by British Red, on Flickr
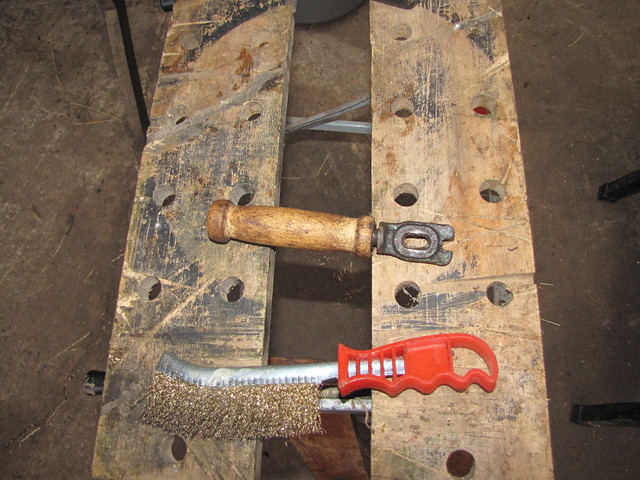
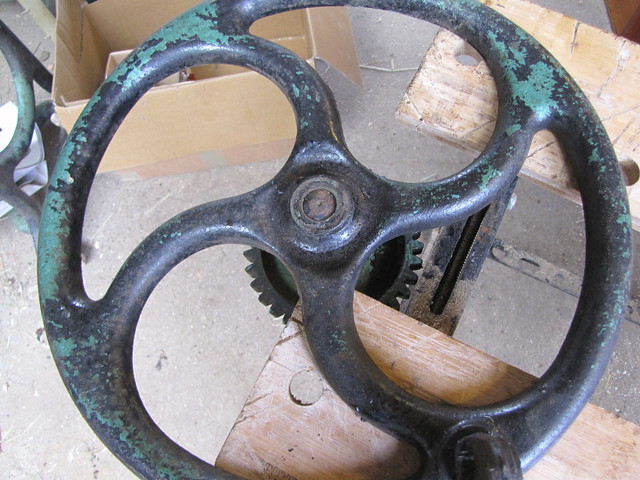
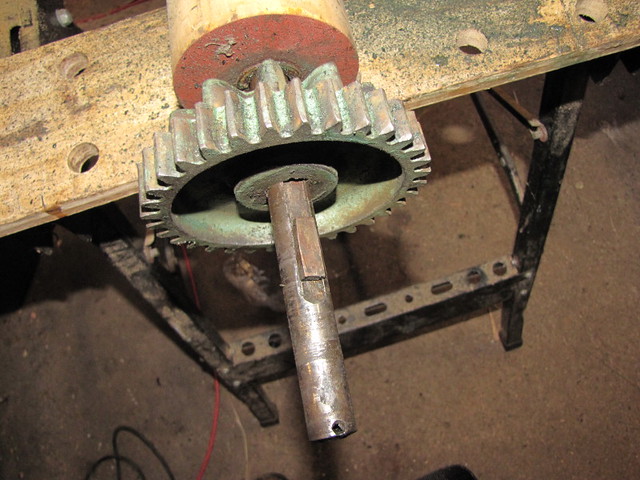
Slide off the mangle handle
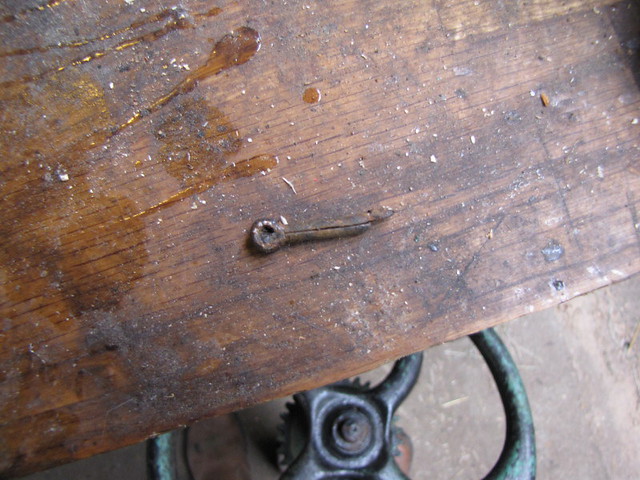
Removed cotter pin by British Red, on Flickr
...being sure to catch the little "block" that locks the cog onto the handle...not sure of the proper word for that?
Mangle Wheel disassembly by British Red, on Flickr
More stripping and spraying next
Spraying parts by British Red, on Flickr
Bottom roller brackets by British Red, on Flickr
Mangle handle stripped by British Red, on Flickr
Top roller cog by British Red, on Flickr
This is the roller with the wood all masked with paper for spraying
Roller masked for spraying by British Red, on Flickr
...and masking tape on the handle woodwork
Mangle handle masked up by British Red, on Flickr
Again paint was holding parts together...so out with paint stripper
Paint stripper on mangle handle by British Red, on Flickr
Pull the cotter pin
Part stripped mangle handle by British Red, on Flickr
Retaining key on cog / handle by British Red, on Flickr
Slide off the mangle handle
Removed cotter pin by British Red, on Flickr
...being sure to catch the little "block" that locks the cog onto the handle...not sure of the proper word for that?
Mangle Wheel disassembly by British Red, on Flickr
More stripping and spraying next
Spraying parts by British Red, on Flickr
Last edited:
Nice progress on the restoration.
Incidentally the little 'block' that locks the gear wheel onto the handle is called a key.
Incidentally the little 'block' that locks the gear wheel onto the handle is called a key.
Similar threads
- Replies
- 7
- Views
- 375
- Replies
- 18
- Views
- 1K
- Replies
- 0
- Views
- 156
- Replies
- 30
- Views
- 513
- Replies
- 19
- Views
- 1K