Red & BBs retirement home......
- Thread starter British Red
- Start date
-
BushMoot: Come along to the amazing Summer Moot 31st July - 5th August (extended Moot : 27th July - 8th August), a festival of bushcrafting and camping in a beautiful woodland PLEASE CLICK HERE for more information.
You are using an out of date browser. It may not display this or other websites correctly.
You should upgrade or use an alternative browser.
You should upgrade or use an alternative browser.
I can't believe I have never seen this thread before! Its just taken me a couple of days to go through it all but boy am I jealous Red.
I've seen a few great pictures of your place on other threads and have been amazed by how good the pictures look and how amazing the subject is but to see how you have accomplished all that in only a few years is mind blowing.
I love the way you experiment and document it on this site it makes really interesting topics and so much information to take away.
Anyway thankyou for all these posts and keep up the good work, I only hope I can build something similar one day.
If you ever need some muscle for a job give me a shout I would happily exchange a days labor for a tour of your place.
Alex
Kind of you to say! I may just take you up on that....especially when I have firewood to split ") Gets old after the first day!
Gets old after the first day!
Gets old after the first day!So....exterior renovations. This is what has been keeping us busy lately!
A little bit of background first.
When we moved the steading was in.....**** state!
First I present....the old pigsties
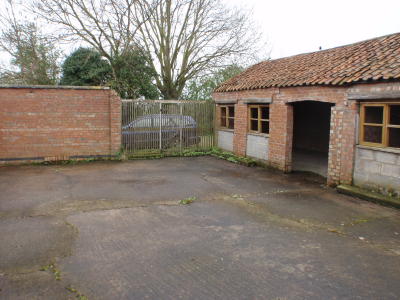
Outbuilding 2 (back to ruined building) by British Red, on Flickr
Note please the amateur blockwork, lack of a door and weirdly, some form of window frames without windows. Because its low, but had a fairly intact walls and roof, this was selected as a secure tool shed. Note also the weird gate (that didn't open) made of roofling laths.
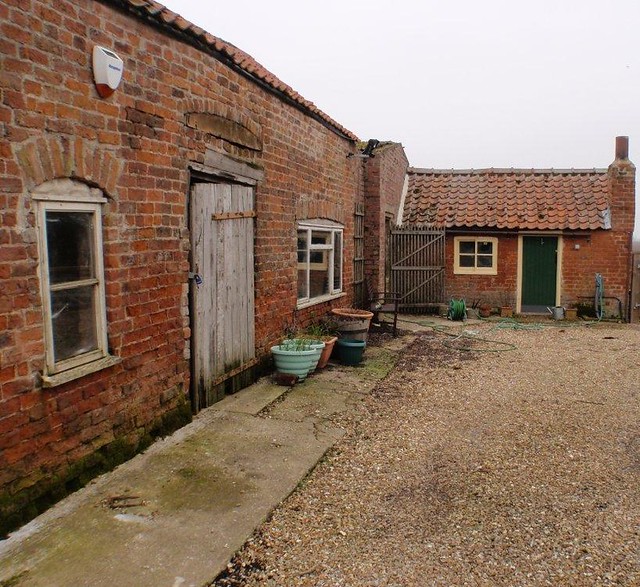
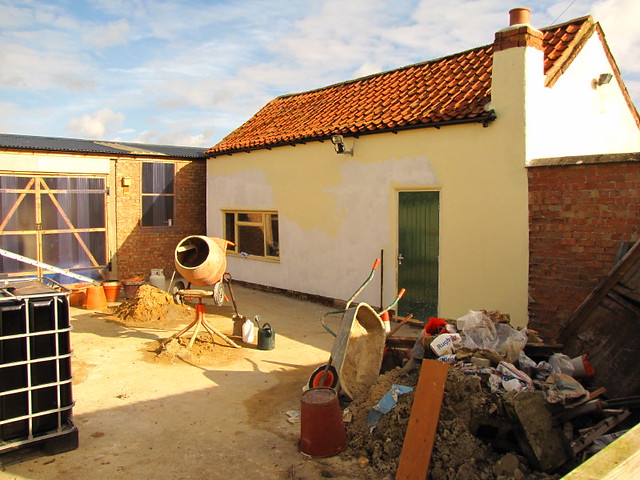
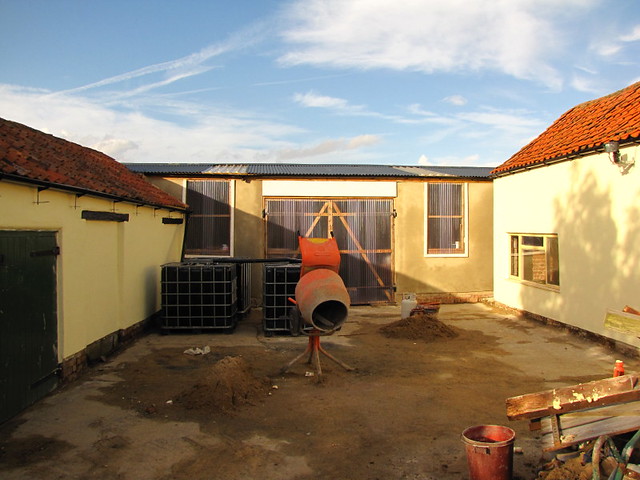
Next the ruined building - destroyed courtesy of a fire the previous owners caused.

Coutryard (Outbuilding 2 on left) by British Red, on Flickr
Two more outbuildings - the large one on the left is a two story barn. the green door at the end is the brew house. Pay particular note to the blown brick facings on the windowed barn...every frost more brick fell off where the frost got in!
So, the first thing we did was to make a place to secure tools. To do this we decided to block up the "windows" on the tool shed and install a very solid door
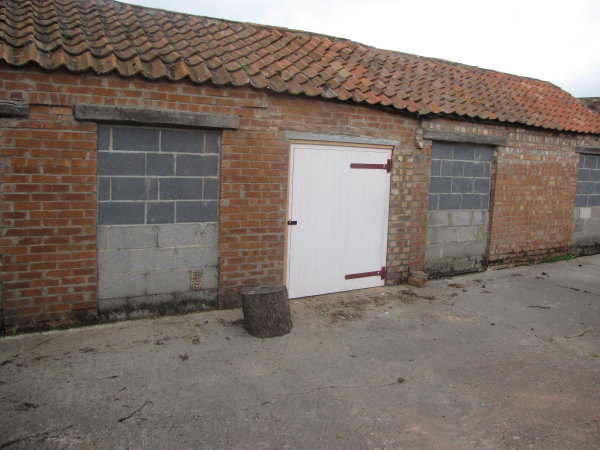
Secured barn by British Red, on Flickr
We added a drop bar and high security padlock

Padlock and hasp by British Red, on Flickr
To be extra secure we added alarm links to the main house alarm

Door Contacts by British Red, on Flickr
Ground anchors for large equipment
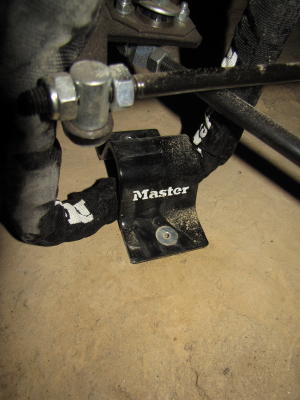
Floor Anchor by British Red, on Flickr
Lights and CCTV
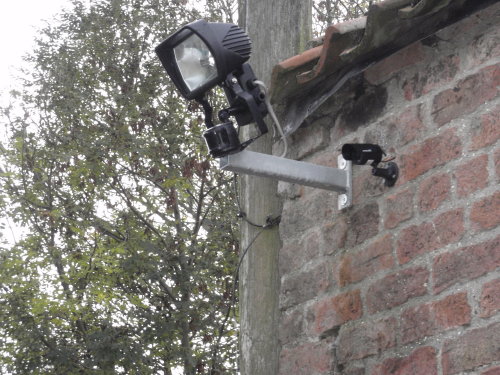
CCTV & flood light by British Red, on Flickr
Now that might seem a little overkill but people do "target" rural outbuildings - and we need our tools! Doesn't cost a lot to make it very hard to steal. On that note we also replaced the daft yard gates with a proper, locked, five bar gate

Yard Gate by British Red, on Flickr
We secured this with a quality lock and also anti lift devices
IMG_3122 by British Red, on Flickr
Other jobs we did at this point were to concrete a ramp in at the yard gate (there was a lip before) and run power and light to all the outbuildings
Barn light & power by British Red, on Flickr
That was the winter task a couple of years back.
Last year we fixed up the ruined barn

Ruined Outbuilding by British Red, on Flickr
Its only single skin brick and we wanted it as a dry workspace. So nothing too fancy done - just a large roof, clear plastic doors, power and light
Barn Doors by British Red, on Flickr
Cleaned out barn by British Red, on Flickr
Completed rainwater system by British Red, on Flickr
That brings us to this year.
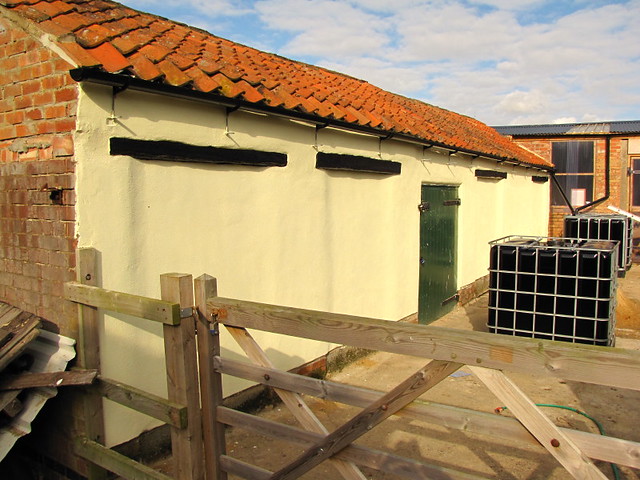
This year we decided to fix the last of the doors, fix structural defects to the remaining barn and sort out the crumbling brickwork.
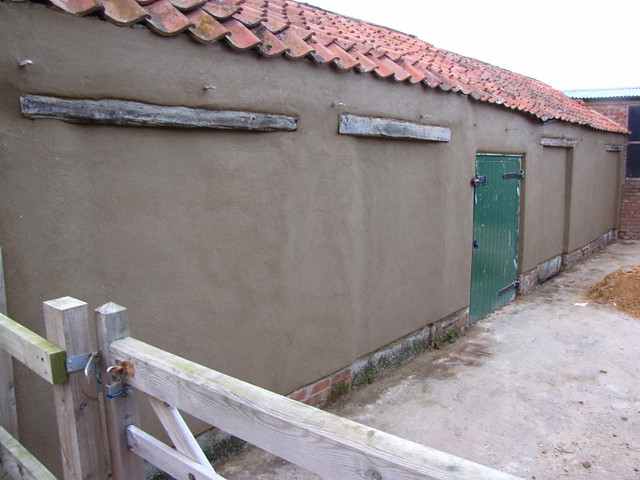
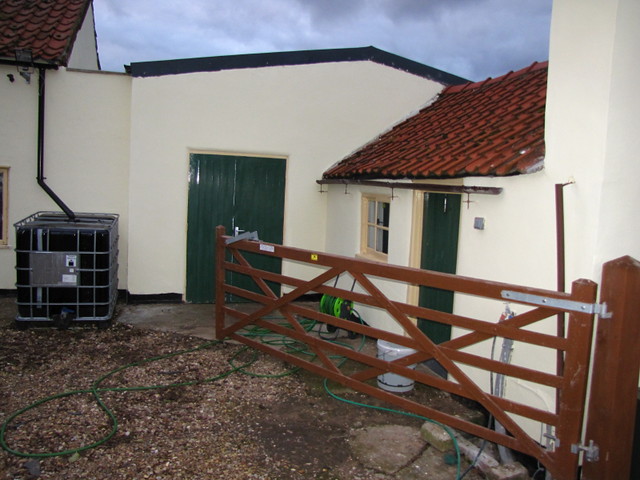
First off check out the rotten barn door on the left
Steading by British Red, on Flickr
The pevious idiot had put in that door - without an RSJ to hold the **** wall up :shock: .
So new concrete joist in and brockwork sorted
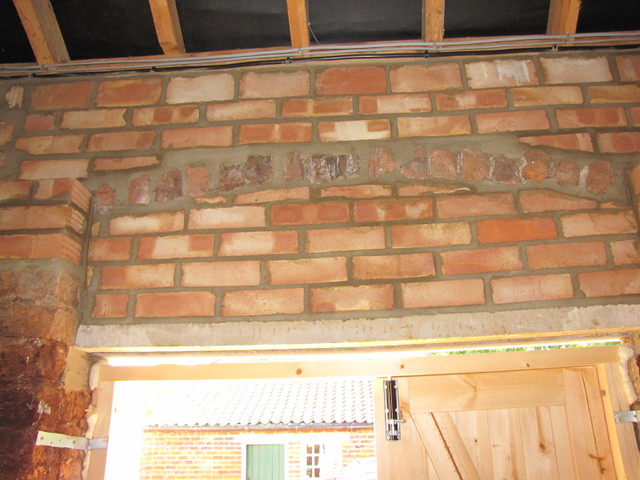
IMG_8099 by British Red, on Flickr
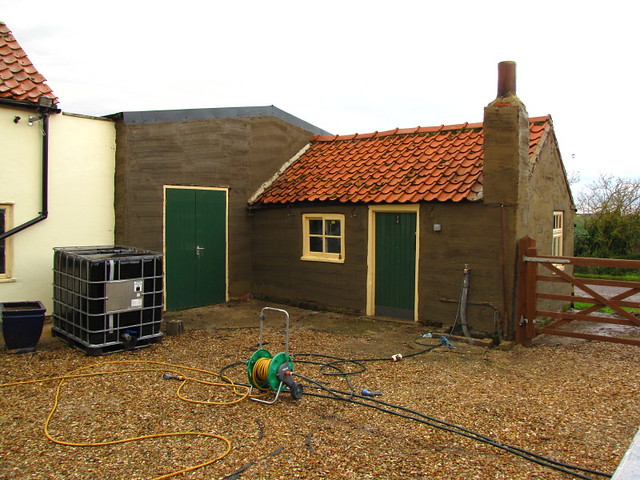
New pedestrian door to the yard
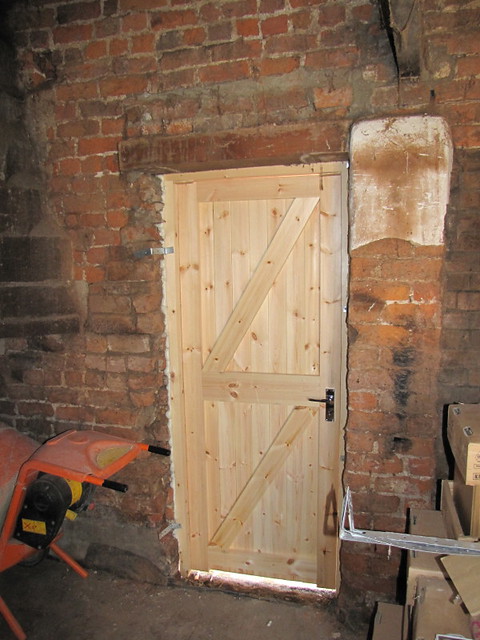
New pedestrian door by British Red, on Flickr
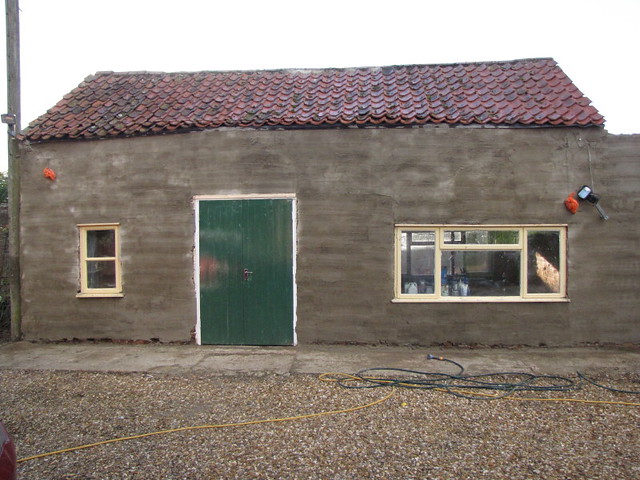
and new double doors to drive

Replacement double doors by British Red, on Flickr
(You can see well in the photo above how far gone the bricks are).
A couple of badly done and broken windows were blocked up
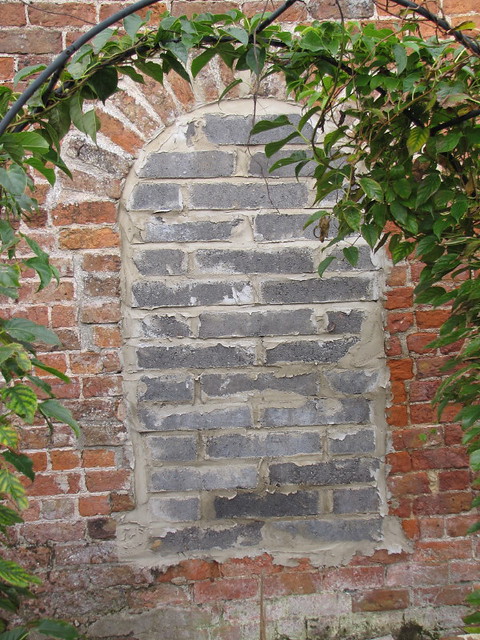
Arched window blocked up by British Red, on Flickr
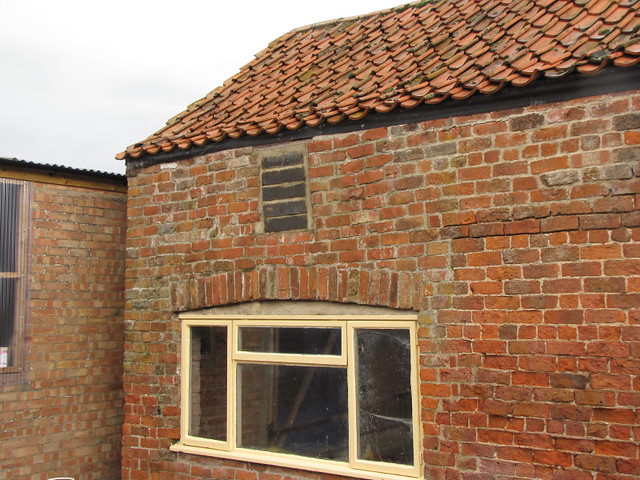
Top Window blocked up by British Red, on Flickr
Then I demounted all the lights, alarms, cameras etc.
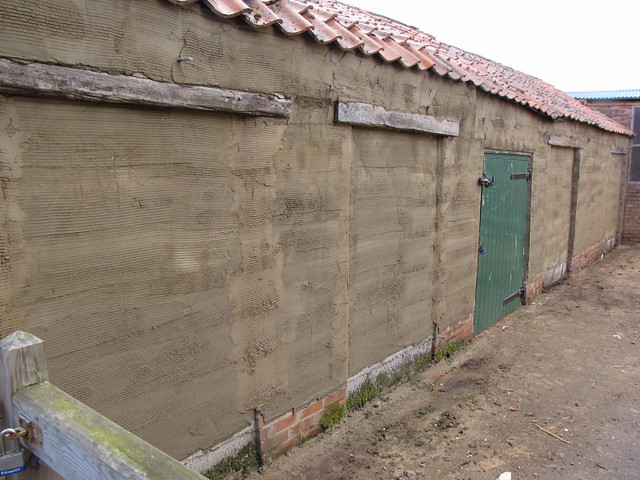
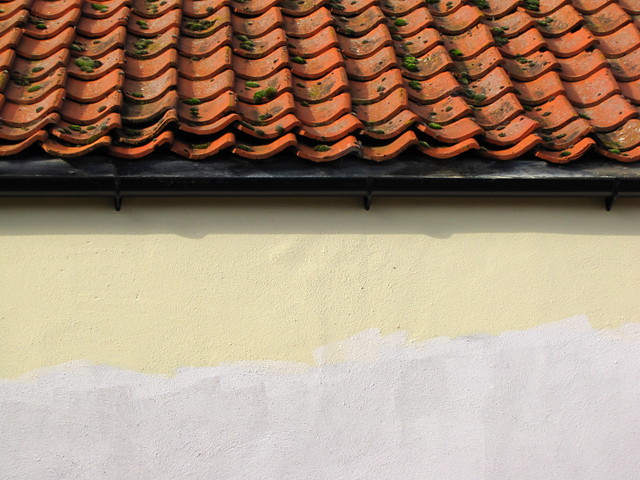
And Simon turned up to sort the rendering to protect the brick
This is the first (scratch) coat going on.

Scratch coat on barn by British Red, on Flickr
Note the render doesn't reach to the floor - this is to prevent water "wicking" up
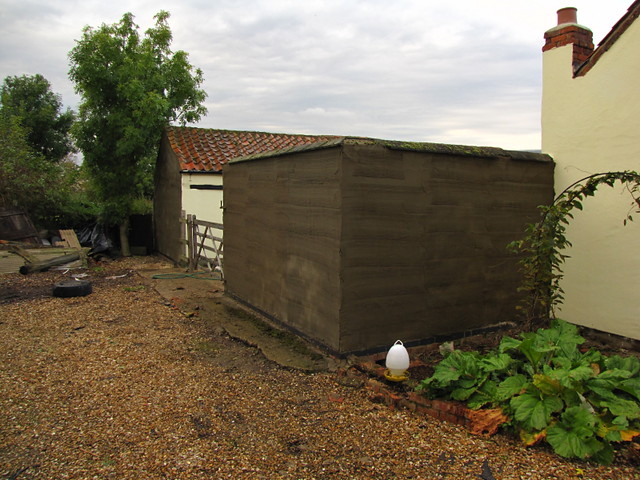
A second (finish) coat goes on top
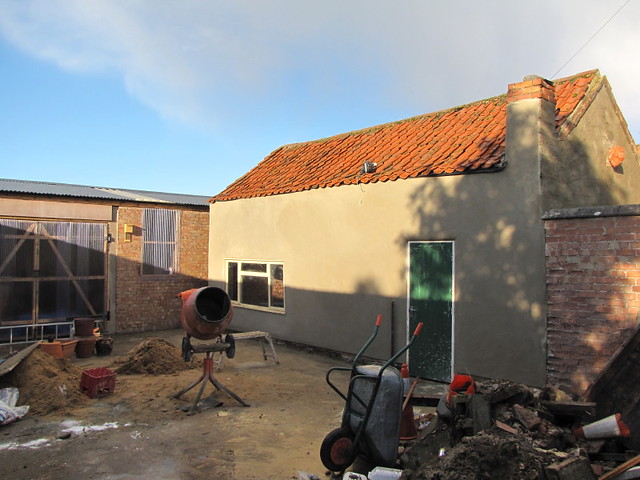
Finish coat on barn by British Red, on Flickr
Then repeat....over the windowed barn and toolshed. We planned to do just these two buildings as they were the ones needeing protection.
If you notice the studs out of the wall in this picture, they are gutter brackets as we have guttered the buildings to protect the render and to harvest rainwater
Scratch coat on tool shed by British Red, on Flickr
Scratch coat on barn by British Red, on Flickr

Finish coat on barn by British Red, on Flickr
Finish coat on gable end by British Red, on Flickr
Finish coat on tool shed by British Red, on Flickr

Finish coat on barn by British Red, on Flickr
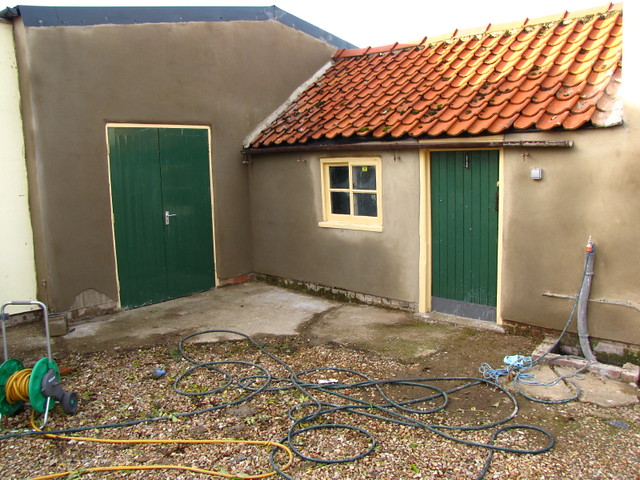
Thats the render on. We then primed the walls and applied two coats of Sandtex.
Priming on barn - IBC in place by British Red, on Flickr
You will notice in this picture that guttering has gone up and there is an IBC tank in place for rainwater capture. All the IBC tanks have been painted in bitumen to prtect them and stop algae forming.
Clearly we painted the walls before putting up the gutters!
Paint behind guttering by British Red, on Flickr
We used bitumen paint on the old wooden lintels of the tool shed - and lashing of bitumen on IBC tanks
Tool shed primed by British Red, on Flickr
We also fixed up the chimney in the windowed barn
Barn primed (with chimney pot) by British Red, on Flickr
I started putting the security lights etc back up
Barn Primed by British Red, on Flickr
Then we started thinking " well - it looks nice....but the outbuildings we haven't done don't look as good". So a quick phone call to Simon, a deep breath and we started on the rest!
Brew House by British Red, on Flickr
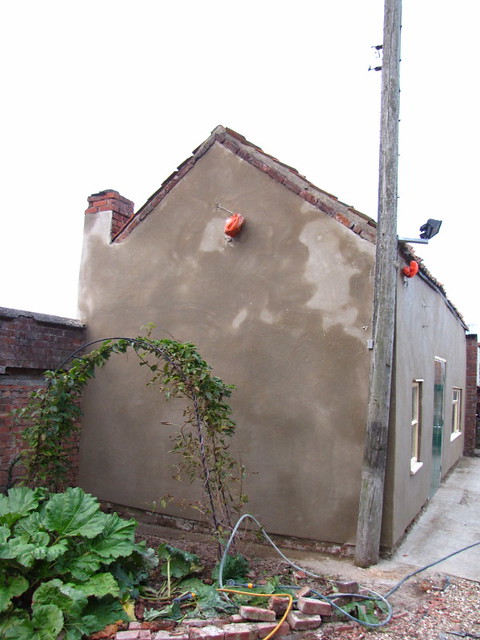
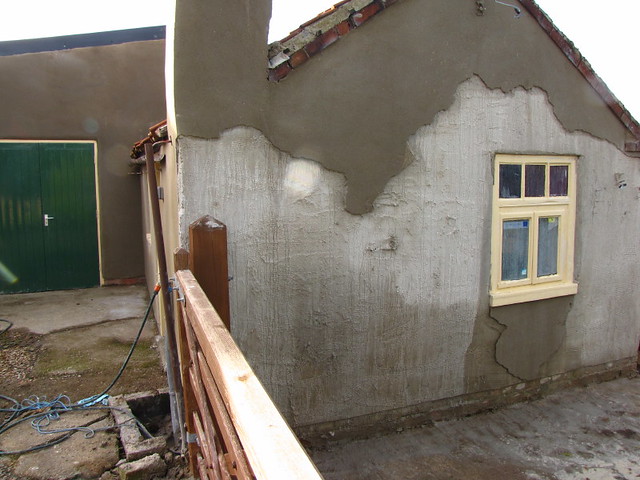
Wall by British Red, on Flickr

Wall and gable end by British Red, on Flickr
Brew House rendered by British Red, on Flickr
Then we had a heartbreaking night . It lashed down with rain on green render. It all fell off one wall!
Render washed off by British Red, on Flickr
(sigh)
Dusted ourselves down and started again!

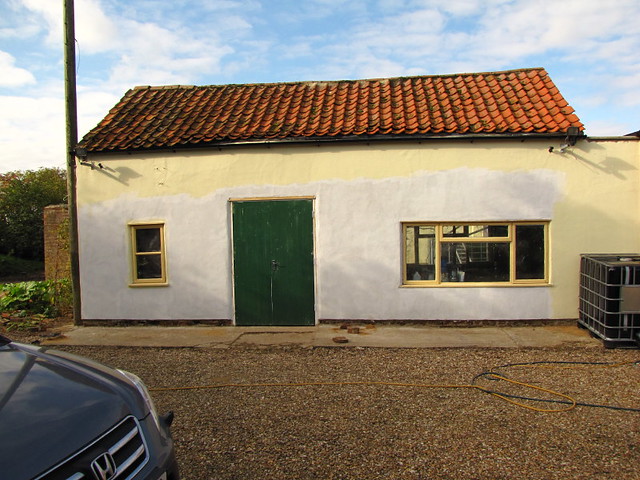
Second Render set and paint by British Red, on Flickr
Render on Internal walls by British Red, on Flickr
Brew house and ibc by British Red, on Flickr
Brew house by British Red, on Flickr
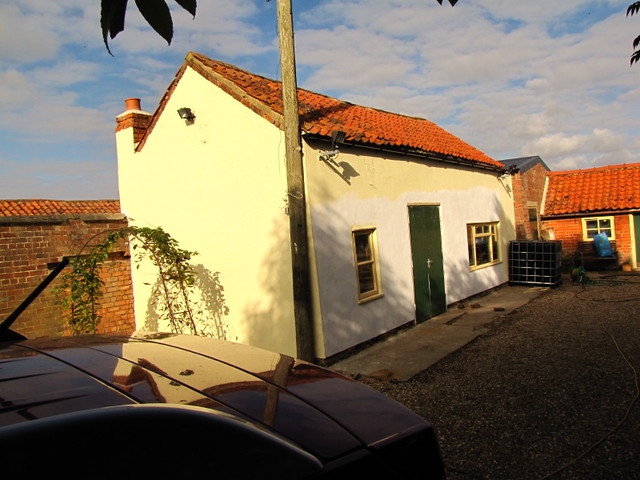
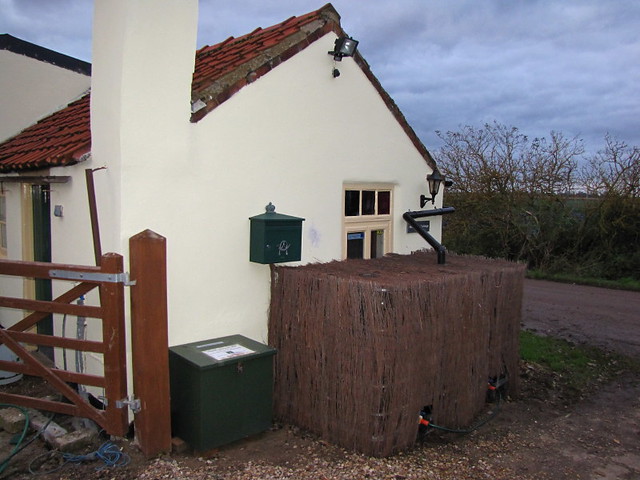
Outside of steading by British Red, on Flickr
(you can see on the photo above that we have used bitumen paint below the render to waterproof the bottom brick courses)

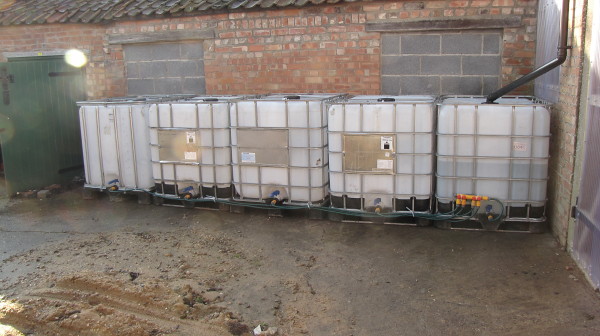
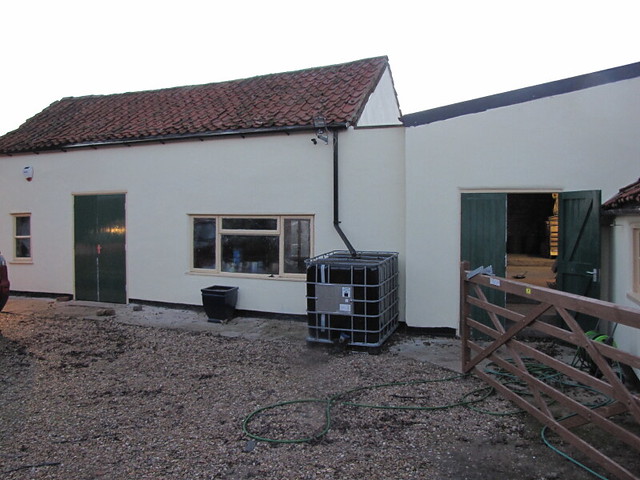
Steading Yard by British Red, on Flickr
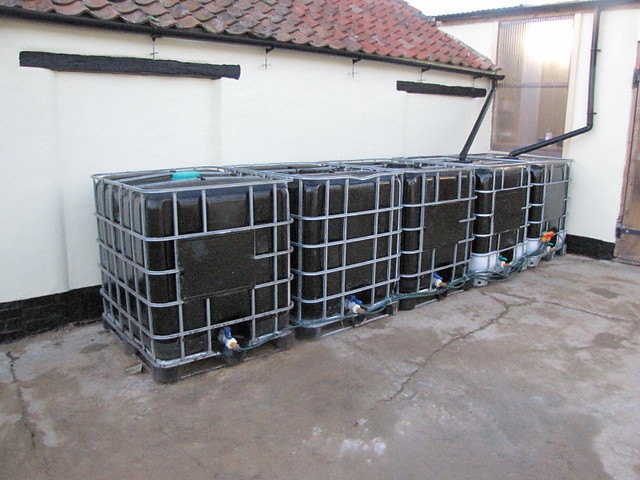
Primary rainwater IBC with dual feed by British Red, on Flickr
We also used leftover kitchen bits to set up a workbench in the potting shed
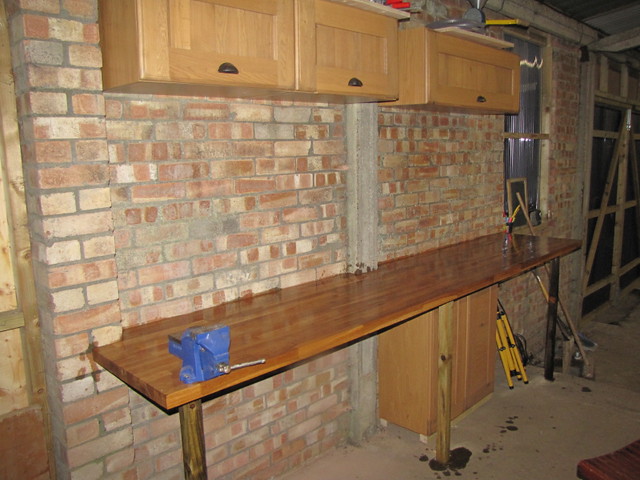
Workbench from left overs by British Red, on Flickr

Potting shed with workbench area by British Red, on
Flickr
Thats where we are up to now. Still have to finish planing and glossing the new doors, some bitumen of the bottom brick courses and get a honking great skip in for the rubble! Its just finding dry days and daylight that is challenging us now
Next steps on the renovation are to rip up and re-lay the drive. In doing that we will also run power to the greenhouses, run water and sewage connections to the brew house and the windowed barn. After that - convert the wondowed barn to have a bathroom (for showering after gardening etc.), kitchen with woodburner (for honey extracting clean room), office / seating area and a couple of upstairs store rooms. That should keep us busy for a few years yet!
Red
A little bit of background first.
When we moved the steading was in.....**** state!
First I present....the old pigsties
Outbuilding 2 (back to ruined building) by British Red, on Flickr
Note please the amateur blockwork, lack of a door and weirdly, some form of window frames without windows. Because its low, but had a fairly intact walls and roof, this was selected as a secure tool shed. Note also the weird gate (that didn't open) made of roofling laths.
Next the ruined building - destroyed courtesy of a fire the previous owners caused.
Coutryard (Outbuilding 2 on left) by British Red, on Flickr
Two more outbuildings - the large one on the left is a two story barn. the green door at the end is the brew house. Pay particular note to the blown brick facings on the windowed barn...every frost more brick fell off where the frost got in!
So, the first thing we did was to make a place to secure tools. To do this we decided to block up the "windows" on the tool shed and install a very solid door
Secured barn by British Red, on Flickr
We added a drop bar and high security padlock
Padlock and hasp by British Red, on Flickr
To be extra secure we added alarm links to the main house alarm
Door Contacts by British Red, on Flickr
Ground anchors for large equipment
Floor Anchor by British Red, on Flickr
Lights and CCTV
CCTV & flood light by British Red, on Flickr
Now that might seem a little overkill but people do "target" rural outbuildings - and we need our tools! Doesn't cost a lot to make it very hard to steal. On that note we also replaced the daft yard gates with a proper, locked, five bar gate
Yard Gate by British Red, on Flickr
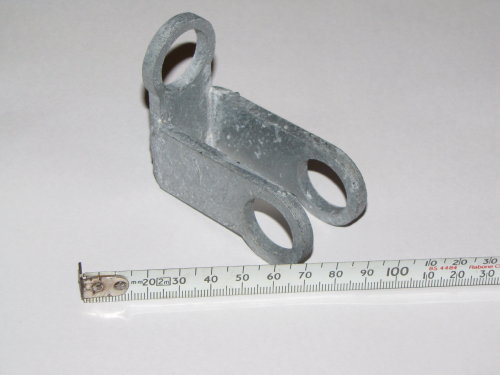
We secured this with a quality lock and also anti lift devices
IMG_3122 by British Red, on Flickr
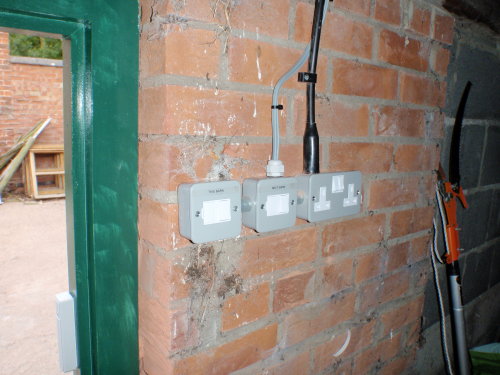
Other jobs we did at this point were to concrete a ramp in at the yard gate (there was a lip before) and run power and light to all the outbuildings
Barn light & power by British Red, on Flickr
That was the winter task a couple of years back.
Last year we fixed up the ruined barn
Ruined Outbuilding by British Red, on Flickr
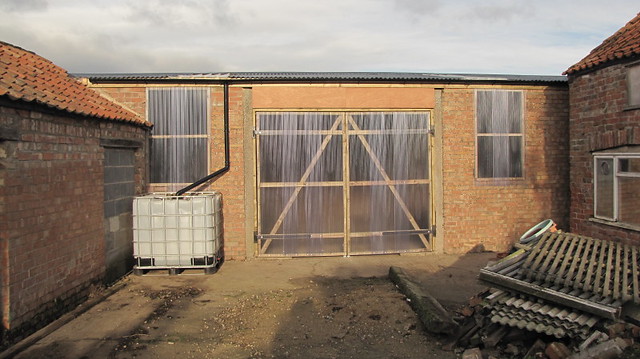
Its only single skin brick and we wanted it as a dry workspace. So nothing too fancy done - just a large roof, clear plastic doors, power and light
Barn Doors by British Red, on Flickr
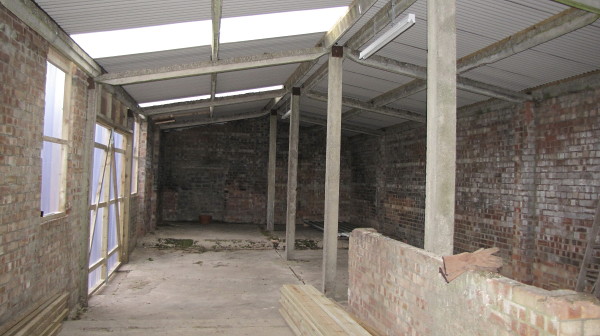
Cleaned out barn by British Red, on Flickr
Completed rainwater system by British Red, on Flickr
That brings us to this year.
This year we decided to fix the last of the doors, fix structural defects to the remaining barn and sort out the crumbling brickwork.
First off check out the rotten barn door on the left
Steading by British Red, on Flickr
The pevious idiot had put in that door - without an RSJ to hold the **** wall up :shock: .
So new concrete joist in and brockwork sorted
IMG_8099 by British Red, on Flickr
New pedestrian door to the yard
New pedestrian door by British Red, on Flickr
and new double doors to drive
Replacement double doors by British Red, on Flickr
(You can see well in the photo above how far gone the bricks are).
A couple of badly done and broken windows were blocked up
Arched window blocked up by British Red, on Flickr
Top Window blocked up by British Red, on Flickr
Then I demounted all the lights, alarms, cameras etc.
And Simon turned up to sort the rendering to protect the brick
This is the first (scratch) coat going on.
Scratch coat on barn by British Red, on Flickr
Note the render doesn't reach to the floor - this is to prevent water "wicking" up
A second (finish) coat goes on top
Finish coat on barn by British Red, on Flickr
Then repeat....over the windowed barn and toolshed. We planned to do just these two buildings as they were the ones needeing protection.
If you notice the studs out of the wall in this picture, they are gutter brackets as we have guttered the buildings to protect the render and to harvest rainwater
Scratch coat on tool shed by British Red, on Flickr
Scratch coat on barn by British Red, on Flickr
Finish coat on barn by British Red, on Flickr
Finish coat on gable end by British Red, on Flickr
Finish coat on tool shed by British Red, on Flickr
Finish coat on barn by British Red, on Flickr
Thats the render on. We then primed the walls and applied two coats of Sandtex.
Priming on barn - IBC in place by British Red, on Flickr
You will notice in this picture that guttering has gone up and there is an IBC tank in place for rainwater capture. All the IBC tanks have been painted in bitumen to prtect them and stop algae forming.
Clearly we painted the walls before putting up the gutters!
Paint behind guttering by British Red, on Flickr
We used bitumen paint on the old wooden lintels of the tool shed - and lashing of bitumen on IBC tanks
Tool shed primed by British Red, on Flickr
We also fixed up the chimney in the windowed barn
Barn primed (with chimney pot) by British Red, on Flickr
I started putting the security lights etc back up
Barn Primed by British Red, on Flickr
Then we started thinking " well - it looks nice....but the outbuildings we haven't done don't look as good". So a quick phone call to Simon, a deep breath and we started on the rest!
Brew House by British Red, on Flickr
Wall by British Red, on Flickr
Wall and gable end by British Red, on Flickr
Brew House rendered by British Red, on Flickr
Then we had a heartbreaking night
. It lashed down with rain on green render. It all fell off one wall!Render washed off by British Red, on Flickr
(sigh)
Dusted ourselves down and started again!
Second Render set and paint by British Red, on Flickr
Render on Internal walls by British Red, on Flickr
Brew house and ibc by British Red, on Flickr
Brew house by British Red, on Flickr
Outside of steading by British Red, on Flickr
(you can see on the photo above that we have used bitumen paint below the render to waterproof the bottom brick courses)
Steading Yard by British Red, on Flickr
Primary rainwater IBC with dual feed by British Red, on Flickr
We also used leftover kitchen bits to set up a workbench in the potting shed
Workbench from left overs by British Red, on Flickr
Potting shed with workbench area by British Red, on
Flickr
Thats where we are up to now. Still have to finish planing and glossing the new doors, some bitumen of the bottom brick courses and get a honking great skip in for the rubble! Its just finding dry days and daylight that is challenging us now
Next steps on the renovation are to rip up and re-lay the drive. In doing that we will also run power to the greenhouses, run water and sewage connections to the brew house and the windowed barn. After that - convert the wondowed barn to have a bathroom (for showering after gardening etc.), kitchen with woodburner (for honey extracting clean room), office / seating area and a couple of upstairs store rooms. That should keep us busy for a few years yet!
Red

We have been looking recently at greenhouse staging. Most of the metal stuff is stupidly flimsy, the wooden stuff is not all pressure treated and generally slapped together of inferior material.
We wanted something to last.
I have some left over decking boards (6" x 1" pressure treated) and a bit of pressure treated 2x2" - (but I bought anther 30 x 7' lengths - its amazingly handy stuff) and decided to make some really solid staging that can double as shelving and drying racks for produce in the Winter.
To start with I cut
8x 80cm lengths of 2x2 (4 legs and 4 long edge pieces)
6 x 56 cm lengths of 2x2 (3 cross members each for two shelves)
8 x 15cm lengths of 2x2 (4 corner bracing pieces for each of 2 shelves)

1) 2x2 lengths by British Red, on Flickr
I drilled two holes at each end of 4 of the 80cm pieces

2) 2x2 drilled by British Red, on Flickr
...and attached a brace piece to each end making a "mini goal post"
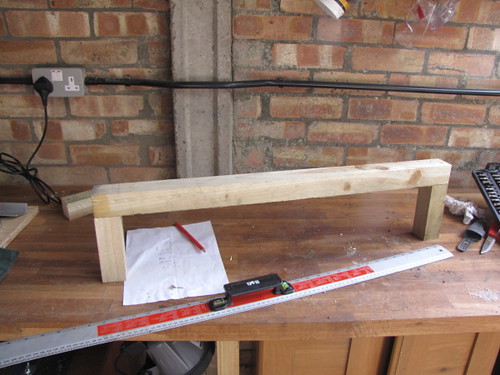
3) Mini Goal by British Red, on Flickr
Two goal posts were attached to the top and bottom of two legs to make a side
4) one side assembled by British Red, on Flickr
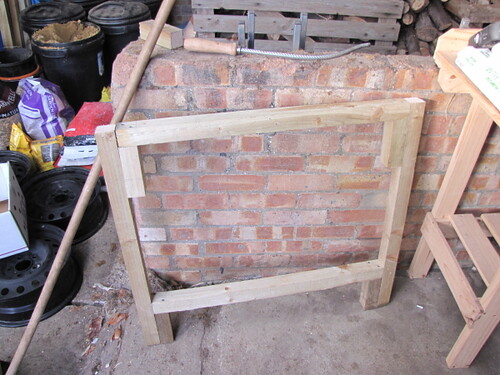
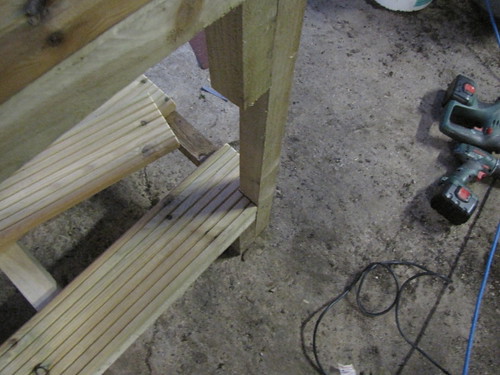
Three 56cm pieces were attached between the sides at the top and bottom to act as shelf supports and complete the carcass
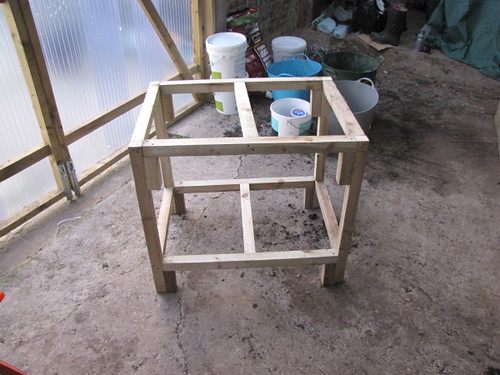
5) carcas assembled by British Red, on Flickr
In building the carcass, all joints were fixed with 3" all weather deck screws.
I then cut 4 90cm pieces of 6x1" deck board to form the slatted top shelf
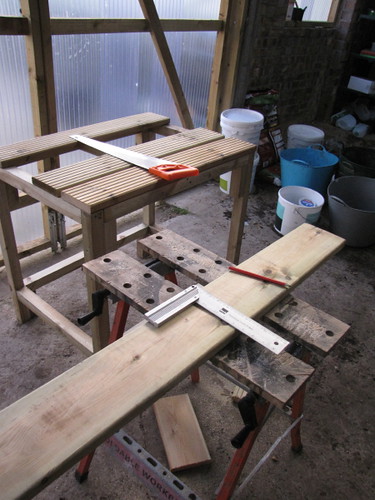
6) 6x1 deck boards by British Red, on Flickr
7) Top boards cut to size by British Red, on Flickr
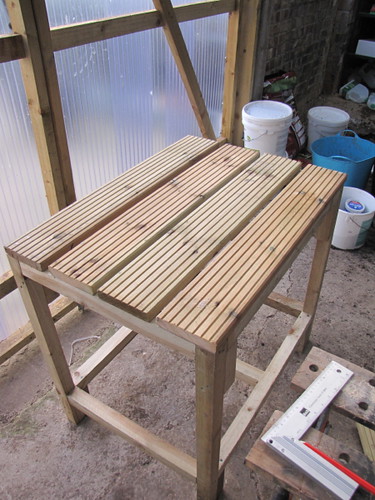
The edges were sanded to avoid splinters and each board screwed down with 4 2" deck screws
7) Top boards cut to size by British Red, on Flickr
I then checked the shelf could take the deisred 2 large gravel trays...
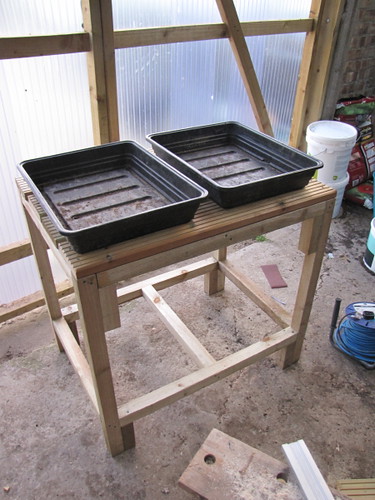
9) Check fit by British Red, on Flickr
Success. Each gravel tray can hold two seed trays....so 8 seed trays can go on each staging module.
For the bottom shelf, the front and back plank need a rebate to fit around the legs
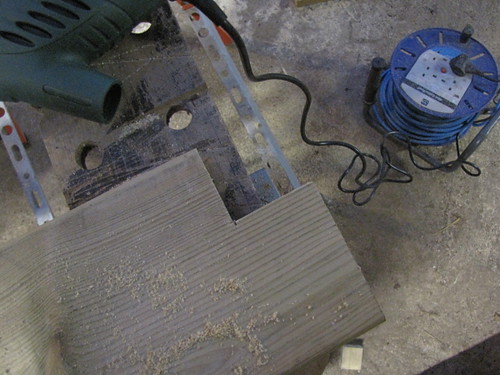
10) Cut Rebate by British Red, on Flickr
11) Check Fit by British Red, on Flickr
The bottom shelves were screwed down in the same way as the top shelf
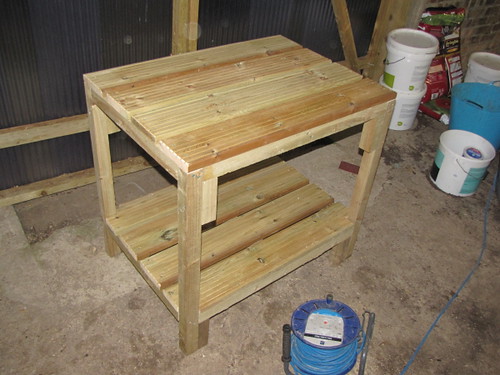
12) Finished Stagig Unit by British Red, on Flickr
There we have it - the prototype greenhouse staging module. Not pretty for sure - but the perfect size for what we want, built to fit our trays, and certainly strong enough to take years of use.
Red
We wanted something to last.
I have some left over decking boards (6" x 1" pressure treated) and a bit of pressure treated 2x2" - (but I bought anther 30 x 7' lengths - its amazingly handy stuff) and decided to make some really solid staging that can double as shelving and drying racks for produce in the Winter.
To start with I cut
8x 80cm lengths of 2x2 (4 legs and 4 long edge pieces)
6 x 56 cm lengths of 2x2 (3 cross members each for two shelves)
8 x 15cm lengths of 2x2 (4 corner bracing pieces for each of 2 shelves)
1) 2x2 lengths by British Red, on Flickr
I drilled two holes at each end of 4 of the 80cm pieces
2) 2x2 drilled by British Red, on Flickr
...and attached a brace piece to each end making a "mini goal post"
3) Mini Goal by British Red, on Flickr
Two goal posts were attached to the top and bottom of two legs to make a side
4) one side assembled by British Red, on Flickr
Three 56cm pieces were attached between the sides at the top and bottom to act as shelf supports and complete the carcass
5) carcas assembled by British Red, on Flickr
In building the carcass, all joints were fixed with 3" all weather deck screws.
I then cut 4 90cm pieces of 6x1" deck board to form the slatted top shelf
6) 6x1 deck boards by British Red, on Flickr
7) Top boards cut to size by British Red, on Flickr
The edges were sanded to avoid splinters and each board screwed down with 4 2" deck screws
7) Top boards cut to size by British Red, on Flickr
I then checked the shelf could take the deisred 2 large gravel trays...
9) Check fit by British Red, on Flickr
Success. Each gravel tray can hold two seed trays....so 8 seed trays can go on each staging module.
For the bottom shelf, the front and back plank need a rebate to fit around the legs
10) Cut Rebate by British Red, on Flickr
11) Check Fit by British Red, on Flickr
The bottom shelves were screwed down in the same way as the top shelf
12) Finished Stagig Unit by British Red, on Flickr
There we have it - the prototype greenhouse staging module. Not pretty for sure - but the perfect size for what we want, built to fit our trays, and certainly strong enough to take years of use.
Red
Making some staging for our little green house is on the to do jobs list
however its teh shooting show this weekend so guess its not getting done then")
well at least its not on any of Sarahs PM lists
however its teh shooting show this weekend so guess its not getting done then
well at least its not on any of Sarahs PM lists
Might pop along for a few hours myself
Gonna wave a few big choppers ar Rifle craft see if they will ceracote em
oh and start looking at custom .22 semi autos
fantastic updates red. are you treating the benches on top of the pressure treatment?
Thanks
Will soak 'em in Teak oil most likely. I'm debating some sacrificial "feet" as well in case of rot standing on the soil
Gonna wave a few big choppers ar Rifle craft see if they will ceracote em
oh and start looking at custom .22 semi autos
Talk to Roger / Sheila Francis if they are there. Still the best in my book
just read the thread - great keep my interest all through it - truely impressive piece of work
seeing your collection of alliums I was wondering if you had any Allium tricoccum put in some shaded area for spring eating? Around here they are known as ramps but I have also heard of them as wood leaks. It is a spring plant - only dying back before summer, producing seed after the folliage has died away.
seeing your collection of alliums I was wondering if you had any Allium tricoccum put in some shaded area for spring eating? Around here they are known as ramps but I have also heard of them as wood leaks. It is a spring plant - only dying back before summer, producing seed after the folliage has died away.
Oh yes....hoping for hundreds this year - they are already showing
Here is a thread on how I went about introducing them
http://www.bushcraftuk.com/forum/showthread.php?t=92982
Red
Here is a thread on how I went about introducing them
http://www.bushcraftuk.com/forum/showthread.php?t=92982
Red
Try a mineral oil if they are going to be wet and damp. Won't let algae/mould grow on it like organic oils.
Sent from my ST21i using Tapatalk 2
Sent from my ST21i using Tapatalk 2
Similar threads
- Replies
- 13
- Views
- 4K
- Replies
- 107
- Views
- 49K
- Replies
- 0
- Views
- 3K
- Replies
- 21
- Views
- 5K