My Covid-19 and later projects
- Thread starter John Fenna
- Start date
-
Come along to the amazing Summer Moot (21st July - 2nd August), a festival of bushcrafting and camping in a beautiful woodland PLEASE CLICK HERE for more information.
You are using an out of date browser. It may not display this or other websites correctly.
You should upgrade or use an alternative browser.
You should upgrade or use an alternative browser.
I have a walking foot attachment that I can move from machine to machine as I need it and a whole host of special feet for the Singer - but hardly use them!
Project 29
Fire Steels
Well - removable handles for fire steels...
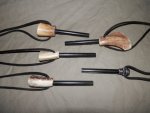
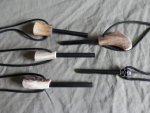
I find it annoying when a Fire Steel is pretty used up but I like the handle and do not want to replace the whole thing. So I made these Fire Steels with removable handles so I can swap out the actual Fire Steel when it is getting too worn.
I bought Fire Steels with pre-drilled holes in one end, made my handles from horn and antler (and a plastic toggle Skull...), incorporating a lanyard hole at the fore-end - slot in the Steel, fitted a paracord lanyard and the job is done. All that holds on the handle is the lanyard so that to swap Steels all I have to do is remove the lanyard, drop out the old Steel and slot in a new one!

Attachments
Some cracking fabric projects there Mr. Fenna. Clearly you know your pattern making onions as the jacket and trousers are nicely tailored rather than looking like a sack with add-ons & cutouts as per most bushcraft homespuns.
Well done
K
Well done
K
Thank you 
I have lots of fun making stuff but clothing is my first love as I do not fit the main manufacturers idea of a "standard" shape... short legs, big ribcage, longish arms and (now) a narrow waist
Being able to design my own gear gives me the freedom to incorporate all the features I want and none that are just excess faff ... I wish that I could make some decent boots too!
Project 30
Antler handled knife
A while ago I made up a few knives from worn out kitchen knives found on my local market's junk stall.
Unfortunately one had a missing rivet in the handle and, with hard use, the other rivets started to fail as well - so I decided to give it a whole new look!
I found a nice, comfortable, pice of antler (Red Deer?) in my "bits bucket" as well as some horn I had cut into buttons for pouches that I had not got around to yet...
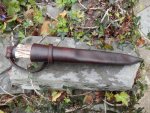
I ground down the knife tang to fit inside the antler, drilled the antler, stabilized the interior of the antler with cyano-acrylate glue, cut the horn to make the bolster and glued it all up with epoxy. to hide the button holes in the butt-cap I pegged it on with some copper nails...
The whole handle was then sanded and polished then the blade given a forced patina with Malt Vinegar.
The sheath was made with 3.5mm thick veg tanned leather that was sewn with artificial sinew, soaked shaped and then force dried in my dehydrator to harden it before dying it with water based leather dye and giving it a waxing with my home made beeswax dubbin mix.
This knife is intended, not only for general woods use but also to form part of my "Iron Age" costume at work.
The knife as originally made ... the lower one...
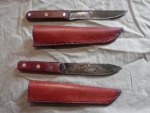
The new version...
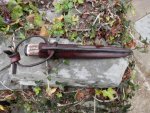
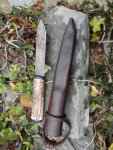
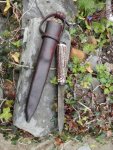
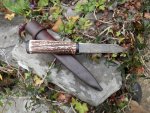
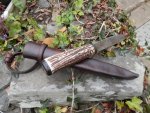
Antler handled knife
A while ago I made up a few knives from worn out kitchen knives found on my local market's junk stall.
Unfortunately one had a missing rivet in the handle and, with hard use, the other rivets started to fail as well - so I decided to give it a whole new look!
I found a nice, comfortable, pice of antler (Red Deer?) in my "bits bucket" as well as some horn I had cut into buttons for pouches that I had not got around to yet...
I ground down the knife tang to fit inside the antler, drilled the antler, stabilized the interior of the antler with cyano-acrylate glue, cut the horn to make the bolster and glued it all up with epoxy. to hide the button holes in the butt-cap I pegged it on with some copper nails...
The whole handle was then sanded and polished then the blade given a forced patina with Malt Vinegar.
The sheath was made with 3.5mm thick veg tanned leather that was sewn with artificial sinew, soaked shaped and then force dried in my dehydrator to harden it before dying it with water based leather dye and giving it a waxing with my home made beeswax dubbin mix.
This knife is intended, not only for general woods use but also to form part of my "Iron Age" costume at work.
The knife as originally made ... the lower one...

The new version...


Project 31
Mini tarp/groundsheet
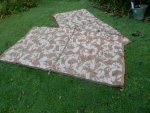
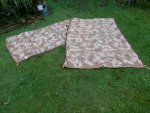
I was in need of a new groundsheet and had a 12 year old MOD tarp that had a hole near the middle...
I cut the tarp in half, removing the damaged section, reinforced the two edges (without any webbing) with some brown webbing that I had in the "bits box" and added some tie-outs where I thought they might be useful...
Both pieces are big enough for full length groundsheets and big enough for use as mini tarps or tarp extensions.
Attachments
I like these John, I use something similar stems from bad techniques when I did lead plumbing . Lol. never got out of the habitProject 23
Thumbles
Not quite thimbles, not quite sewing palms, not quite thumbstocks - but offering thumb protection when carving or sewing....
Ambidexterous, wet formed, 3.5mm Veg Tanned leather, sewn with artificial sinew, dyed with Eco-Flo dye and treated with home made dubbin.
I am getting really desperate for projects.... no point making stock to sell - will I be making stuff that will not sell using materials that I could have used to replace stuff that is selling well ... if I ever get my stall in operation again? I can't afford to use good materials just to make stuff just to make stuff which may never be used. I do not actually need anything major myself and stuff I would like I do not have all the bits for and with an income based on furlough at 1 day a week I cannot afford to buy luxuries.
So - if I cannot make something from stuff I have in the "Off-cuts and might come in useful" pile - then it ain't getting made!
I like making stuff - but I also like reading and walking - so more of those are getting done at the moment!
View attachment 59413View attachment 59414View attachment 59415View attachment 59416View attachment 59417View attachment 59418View attachment 59419
Project 32
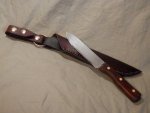
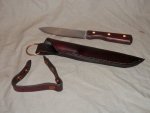
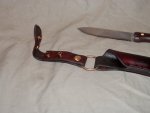
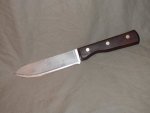
Tramontina Cleaver knife.
I had an unused kitchen cleaver, made in S/S by Tramontina so I made a knife out of it...
I cut it out with an Aldi clone of a Dremel, ground it on my belt sander (all the while keeping it wetted to save overheating the steel and kept the original handle.
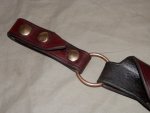
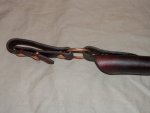
The sheath is welt sewn from 3.5mm Veg tanned leather and sewn with artificial sinew.
I had a play with the removable "dropper" belt loop
The blade might benefit from my polishing out some grind marks - but is literally razor sharp!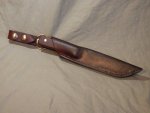


Thank you 
It certainly makes good feather sticks - I have been sitting watching "Repair Shop" and getting ready to light the fire
It certainly makes good feather sticks - I have been sitting watching "Repair Shop" and getting ready to light the fire
Project 33
BushcraftUSA,s "Bushclass Basic" elements that I can do indoors!
Storm Alex is raging so I chose to do some indoor Bushcraft using elements of BCUSA's "Bushclass "Basic" and "Elective" lessons...
When the weather improves I may get out and finish "Basic"
I chose these projects as they fitted with other stuff I was doing, could be done indoors and revisit old skills. I should point out that I hold the BCUSA Bushclass "Advanced" Award (for a long time!) and this is all just for fun not the award!
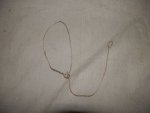
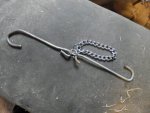
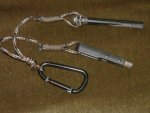
Whipping rope/custom fire steel/lanyard
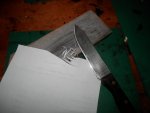
Sharpening
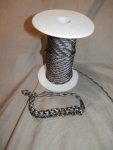
paracord bracelet
Whipping
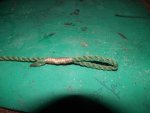
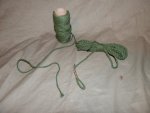
2 strand twist from man-made materials - 20 feet of it with a whipped eye
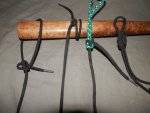
4 basic knots - taughtline, round-turn and two half-hitches, Sheetbend, fig8 on the bight
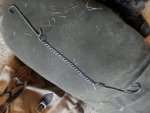
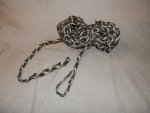
Braiding man-mad materials/ridgeline, braided in eye and terminal - 10 meters!
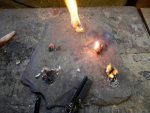
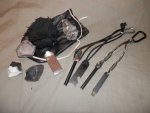
F&Sand charcloth/ improvised striker/ custom firesteels
Cont
BushcraftUSA,s "Bushclass Basic" elements that I can do indoors!
Storm Alex is raging so I chose to do some indoor Bushcraft using elements of BCUSA's "Bushclass "Basic" and "Elective" lessons...
When the weather improves I may get out and finish "Basic"
I chose these projects as they fitted with other stuff I was doing, could be done indoors and revisit old skills. I should point out that I hold the BCUSA Bushclass "Advanced" Award (for a long time!) and this is all just for fun not the award!
Whipping rope/custom fire steel/lanyard

Sharpening

paracord bracelet

Whipping

2 strand twist from man-made materials - 20 feet of it with a whipped eye

4 basic knots - taughtline, round-turn and two half-hitches, Sheetbend, fig8 on the bight

Braiding man-mad materials/ridgeline, braided in eye and terminal - 10 meters!

F&Sand charcloth/ improvised striker/ custom firesteels

Cont
Last edited:
This latest is a brilliant idea.
I think I've already completed 99.9 per cent of the basic with my projects. ...apart from the overnighters this year due to health problems,though they have been done in the past.
I'd love to see something like that here on this forum, and I'm sure that many others would too. Especially with bad weather comming and more possible lockdowns. It would give us something to do and help the many beginners here.
The outdoor bits - done in the tail end of Storm Alex ... so everything was damp!
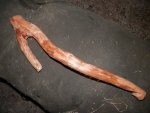
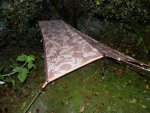
Basic 9 - Set a tarp shelter
This is what got me going on the re-visit to the Basic... I needed to make the set up for my "new" mini-tarp
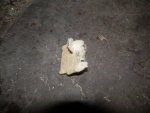
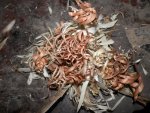
Basic 1 - feather sticks and shavings
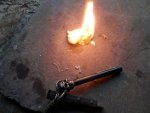
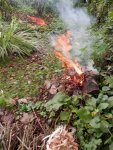
Basic 3 - Twig fire
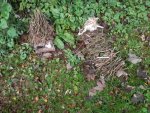
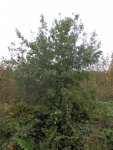
Basic 11 Tree ID and uses
Sycamore - Carving kitchen ware, spoons etc as it has no flavour of its own. Firewood when well seasoned. Can be tapped for sap in Spring (not as good as Birch sap...
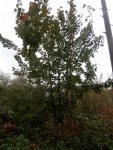
Ash - Firewood green or seasoned. Tool handles. Keys are edible when young.
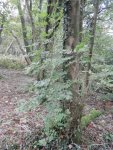
Oak. Durable constructions from house-frames to chairs. Excellent for cooking fires when seasoned. Acorns are edible if processed - "Coffee" and flour
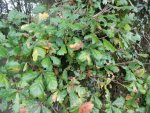
Silver Birch. Great for carving - spoons knife handles etc. Bark and twigs make excellent fire lighters. Sap makes a great wine!
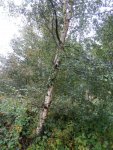
Only Basic 12 - "Cook Bannock with fire" to go and Basic is done
I am saving that for our next group meet-up so I can share it... I do not eat much in the way of carbs these days (except when camping!)
Basic 9 - Set a tarp shelter
This is what got me going on the re-visit to the Basic... I needed to make the set up for my "new" mini-tarp

Basic 1 - feather sticks and shavings

Basic 3 - Twig fire


Basic 11 Tree ID and uses
Sycamore - Carving kitchen ware, spoons etc as it has no flavour of its own. Firewood when well seasoned. Can be tapped for sap in Spring (not as good as Birch sap...

Ash - Firewood green or seasoned. Tool handles. Keys are edible when young.

Oak. Durable constructions from house-frames to chairs. Excellent for cooking fires when seasoned. Acorns are edible if processed - "Coffee" and flour

Silver Birch. Great for carving - spoons knife handles etc. Bark and twigs make excellent fire lighters. Sap makes a great wine!

Only Basic 12 - "Cook Bannock with fire" to go and Basic is done
I am saving that for our next group meet-up so I can share it... I do not eat much in the way of carbs these days (except when camping!)
Attachments
Last edited:
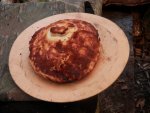
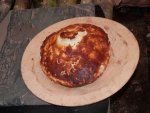
It does look edible.  Well it does look good. Do you have more pics to show how it was made, I am not sure I have that figured out.
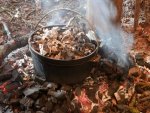
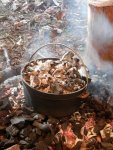
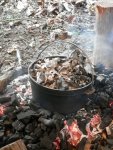
I mixed up 3 cups plain flour, 2 cups milk powder, 2 tablespoon sugar, 1 tablespoon baking powder one teaspoon of salt. I took half the mix to camp in a poly bag. The mix was tipped into a bowl and then I added water to make the dough. This was put on a foil dish, on a trivet inside the Dutch Oven. The dutchy was put on hot coals and more coals put on top. The dutch oven was rotated a quater turn clockwise ever 10 mins and the lid a quarter turn clockwise at the same time. Checked for burning every fifteen mins.
Turnd out when it looked ok and nothing stuck to a knife pushed into it. Sliced in half I saw the bannock needed a little more cooking in the middle but this would burn the base so I cut out the middle and did it for a few more minutes. Tasted great!
Turnd out when it looked ok and nothing stuck to a knife pushed into it. Sliced in half I saw the bannock needed a little more cooking in the middle but this would burn the base so I cut out the middle and did it for a few more minutes. Tasted great!
Similar threads
- Replies
- 12
- Views
- 2K
- Replies
- 5
- Views
- 1K
- Replies
- 8
- Views
- 2K
- Replies
- 32
- Views
- 9K

