Long time over due (very pic heavy)

warthog1981

Native
Jun 3, 2004
1,840
76
43
Fife
Hi this is my restoration thread on restoring and tweaking this axe
it's been a long time coming for me to be able to find the time to get it done due to one thing or another but it's done now.
Here's a link to the backstory http://www.bushcraftuk.com/forum/showthread.php?t=124832&p=1557719#post1557719

Ill apologise now for the many bad pictures

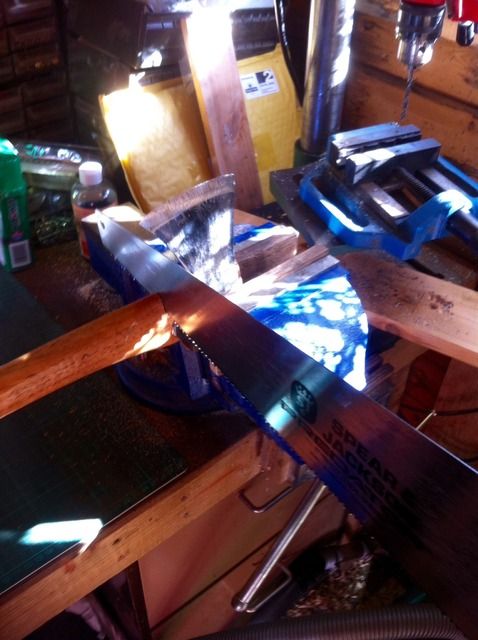
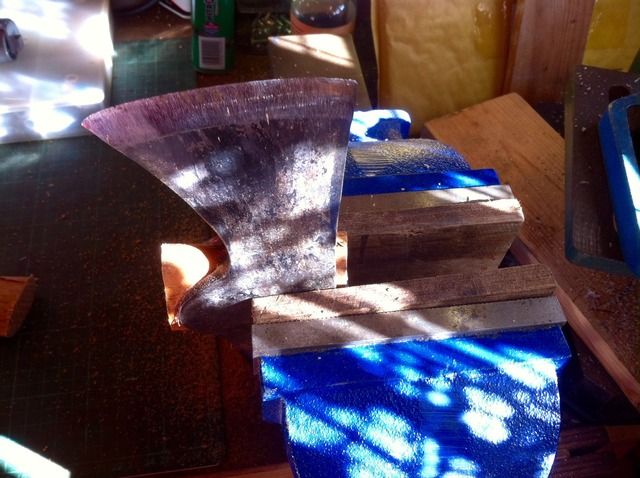
First job was to saw off the old knackered handle near to the head


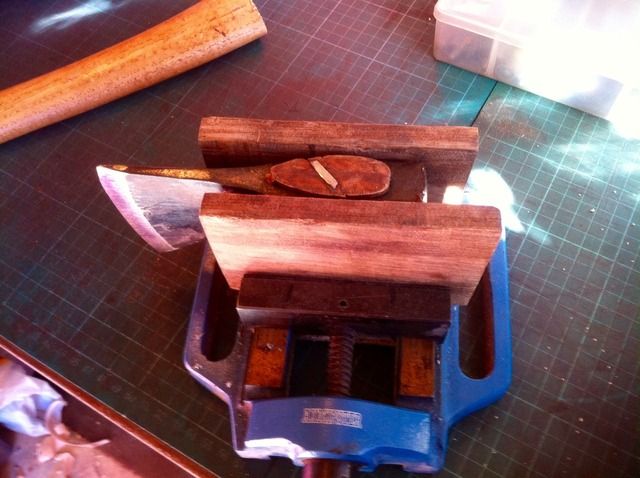
job done if you notice I use scrap wood as soft jaws for my vice saves chewing up things


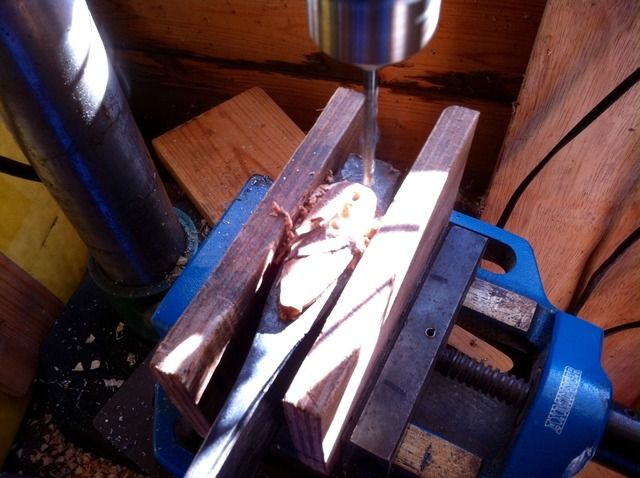
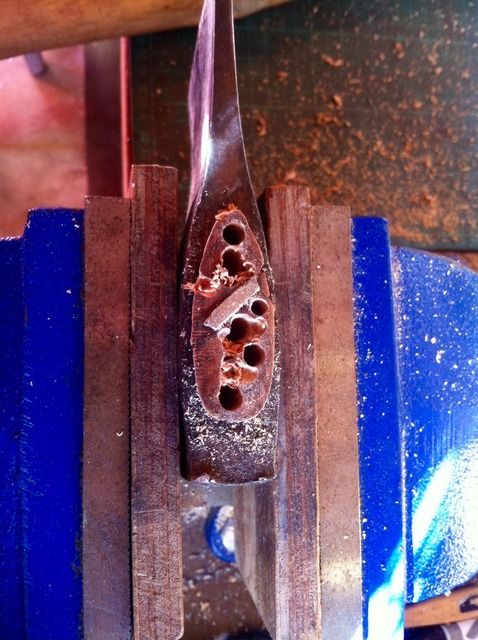
next step swap vices this ones for my pillar drill time to drill the wedge out


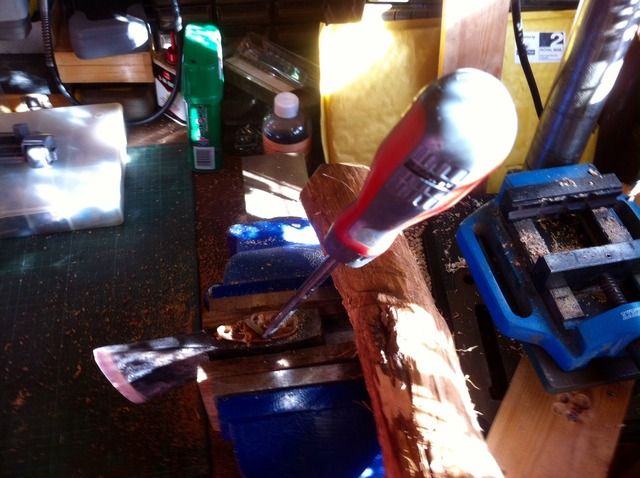
time to persuade the metal wedge to come out I had mislaid my rubber mallet so improvised
 

warthog1981

Native
Jun 3, 2004
1,840
76
43
Fife
That's the metal wedge out and the holes opened up a little bit more


I use a piece of heavy brass bar and a rubber mallet to persuade the rest of the handle to come out


You can just start to see it moving


and its out
Luckily the eye of the axe is not deformed at all


I had this hatchet handle spare from a previous project so thought I'd give it a go with this head
It's handy because it comes with the wooden wedge to
 
Last edited:

warthog1981

Native
Jun 3, 2004
1,840
76
43
Fife
Here's the bit of the old handle sizing it up to the top of the new
The new ones a bit big but I can soon sort that out :)


it looks like I've missed a few steps but the axe head is sitting on top of the handle just seeing what it might look like


A few pencil lines as a guide


My fine adjustment tool of choice angle grinder with a 40 grit flapper disc new one for this job has plenty of bite
 

warthog1981

Native
Jun 3, 2004
1,840
76
43
Fife
The first few passes of the grinder each side


you can see where the head is rubbing the black marks on the handle

I test fit the handle a lot as it's difficult to stick bits back on


when I'm test fitting the handle I use the rubber mallet to tap the handle on to ensure snug fit
when it's almost there I give it a sand with some coarse sandpaper to flatten out any high spots
You can see the handle sticking a bit to far through but I wanted it to sit further down the handle

 
Last edited:

warthog1981

Native
Jun 3, 2004
1,840
76
43
Fife
Before I fit the handle properly I like to clean up the handle
so peal the labels off they never seem to come off in one piece
I like to use a Stanley knife blade at 90 degres to scrape off the last of the label and the printed label


The handles a little bit to fat here for my hand for comfortably choking up on it so time the thin it down a little just sand it down till it's good


Time to do some work on the head now you can see I've not cleaned it up yet time to get started
I use the same flapper disc in the angle grinder I know this will freak some people out.
If you go slow and check the head at every pass of the grinder that the heads not getting to hot it's ok to do it


warthog1981

Native
Jun 3, 2004
1,840
76
43
Fife
Once I've knocked off the worst of the damage with the 40 grit flapper disc I then move on to a sanding pad that's Velcro backed disc that take different grits of sandpaper


starting to get there


warthog1981

Native
Jun 3, 2004
1,840
76
43
Fife
You need to be very careful using the finer grits on the angle grinder I've got a good selection and work my way down the grits. The finer the grit the more friction so more heat build up
once I get it as smooth shinny as I dare.


The top of the handle was a bit long so trimmed it down before fitting the wedge's
timed to fit the head I like to use a three pound lump hammer to seat the wedge nice and tight


Wooden wedge fitted and trimmed I was swithering about fitting the metal wedge as well
but I did don't panicky if you get a liittle bit of splitting where the metal wedge goes in just tidy it up as bast you can


I'm pleased with the fit


Last edited:

warthog1981

Native
Jun 3, 2004
1,840
76
43
Fife
My little linisher and polisher this it the coarse cutting wheel and compound


This is the finer buffing wheel and compound


after a bit if time buffing and polishing you get this


The sheath had a fairly big cut in it. but luckily I had a spare sheath that I had made up years ago but forgot what axe it fitted it only needed half its press stud fitted I've got plenty.


What do you think ???
I think it suits the shorter handle.
 

threetree

Forager
Aug 22, 2011
128
3
lancashire
Great job. I'm just starting work on my own axe project. I've got a Swedish sandvik head that im going to refurb and put on a gransfors bruks haft.
 

BCUK Shop

We have a a number of knives, T-Shirts and other items for sale.

SHOP HERE