Leather Craft_Show us what leather goods you have made past & present

  • Hey Guest, Early bird pricing on the Summer Moot (29th July - 10th August) available until April 6th, we'd love you to come. PLEASE CLICK HERE to early bird price and get more information.

Broch

Life Member
Jan 18, 2009
8,064
7,856
Mid Wales
www.mont-hmg.co.uk
Would be good to see if some of the W.I.Ps by experienced makers could high light and show not just the finished product but how certain elements of the various builds are done? steps to attach smaller parts , how burnishing is best achieved , all the little steps from flat leather to finished project?

Any takers?

Yeh, but in my case, a) I'm still a beginner and b) I make it up as I go along :)
I have a few projects planned, I'll try and take photos as I work but, bare in mind, I break a lot of the rules! (or are they guidelines?)
 

Ch@rlie

Nomad
Apr 14, 2011
338
107
53
Felixstowe
Would be good to see if some of the W.I.Ps by experienced makers could high light and show not just the finished product but how certain elements of the various builds are done? steps to attach smaller parts , how burnishing is best achieved , all the little steps from flat leather to finished project?

Any takers?
I'm self taught using Youtube University combined course with trial and error.
I can offer some methods/advise/tips including burnishing edges..
Waning not photo heavy.. if any.
First is not all leather types will burnish.
Chrome Tanned wont, to test if your leather is chrome tan it will usually have a blueish/greyish edge (just use edge paint apparently.)
Another way of knowing is cut a small section say 6mm wide 50 mm long (1/4 inch by 2 inch) drop it in a breakfast bowl pour boiling water on it so its half full, if it does nothing its chrome tan.
if its veg tan it will twist or curl like its alive, quite weird to watch.

Vegetable tanned leathers, Bridal is full of waxes & oils I've had no experience with that so cant comment if it burnishes.
Normal plain raw looking veg tan that is known as russet? The stuff most of us get that can be tooled & stamped.
Pre Dyed veg tan works the same. To press an image into pre dyed leather (results vary so be sure you test on scrap) you wet the inside face in the location you want the image, allow it to soak in and press the stamp/embossing into the Dyed side your better off using a press vs a stamp you hit, I've found a longer press time gives a better the result,
apparently a heated stamp is best option but Ive never done it, so cant offer any info.
back to burnishing.. seems im rambling lol.
I personally wet the actual edge a little (I dont mean soak, just dampen) and leave it dry till it basically goes firm (pre dyed may already be very firm) at this point if the cut or edge is rough, sand smoother with a fine sand paper say 120 or 240 grit, dampen again if necessary, allow to dry I then trim the edge with a bevel tool to remove the sharp flat edge.
The nicer your edge before you try to burnish the better the finish will look.
I then rub the edge almost the face and back as though I'm sanding to dome or shanfer them with a scrap of leather, this presses the fibres tighter.
Next, (one product Ive used alot and works well.. I have a few different ones)
I apply a very tiny amount of neat pva glue (and i mean as small as you can get) on my finger tip and rub that along the edge and keep doing that till ive covered the distance.
I rub this in using my finger then either a piece of leather or a burnishing stick, could use a metal pen Ive used all sorts of things. once the pva is rubbed in, it will harden and gloss pretty good, I sometimes use bees wax over the top and continue rubbing.
Its not necessary to be applying lots of pressure but you do want a little heat generated to help the process along.
The thicker the leather the easier the process is to get a good or a gloss type edge finish, the more layers (such as a knife sheath or anything with stacked layers) the more difficult it is to get a seamless edge finish.
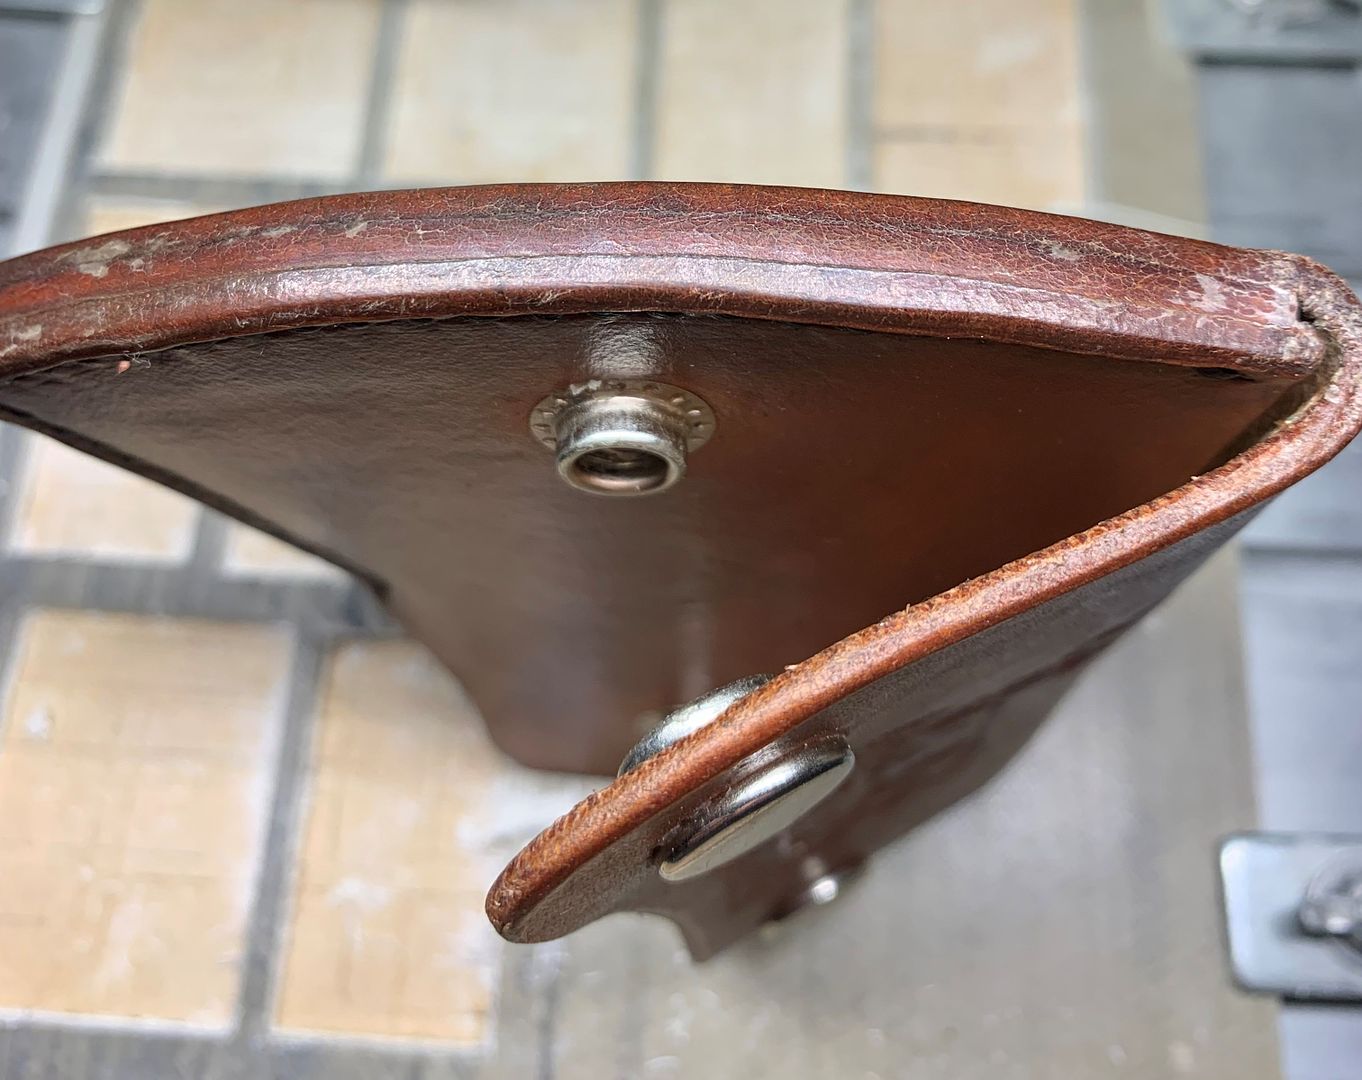
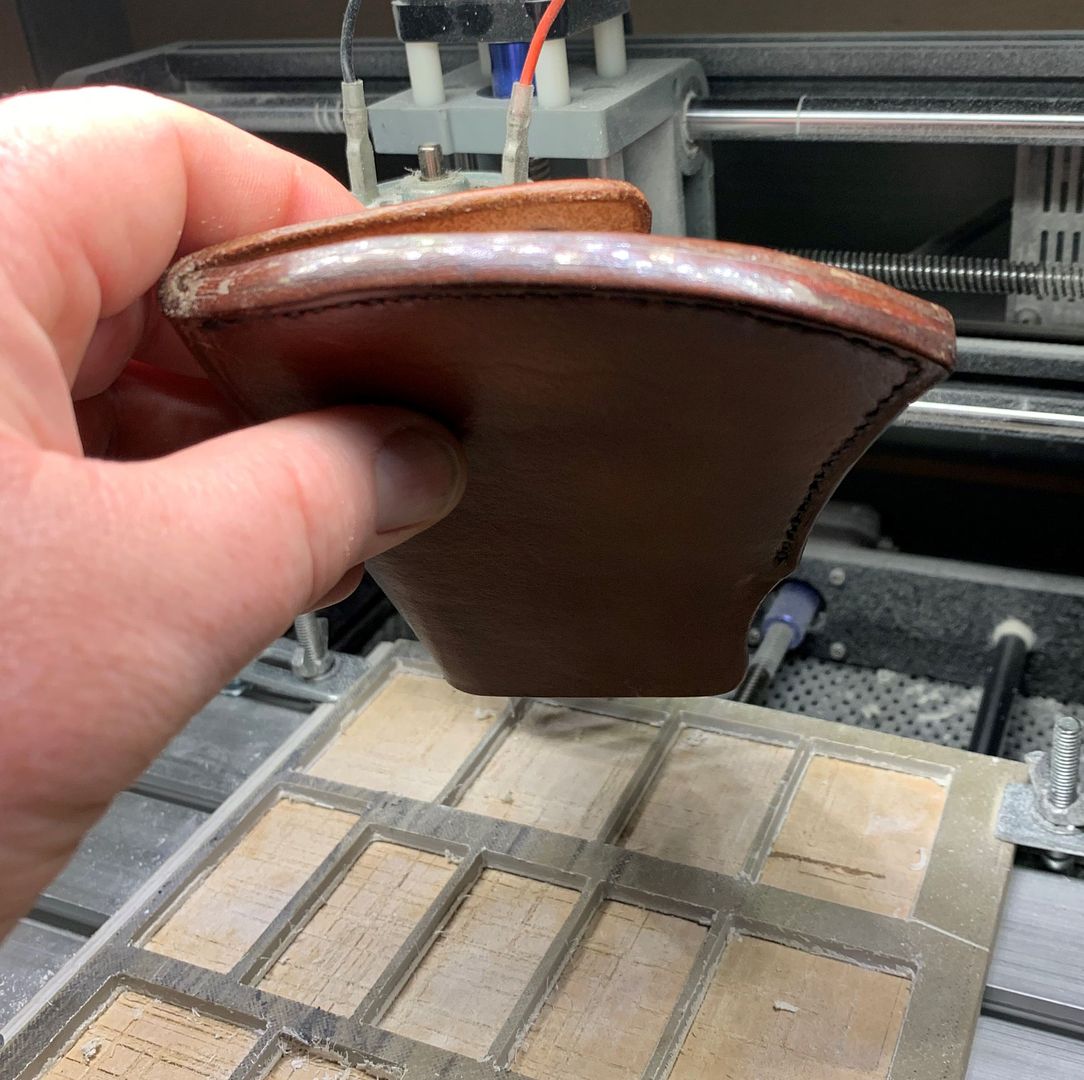
End of the day what ever finish you desire comes down to the amount of effort you put in. However just remember it wont last as high gloss if thats your goal, if its getting used and abused in normal day use, as can be seen with my axe sheath which isnt abused but is used. the method discribed above is how I did the edge. (see photo) this is a real close up photo (on my monitor its prob twice its physical size so x2 mag) you can see its smoothe, was/is shiny but wears with use.
looks terrible this close up in the photo, but in person it looks really good.
Axe_cove_2.jpg

The idea of burnishing is to prevent dirt and water ingress into the fibres, along with looking nice. (light directly above few inches away hence reflections)
axe_cover_3.jpg


You can use Bees wax, or home made wax combos,Tokonole, Gum Trag, PVA, wall paper paste, pearl glue, water based lacquer Ive even heard varnish mentioned.
test stuff & methods on scraps and see what works for you.
 
Last edited:

Ch@rlie

Nomad
Apr 14, 2011
338
107
53
Felixstowe
Yeh, but in my case, a) I'm still a beginner and b) I make it up as I go along :)
I have a few projects planned, I'll try and take photos as I work but, bare in mind, I break a lot of the rules! (or are they guidelines?)
I also consider myself a beginner, I also make it up as i go along, start with great intentions then wing it. I do make templetes if I feel I might want to make more, most of my stuff is for me so I have no expectations to meet. look forward to seeing or reading anyone elses methods :)
 
  • Like
Reactions: TeeDee
Dec 29, 2022
225
221
East Suffolk

TeeDee

Full Member
Nov 6, 2008
10,499
3,702
50
Exeter
Ok few questions.

Leather thickness -what is more usable for most projects ? so I'm guessing pliability vs Stiffness 2.5mm , 3.5mm etc

How does treating Leather after the making improve it ? Boiling it , Waxing it , Oiling it etc
 
  • Like
Reactions: William_Montgomery

TeeDee

Full Member
Nov 6, 2008
10,499
3,702
50
Exeter
Also in the same way that there is a practice stick for carrying out fine knife work on a single stick to learn and show individual techniques , is there such a thing for Leather working? Stitches etc
 
  • Like
Reactions: William_Montgomery
Dec 29, 2022
225
221
East Suffolk
How does treating Leather after the making improve it ? Boiling it , Waxing it , Oiling it etc

Boiling (veg tan) leather hardens it a lot, I believe it was often used to make armour before other materials became more readily available/popular. After boiling it and before it dries, there is short amount of time where it is extremely mouldable, so I think it is often used for making things like theatre masks etc. Or anytime you want to mould heavyweight leather.

When tooling leather, you have to wet it first which ends up drying the piece out a fair bit as the whole thing dries, it becomes harder and less pliable. To replace some of the oils I give it a good coat of neetsfoot oil. It helps it regain some of it's water resistant qualities and stops it drying out. There are various wax/oil based finishes used on the final product which help protect, condition and waterproof the final piece.
 
  • Like
Reactions: TeeDee

Ch@rlie

Nomad
Apr 14, 2011
338
107
53
Felixstowe
Ok few questions.

Leather thickness -what is more usable for most projects ? so I'm guessing pliability vs Stiffness 2.5mm , 3.5mm etc

How does treating Leather after the making improve it ? Boiling it , Waxing it , Oiling it et

Dont know what went wrong here, couldnt get rid of the quotes or delete so its Blank.
 
Dec 29, 2022
225
221
East Suffolk
Am I correct in thinking one can 'push' from the reverse side to make those images pop out more in the main areas?
I think that is a technique used, though not something I've done myself. It might be that you need some kind of filler to fill the areas behind the relief, depending on the use of the final thing.
 
  • Like
Reactions: TeeDee

Ch@rlie

Nomad
Apr 14, 2011
338
107
53
Felixstowe
For me the issue of leather thickness is more dependant on what you want to make, I dont make enough to warrent spending out on various thicknesses, I mainly make stuff for myself but have sold a few things.
The projects you make dictate the thickness you require really and its also depends on your method of joining them. For me 2.5-3mm is fine for things I generally make.
I oil or use wax mixes Ive made, theres huge debate about the oils that can be used, I personally use Virgin olive oil, never had issue of anything going rancid, Ive never used Neets foot oil, personally dont like the smell of it after opening a bottle at a friends and smelling some of the items hes made.
 
Dec 29, 2022
225
221
East Suffolk
Am I correct in thinking one can 'push' from the reverse side to make those images pop out more in the main areas?
You can use a mould to shape the leather around to give you a more three dimensional effect. Often used with masks/sheaths. I'm sure that could be used with interesting effect when localised with tooled leather.
 
  • Like
Reactions: TeeDee

Broch

Life Member
Jan 18, 2009
8,064
7,856
Mid Wales
www.mont-hmg.co.uk
I usually buy leather by the 'side' or 'shoulder' and use 1.5-2mm for things like my book covers and 3-3.5 for belts etc. Buying it in smaller pieces (like A4) can work out expensive and some of my projects (the knife roll I made and the quivers) use up quite large pieces.

Dampening the (unstained, unpolished) leather is enough for working it - carving and embossing - you only need to soak it if trying to mould it to a shape. In fact, it is very easy to get it too wet to work properly. It can go quite hard when it's been soaked; I've never had to boil leather to do what I want but, then, I've never made armour :)

I started out doing a one-day course with Hamish (was Dreadhead on this forum) which covered the basics nicely. These are the two books I've used (I don't do much YouTube :)). The traditional US style of carving (think saddlery etc.) doesn't easily suit the Celtic knot work I was trying to do so I've developed (still working on) my own methods.

2023-12-16 11.00.31.jpg
 

Ch@rlie

Nomad
Apr 14, 2011
338
107
53
Felixstowe
I usually buy leather by the 'side' or 'shoulder' and use 1.5-2mm for things like my book covers and 3-3.5 for belts etc. Buying it in smaller pieces (like A4) can work out expensive and some of my projects (the knife roll I made and the quivers) use up quite large pieces.

Dampening the (unstained, unpolished) leather is enough for working it - carving and embossing - you only need to soak it if trying to mould it to a shape. In fact, it is very easy to get it too wet to work properly. It can go quite hard when it's been soaked; I've never had to boil leather to do what I want but, then, I've never made armour :)

I started out doing a one-day course with Hamish (was Dreadhead on this forum) which covered the basics nicely. These are the two books I've used (I don't do much YouTube :)). The traditional US style of carving (think saddlery etc.) doesn't easily suit the Celtic knot work I was trying to do so I've developed (still working on) my own methods.

View attachment 84131
I actually have 2 copies of the leather craft hand book, purchased first then moved house and thought it was lost during the move, purchased the second then the other showed up nearly a year later.
 

Minotaur

Native
Apr 27, 2005
1,605
235
Birmingham
Loved reading through this thread. If I wanted to get started and make, for example, a pouch or wallet, what would I need to get started at home? Without a workshop, so would need to all be hand tools.
Check out the Identity store as they have smaller pieces of leather for sale. A4 and A3.
Unless you planning on going into business think the only big tool people tend to end up with is a hand press.

Would be good to see if some of the W.I.Ps by experienced makers could high light and show not just the finished product but how certain elements of the various builds are done? steps to attach smaller parts , how burnishing is best achieved , all the little steps from flat leather to finished project?

Any takers?
I cannot remember which member made them however would love a tutorial on the those really nice leather pouches with the 45% cut edges sewn together to form perfect square corners.
 
  • Like
Reactions: TeeDee

Tengu

Full Member
Jan 10, 2006
12,798
1,532
51
Wiltshire
Oh, those are very handsome bags.

Ive marked out some leather for making an oldstyle school satchel one of these days, but at the moment I am really too busy on my Iron Age kit...
 

BCUK Shop

We have a a number of knives, T-Shirts and other items for sale.

SHOP HERE