wolf said:
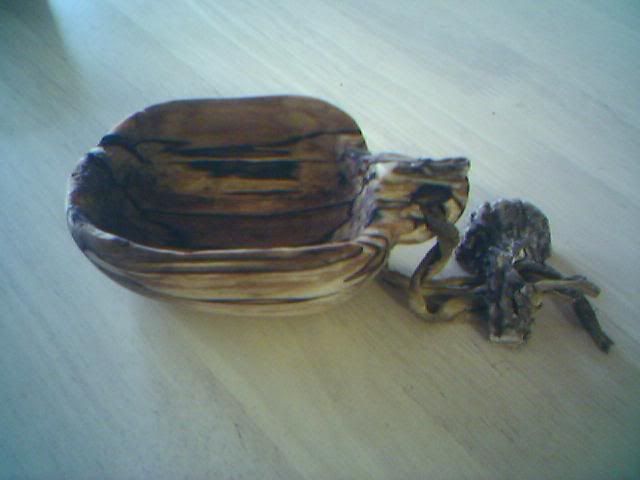
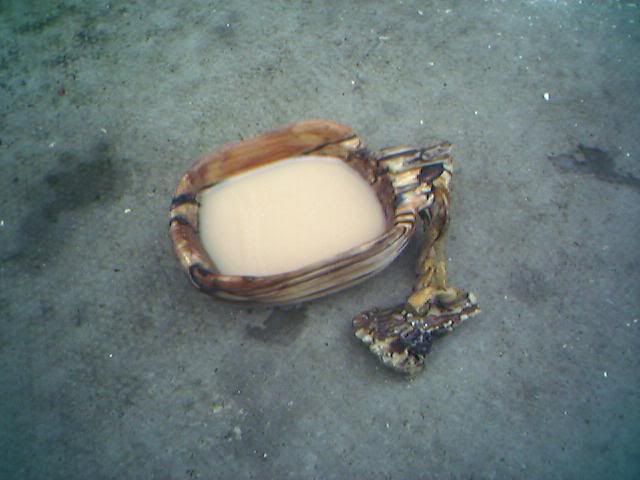
hi pierre i was inspired by your cups,and the use of the toggles,so i added my own antler toggle to my cup,now i just need to make the canoe...

cheers.....
")
Toggle looks good!
You want to have the thong long enough so it can go around your belt. The toggle needs to be long enough to go between the looped thong and hold it in place.
Making a canoe is a little beyond what I can convey on a website. If you can come up with 12 to 14 pieces of birchbark 3 feet X 4 feet, 1/8 inch thick, and pliable - flatten them between two pallets - the top one filled with rocks, in a dry place, for a couple months, and we'll talk.
Truth is - I sold my birchbark canoe. Just too much trouble. I have eight others and it was just too much upkeep.
My grandfather and his fathers family never really liked birchbark canoes. Lot of work, and they'd only last two years in the rocky rivers near where they lived. They also built dugout canoes - some of which are still around. They would name the dugouts. My grandfather's dugout canoe was named "The Lone Trapper." Get two people in it, and it would capsize. They were very beautiful canoes. Looked more like a piece of parlor furniture than a canoe.
Here is how they would build them:
They would start with a piece of clear virgin white pine log. White pine is a very special wood - in that you can drive a large nail within a short distance of the end of a board and it will not split.
They would square one side (which would end up being the "top") with a broad-axe, draw the outline of the canoe, and take after it with axes to get the exterior roughed out. Then they would go after the exterior with drawknives and crooked knives. They would finish it with flat smooth stones and sand. Once they had the exterior looking the way they wanted it, they would drill a series of small holes the exact depth they wanted the thickness to be.
They would take an adz after the interior, followed by chizels, crooked knives, stones and sand. They would take out wood until they hit the small holes they'd drilled. They would plug the holes with the proverbial square peg in a round hole. When they had the tool work done, they would fill the dugout with water, and heat stones, lifting the hot stones into the dugout with two antlers. They would wedge the belly of the canoe out until the canoe reached the correct form. They later used a Model T jack for this. The wedging often took three or four times to get the shape correct.
These were extremely beautiful canoes made by people learned in their craft. They were about 5/8 inch thick on the sides, though they were thicker at the bow and stern. The texture was smooth as a gunstock. They were very heavy to portage though, and that is why they also made birchbark canoes.
Care of the dugout canoe included sinking them in deep water every winter, and laying canvas over them, so they wouldn't crack, when they were out of the water. The virgin white pine was very rot resistent.
About 1918 my grandfather bought a stove-in Oldtown canoe from the US forest Service, repaired it, and they never made another birchbark or dugout canoe. By the time I wanted to make a birchbark canoe, he really couldn't remember much about making them and I had to go elsewhere to find out how.
PG
 thanks..