Photographing a camp at night.

  • Hey Guest, Early bird pricing on the Summer Moot (29th July - 10th August) available until April 6th, we'd love you to come. PLEASE CLICK HERE to early bird price and get more information.

Wayland

Hárbarðr
Baker-Tent-I.jpg


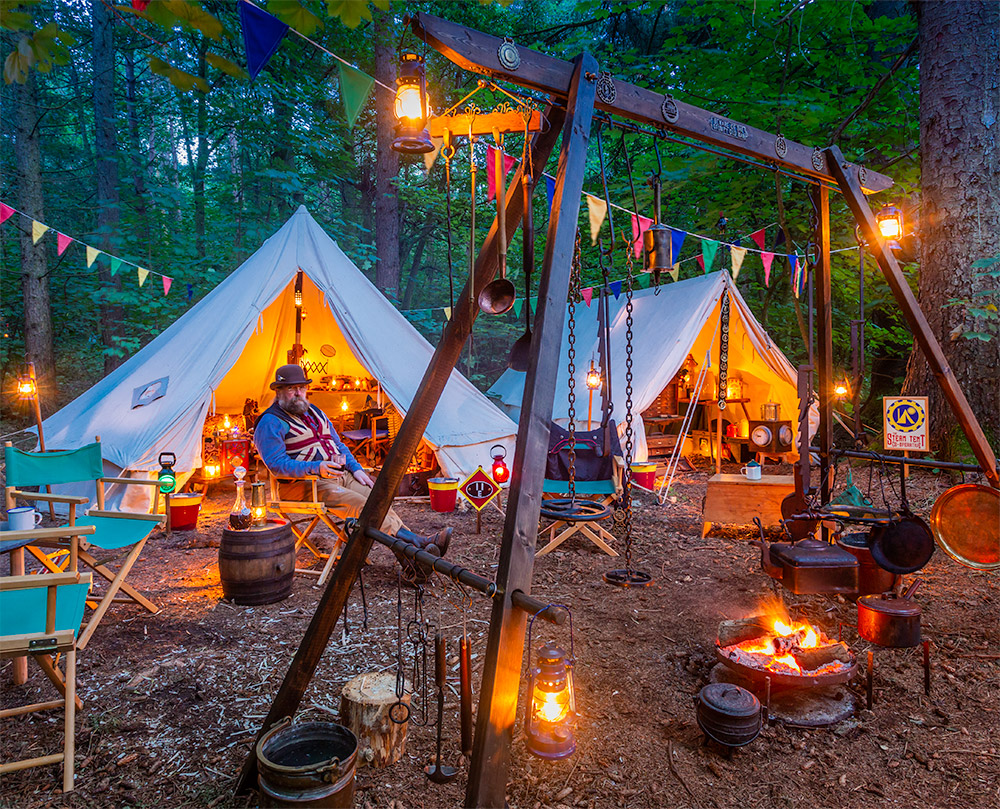
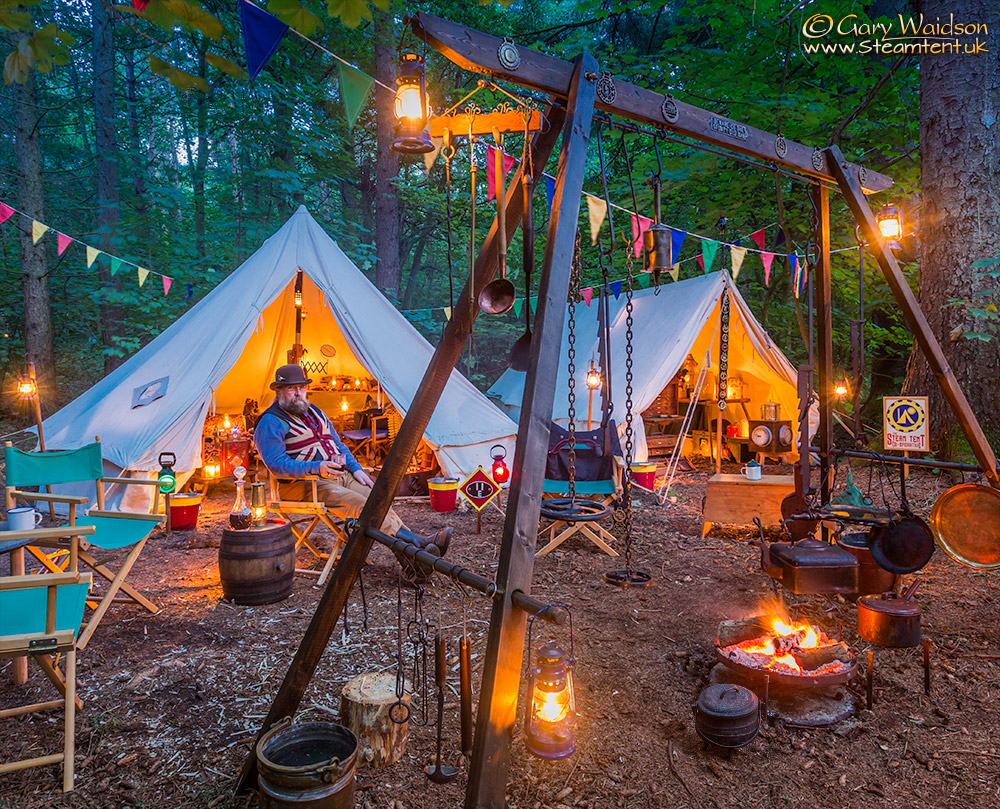
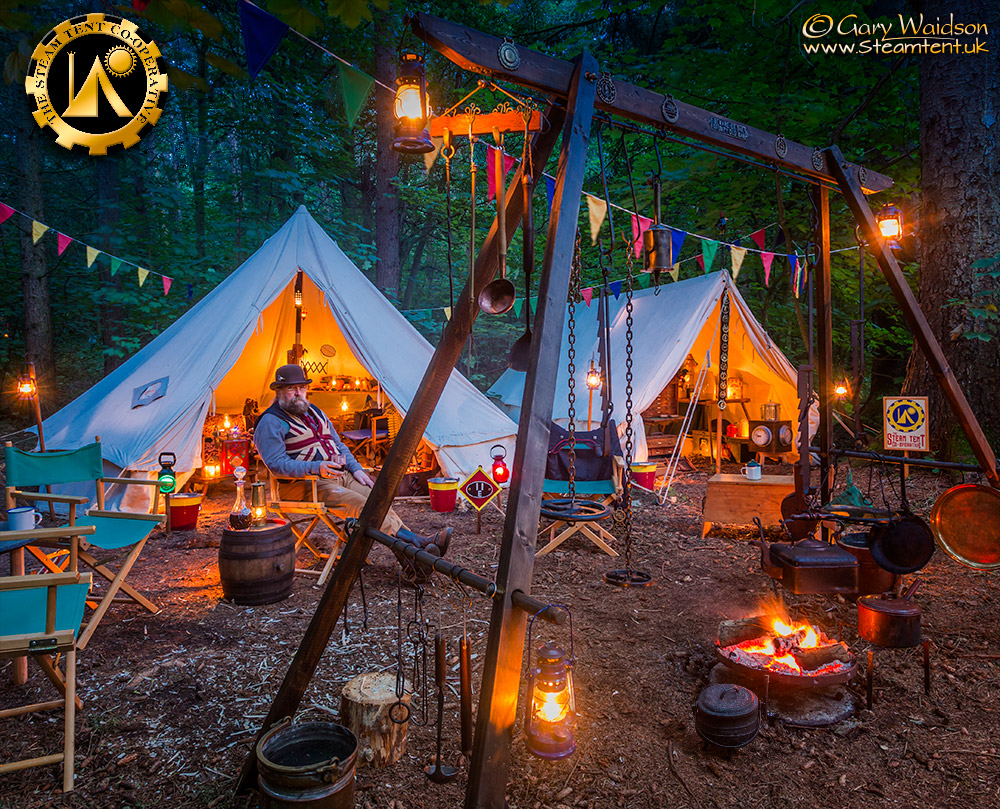
Someone asked me if I could put together a tutorial about taking my night time camp fire shots so I thought I'd give it a go.

To do this I'm afraid I have to give you some technical background. I'll break it down as simply as I can but if you want to get pictures like this then you do have to understand the process.

Unfortunately, there are no short cuts.

The-Steam-Tent-Co-operative---Gold-Rush-II.jpg


I've been interested in photography for about forty years now, first with film and now digital. The most important thing I’ve learned in that time is that the old trope about “a camera never lies” is one of the greatest lies ever told.

The camera cannot help but lie. Everything about a photograph is an illusion.

The-Steam-Tent-Co-operative---A-Seat-by-the-Fireside.jpg


One of the biggest problems is that a camera works differently to our eyes. When we look at a night time scene our eyes constantly adjust, which allows us to look at a burning lamp yet still see details deep into the shadows.

A camera cannot easily do that with a single exposure. It will need some help.

Lantern-Light-I.jpg


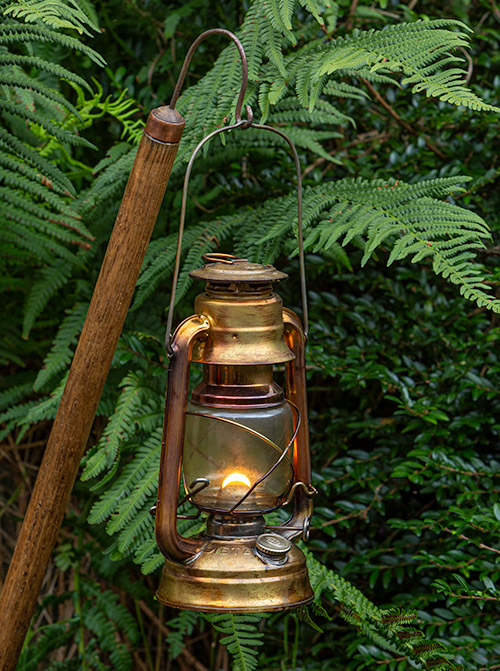
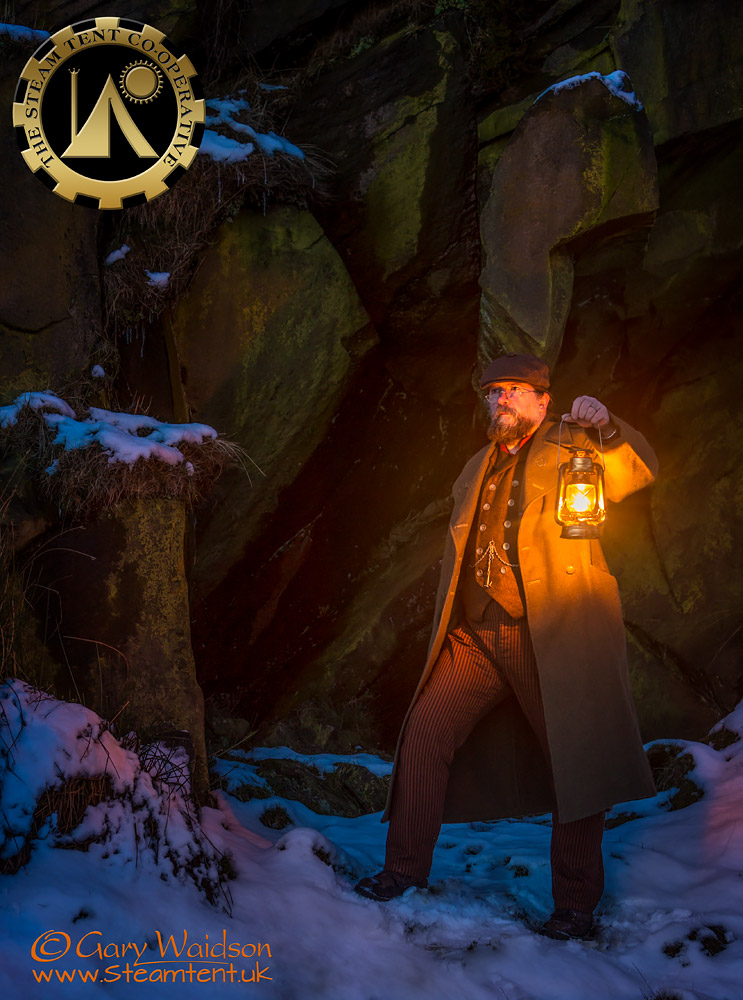
Imagine taking a picture of that burning lamp in the middle of the day. The scene will be illuminated by light from the sun either directly or diffused through clouds.

That ambient light is bounced and reflected from objects and surfaces all around the lantern and will probably overpower the light generated by the lamp.

We might be able to see the flame but it is likely that the light it is throwing out will not be apparent.

Lantern-Light-II.jpg


Now imagine we are taking a picture of that same lamp in the middle of a moonless night far away from any other light source.

Now the main source of light will be our lamp.

Our eyes can see the flame and also the light reflecting from the scene around the lamp, an enormous range of contrast that a camera cannot possibly record in a single exposure.

Lantern-Light-III.jpg


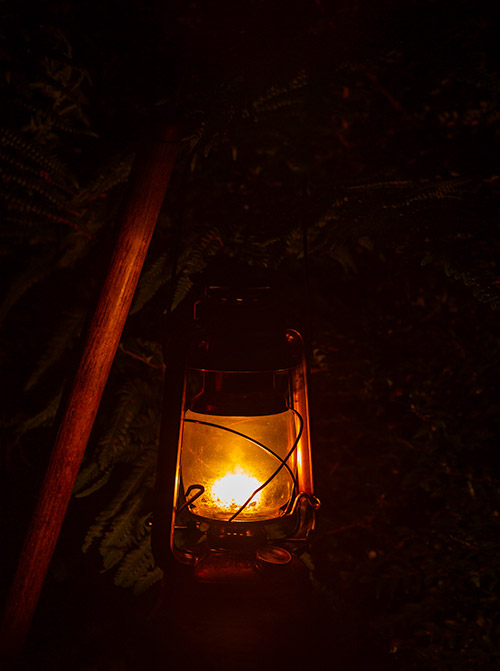
All other things remaining the same, the photographer has to choose between a short exposure to stop the flame burning out too much which leaves the scene too dark or exposing longer for the scene which means that the flame will be much too bright to be properly recorded.

Either way, the contrast is far too great.

( Note: There are now special techniques that allow the photographer to take multiple exposures and combine them with software in order to compensate for this wide contrast range to some degree, usually described as High Dynamic Range ( HDR ). Those techniques are beyond the scope of this article and would still struggle to record this. If you are interested you can read about such techniques online )

We can see therefore that in full daylight the light of the lamp will usually be overpowered by the ambient light.

We can also see that in full darkness the camera will not be able record the flame of the lamp and the scene illuminated by the lantern in one image.

Lantern-Light-IV.jpg


But what about the time between?

Twilight?

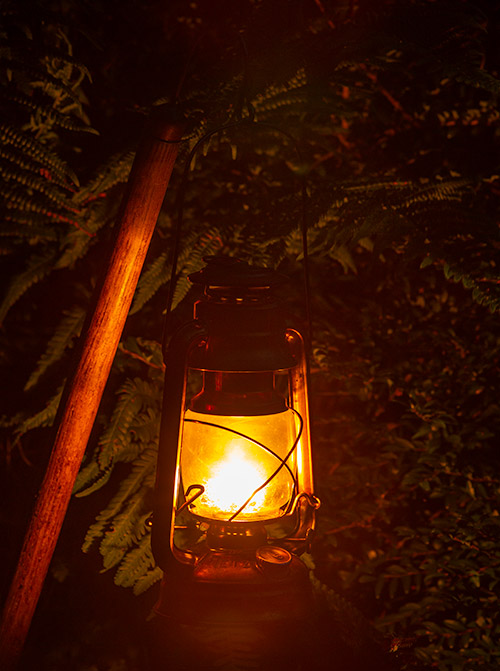
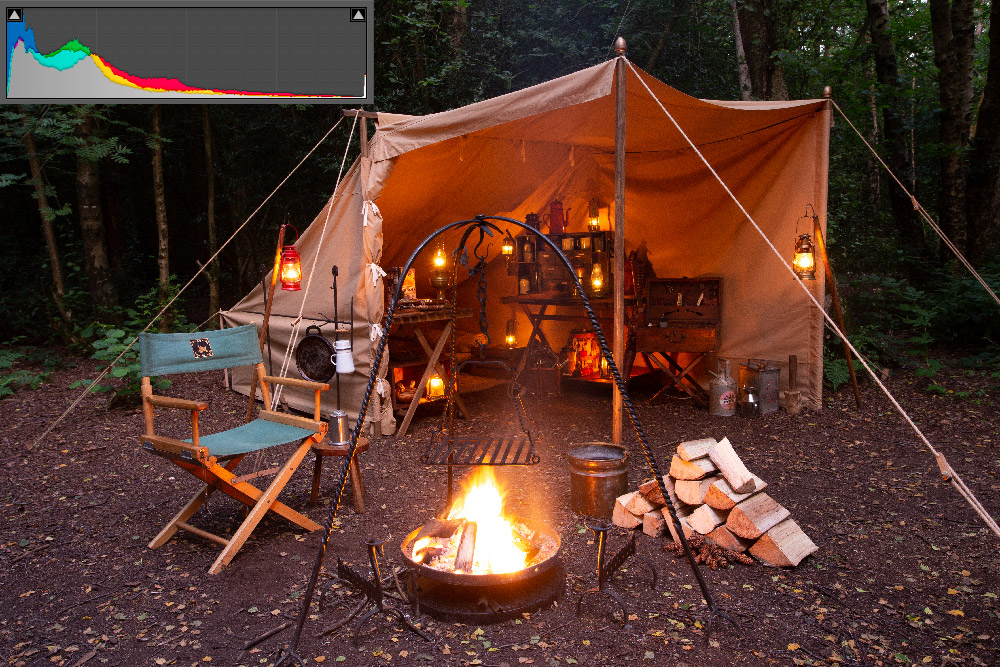
The brightness of the flame is constant as is the light from the lamp falling on the scene around it. The only real variable is the ambient light.

As the sun goes down and the light of the day dwindles, there will be a moment when the ambient light and the light from the lamp will fall into a balance that is much closer to the range of contrast that the camera can capture.

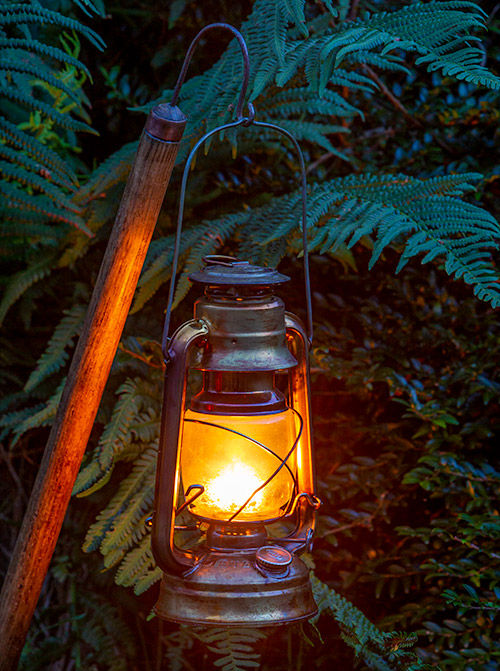
As you can see, it still cannot capture the brightness of the flame and the darkness of the scene fully but at least it has a fighting chance of producing the sort of image we are looking for.

This is not an exactly predictable time, depending on the conditions it might last for a few minutes up to half an hour, but it is these few minutes at twilight that provide our best window of opportunity.


Now, hundreds of books and websites already exist that explain how your camera works and about the fundamentals of photography, I cannot write anything better that will make it easier for you, you do not have to know everything but you do at least need to know how to use your own camera which means reading the instruction manual. If you cannot find it you can usually download copies online.

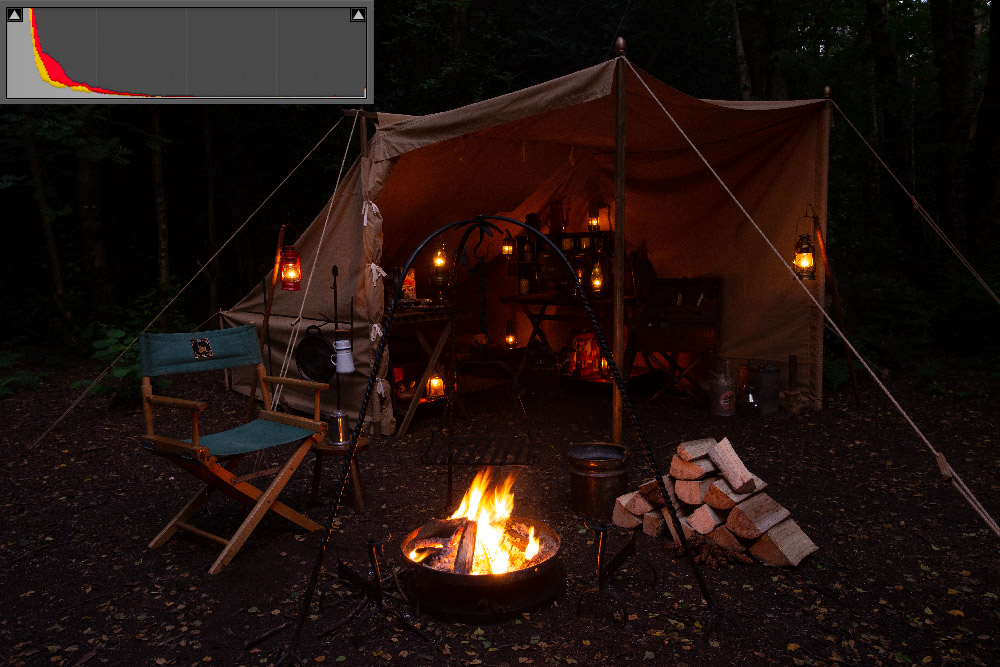
Pay particular attention to how to turn on the histogram mode, highlight warnings, change exposure modes, aperture, shutter speed, ISO, white balance, exposure compensation, manual focus, display brightness, turn off any automatic flash, shoot in live view and set the camera to record RAW image files. Every camera is slightly different so I cannot possibly be expected to know how to do any or all these things on yours.

You also need to understand how exposure works, which means learning about the relationship between shutter speed, aperture and sensitivity ( ISO ). This link Is a good place to start, in fact I recommend a good look at all the tutorials on that website as I do not know anywhere that presents better information about how photography really works. It is well worth your time to read through it.

These are the basics of photography that every photographer should understand. I'm sorry but I do not have the time to teach you all these things so you do need to do some homework. There are no short cuts or magical settings if you want to take photographs like these.

If you are shooting RAW files, which I highly recommend, you will need some kind of raw processing software, either commercial, open source or supplied with your camera, often via a web site. Put simply, if you are not shooting RAW files you are wasting about 90% of the potential quality that your camera can produce and you are unlikely to be able to apply most of the post production techniques that you will see later in this article. You will also probably need some kind of image processing software. Again commercial, open source or supplied with the camera.
 
Last edited:

Wayland

Hárbarðr
There are some things we can do to improve our chances and probably the best of these is get a tripod.

If we put our camera on a sturdy tripod or use some other means of supporting the camera so that it doesn't move we have removed the likelihood of camera shake from the equation.

We can use longer shutter speeds and we only have to worry about subject movement. If everything in the picture is stationary no problem. It means we can stop down to increase the depth of field without having to increase the ISO.

In practice I usually use a mid range setting between f/8 and f/11. It's a good compromise which also tends to be the sweet spot for getting the best image quality from the lens, so that’s a bonus.

All sensors have a “base sensitivity” at which they are designed to work best. This is usually ISO 100 to 200 although some top end DSLRs will produce good images at ISO 800 or even ISO1600. On my camera I usually stay at ISO 800 or below for this kind of work.

If you haven’t already done it, turn you flash off.

One of the functions you need to find on your camera is called the histogram. Go check that instruction book. This produces a graph showing the amount of pixels in your image for each level of brightness that your camera can record. Normally the left end is the black pixels and the right end is the white pixels and there should be a spread that looks a bit like a mountain range in between.

Tutorial-3.jpg


Here is an image with it’s histogram overlaid at the top left.

There is no ideal shape to that graph for every picture but if the pixels are all stacked up on the far left, as you see here, then the picture will appear very dark and the darkest areas will be totally black with no detail at all.


Tutorial-1.jpg


This histogram looks better but you can see that there is a line of pixels up the right hand edge. Those are pixels in the image that have burned out to pure white and have no detail. It is mostly the fire and the lantern flames but some will be other detail that we should be able to see like the wood on the stack and the ties on the canvas.


Tutorial-2.jpg


An exposure in the middle is much closer to the mark. We have still lost the brightest details such as the fire and the lantern flames, as shown by the line at the right hand edge and we are still losing some detail in the shadows with the histogram stacking up on the left hand end as well.

This goes to show how much contrast we are dealing with.

In the picture, there are indeed shadows with no detail but our minds are far more willing to accept dark areas that our eyes cannot see into than light areas. In reality, our eyes could probably see the flames but even they might struggle with that deep dark shadow. The feel of this shot is about right and the lighting is nicely balanced.

In general only the very brightest areas of a shot such as the brightest area of the fire or the centre of a lantern should be allowed to burn out at the right hand end of the histogram and if there is a choice try and keep detail even in those brightest areas if you can. Often your digital camera has a mode which you can switch on that will show you the areas that are burning out by flashing contrasting pixels over the display These highlight warnings are a very useful tool if you can find how to switch them on.

So, hopefully we have set ourselves up on a tripod around sunset time, the fire is burning and the lamps are lit. If we are really on our game we also got ourselves a cable release when we bought our tripod so that we don't bump the camera when we press the shutter button. If your camera has a “live shooting” mode that is useful because you can see an approximation of your image on the screen before you take your shot.

Either way, focus your camera, and choose your settings. I usually set the camera to aperture priority automatic, and select f/10 at ISO 800 just because I know that is a sweet spot of my cameras performance, look at the display and see how the ambient light is balancing with the fire and lantern light.

( A good tip here is to turn your display brightness right down. Your eyes are starting to adapt to the dim light and the image on your screen will seem much brighter than it really is. )

When the picture starts to look promising, take a shot.

Now check the histogram to make sure that you are not burning out the highlights. Sky and white canvas are obvious places to check, the fire and lantern flames will tend to burn out a bit but have a look at the left hand end of the histogram, if the graph is very low there you might be able to reduce your exposure a bit to recover some of the highlight detail. If it is very low on the right hand end you might be able to increase your exposure, pulling out more shadow detail, but watch out for the highlight warnings.

The easiest way to adjust your exposure when you are on automatic is not by going manual but to use the over/under exposure compensation settings. ( Instruction book again if it's not obvious. ) The advantage of doing it this way is that once you have the right amount of compensation it is likely to stay correct as the ambient light falls.

Note: if the shutter speed drops too far it is likely that you may have to switch to manual because your automatic function tends to wimp out at about 30 seconds.

I recommend that you also switch to manual focus at this stage. As the light level drops your camera will find it harder to focus and may get it wrong. If you are already focussed and switch it off without moving anything, then that is one less thing to worry about.

Keep taking pictures, memory cards are cheap compared to film, it doesn't matter if you fill them up at this stage because you can sort your pictures out when you get back to your computer. Keep checking for highlight warnings.

As the light level drops, your exposure time will increase, if you have people in your frame they are going to move and blur in your picture. If possible, ask them to stay still for a second or two as you take your picture. This will probably cause a bit of hilarity and will be much easier if they are sitting but it may be the only way to get the shot you want. The flames of the fire will inevitably move, nothing you can do about that but hope.

Somewhere in that sequence of shots, you will hopefully have one where the light is perfectly balanced, everyone is still, the fire looks OK, the highlights are not too burned out and the shadows have a bit of detail in them but it may not look the way you want it to yet. Don't worry, the important thing is that you have the maximum amount of information in your camera that you can get.

Sit down now and enjoy the fire for the rest of the night, shooting time is over. Just like the days of film, darkrooms and chemistry much of the magic happens when you get your picture home.
 
Last edited:

Wayland

Hárbarðr
Now this is the part where I'm going to struggle to instruct you, because there are many different RAW file converters and many different image processing programs out there and they are all have slightly different ways of working.

The only thing I can do is explain my own personal workflow which is done using Adobe LightRoom and PhotoShop. I hope that you can adapt those methods to your own software.

Night-Photo-Tutorial-01.jpg


First you need to decide which of your images you are going to process. It might not be the one that first catches your eye on the screen. You want the one that has the best information in it and for that you need to look after you have made some corrections in your RAW converter. In my case that will be in LightRoom.

I move the images from the card to my hard drive and LightRoom will start building the preview images. I choose a likely looking shot and open it in the “Develop” module which allows me to make some corrections.

The image above doesn’t look great at this stage does it? This is the unprocessed data that your camera has recorded. Cameras usually tart this up to produce a JEPG using algorithms dreamed up by technicians that have no idea what you are actually photographing.

We are going to do the job intelligently using software that is capable of delivering far better control and quality.

Night-Photo-Tutorial-02.jpg


First of all I move the highlight slider to darken the brightest areas. Notice how we have gained more detail in the lanterns and the fire. The canvas shows more texture and some colour but the overall scene looks darker.


Night-Photo-Tutorial-03.jpg

Then I'll take the shadow slider and move it to the right to lighten the darkest areas. Notice it is mainly the darker areas that have been effected, we still keep that improved highlight detail.


Night-Photo-Tutorial-04.jpg


If needed I will then tweak the White and Black sliders to make sure they are not blowing out.

In LightRoom if I press the ALT button while doing this I get a highlight or shadow warning showing areas with no detail. Move the slider until they show and then move back until the whites no longer burn out and only the deepest shadows stay black.


Night-Photo-Tutorial-05.jpg


Add a little Clarity which increases local contrast. Do not over do it or you things will start to look weird.


Night-Photo-Tutorial-06.jpg

Add a little Vibrance which adds saturation to some of the more muted colours. Again, don’t over do it. A little goes a long way.


Night-Photo-Tutorial-07.jpg


Looking at the individual colour channels I reduced the luminance of Green, Cyan and Blue to create a cooler tone in the background. This feature may not be present on some RAW converters but lowering the luminance darkens those colours and also makes them appear more saturated. Look at the canvas over the last three pictures and you can see what is happening but the blue sleeve is now a bit too saturated. I’ll fix that later.


Night-Photo-Tutorial-09.jpg


Then, returning to the main panel I increased the overall exposure and contrast, I then go back to the full set of images that I have taken and apply those same development settings to the whole set. This is usually a single operation in most programs.

This allows me to now make my final choice of which image I’m going to work with in PhotoShop to finish the job.

I can see that sleeve is definitely overcooked now but the tones in the middle of the picture are mostly as we want them so I’m going to continue with this image.
 
Last edited:

Wayland

Hárbarðr
Night-Photo-Tutorial-10.jpg


In PhotoShop I add a signature, copyright data and make a slight perspective alteration to correct the distortion caused by the wide angle lens on the cauldron in the foreground.


Night-Photo-Tutorial-11.jpg


I then used the graduation tool on layers blended in the soft light mode to darken the edges and the background. You will note that the tones in the middle are largely the same as the previous picture but the outer parts of the picture have been returned to a darker tone without losing the detail that we gained earlier.


Night-Photo-Tutorial-12.jpg


The highlights in the trees were a bit distracting so I spotted them out a bit. This was done on a separate layer using the healing and cloning tools in PhotoShop.

Probably the longest part of the process, five minutes or so.


Night-Photo-Tutorial-13.jpg


And the last touch was to reduce the saturation of those blue sleeves with a local adjustment layer.

Add the group logo and it's ready to go.

That probably sounds like an awful lot of work but it probably took me about ten minutes in all.

Admittedly I’ve had a lot of practice but these are images that will not process themselves, your camera is unable to be as precise about it as you can.

Just like the old days of film and chemistry an important part of the job is done long after the picture has been taken.


Night-Photo-Tutorial-I-500.jpg
Night-Photo-Tutorial-II-500.jpg


If we put the original image from the camera next to our finished picture the difference is clear to see.

Which is more real? In terms of what the camera saw it must be the left one but in terms of what my eyes saw when looking at the scene, the right one is a far better representation.

Only by taking control of the process yourself can you hope to overcome the limitations of the equipment and technology.

Did the camera Lie? Not really, it just wasn’t capable of adapting in the same way human perception does.

Is this all PhotoShop trickery? The image is processed to reflect my emotional response and personal impression of the scene. I think it does that honestly.

Perhaps the spotting out of the sky in the background could be questioned but as always, I left the retouching on a separate layer so that it could be restored later if needed.

I personally think it improves the picture by removing distractions and I do not think it greatly effects the accuracy of the scene. The second image feels far more like the way I perceived it when I was actually there.

Ultimately, every picture is an illusion, even news shots present an edited view of the world. you just have to decide how much you trust the integrity of the photographer, his or her perception of the original subject and their ability to bring that perception to you.

Wayland-with-Hurricane-Lantern.jpg


So, that is how I go about creating some of the pictures you see here.

Not quite as simple as pointing a camera at the subject and expecting technology to magically do it all for me.

When people say things like “That’s a good picture, you must have a good camera...” That totally ignores the knowledge and effort that really goes into producing a complex photograph.

The most important part of any camera has always been the ten inches behind the viewfinder.

Having said that, it’s really not too difficult either if we are prepared to do a little homework.

Have a go next time you are out there, you never quite know what you can achieve until you try it.
 
Last edited:

Wayland

Hárbarðr
Something I forgot to mention in the article is that another reason to set up on a tripod before the light fades is that it makes it much easier to see your composition in the viewfinder or on your display.

Look around the whole image and make sure everything is where you want it to be, either in or out of the frame.

You don't want to be changing your position at that critical moment when the light is right because it's all too easy to forget something like refocusing when you are racing against time.
 
  • Like
Reactions: Toddy

plastic-ninja

Full Member
Jan 11, 2011
2,228
260
cumbria
Great tutorial. I've often wondered how much post processing goes into your brilliant pictures.
Thanks so much for posting this. I'm sure I'll not be managing anywhere near as well as you do, but it will inspire me to take a proper camera along more often rather than just accept the limitations of the phone camera. The skills on this forum are amazing.
 
  • Like
Reactions: Wayland and Toddy

Dean

Mod
Mod
Jan 24, 2004
888
125
44
South Wales
www.facebook.com
Great tutorial Gary, every time I introduce someone to light photography and see their reactions using the techinques you taught us at the Bushmoot it brings a smile to my face children absolutely love it when they can see what they have created.
 
  • Like
Reactions: Wayland

Toddy

Mod
Mod
Jan 21, 2005
38,937
4,570
S. Lanarkshire
I have always appreciated your photographs, Gary :) often thought they'd be worth pestering you to produce as posters :D or even as a series of notecards.

Thank you for taking the time to write all this out, to make clear some of the background of the technical, creative and artistic, work that goes into creating the final images.

I confess I'm a lazy photographer, but you've made me think about it, and I will pay heed.

atb,
M
 
  • Like
Reactions: Wayland

BCUK Shop

We have a a number of knives, T-Shirts and other items for sale.

SHOP HERE