Hammock Rigging

  • Hey Guest, Early bird pricing on the Summer Moot (29th July - 10th August) available until April 6th, we'd love you to come. PLEASE CLICK HERE to early bird price and get more information.
Well after a little tinkering, I thought I'd share my webbing set-up.

Inspired by various other rigs I've seen, and adapted to cover all my requirements:

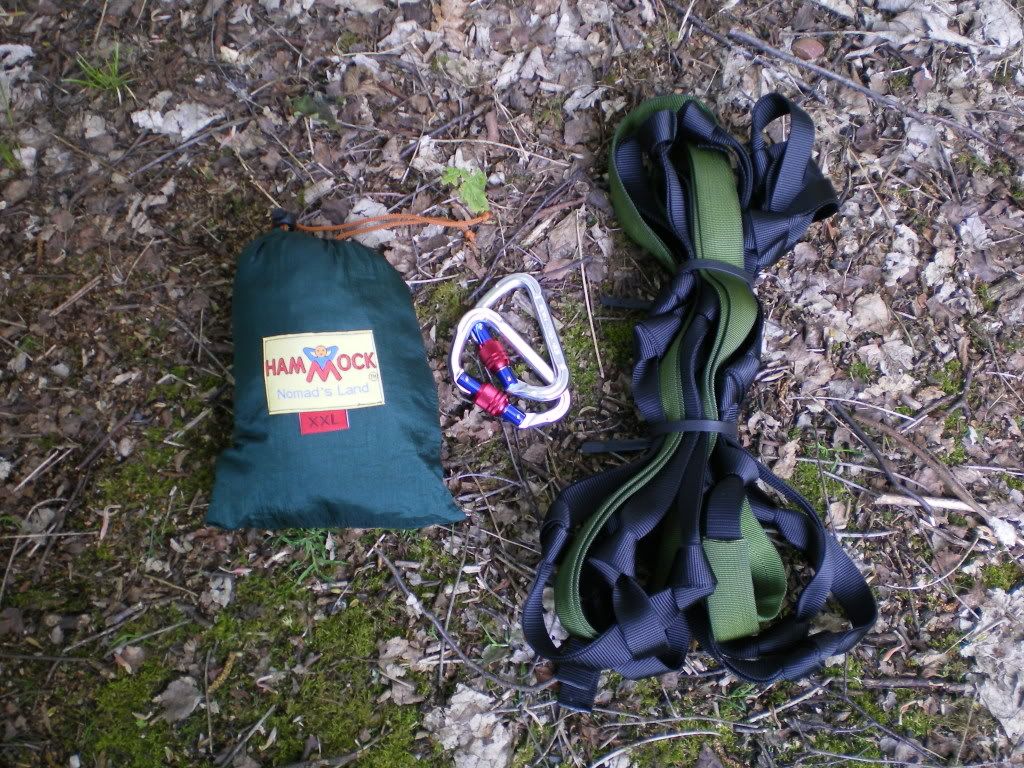
The kit (including GB hammock):
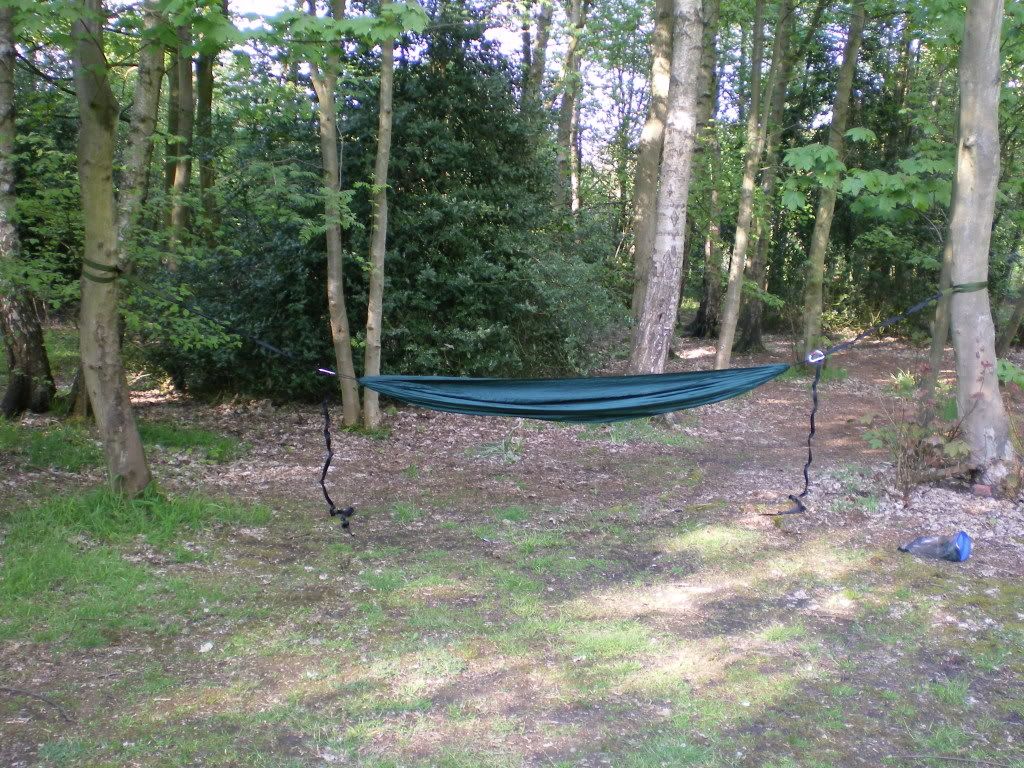
IMGP1844.jpg


The rigged hammock:
IMGP1845.jpg


Close-up of one end:
IMGP1846.jpg


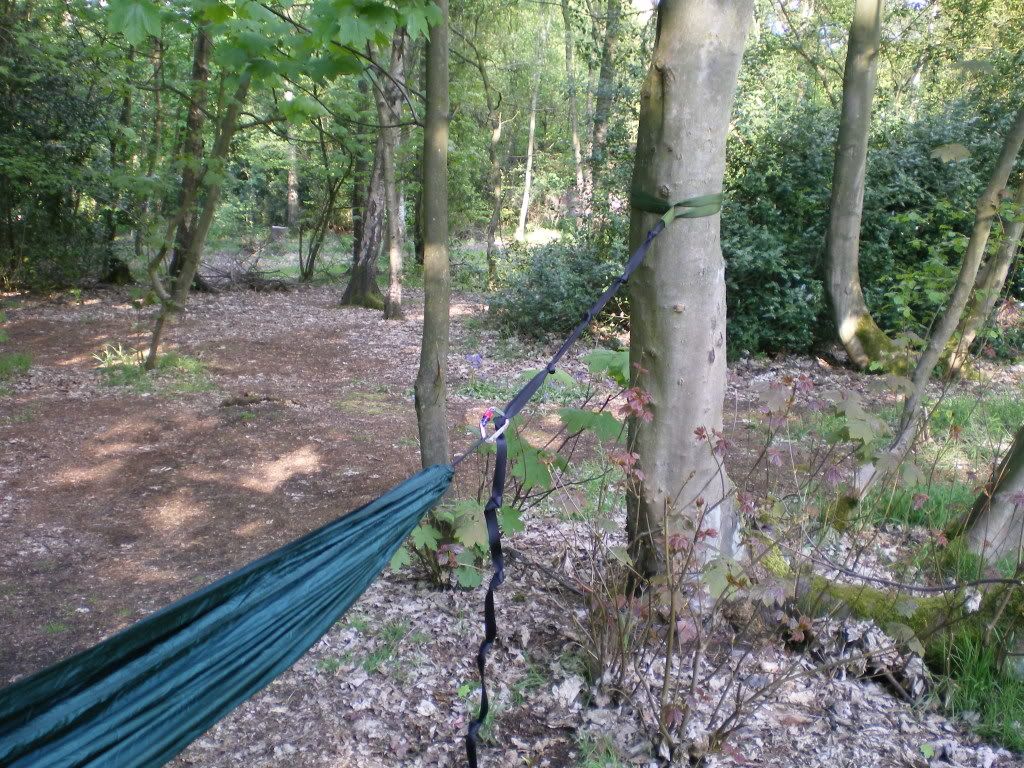
Rig on medium sized tree:
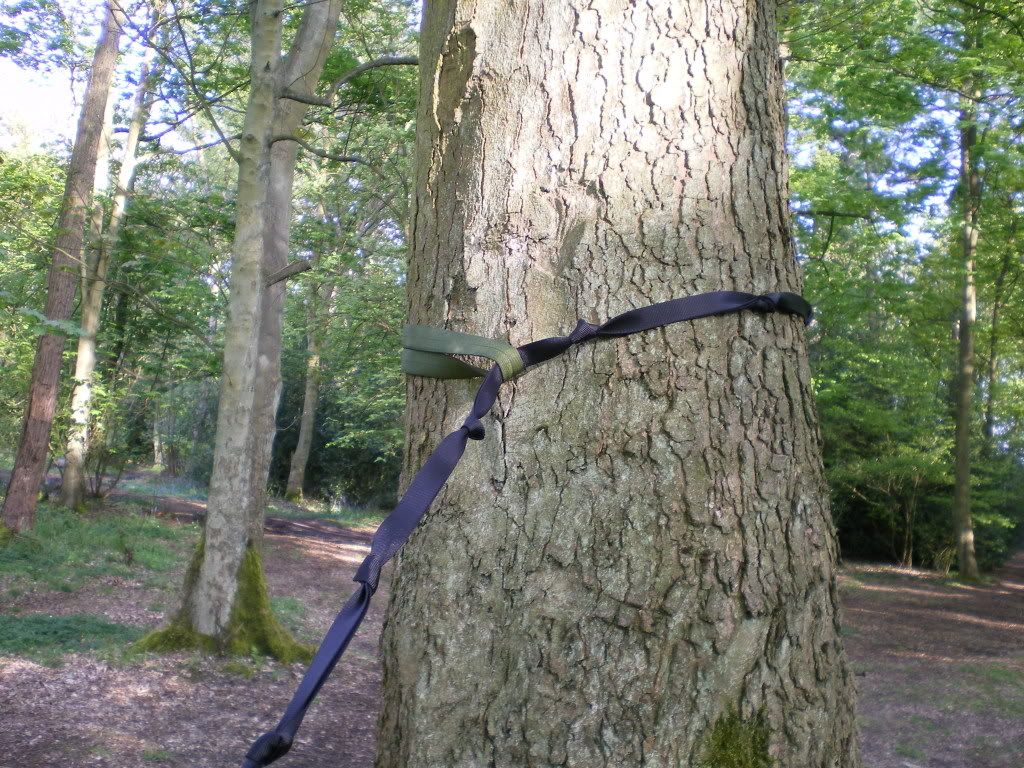
IMGP1847.jpg


Rig on larger tree:
IMGP1850.jpg


The advantages:

  • The webbing used is 25mm flat webbing with a breaking strain of 1.2 tonnes;
  • The high-wear area is sleeved to prevent damage to the main webbing;
  • As the webbing is doubled, the load is spread the same as with a 50mm 'tree hugger';
  • There are no knots to tie when setting up;
  • The overhand knots in the webbing are adjustable if required, so the rig has as much adjustment as with rope & knots;
  • The system can be set up in 3 minutes and taken down in 2 minutes, if not less (I wasn't racing when I timed it).

The webbing rig is 5 metres in length on each side, with 1 metre sleeved, so can accommodate almost any sized tree / be used in areas where trees are further apart.
 
I think I see a cow hitch around that tree ;-)

My statement was referring to 'proper' knots (eg. evenk slippery hitch / taut tarp hitch).


Don't the overhands under load become difficult to adjust later? why not Fig. 8's instead?

So far they don't seem to lock in the webbing the way rope knots do, when unloaded they seem fairly easily adjusted, perhaps time will tell a different story? W.r.t. fig. 8 knots, I figured they would be my 'fall-back' plan, but as they use a little more webbing up I'd try the system out with overhand knots to get the maximum usable length.

I alternated the side I tied the overhand knots as this keeps the rig straighter.
 

covertcraft

Member
Feb 6, 2009
26
0
Milton Keynes
nice set up that, iv'e had a line ping on me due to abrasion so I like the idea of sleeving it. looks like they should last a long time. Thanks for sharing.
 

Ogri the trog

Mod
Mod
Apr 29, 2005
7,182
71
60
Mid Wales UK
I was also about to query the sensibility of all those knots,
but thinking a little deeper, it all makes sense - quick, easy and convenient. Clever thinking that man.

I might consider joining the two ends of the webbing above the hammock as a makeshift ridgeline which would also keep them up off the floor, clean & dry, but in extremis, you might get some water tracking along the ridge.

Good set up.

ATB

Ogri the trog
 

Barn Owl

Old Age Punk
Apr 10, 2007
8,245
5
58
Ayrshire
I'm toying with giving the hammock a go after hearing how comfy they can be.

This looks like an excellent set up.Simple but effective.

Thanks for that.
 
I might consider joining the two ends of the webbing above the hammock as a makeshift ridgeline which would also keep them up off the floor, clean & dry, but in extremis, you might get some water tracking along the ridge.

Ogri

I did consider this, but it only works where there is sufficient spare webbing (ie. the trees are close enough / are not too large diameter). Whilst I didn't do it for the photos (to prevent confusion) in such cases I plan to loop the spare webbing by connecting one of the knots nearer the end back onto the karabiner. This would also create a 'drip line' in case of wet weather.

Thanks for your comments.
 

Elines

Full Member
Oct 4, 2008
1,590
1
Leicestershire
Its probably me but I can' t work out how the webbing stay attached to the tree:

- what does the back of the tree look like

- what does it look like if the webbindg is just laid flat in a straight line

(pics of either or both may help me understand)
 
Its probably me but I can' t work out how the webbing stay attached to the tree:

If you look at the photo showing the green sleeved webbing around the tree you will see it's in a loop. Both 'legs' of the webbing coming from the loop go around the back of the tree and pass through the loop.

Your weight in the hammock simply pulls on the webbing casuing it to tighten around the tree.

The reason for all the knots is to provide a ready choice for attachment when rigging, which can be adjusted to get the hammock in the right area, and then fine tuned if required by adjusting the knot to the required setting.

Whilst all this may sound complicated, its actually VERY simple, hence it works so well.

I hope this makes sense.
 

Elines

Full Member
Oct 4, 2008
1,590
1
Leicestershire
Thanks

I think I am getting there. So ..........

- the blue tape is threaded through the green sleeve

- hammock not fitted at this point

- the green sleeve (with tape inside) is made into a loop and wrapped around the tree

- the two ends of blue tape are put thru the loop and pulled tight (in photo 4 above - the one next to bottom) I hadn't realised the blue tape was doubled - it looks as though there is only one 'end' of green loop - which is why I couldn't work out how it fitted

- you then fix the krab at the most suitable knot, fine tuning if necesary

Is that it?
 
Dec 16, 2007
409
0
Thats it.

When you get a "ticket to the moon" hammock it comes with hooks where the krabs are and 2 lenghts of rope doubled over and pre knotted.
Works the same as this and is good to jst throw a hammock up and have a break if out walking, riding etc. I carry one in my bum bag when out on the bike so can have a quick nap mid ride.

Like the set up it is so simple.
Swampy

DSC00333.jpg
 

BCUK Shop

We have a a number of knives, T-Shirts and other items for sale.

SHOP HERE