Down the line

  • Come along to the amazing Summer Moot (21st July - 2nd August), a festival of bushcrafting and camping in a beautiful woodland PLEASE CLICK HERE for more information.

Tomteifi

Nomad
Jan 22, 2016
294
16
Carmarthenshire, South Wales


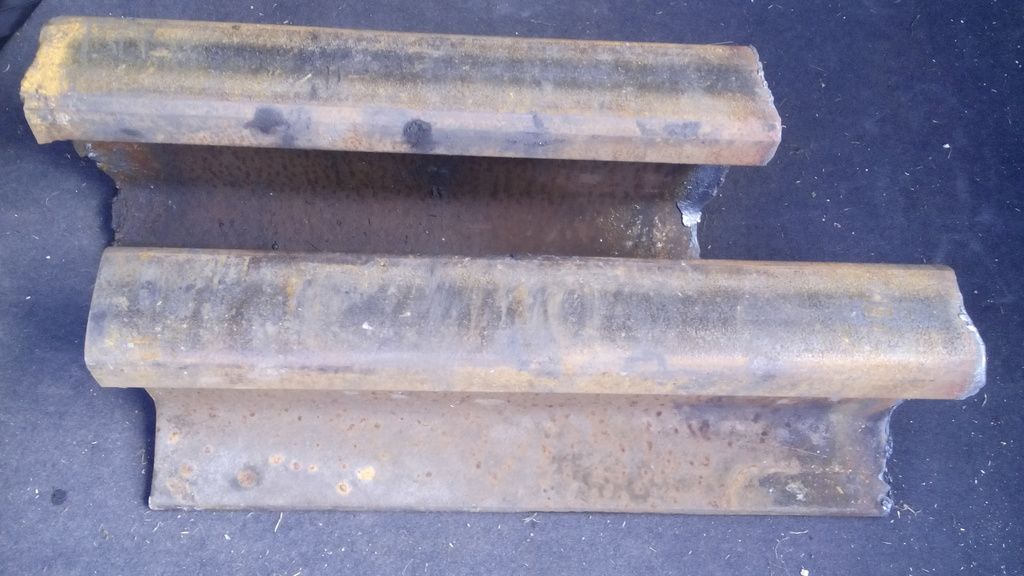
Got hold of these for next to nothing local to me. One guess what they are going to be. Pics. to follow on progress.
Smaller one for my boy for knife making, slightly larger one for me for general metalwork also. Haven't done one before
so any good tips will be appreciated.(Feeling much better now John, thanks.)

cheers:drive:

Tom.
 
Ah - been down Henllan have you?:)
Idealy you need to flatten the tops first - grind or weld on a plate - to give a 90 degree edge on top.... not that I did with mine and I still managed to make stuff....
Bed them well onto a stump - I used some angled pins - and make sure the stump is not going to move or bounce too much ... mine "walks" across the floor if I am doing a lot of heavy hitting and is a *** to move back!
Have fun!
 
Er.. the other place (whose name escapes me) on the way to Carmarthen who sells sleepers and stuff as well. Got one for my boy who wants to do some knife making so i'm along for the ride as it were. Was always keen on them but never got one-til now that is. Having them cut for noses and tails etc. at the moment (not exactly a hacksaw job is it?) Will be doing the shaping at home. Good idea for the plate on top- would save a lot of grinding(will consider that tip John) Yes stumps are good, heavier the better, with the anvil top bed finishing at knuckle height for an optimum hit! Was my best subject at school but never carried it on later. Got a mate who cuts and sells woods and has some huge oak pieces-will need me trailer for that job when it comes around. First job with it will be making the spikes to hold the b*****rs down. Already have the roaring fiery dragony type monster that heats stuff up a lot.

cheers

Tom.
 
Same piece, different angle...

The other piece in the pic. will be similarly doctored(its a few inches shorter in length)and will be used for knife making(not by me, by my offspring...hmmm maybe it is me...arrgghhh..its me reincarnate!) The first one I will be using for general small metallic projects...oh I do talk rubbish don't I? Have not got a clue what i'm going to use it for yet but I will use it for something!!!

Tom.
 
Last edited:
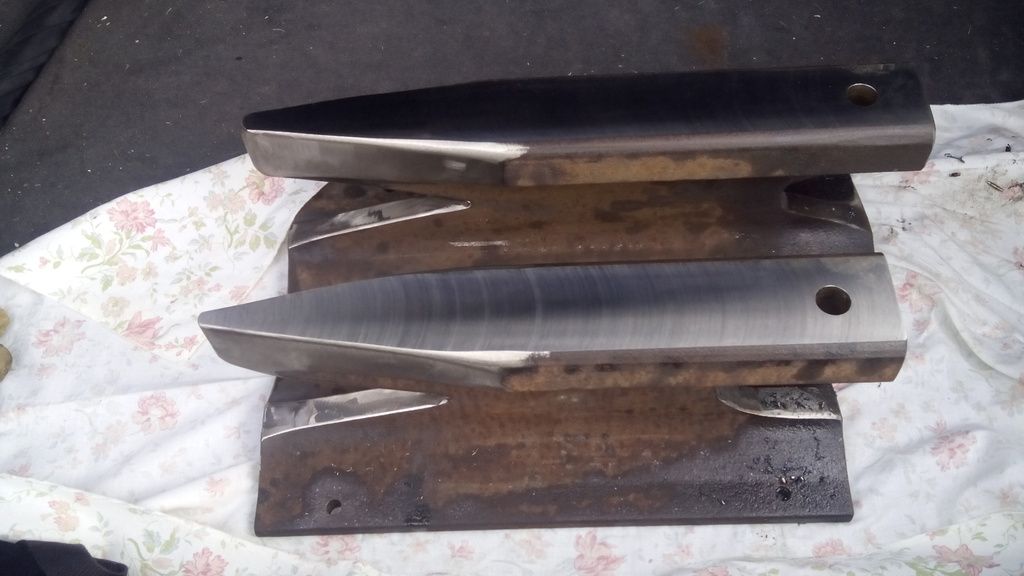
hen... a close up, warts an' all of the 'ickle booger...The ends and angles have been cut on a bandsaw. The top has been surface ground and finished with 180grit on a large belt sander. The holes were drilled using a pillar drill and hss bits. The rest will be cosmetic apart from maybe squaring up the hardy hole in the top.
 
Last edited:
Thanks. Baby at the front weighs 27.5lbs and big bertha is 31lbs. Just sourced a goodly amount of gratis railroad spikes for the 'treatment.' Can hardly wait for those to arrive. Bit more to do on the anvil side yet but the worst is done and dusted. Need to build up a fair suitable tool base but can start with what I've got already plus make a few also as I go. Smaller one is going to my boy for him to start knife making-bertha is staying with me. The top is so nice and totally flat, I could almost lick it. Good solid base is also on the agenda and being addressed and includes epoxy, screws, spikes, hardwood base and concrete-should be fun.
 
One anvil update; the smaller of the two has now been finished in that its had a good wire brushing(electrically) and has had a thin coating of beeswax/blo/turps mix and is ready for my boys birthday treat. The two rusty old spikes are 90 odd yr old 5" jobbies from a narrow gauge railway and will be his first job on it. A temporary work holder will utilise the pritchel hole for some of the work. Pics to come when done.
 

BCUK Shop

We have a a number of knives, T-Shirts and other items for sale.

SHOP HERE