Deerskin to Buckskin

  • Hey Guest, Early bird pricing on the Summer Moot (29th July - 10th August) available until April 6th, we'd love you to come. PLEASE CLICK HERE to early bird price and get more information.

Toadflax

Native
Mar 26, 2007
1,783
5
64
Oxfordshire
After getting a deer hide just after Christmas (thanks to Silverback for this), I've eventually got started on turning it into buckskin. This is my first attempt, so I'm not going to do a tutorial as I don't know enough about the process, but if you do want information I thoroughly recommend the Deerskins to Buckskins DVD and book available from Amazon and from http://www.braintan.com. I managed to borrow a copy of the DVD from Buckshot :thanks: and it is one of the best training DVDs I have ever seen. The book is useful, but the 2.5 hour video gives you a real feel for what you need to do.

Here's the original hide after defrosting it (untreated hide keeps well in the freezer) - a Muntjac, a good one for a beginner because it is pretty tough and thick and small enough so that it isn't too much work in each of the stages, so if you mess up then you haven't wasted too much time.
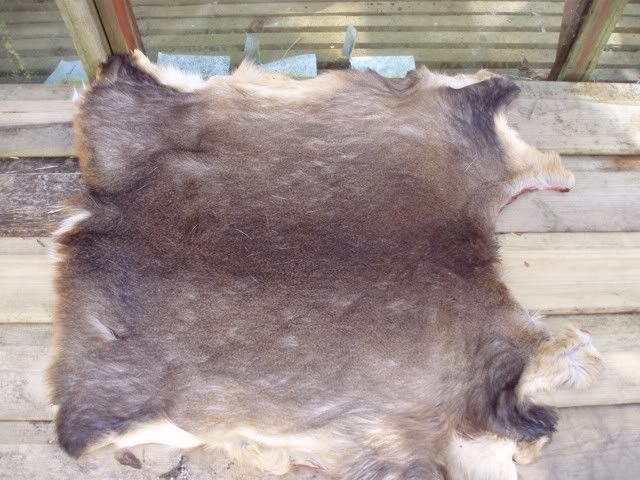
buckskin_01.jpg


The first stage is fleshing, removing the remains of meat and fat from the inner side of the hide. I used a branch from one of the trees in the garden as the scraping post, having removed the bark and left it to dry out for a few months, supported by my workmate. The branch would be too small a diameter for a large hide, but works well for the small Muntjac. The scraper is a Frosts draw knife (thanks again to Buckshot for this) suitable blunted using my sharpening stone rubbed across the edge.
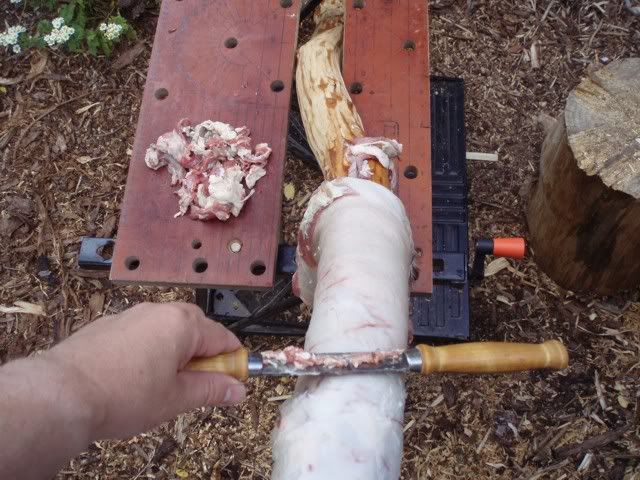
buckskin_02.jpg


And here it is ready for bucking.

buckskin_03.jpg


After fleshing, the hide is soaked (bucked) in a lye solution. I used hydrated lime bought from the local builders' merchant. I had to buy a 25kg sack for about £12 and used 75g for my solution! I'm going to keep most of this for future hides, but If anyone wants some of this I can bring some along to the Moot (send me a PM).

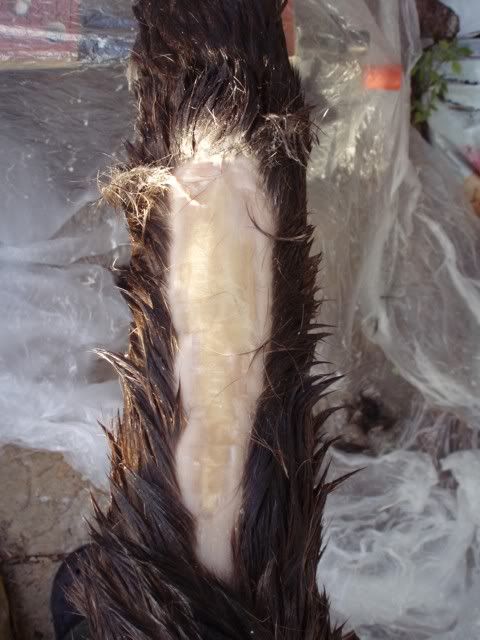
After 3 days, the hair was pulling out easily and the hide felt swollen so I started on the graining stage. Here you can see the early stages. A similar process to fleshing, but you scrape the hair out and then scrape hard to remove the grey/blue grain layer to reveal the tawny fibrous layer underneath.
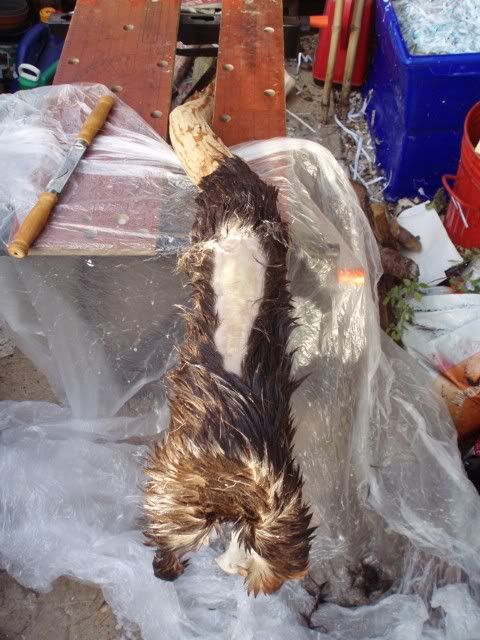
buckskin_04.jpg


It's more obvious on this close-up.

buckskin_05.jpg


It's hard work, and you need to be thorough to ensure that all traces of the grain are removed, otherwise they will show up as white patches when you smoke the hide.

A larger area now scraped, you can see some tool marks on the hide. I don't know if this is because the scraper is perhaps still a bit too sharp, poor technique, or whether they will disappear in later stages.
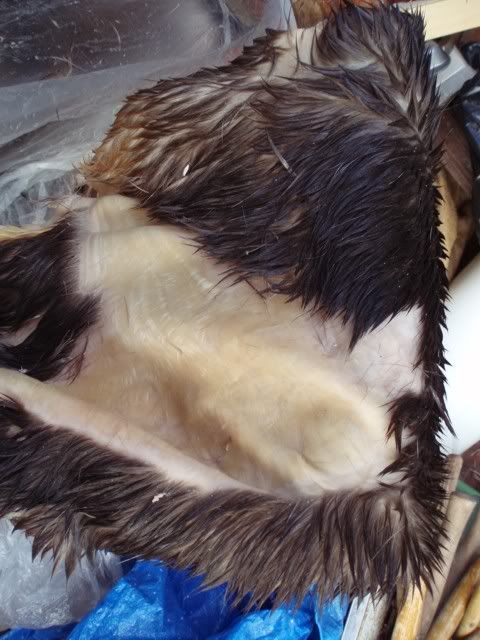
buckskin_06.jpg


And here it is fully scraped...

buckskin_07.jpg


...well, not quite, there are still some traces of grain but it was getting dark so I had to stop. I've dropped it back into the bucking solution for another day and I'll have a go at finishing it off this evening.

So far, it has gone remarkably well - just like it shows you in the book and the DVD.

More to follow in days to come.


Geoff
 
Last edited:

Eric_Methven

Bushcrafter (boy, I've got a lot to say!)
Apr 20, 2005
3,600
42
73
Durham City, County Durham
That's an excellent start. You might find the tool marks are from the fleshing beam not being perfectly smooth. Any dips and bumps in the beam will be reflected on the hide when you're scraping. It seems to have worked out well though. I find the best fleshing beam for your kind of setup is a length of plastic drain pipe filled with sand and a couple of end caps.

Eric
 

Toadflax

Native
Mar 26, 2007
1,783
5
64
Oxfordshire
You might find the tool marks are from the fleshing beam not being perfectly smooth. Any dips and bumps in the beam will be reflected on the hide when you're scraping.

I suspect that you are correct there - thanks for the advice. I took the bark off the branch using the draw knife (before I blunted it) and scraped it fairly flat, but it certainly isn't completely flat and smooth.


Geoff
 

Toadflax

Native
Mar 26, 2007
1,783
5
64
Oxfordshire
A couple of days on, and some further progress.

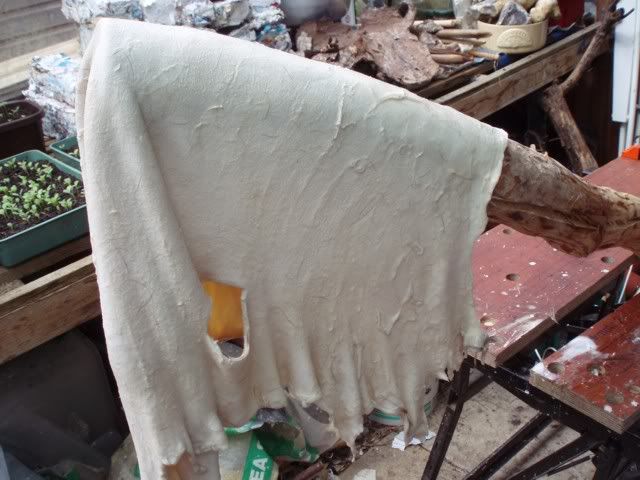
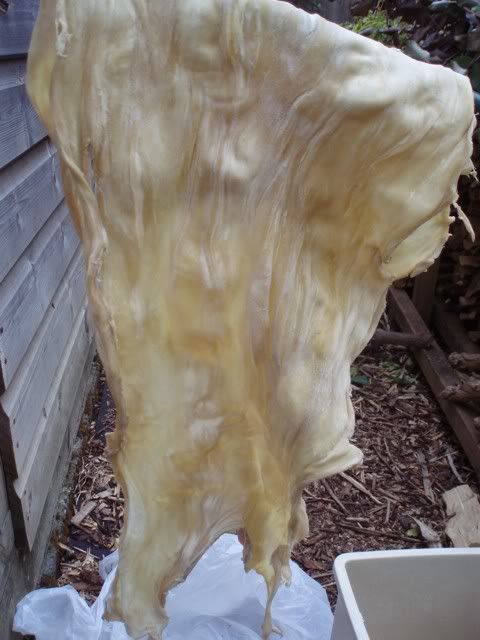
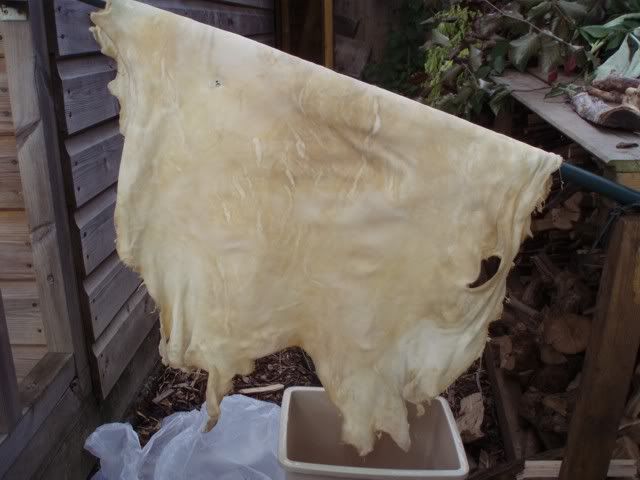
After bucking and graining the hide for a second time, and getting all of the grain off (see later), I rinsed it in a bucket of clean water for 24 hours (with a hose on trickle to give a little bit of water flow out of the bucket). After this, the hide is no longer swollen and is floppy and stretchy...well almost so. Some of the thicker bits are still a bit stiff and swollen, so it really needs some more rinsing to flush out all of the lye. Note the hole in the hide that must have been made when it was being skinned. You can also see the remnants of the membranes on this (inner) side of the hide.

buckskin_08.jpg


Although it needs more rinsing, I thought I'd have a go at membraning it - removing the last traces of fat and membrane from the inner side. This is a fairly quick job and evidently doesn't need to be done too thoroughly, because you can remove the final traces when softening (this may be where the pumice stone comes in, to sand the surface smooth).

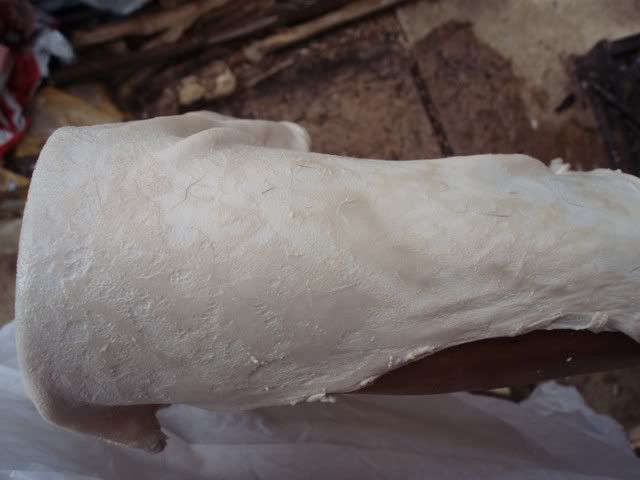
A look at the other (outer) side of the hide shows that the grain has been removed pretty well...

buckskin_10.jpg


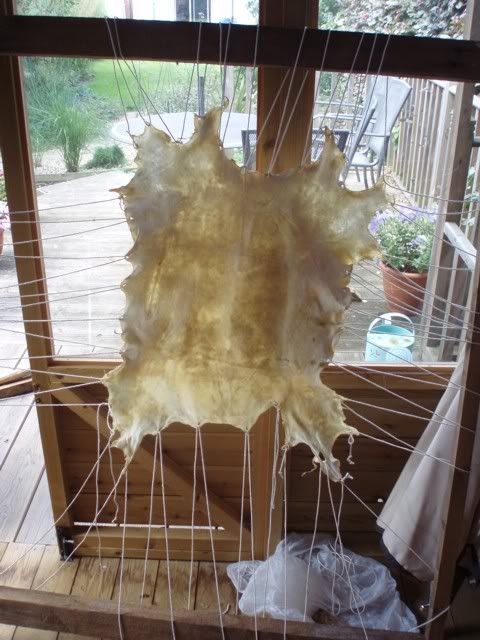
The dark marks are just where the hide has been compressed against the edge of the beam during membraning and should disappear, though you can see another knife mark at the lower right hand corner. Knife marks are clearly something to be aware of if you are getting a skin from someone else - particularly if you are paying for it. (I got this one gratis, so I have no cause for complaint! :)).

However, despite being absolutely convinced that I'd removed all the grain, there is still quite a bit remaining at the neck and one of the legs (darker patches on this photo)...

buckskin_09.jpg


...so it's back into a new mix of the bucking solution for one last time. If I can't get it off this time, then it's going to have to stay.

Next installment hopefully in a few days time.


Geoff
 
Last edited:
British Red

M.A.B (Mad About Bushcraft)
Dec 30, 2005
26,715
1,962
Mercia
This a fantastic post Geoff - these sorts of thing bring me back to this site

Truly excellent - I'm enthralled

Red
 

Toadflax

Native
Mar 26, 2007
1,783
5
64
Oxfordshire
Thanks for all the encouragement!

So, onto the next chapter.

Having had one go at membraning the hide already, the offputting smell of rancid fat has now gone and the hide is almost oudourless. I'll probably have a more thorough go at fleshing when I do my next hide.

After a third soak in the bucking solution, I was getting fed up with graining, so I really laid into it and discovered (as it says in the book) that hide is actually very tough stuff, and you can really scrape it very hard without damaging it. I thought in any case that the bits where there was still some of the grain layer were at the edges, where I was probably going to lose some of the hide in any case when I come to soften it and finally to cut it out when I make something from it.

So it's into the rinsing bucket.

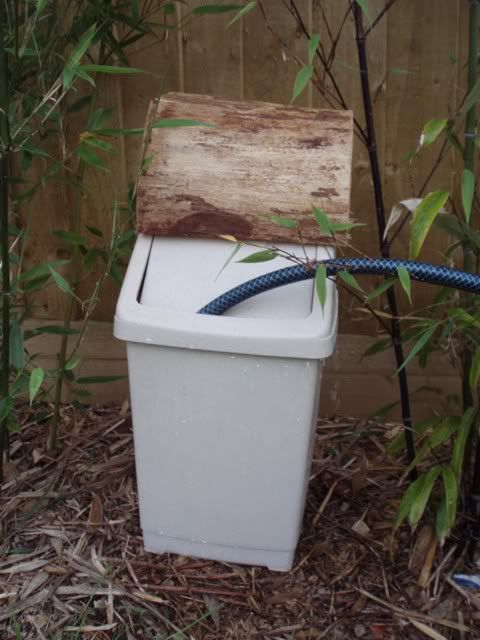
buckskin_14.jpg


As for the first time when I tried it, 24 hours isn't quite long enough and some of the thicker bits of the hide are still a bit swollen and stiff (and tawny coloured) so I'll leave it in there for another day.

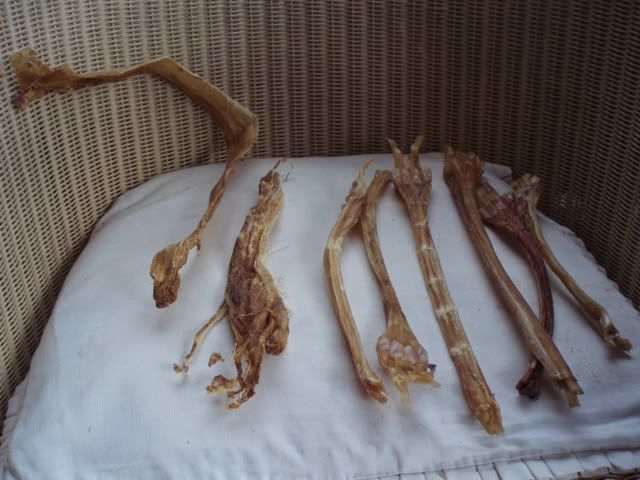
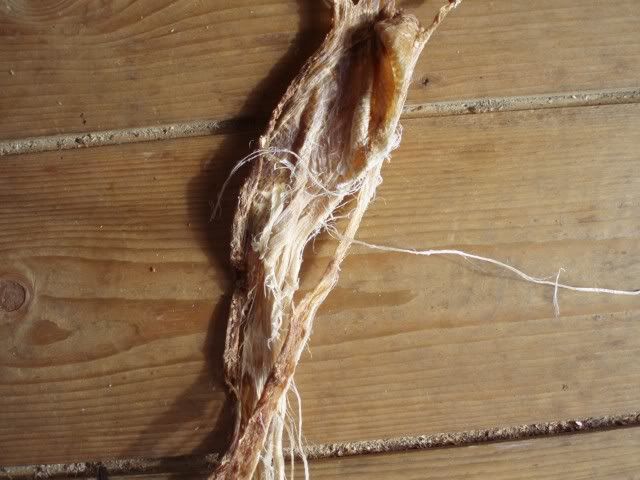
In the meantime, I'm going to have to sew up the two knife holes in the hide and I'd managed to buy some sinew from someone on ebay. I got a mix of red deer leg sinew (which probably isn't going to be long enough unless I take out the fibres and twist it into a sinew thread) and reindeer backstrap, which is ideal for this purpose.

buckskin_11.jpg


You can see from the next picture how the backstrap sinew will easily pull into the individual fibres.

buckskin_12.jpg


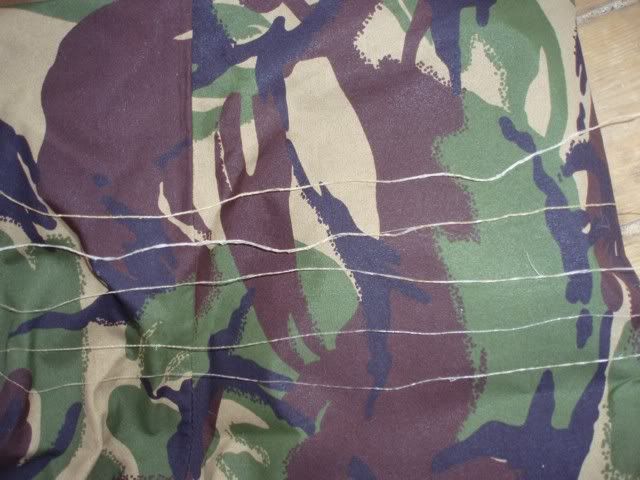
And here are a few of them ready for sewing.

buckskin_13.jpg


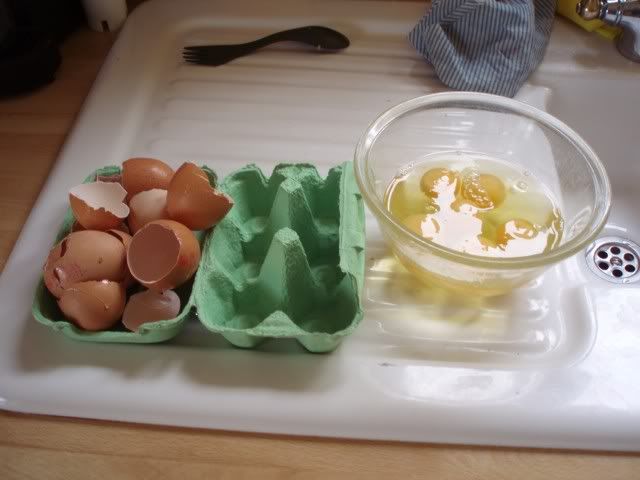
The next main stage is dressing the hide in preparation for softening. The traditional method is to use the animal's brains ("every animal has enough brains to tan its own hide") but my wife won't allow me to bring brains into the house, let alone use her liquidizer to mash them up! So it's off to the local shop to get a dozen eggs.

More to follow in a day or so.


Geoff
 
Last edited:

Toadflax

Native
Mar 26, 2007
1,783
5
64
Oxfordshire
Well, I'm now getting in sight of the final product! It's been a fair bit of work so far, but I'm now getting excited about seeing what I can produce.

After the rinsing stage, I had another go at membraning, and got some more off. This has the added benefit of squee-geeing out some of the moisture. At this stage the hide is still a rather damp piece of wet skin...

buckskin_15.jpg


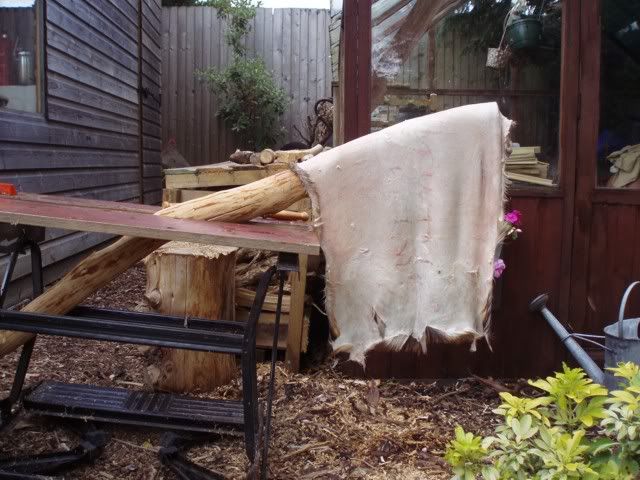
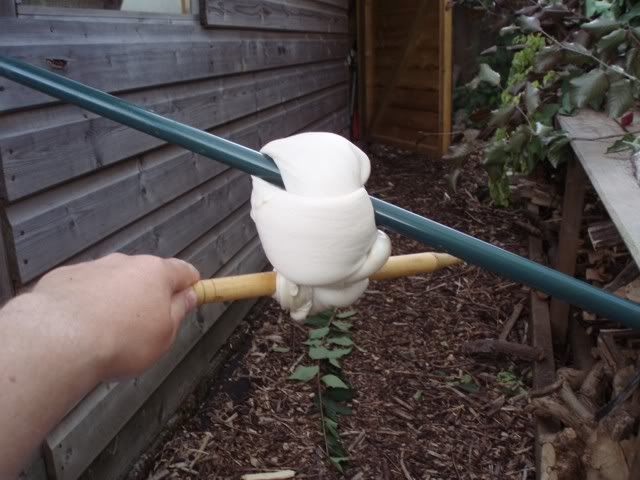
...so you need to ring out the hide in preparation for dressing. This is done by hanging it over a horizontal pole and repeatedly twisting it using another stick, until you don't get any more liquid running out.

buckskin_17.jpg


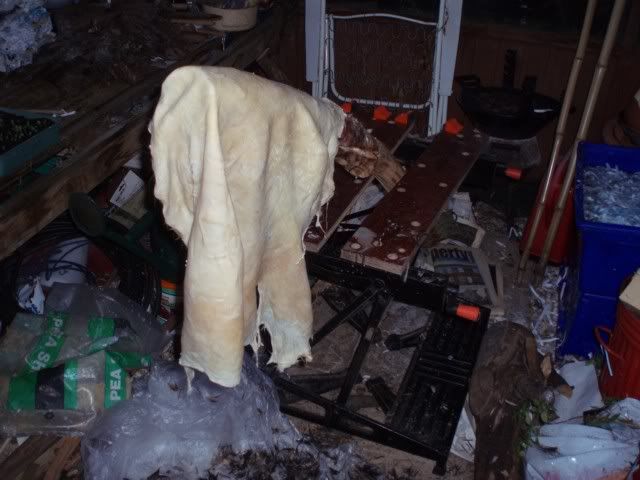
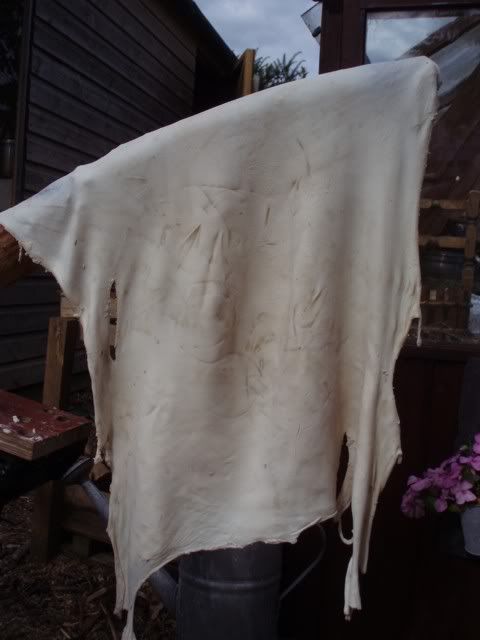
Once this is done, you open up the hide and it now looks rather like a wet chamois leather.

buckskin_18.jpg


It now needs to be stretched out by hand before soaking in the dressing solution.

buckskin_19.jpg


It's now that I can start to see what the final buckskin may look like. Most of it is brownish, this is where the skin is still a bit damp. Towards the bottom right is a patch of white - this is the colour it should finish up, before smoking. It's very interesting how you can stretch a brown piece and it turns white. At the top of the hide, slightly left of centre is a bluey-white patch - this is where there is still a fair bit of moisture in the skin - this can be reduced by scraping it with the scraper on the fleshing beam to push out some of the moisture, them mopping it with a bit if kitchen towel.

Once it has been well stretched, it needs to be soaked in the dressing solution. In this case, half a dozen eggs mixed in 2 pints of water.

buckskin_16.jpg


I'm going to leave it in this for 24 hours before ringing it out again, dressing it once more, then ringing it again in preparation for sewing and then stretching, if I get a good dry day.


Geoff
 
Last edited:

Toadflax

Native
Mar 26, 2007
1,783
5
64
Oxfordshire
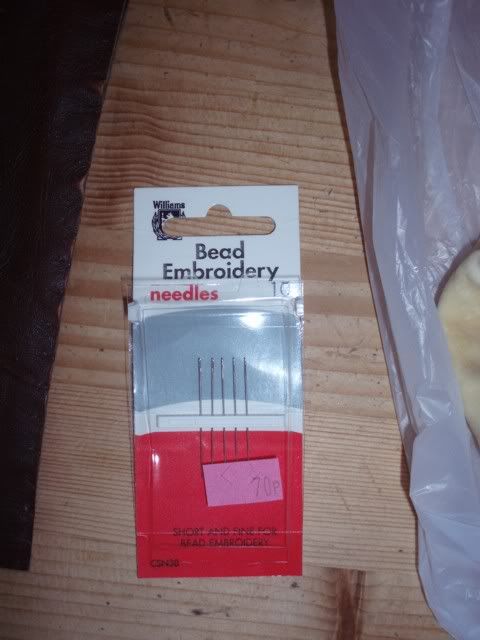
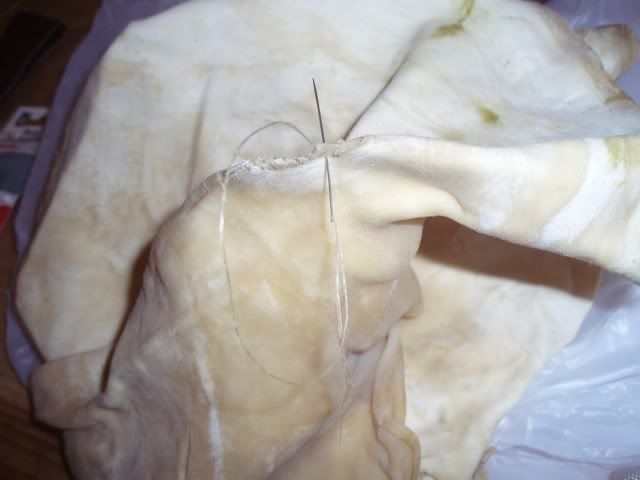
After dressing the hide in the egg mix a couple of times, and finally ringing it out as described earlier, it was time to get onto sewing up a couple of holes. I originally tried a standard sewing needle, but couldn't get it through the hide so I had to wait a few days until I could buy the recommended needle types.

I first tried small beading needles...

buckskin_20.jpg


...which worked fairly well, once I'd managed to get the backstrap sinew threaded through the very narrow eye...

buckskin_22.jpg


...except I broke two of them while pulling them through the hide - the eye itself broke off - so I then switched to leather needles, which have a triangular section that cuts through the hide. These needles are larger and leave larger holes, but at least I did manage to get two holes sewed without any more breakages. If, as it was for me, you are a novice at sewing leather, it is remarkable how tough it is to sew. I needed to use a thimble to push the needle and also a small scrap of leather to grip the needle when pulling, because my fingers were too slippery to grip it.

If you are wondering what the green patches are, it's one of those unfortunate incidents that you couldn't prepare for. After ringing the hide, I sat down in one of the garden chairs to stretch the hide open over my knees, only to see these green patches (and several others) appear. Without me noticing, my hand had brushed against some bird droppings on the chair and I'd spread the mess over the hide. :( Hopefully the smoking process will hide these stains.

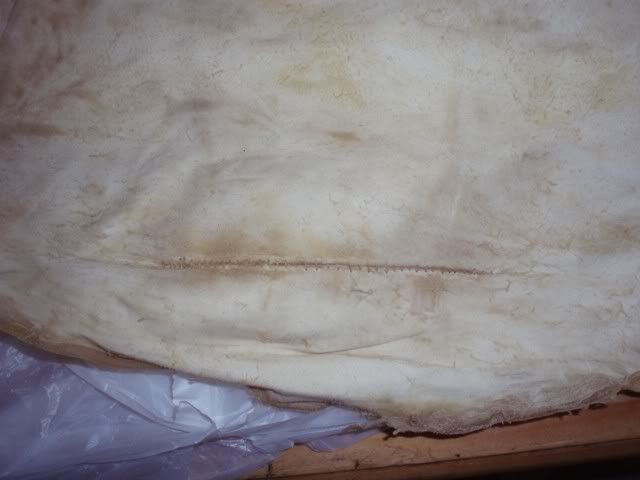
Here is the larger hole finished...

buckskin_23.jpg


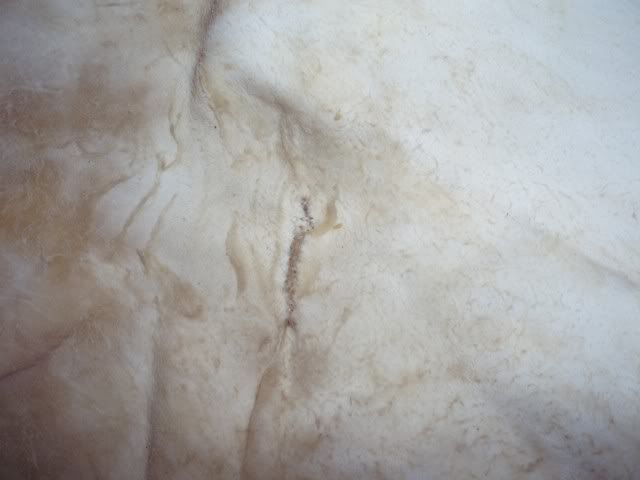
...and the smaller one.

buckskin_24.jpg


I wanted to use natural sinew, but if I was doing a lot of sewing I'd probably be inclined to use artificial sinew, simply because you should be able to make consistent width and length pieces.

Tomorrow I have to build a softening frame, in preparation for the forecast good weather on Sunday when I can finally soften and stretch the hide into buckskin.


More to follow in due course.


Geoff
 
Last edited:
Toadflax

Native
Mar 26, 2007
1,783
5
64
Oxfordshire
After an exhausting day, it's nearly finished.

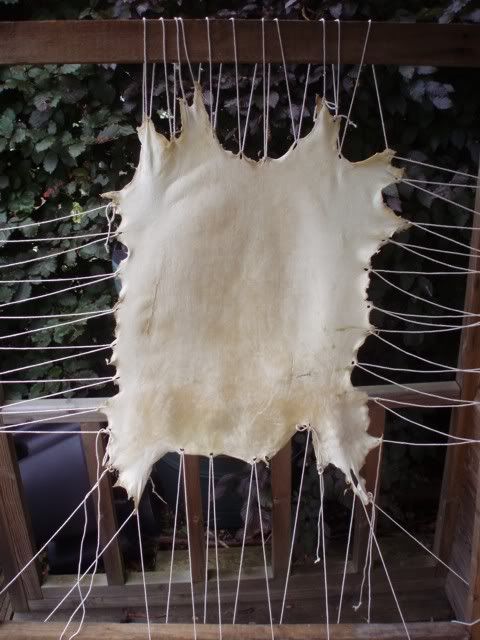
I knocked up a softening frame by nailing together a few bits of wood lying around the place, and tied the damp hide into the frame.

buckskin_25.jpg


You then work the hide as it dries by pulling at the edges with your fingers, and massaging /stretching it with a bevelled piece of wood, buffing the surface every so often with a piece of pumice stone. After some time, you can see that parts of it are turning white, while there are still damp (light brown) patches.

buckskin_26.jpg


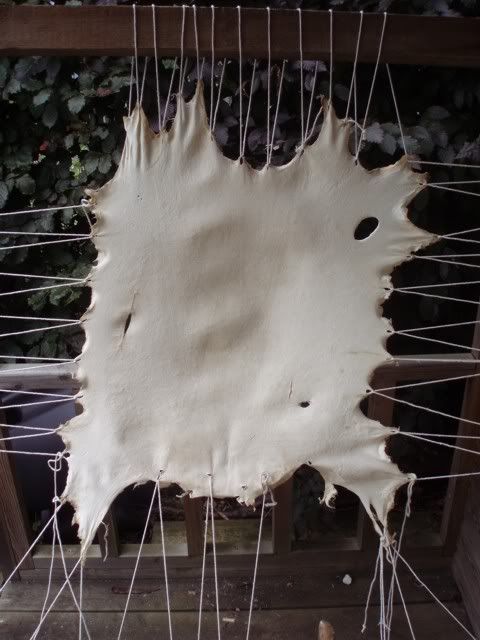
It is very hard work, and you can see now that the stress of the softening process has pulled open the two holes that I had stitched up, and I've managed to push another hole in the hide at the top right corner. However, at the edges the hide has now turned into very soft flexible buckskin. the wrinkles in the middle of the hide here show where it is still damp and needs to be worked.

buckskin_27.jpg


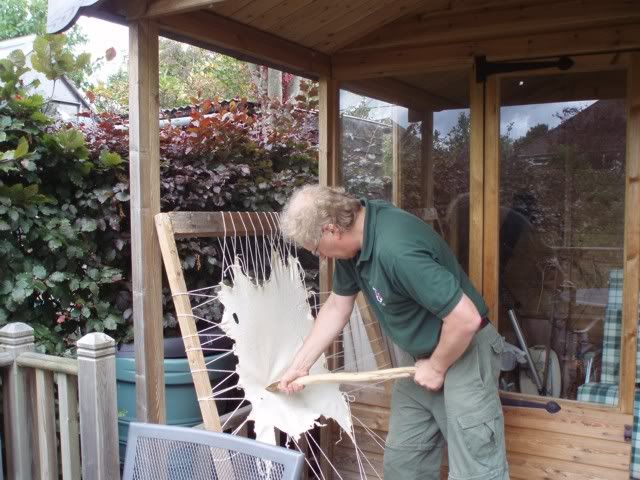
This is the main technique for softening, constantly massaging the hide with the bevelled end of a big stick.

buckskin_28.jpg


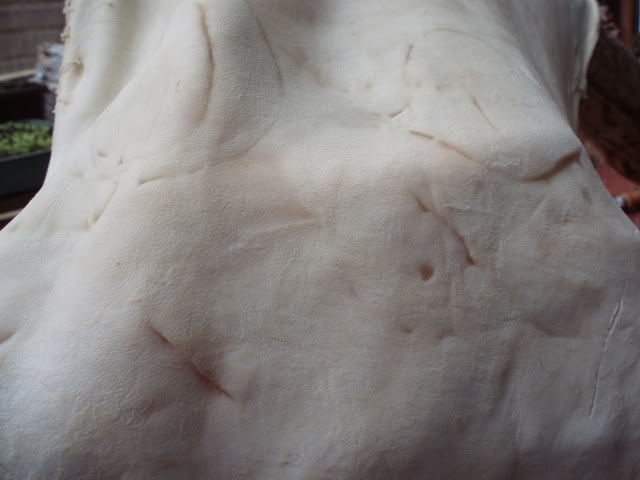
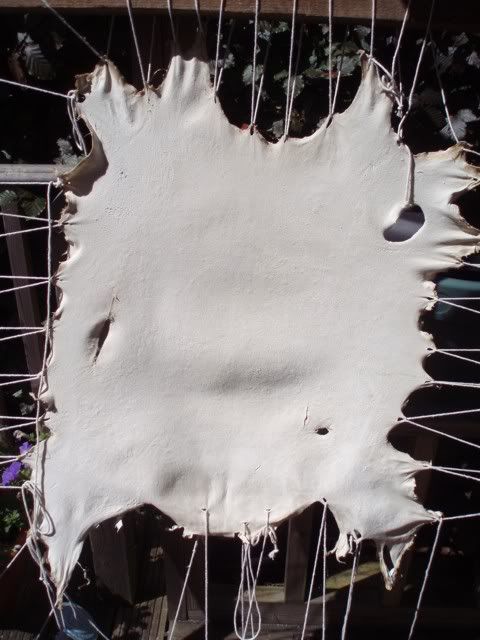
And here is the finished item after an exhausting 4 hours or so. The upper edges of the hide are very soft, the main body is soft, but feels a little bit stiff. I don't know whether this is because it is thick, or whether it just hasn't softened as much as it could. However, it's certainly good enough for the little buckskin pouches that I'm going to make. The central lower part of the hide (the buttocks) has come out very hard and stiff. I don't know whether I just didn't work this properly, or whether the egg solution didn't penetrate this thicker part of the hide during the dressing stage. If this was a really big and good hide, I'd redress and soften again, but I'm just going to accept this as wastage.

buckskin_29.jpg


The next stage is to smoke the hide, to give it that typical brown buckskin colour, and to give it some water resilience (not proofing, but it means that the hide should remain soft if it gets wet and then dries out).


Geoff
 
Last edited:
British Red

M.A.B (Mad About Bushcraft)
Dec 30, 2005
26,715
1,962
Mercia
Wow!!!!!

This thread is just superb. I doff my cap to you Geoff - an absolutely stunning and informative pictorial. I so want to try this

Red
 

andy_e

Native
Aug 22, 2007
1,742
0
Scotland
Having just spent the majority of the weekend brain tanning and working a Roe deer hide up at Loch Tay, I now appreciate how much work goes into producing buckskin, nice to see the process in photos.
 

Joe

Need to contact Admin...
Hi Geoff,

You've done an excellent job on that hide, when you're making something from the finished smokey hide you will know that the hard work was well worth it. The stiff bits around the hind quarters seems to be quite common - the skin is thicker there and sometimes requires a bit more scraping and working while it's drying out. As you've said, it can be rebrained and dried again to make it softer. If I get the same problem on an otherwise soft and flexible skin then I'll try and save those tougher, stiffer bits for making something that requires those qualities such as moccasin soles or really strong cord.

If you can avoid putting waterproof wax on the items you make from it then everytime you do anything bushcrafty around an open fire, you can 'top up' the smoking effect by hanging them in the smoke. They will darken a bit each time but in a sort of dappled manner giving your buckskin projects even more character.
 

BCUK Shop

We have a a number of knives, T-Shirts and other items for sale.

SHOP HERE