Deerskin to Buckskin

  • Hey Guest, Early bird pricing on the Summer Moot (29th July - 10th August) available until April 6th, we'd love you to come. PLEASE CLICK HERE to early bird price and get more information.

Toadflax

Native
Mar 26, 2007
1,783
5
64
Oxfordshire
Thanks, Joe, for the useful tips - always good to hear from people who have done this before.

Andy_e - we must compare notes at the Moot!

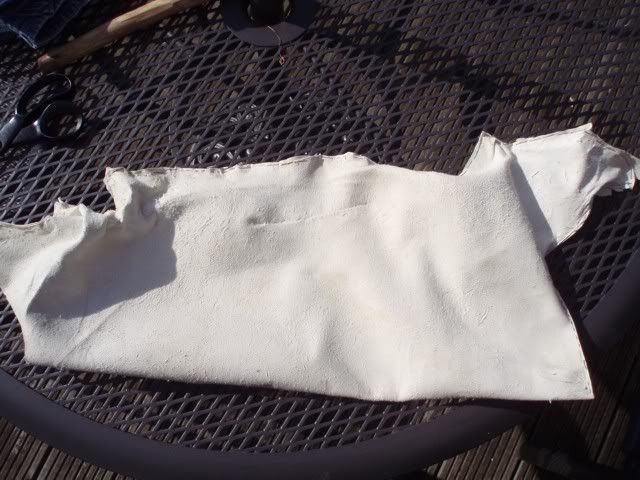
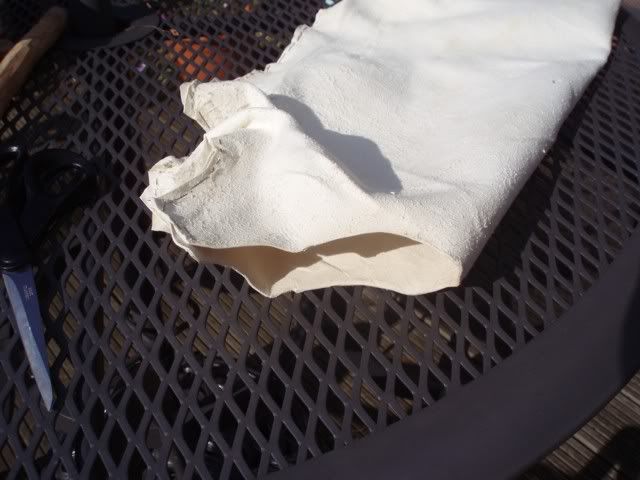
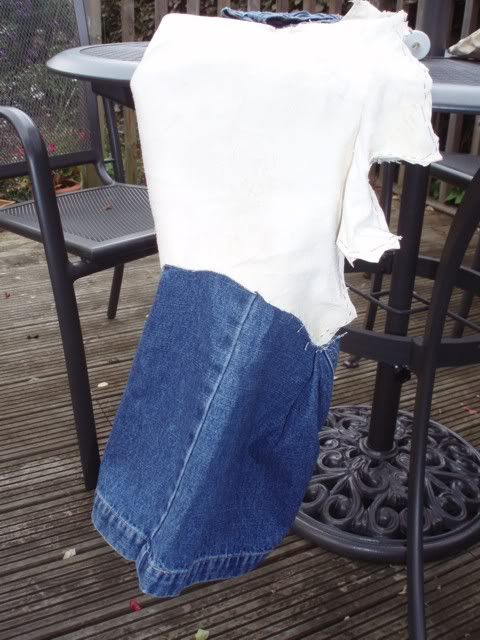
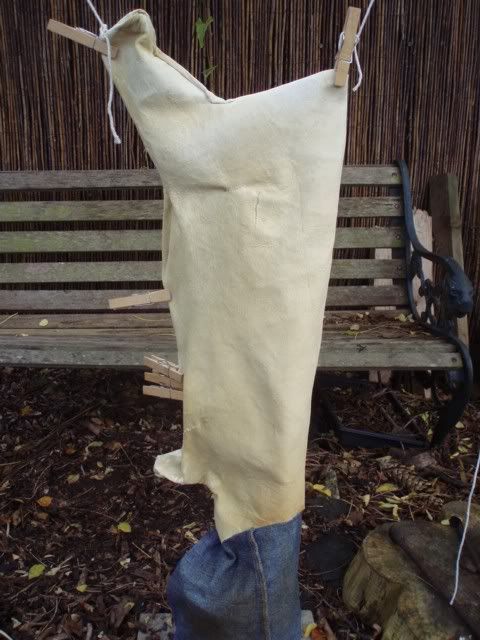
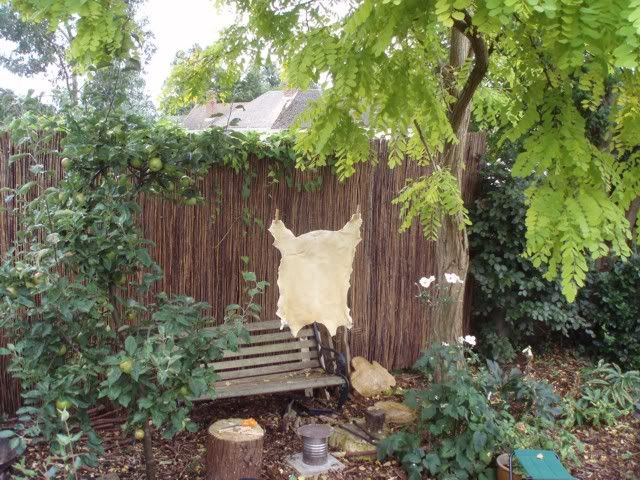
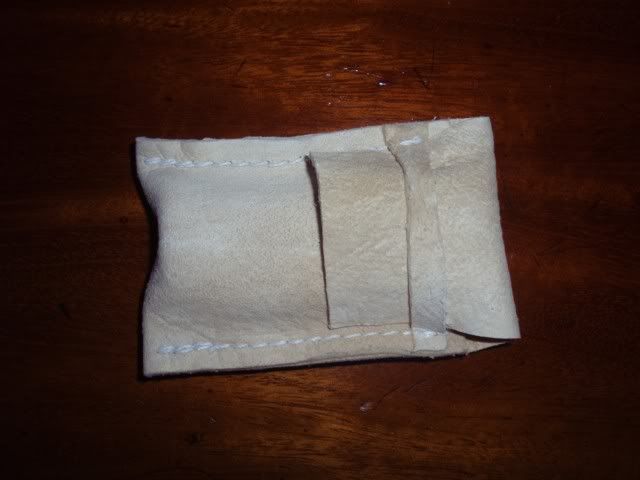
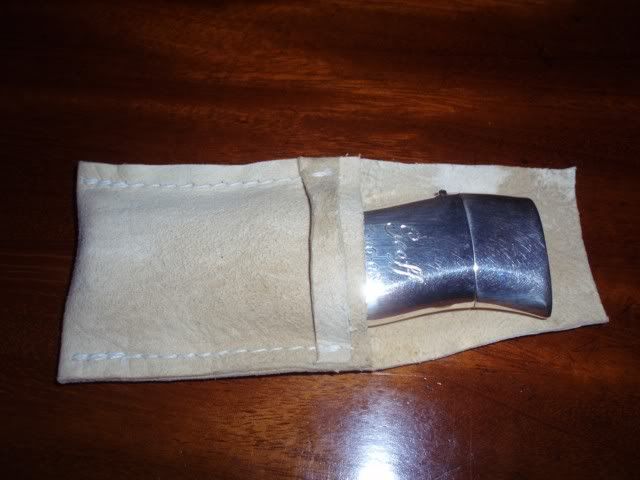
And thanks for all the other comments from everyone. Still a bit more work before I can finally reap the rewards. I'd hoped to be able to make a buckskin bag for my flint and steel kit to take to the Moot, but I'm rapidly running out of time so it may have to stay in its boiled sweet tin for now. :(

More piccies to follow in due course.


Geoff

PS: I am absolutely no expert at all on making buckskin (this being my first attempt), though I have read and studied a lot before I got started, but if anyone is having a go themselves and wants to ask me anything, please feel free to PM me.
 

British Red

M.A.B (Mad About Bushcraft)
Dec 30, 2005
26,715
1,962
Mercia
Its all the better for that Geoff - I hate tutorials witten by "experts" much of the time. They say things like "don't forget to invert the futtock for the recriprocal flange stroke" leaving me more confused at the end than the beginning. The joy of this is the plain English and travelling on your journey with you!

Red
 

Toadflax

Native
Mar 26, 2007
1,783
5
64
Oxfordshire
After some time away from the project for the Moot and other holidays, I'm back again.

After softening the hide, it needs to be smoked in order to keep it water resistant. This doesn't stop it getting wet, but it means that if it does get wet, then it will dry again as soft buckskin, rather than reverting to hard rawhide.

The first thing to do it to fold the hide in half and seal the edges to make an open ended bag. I used staples, though you can sew (time consuming) or glue it. You can also see that I have sewn up the holes in the hide, this time just using cotton thread, so that they are sealed to prevent the smoke escaping.

buckskin_030.jpg


An opening needs to be kept at the neck...

buckskin_031.jpg


...so that a 'skirt' can be sewn on that will go over the smoking stack, and minimise the chance of the hide being scorched.

buckskin_032.jpg


You need something that will smoke, rather than burn, and I'm using chipping from a rotten stump that my wife dug up out of the garden. Rotten punk wood is supposed to be pretty good, though I think that you can even use grass clippings.

buckskin_033.jpg


I'm using a coffee tin as the smoker, primed with some barbecue charcoal.

buckskin_034.jpg


The hide needs to be hung so that the bag hangs as open as possible, so that the smoke can reach all parts of it, with the denim skirt hanging over the smoker so that the smoke goes up into the hide rather than escaping.

buckskin_035.jpg


Some smoke obviously gets out at the seams, but you want to keep the bag as tight as possible so the smoke is forced into the hide itself.

buckskin_036.jpg


Continue smoking until the inside is the colour that you want (the longer the darker). Once the hide has coloured a bit, it is functionally smoked (i.e. should stay soft after wetting), but you can continue until it is the colour that you want. You then turn it inside out and smoke the other side. As Joe said in an earlier posting, you can always 'top up' the smoking later once you have made some things with the buckskin.

buckskin_037.jpg


Then tear off the skirt, open up the hide, and here's the buckskin!

buckskin_038.jpg


So now it's onto to see what I can make. The hide is fairly small, so it won't be too much but I think a couple of small drawstring bags to hold my flint/steel kit and my fire piston kit, the harder pieces from the buttock area can be cut out to make some small hand protector pads for use when pressure flaking flint, and maybe some bracelets from some of the scraps.

Thanks again for all the advice and encouragement, but I think that's just about it...until I get another hide!


Geoff
 
Last edited:

Toadflax

Native
Mar 26, 2007
1,783
5
64
Oxfordshire
And finally, I got around to making something with the buckskin. It's just a simple pouch to hold a silver lighter case that my wife got me for our 25th, but it's a start.


Geoff

buckskin_30.jpg


buckskin_31.jpg
 
Last edited:

TeeDee

Full Member
Nov 6, 2008
10,500
3,702
50
Exeter
Just came across this post from the fleshing poles thread , good stuff.

Deserves a B-U-M-P!!
 

VaughnT

Forager
Oct 23, 2013
185
61
Lost in South Carolina
Looks like you have fun, and that's the important part. The more hides you do, the better you'll get.

I've found that when wet-scraping the hide, it's best to forego the frame altogether. Lacing up the hide in a frame only reduces the amount of skin you have and doesn't really help you when it comes to working the skin.

In the US, we have a product called Red Devil Drain Clog Remover that's nothing but lye. It's a lot cheaper than buying a 25kg bag of lime and works just as good.

For me, I prefer my hides to be a bit stiffer than most folks. The stiffer the hide, the less stretch it has, which means that it's better for bags, pouches, straps and outerwear. Like any other leather, the feel and stretch makes it good for certain purposes. You wouldn't want a chamois for biker leathers.

Also, I save a lot of hassle by letting the skin drip-dry a good bit. You don't need to keep the fibers in constant motion, just don't let them get stuck back together. So I'll hang my hides up to air out a bit and come back every half hour or so to stretch them.

Good job, hoss. Don't mind my rambles.
 

BCUK Shop

We have a a number of knives, T-Shirts and other items for sale.

SHOP HERE