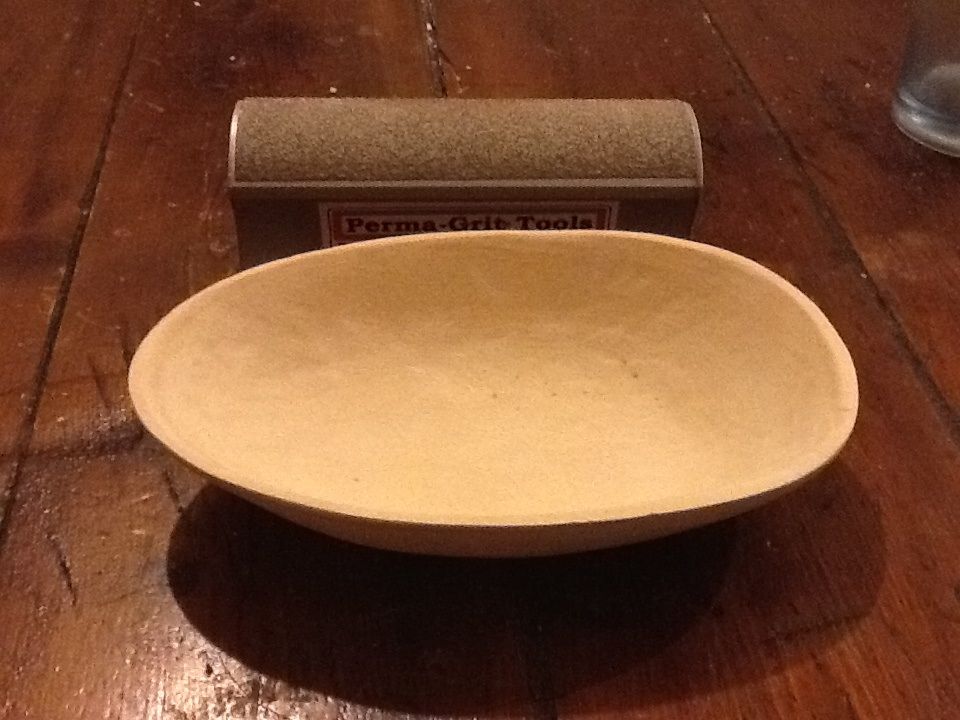
Bowl adzed out of a piece of green beech

tombear

On a new journey
Jul 9, 2004
4,494
556
55
Rossendale, Lancashire
I've been enjoying learning to use my shiny new new Dave Budd bowl adze, I'd roughed out a bowl with it and a little Estwing hatchet and part finished it with a mora and one of their spoon knives.

imagejpg1_zpsfd2856c1.jpg


Its still about a half inch thick in most places and I'm loath to finish it when it will probable open up as it starts to dry out.


The tree went over about a week back and we scrounged a log from the chaps cutting it up on, must have been Monday . So is there anything I can do to increase the chances of it surviving or should I just carry on using it to practice on?

Compared to the seasoned stuff I tried to use it up the adze worked like a dream on this green stuff. I still have a tendency to dig in rather than skim bits off but I getting there!


Atb

tom
 

mrcharly

Bushcrafter (boy, I've got a lot to say!)
Jan 25, 2011
3,257
46
North Yorkshire, UK
I'd take it thin if I were you. Thin wood is more likely to deform instead of cracking.

Is the top, wide part of the bowl from the wood nearest the centre of the branch?
 

Fraxinus

Settler
Oct 26, 2008
935
31
Canterbury
I'd take it thin if I were you. Thin wood is more likely to deform instead of cracking.

That is a method used by woodturners to make greenwood bowls and hats, gives a rather pleasing look to the finished items too.
Another method is to place the bowl in a polythene bag with some of the shavings with the end open slightly to restrict drying speed, heartwood is the main cause of problems usually though.

What's with the chain mail and flea collars? :D

Rob.
 

Robson Valley

On a new journey
Nov 24, 2014
9,959
2,672
McBride, BC
Great result. Flip it over, carve the outside for a mask.
PacNW native carvers are most reluctant to reveal how they carve green woods, such as alder,
to finish with a flawless dry piece.

What advice did Mr. Budd provide to keep your adze edge "carving sharp?"
 

VaughnT

Forager
Oct 23, 2013
185
61
Lost in South Carolina
Nice work. I'd like to see this bowl adze you speak of as I'm trying to come up with a design to try forging here at the shop. Never made one or used one, don't even know if I've ever seen one in person, so I'm always looking to learn.

To prevent your bowl from cracking, place it in a plastic bag with a few handfuls of the fresh wood chips you've removed (still green and full of moisture), or place a moist papertowel/cotton rag in with it. The moisture in the chips or rag will increase the humidity in the bag and prevent bowl from shrinking too fast and cracking on you.

Once you get the bowl finished, you'll still need to let it dry slowly until it's reached the ambient humidity in your home. It can take a solid year for a wood piece to stabilize completely, but you'll do well as long as you give it a few weeks in the plastic bag. Even without a wet rag in there, the bag prevents moisture from being wicked away by the wind or your home's heat. Protecting the wood from drying too fast is the key. Once you get it where you want it, give it a good coating of oil to prevent drying out too much.
 

tombear

On a new journey
Jul 9, 2004
4,494
556
55
Rossendale, Lancashire
Cheers for that folks, I shaved and scraped it down as far as I dare and started sanding it.

imagejpg1_zps47f334be.jpg


I'll bung it into zip lock with the chips until I have time to finish it and then let it dry out slow. Ill use walnut oil on it when its time.


The chain mail is a German made butchers glove I picked up on Accy flea market for 2 quid. I nearly fell off my perch when I googled how much it had cost somebody! Still, it saved me numerous cuts , its ridiculously well made.

Here's one of Mr Budds finest, handle by me, I'm afraid if he gave m specific instructions for sharpening it it went out of my head over x-mas.

imagejpg1_zpsf300ba8c.jpg


Now for supper, hardly eaten owt all day, been enjoying myself too much!

ATB

Tom
 
Last edited:

humdrum_hostage

Full Member
Jul 19, 2014
771
2
Stradishall, Suffolk
Nice job Tom. It's looking really good. I have Adze envy right now! :eek:

I also found the word chips are good to make a little 'bed' for the wood to sit on in the bag other wise it almost sweats against the bag and one bit I had started to grow mildew as I had it in my house for about a week so now I keep bits in the garage where It's cold and dark until I am nearing completion.

Good work though, mine is still at the stage of your first picture.
 
Last edited:

tombear

On a new journey
Jul 9, 2004
4,494
556
55
Rossendale, Lancashire
Cheers! Less oiling after its been left to dry out under the shavings its as finished as I want it.

imagejpg1_zps7338b55d.jpg


For a first go with the adze and the second go at a bowl at all I'm pretty pleased with it. The next one will be a more usable size, once its oiled and I can fill it with a liquid to measure ill be interested to know how much it will hold.

ATB

Tom
 
Last edited:

Robson Valley

On a new journey
Nov 24, 2014
9,959
2,672
McBride, BC
Very, very smooth. Adze work can rough-craft so many forms. I cheat and hog out excess wood with Forstner bits,
Bash out the lace and go again.
You know? It's a pleasure to see a dish such as yours. Possibly something which has not come to the light of day
for a century+. In that day and time, there was no other way.
Good.
Thanks.
 

Dave Budd

Gold Trader
Staff member
Jan 8, 2006
2,914
337
45
Dartmoor (Devon)
www.davebudd.com
good to see that you managed to get your hands on some green wood :) It's much easier to carve than a lump of rock hard beech! :lmao:

I normally use wet and dry paper to sharpen adze and a leather strop with polishing compound (my white or blue normally) applied. Little and often with carving tools is always best.
 

humdrum_hostage

Full Member
Jul 19, 2014
771
2
Stradishall, Suffolk
I normally use wet and dry paper to sharpen adze and a leather strop with polishing compound (my white or blue normally) applied. Little and often with carving tools is always best.

Since I joined here and read the sharpening threads, I have been sharpening my knives, axes & chisels with wet & dry and leather strops and I am not sure why I ever did it any other way!
 

tombear

On a new journey
Jul 9, 2004
4,494
556
55
Rossendale, Lancashire
Cheers! I must admit that when I've been cleaning up the tools I get off boots with copious amounts of wet and dry I've ended up with wickedly sharp edges by accident more often than not. Has any one put up a specific idiot proof tutorial on sharpening bowl adze with wet and dry?

Tomorow I am venturing to the wilds of Bacup to see the chap who is going to be thinning some trees out so I can pick some prime cuts. He'll then let me know when we can pick up a boot full of them. I think we have some old gloss paint to seal the ends. I'll have to think about where to store them that's dry. Perversely I've plenty of space inside but nowt under cover outside. One rooms pretty cool most of the time so I may have to use that.

ATB

Tom
 

Robson Valley

On a new journey
Nov 24, 2014
9,959
2,672
McBride, BC
I have 3 adzes, only the Stubai is really suitable for bowls and the backs of masks.
For edge management, I elected to do them all at 25 degrees, total included bevel.
With wet and dry papers, 800 only if they need it. Then 1500. Then hone with chrome green.

On a 6x4 card, draw the angle of choice (might be a plan to measure what you bought!)
Scribble some black felt marker on the bevel so that you can examine the results of your work.
I clamp the tool to the bench and wrap the abrasives aroud the tapered surface of my polyurethane carving mallets.

You don't have much room to fool around.
I suggest that you turn a mandrel to match the sweep of the adze.
Match the surface parallel to the blade and pull straight out/over the edge. 5X and see how it cuts.

For outdoor wood, any cheap, cheap tarp/plastic matress cover. . . . whatever.
Loose enough for air circulation in the shade. A bunch of bricks around the bottom edge
for an "all-weather" installation.
 

humdrum_hostage

Full Member
Jul 19, 2014
771
2
Stradishall, Suffolk
I Haven't got a garden but I do have a garage which has now turned into my log store, roughing area with stump, workmate, hatchet, saws & wedges for preparing what I take indoors to carve. I have the wood on a pallet to keep it aired and its cold and dry in there.

Oh and its now also my Biltong drying room too :D :D :D
 

tombear

On a new journey
Jul 9, 2004
4,494
556
55
Rossendale, Lancashire
Cheers! Got some 800 wet and dry and the smoothest I could find was 1200 so I got that as a stop gap.

i had a excellent meeting with the very helpful chap who offered me the wood, he showed me all the trees that were either coming down or needed a lot of pruning after many years of neglect. We discussed my needs and when he does the work in February I will be getting plenty of beech, sycamore, oak and some birch. Maybe some other stuff a there's a lot of work needing to be done in the grounds of a old mill owners house he is doing up. He was so helpful I offered to do a couple of days labouring if he wanted any help.

Back to sharpening, when it comes to polishing, can this be done mechanically? It's just in my travels I've picked up various buffing wheels, felt and cloth as well as a big, about 2 inch wide rag wheel that fits onto the bench grinder. I've the grey and red brown blocks of polish to go with that. There's a leather wheel with its tube of paste that came with the Tormek 7 as well. I've a leather razor strop and a section of leather drive belt fixed to a wooden block and various strop pastes i've picked up.

Atb

tom
 

mrcharly

Bushcrafter (boy, I've got a lot to say!)
Jan 25, 2011
3,257
46
North Yorkshire, UK
I think it can be done, but you will have to be very careful to not round off the edge or catch the adze.

I'd stick with using a bit of leather on a stick, myself. Doesn't take long to touch up an edge.
 

Robson Valley

On a new journey
Nov 24, 2014
9,959
2,672
McBride, BC
I wouldn't go so far as to call it polishing.
Just that CrOx has a nominal particle size of 0.5 micron and the AlOx is about 0.25 micron.
They are abrasives. The scratches are so fine, the unaided human eye can't see them.
A 10X magnifier demonstrates the result.

Fot me, the final honing step , 10 wipes at the consistent angle, it an enormous difference
between "sharp" and "carving sharp". It's the step that really makes my carving tools come alive.
I would never do it with power. As mrcharly says: 'very careful. . . . . . '
 

tombear

On a new journey
Jul 9, 2004
4,494
556
55
Rossendale, Lancashire
I've sorted out the sharpening kit so since the weathers down as rubbish all day tomorrow I'm thinking of having a long session sharpening everything that needs doing, from the kitchen knives to the turning tools. Its probably about time I started noting angles, settings and what not, especially the ones ill do on the Tormek water wheel. I found I had picked up several slip stones of various sizes which should make doing the incannal stuff easier.

atb

tom

Ps I don't suppose anyone has link to a vid of sharpening a bowl adze with wet and dry?
 
Last edited:

BCUK Shop

We have a a number of knives, T-Shirts and other items for sale.

SHOP HERE