Heat treating : More Old Saws, Part 4

Heat treating
The starting material in its raw form (as in a handsaw) is a medium carbon spring steel, that has been commercially heat treated to somewhere in the mid 50’s Rockwell C.
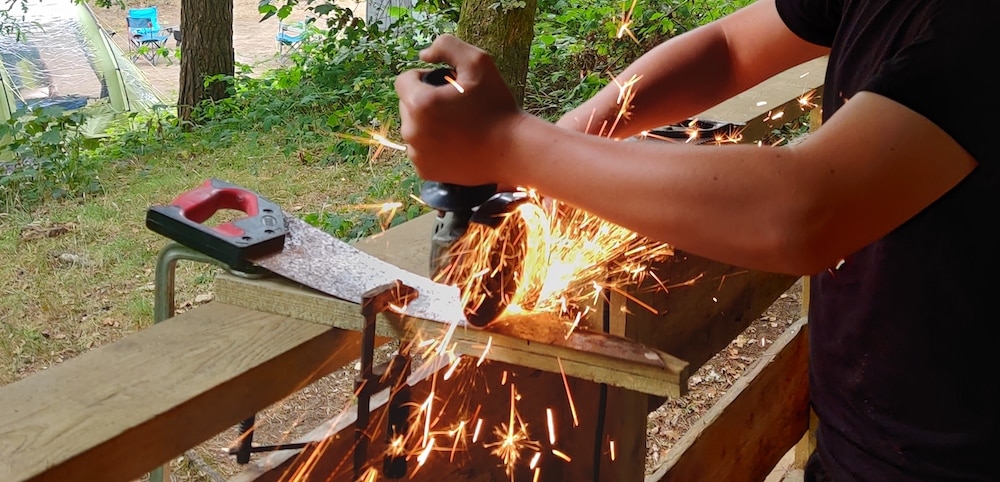
That gives it enough resilience to resist permanent bends or snapping, yet it is still hard enough to hold an edge for sawing wood. The saw I used for the knife-making series also had induction-hardened teeth. That means that the bulk of the blade was heat treated to the low or mid 50’s, and then the 5mm width along the edge where the teeth are has been heated to the point that it will harden and then quenched. The result is teeth that will stay sharper for longer but cannot be sharpened with a file and tend to snap off rather than flex or bend.
It’s impossible to know what the type of steel actually is, but most saw blades are made from a group of similar steels; typically 0.5-0.8% carbon, and most will have nickel, manganese, silicon or chromium added to them. I normally only use virgin steel because each element plays a role in the steel’s performance and affects how the heat treatment is carried out. In this case, I went for very generic, quick and dirty ‘backyard’ heat treating; all in the knowledge that it was only an old saw and I’m not trying to make the world’s best tool here!
Steel in its natural state is generally too soft to be useful, and steel that has been forged has often been ‘upset’ through changes in temperature. When steel has been heated above its hardening temperature (in the orange range), the grain size of the metal increases (which is weaker, like coarse concrete), the chemistry is disrupted (alloying elements separate out of solution) and areas can air harden upon cooling (so some bits will be too hard to file or drill).
Heat treating can resolve these various issues in three stages: normalising and/or annealing, hardening and tempering. I’m going to keep this simple, with no metallurgical speak or specific temperatures because they can get confusing and vary from alloy to alloy, plus even I find it all very very dull!
Annealing
Annealing involves raising the temperature of the steel to around the hardening temperature and letting it cool very slowly (often done at home by burying the steel in an insulating material like ash or vermiculite).
The annealing sorts out the chemistry (for the most part) and reduces the grain size to a baseline size, but the main advantage is that it renders the steel as soft as it can possibly be.
When you buy new steel, it is usually annealed in industrial ovens, making it very uniform. However, steel annealed at home is often variable at best because it will be at different temperatures when it starts cooling, and then cool at different rates, so you get hard spots and uneven grain size around the piece (unless you have a heat treating oven of course).
Normalising
Normalising also involves heating to around the hardening temperature but then letting it cool in still air, so is much faster. It doesn’t make the steel quite as soft as annealing (though usually plenty soft enough to file, drill or otherwise cold work), but it does have other benefits. If done correctly, normalising puts each alloying element back into solution and reduces the grainsize further. Normalising is usually done multiple times, reducing the grain size further each time (but with diminishing returns). The simplest method is to heat the steel to a shade above hardening temperature (so if hardening is mid orange, then go to bright orange) and let cool, then to the hardening temperature and finally a shade below hardening temperature (so a dull red).
If I’m doing this outside, I create shade to see the colours better, and if it is breezy, I will cover the metal in a layer of ash or even under a bucket when cooling. If you heat the steel above the hardening temperature again, the grain size grows again, and you are back at square one; if you heat the steel unevenly, then the grain size will refine unevenly (which can then lead to warpage when you come to hardening). It is also possible to refine the grain size so far that the steel will not harden fully. The three cycles outlined above seem to be about right, and if you haven’t been overheating the steel in the final stages of forging, the last two are the most beneficial. Of course, different alloys benefit from more or less care with the temperatures used.
Hardening
Hardening does what it says on the tin. The steel is heated to somewhere between a mid-red and a bright orange (depending on the type of steel and quenching medium) and then cooled rapidly. Different alloys are designed to be quenched from different temperatures and in different mediums. Some highly alloyed steels (HSS and stainless) are designed to be very hot and cooled in air, and most carbon steels are a little lower in temperature and oil quenched, though some are designed to cool in water/brine. Generally speaking if you quench an oil hardening steel in water/brine, then it will warp, crack or even shatter.
If the steel is hotter than required, then it will either not harden properly (it takes too long to cool far enough) or the grain size will have grown and lead to a weakened structure. On the other hand, if the steel is not hot enough, it will not harden fully, and the resulting edge won’t last as long.
The trouble with mystery steel is you have to guess the correct temperature and quenchant. People often quote ‘cherry red’ as the colour to go for. I don’t, because everybody’s estimation of ‘cherry red’ will vary, and even one person will change with varying light levels.
If we assume that cherry is around 800C, and your steel is something like EN45 (a favourite spring steel in re-enactment circles), then it will not fully harden until it gets to around 900C; if it’s something like silver steel (high carbon tool steel, used a lot by engineers) and go for 800C, then it might crack since it is designed to harden at 770C.
All steels come with a hardening range; the lower end will lead to less distortion and is better for thin blades, and the higher end risks more distortion but will serve better for thicker tools. The type of oil used varies in industry, with thicker oils used when the cooling rate wants to be slower. I use a very fast commercial quenching oil, this allows me to get the maximum hardness out of a bit of thin steel, and any increased risk of warpage is either mitigated by normalising well or dealt with afterwards.
At home you could use engine oil if you want to annoy the neighbours, poison yourself or remove your eyebrows; alternatively use vegetable oil. Peanut oil is a good choice since it has a high flash point and is relatively fast. Warming it up to make it more fluid is a good plan, especially in the colder weather (it speeds up the quench and makes it more uniform).
In the case of this saw blade we’ve used for the last few articles, I’m assuming a simple steel (with some elements that won’t suffer too much from homebrew), and as I said, it’s only a bit of scrap steel, so I’ve played fast and loose with the heat treating. Given the types of steel generally used for this type of tool, the hardening temperature is likely to be between 820 and 840C and oil hardening, so I should be bringing the steel to a mid-orange (just about where it begins to glow rather than just be a colour) and then quench.
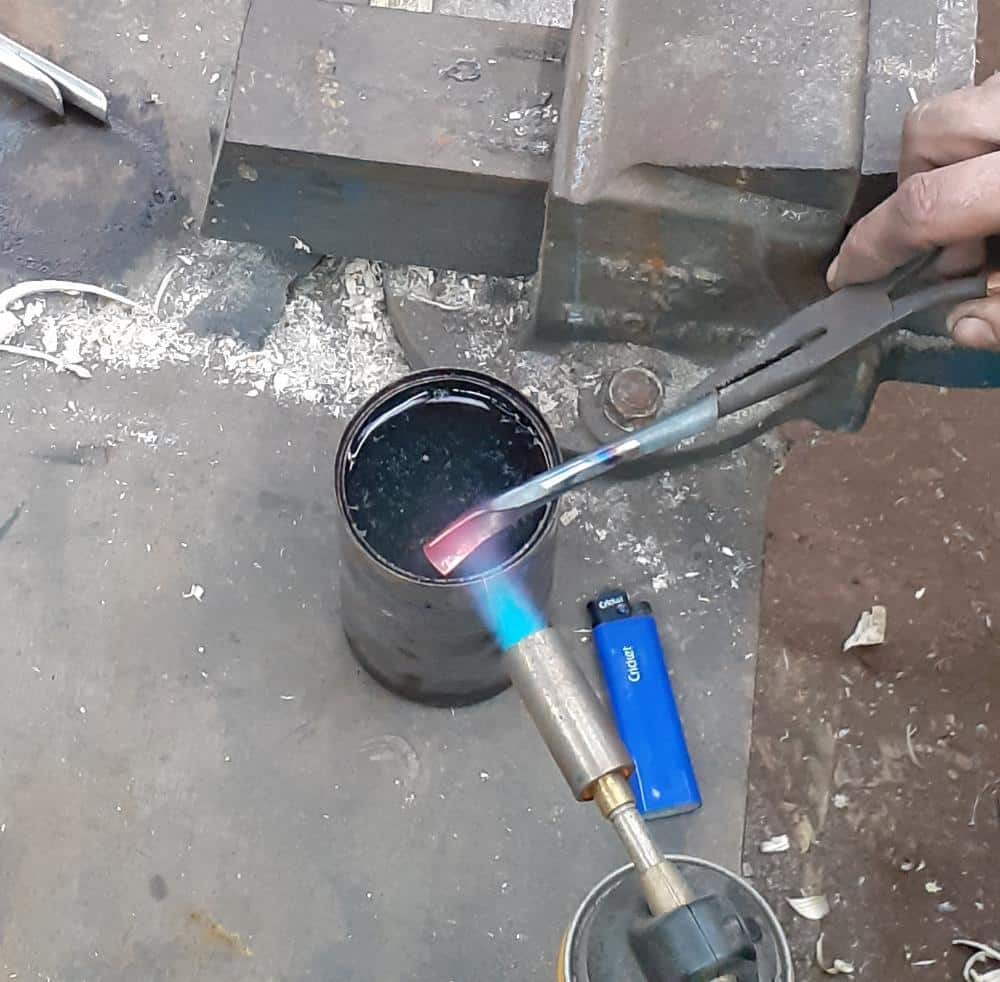
Since I have been using a blow-torch, and without building a forge around it, I can only get a very small area hot enough, I opted to quench in water and from a lower temperature. I was able to get each tool uniformly to a dull orange, somewhere around the 800-820 mark, and when plunged into water it was hard enough to skate a file (where the file doesn’t grip and slides over the hardened surface). I checked the first test piece for cracks, and I got away with it, had it cracked, then I could’ve added salt to make a brine solution to make a fast but more stable quenchant or tried the quench in oil.
Brine is normally a safer bet than water, but I don’t keep salt in the workshop, nor any vegetable oil! The tools only needed the cutting edges to get to the orange, but the more of the steel that is hot and the more evenly it is heated, then the less chance of it warping. The gouges with the rolled shafts only had the working ends heated up. Using this torch meant I had to play the flame around the whole area to be heated, lingering more often on the working end where I wanted to be sure of the correct temperature. Natural light but not direct sunlight is ideal for seeing the colour and glow.
When plunged into the water (or preferably oil), the metal is moved gently to keep cooling liquid in contact.
Tempering
Tempering is the final stage of heat treating. Tempering involves reheating the steel to a lower temperature, which reduces the hardness and increases the toughness. As hardened, the steel is like glass: very hard but also very brittle. To a point, the higher the tempering temperature, the softer and tougher the steel. Even at temperatures as low as 150C, the toughness of a bit of hardened steel can be an improvement (but is only really useful as a metal scribe and the like). Just as with normalising and hardening, the actual temperature needed to achieve the correct balance of hardness and toughness varies depending on the type of steel and the previous heat treatments. Most knives and edged tools will be tempered to somewhere between 190 and 250C, assuming a simple carbon steel rather than HSS or stainless. A spring or sword might be more like 350 or 400C. With edge tools such as knives, the angle of the cutting edge makes a huge difference to how well it will hold an edge.
Tools can also be selectively tempered to have a harder cutting edge and a softer (tougher) back/body. Unfortunately, suppose your cutting edge gets hotter than the appropriate tempering temperature. In that case, it will not hold an edge, and the only remedy is to re-harden and try again (which is not always possible).
The easiest and most reliable way to temper a bit of steel is to do it in an oven. Domestic ovens do not hold accurate temperatures though: they oscillate and some quite widely of the temperature that you set them too! If tempering in a domestic oven (or toaster oven), then get a couple of oven thermometers and place one towards the back and one towards the front on the shelf and record what they say at a given temperature setting. Then do it again with the shelf raised a bit and lowered a bit, the results can be quite surprising!
When the most consistent shelf position is found, a baffle can be a good idea. A baffle, in this case is something to even out the fluctuation and can be as simple as a tray of sand that you bury your blades in. Turn the oven on with the blades buried in the sand tray, place it all in the oven and leave it to come to temperature; check it with a thermometer stuck into the sandbox (it will take quite a while to warm up). Then you can decide how long you want to temper for and start the clock. Some people tell you 1 hour, others 2 hours; the industry standard is “1 hour per inch of thickness”, so theoretically, 15 minutes should be enough for a blade, but I would say it’s worth leaving a bit longer to be sure that the whole blade has attained the proper temperature (an hour is plenty really).
I use an oven that will not get hotter than the temperature it is set at, and I have a constant digital readout of the inside temperature. At the time of writing this, I have just finished a batch of axe heads, and the oven preheated to 200C took nearly 5 hours to come back up to temperature when I put the heads in there (10kg of cold steel takes time to warm up!), so my clock didn’t start for all of that time! It is generally a good idea to repeat the tempering once or twice more; this is good practice but is not really necessary unless you are working with highly alloyed steels.
The other way to temper is to go old school and watch the oxide colours on the surface of the heated metal. If steel is ground to a clean, shiny surface, thin oxides form on the surface as it is heated. The colour of the oxide changes with the temperature, so the books will often refer to tempering it to a straw, bronze, blue, etc colour. As with the hardening temperature, each person’s perception of colour will vary; the ambient light affects that perception, the temperature might be incorrect for that steel, etc.
The surface condition of the metal can affect the colour, as can how long the metal has been at a given temperature (the oxides darken with time) so my blades often come out of a 200C oven with oxides of purple, because they have oil on them, and have been hot for a long time despite never having reached the proposed 250+. So here again, experimentation and experience are key.
Polish a bit of hardened steel with a given grit (could be a 120grit flap-disc, broken bit of 200grit waterstone, etc) and temper to a very pale golden hue. Sharpen it and see if it is too fragile for your intended blade. If it is, re-polish and re-temper to a straw colour and try again. Keep at that until you find a temper that suits your needs.
Generally, with simple steels, the proposed golden hue/pale straw (around the 190-200 mark) through to a bronzey brown (220-240C) is about right for most woodworking tools. Most of the tools I use are tempered this way, but it is unreliable and not repeatable, so I tend not to do it for the tools that I sell (unless made during a course where I am teaching the technique). It is by far the quickest method though!
I would typically use the forge for old-school tempering, but in this case, I have used the blow torch, turned down to a low soft flame. A pair of heavy tongs heated to red hot or a block of metal heated up can also be used as a heat source. I’ve even used both an electric and a gas hob to do this with knife blades in the past. If the tool has a thick body and a thin edge (like an axe), then heating the thick bit first and allowing the heat to migrate is a good plan. You watch the colours run and when the desired colour reaches the edge, cool it down, and the job is done.
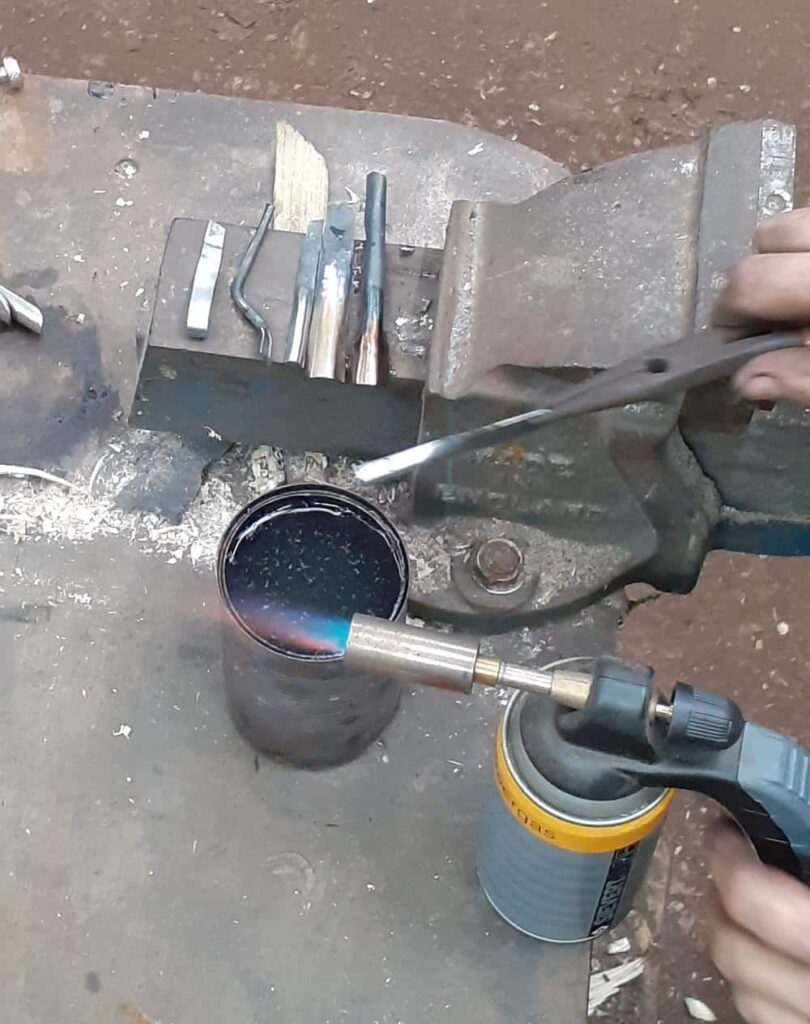
With anything but small chisels, part of the cutting edge will likely get to temperature before the rest. In this case, dribble water onto that section to halt the heat’s progress and allow the rest to catch up without ruining the temper on that section. Depending on the cross-section and shape of the tool, it can be quite challenging to get the temper correct, and it does take practice!
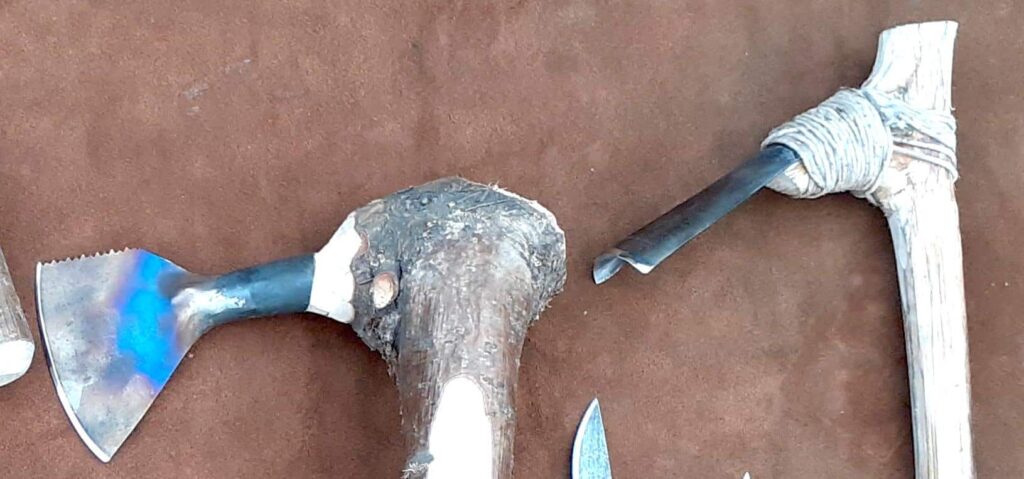
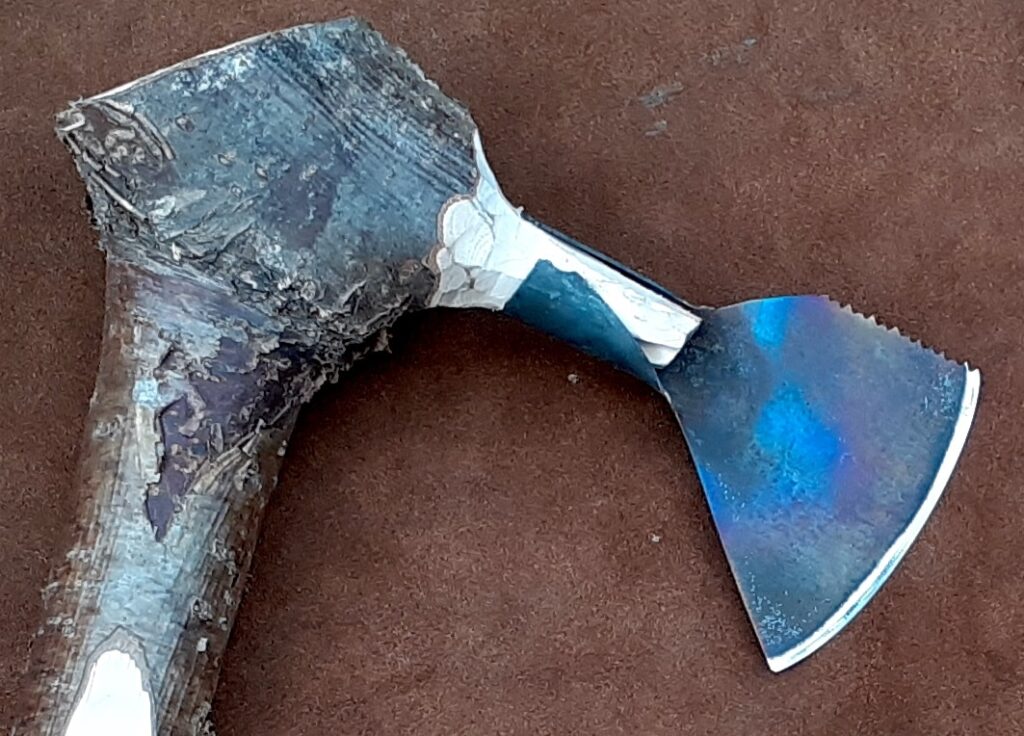
Fortunately, these saw blade tools are all uniform in thickness and relatively easy with a soft flame. The areas that I wanted to be softer (and thus tougher) were heated until they went purple or blue, and as they came close to that colour, I moved the flame gently over the rest of the blade until I saw the golden colour beginning. Any part of the edge gold/straw coloured was dipped into water until the rest was there and the whole tool cooled.
You can see the full range of colours in the pictures of the axe as well as the oxides left on the rest of the metalwork (which darkened quite considerably by the camera btw).
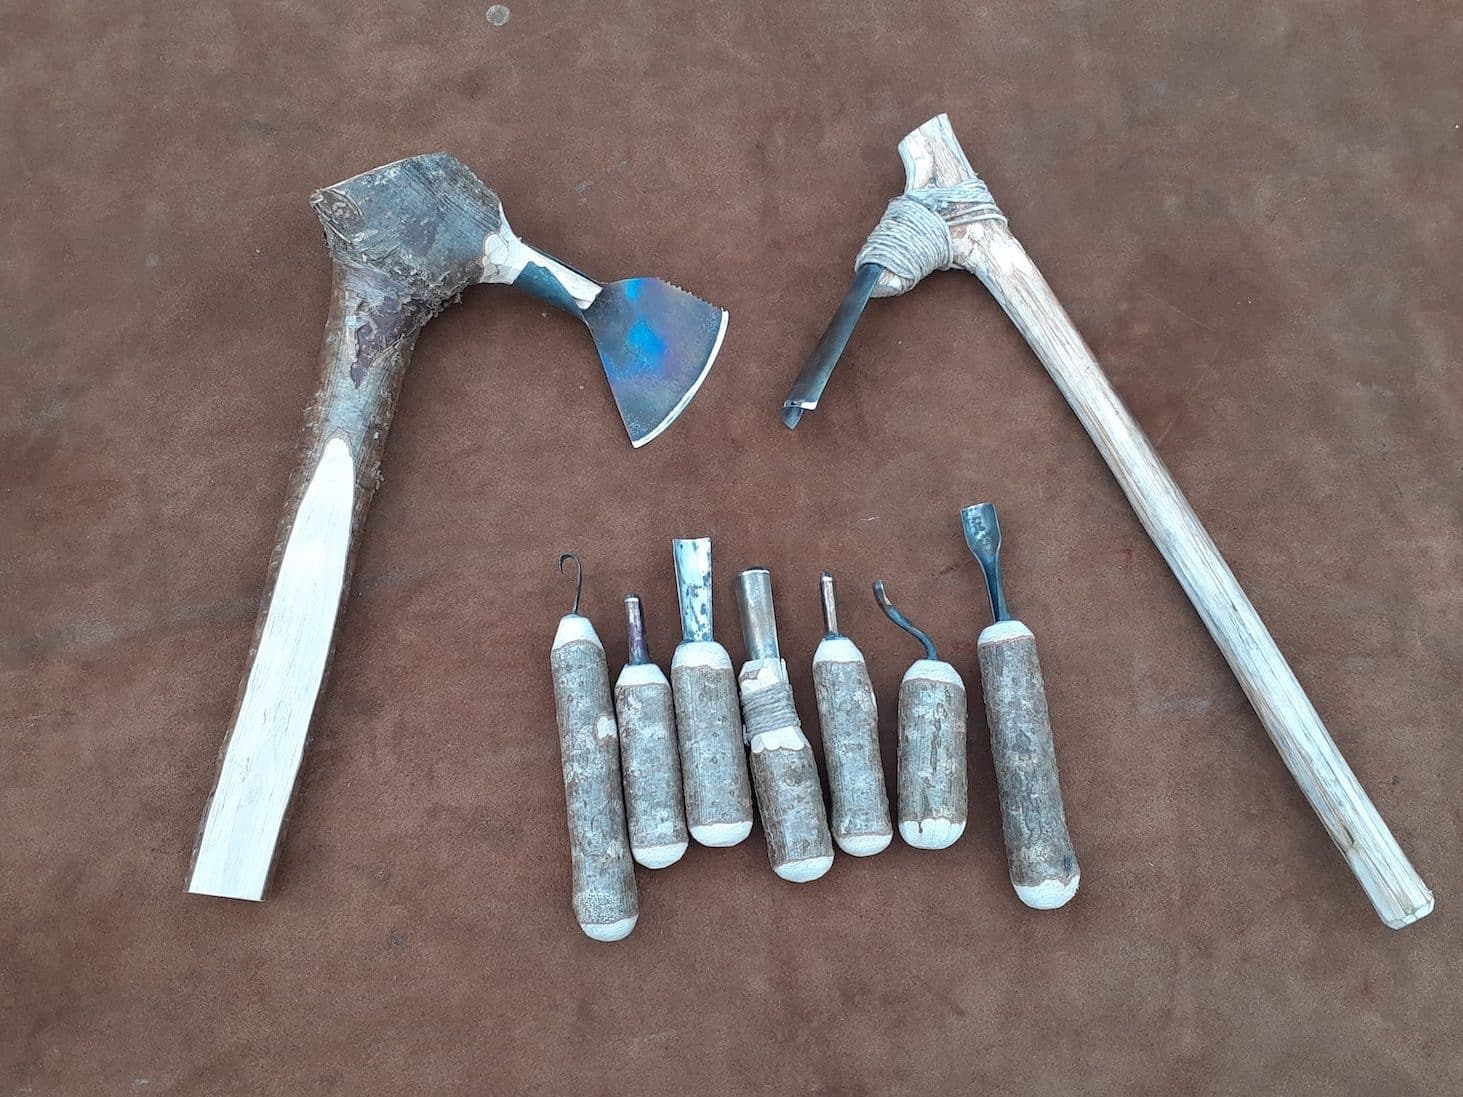
Once all of the heat treating is done, the tools can be fitted to their handles and sharpened, ready for use.
Have a look at the other articles in this series
More old saws part 1 – Turning an old handsaw into other useful tools
More old saws part 2 – Making carving tools from an old handsaw
More old saws part 3 – Hot formed carving tools from an old handsaw

Dave Budd is a world renowned smith specialising in historic weapons, tools and other period steelwork, he runs knife and axe making courses amongst other things from his woodland in rural Devon.
You can see some of his work and contact him through his website DaveBudd.com