DIY Hot-formed carving tools

More old saws: Carving tools part 3
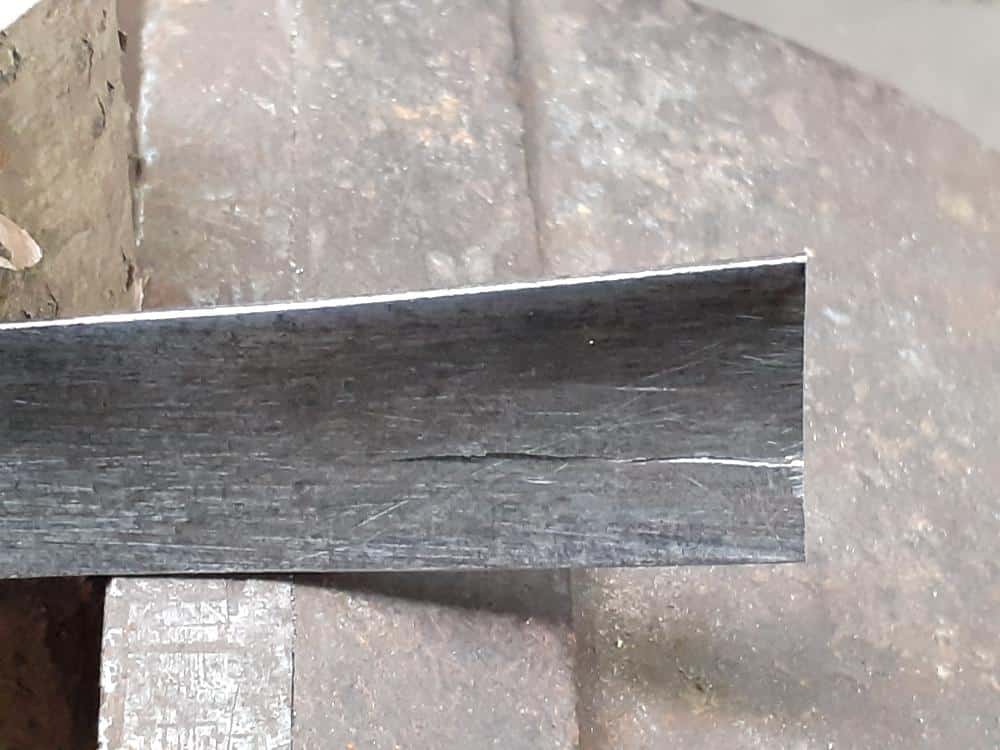
After the failed attempt at cold forging a shallow gouge, I decided that it was time to turn up the heat.
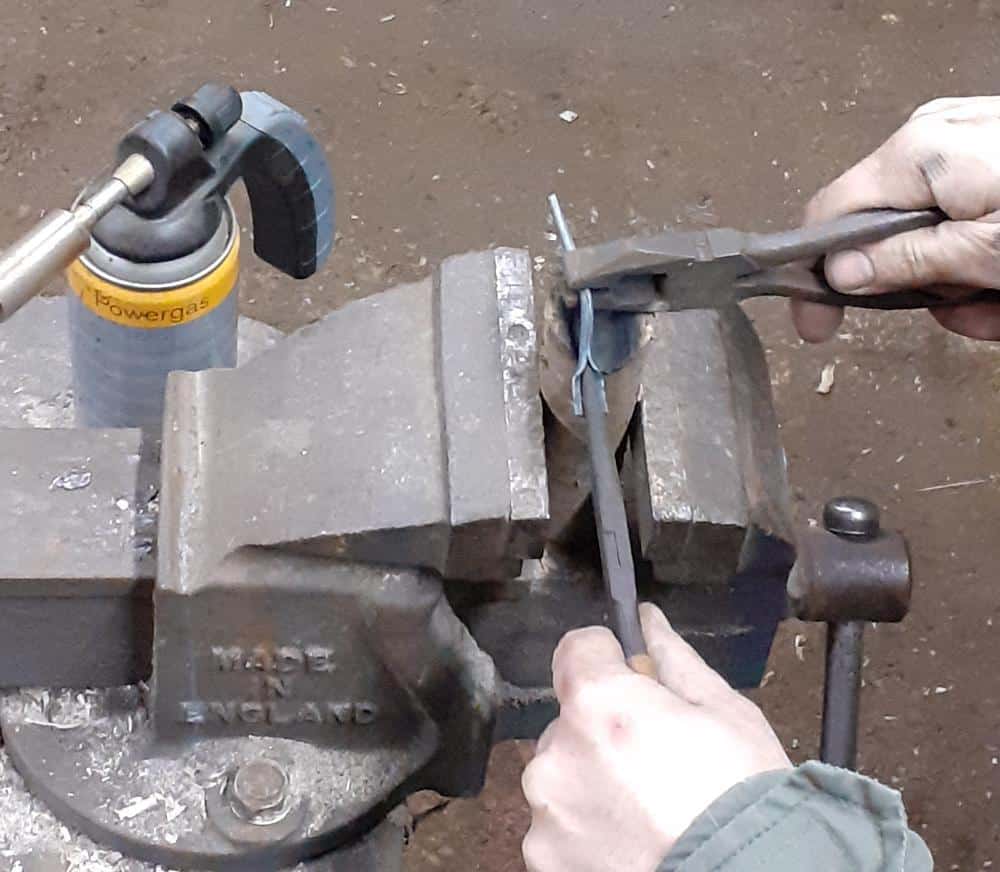
Normally I would light a forge or for small items use my oxy-propane torch, but in keeping with the ethos of this series I wanted to use a more domestic set-up. I bought the cheapest blowtorch that I could find on the assumption that whatever you have, it can’t be any worse than this!
In addition, I used a couple of pairs of pliers, small hammers, a vice and a simple swage made from a bit of firewood.
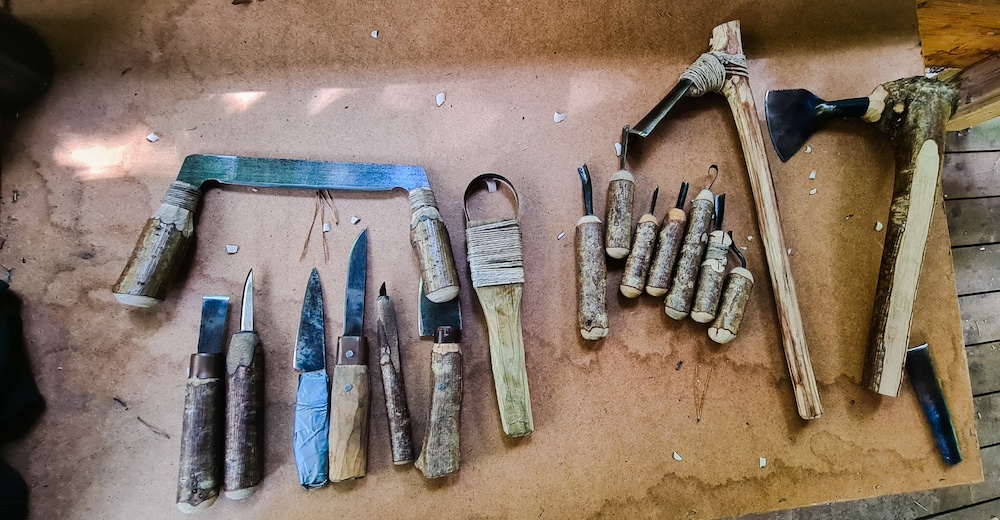
Starting where I left off with a simple gouge. SEE PART 2 OF THE SERIES
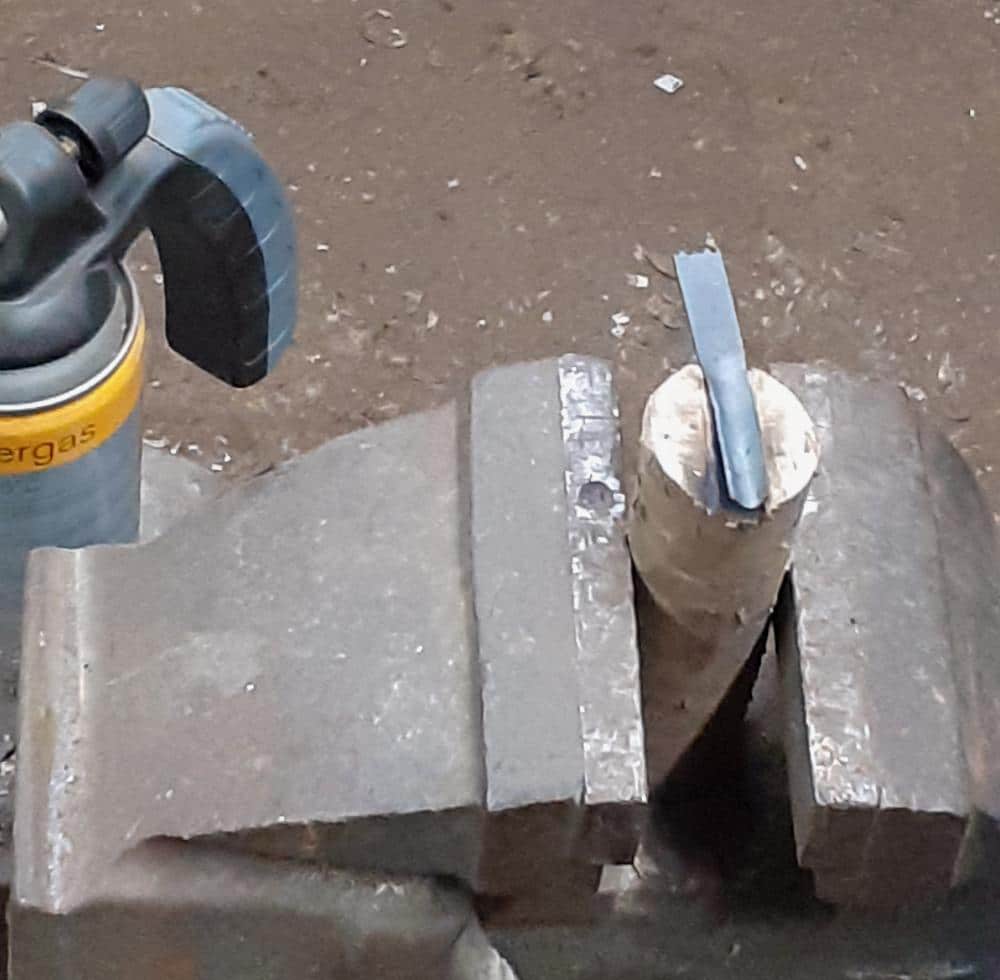
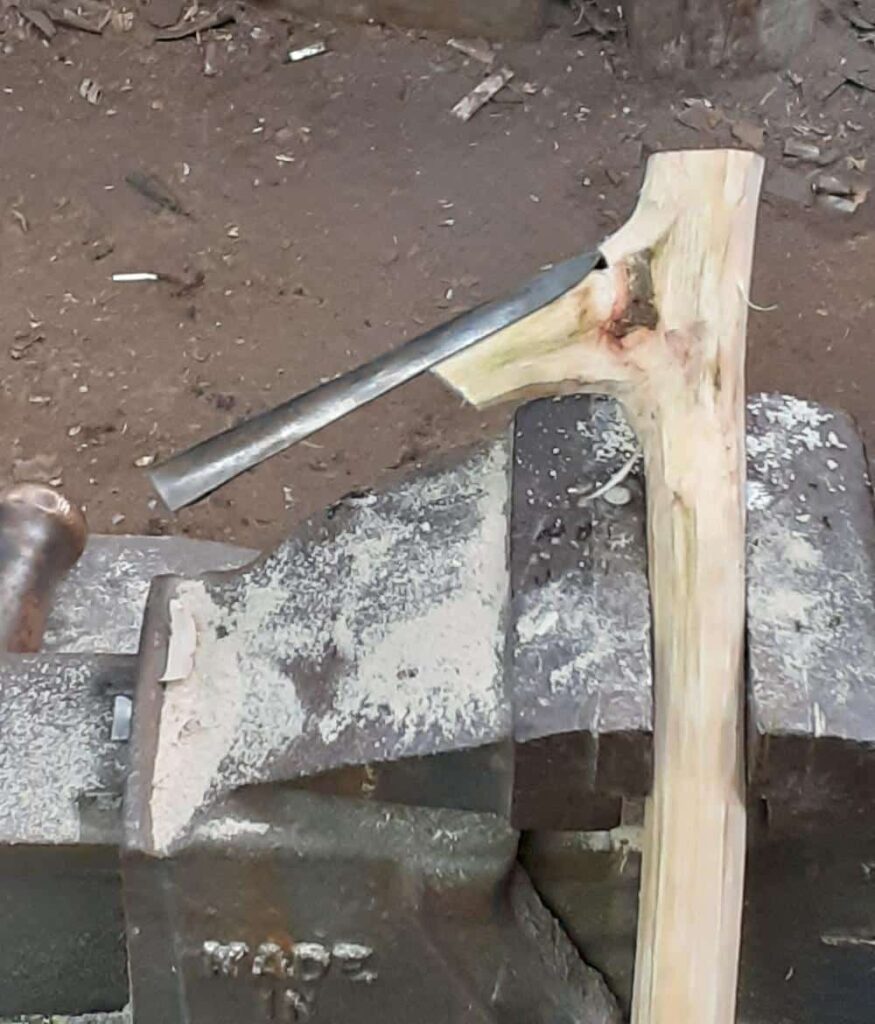
Normally I use steel swages (hollow formers) to shape hot metal, but wooden swages work very well for short periods (provided you can get through the flames and smoke).
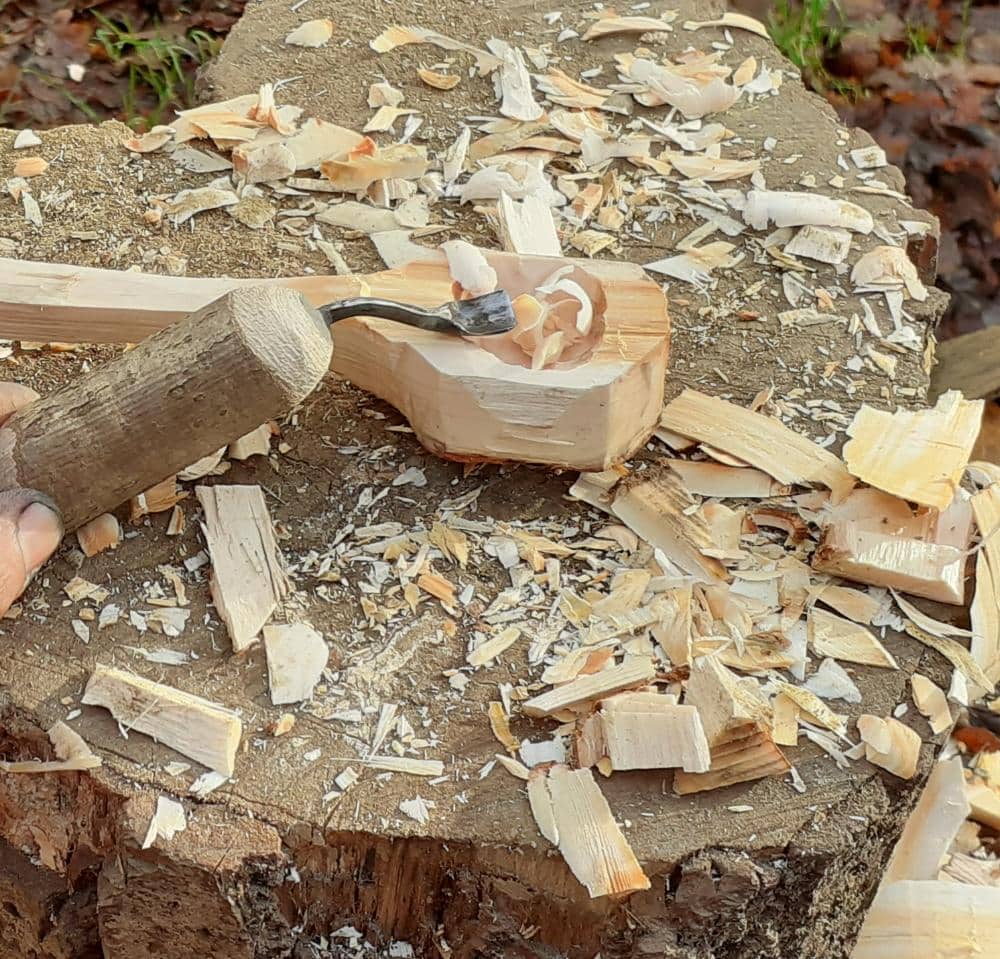
In this case, I used a spoon hook to carve a groove in one end of a piece of dry hazel.
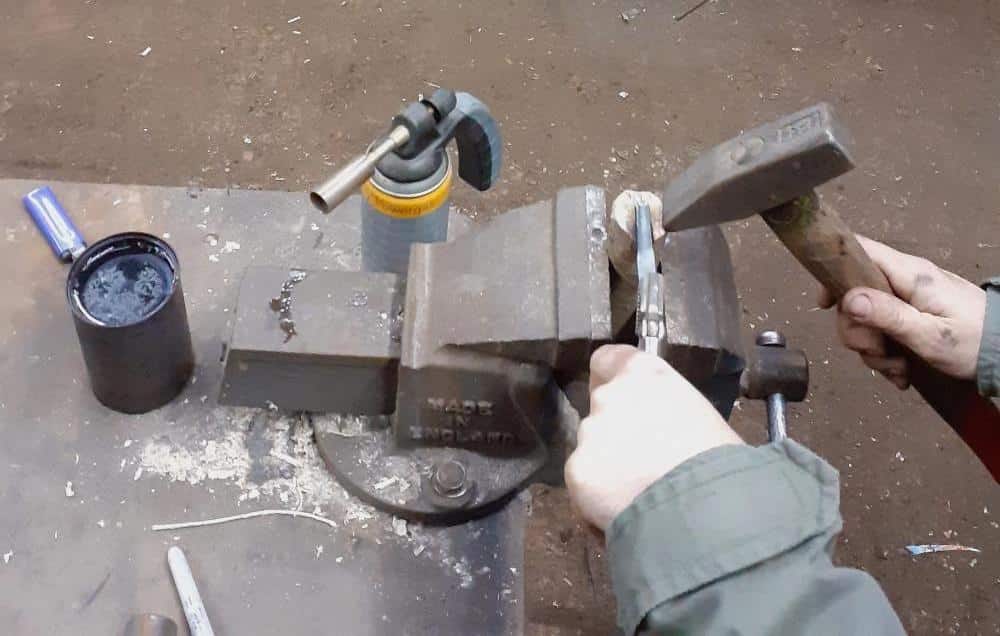
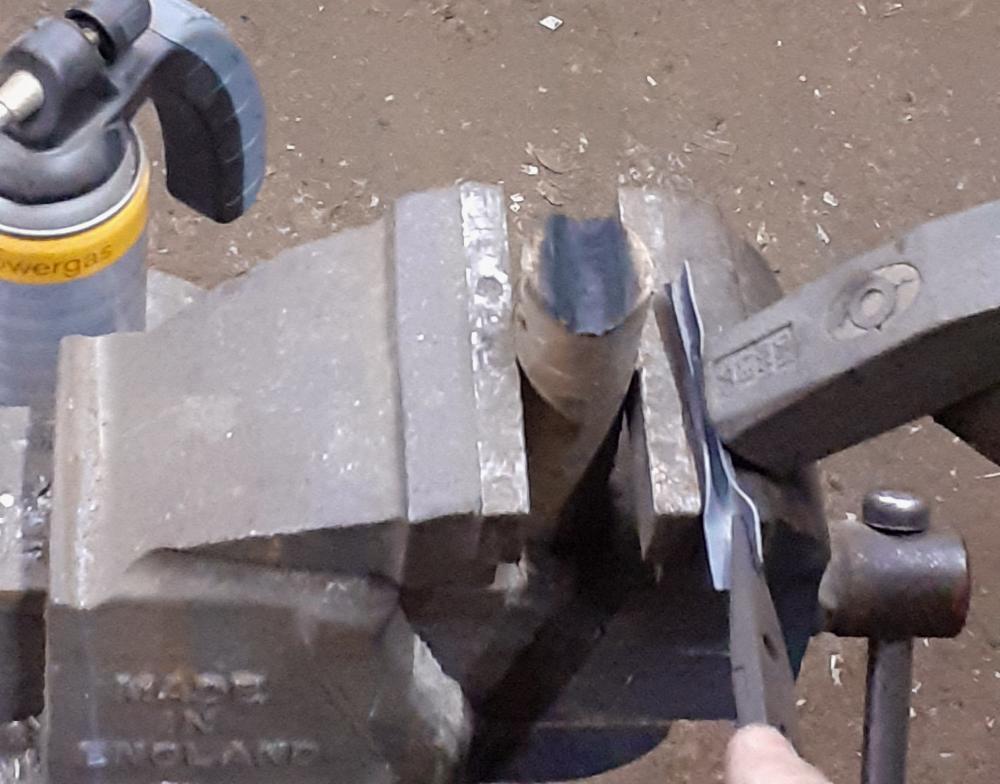
Using the blowtorch to heat the steel to a good red, I hammered it gently into the wooden swage in much the same way as I made the spoon carving tools with the vice.
Whenever the steel was too cool to move, it was reheated and the hammering continued. I made several simple gouges with various sweeps. The tightest gouges (used to carve decorative grooves) were first forged into a shallow gouge into the wood and then the sides were squeezed together in the vice or hammered closed using the vice as an anvil; either way, all of the forging was done with the metal red or orange and the hammering stopped as soon as it cooled to black (it case it hardens and snaps/cracks).
After the basic forge work is done, the rough edges are ground/filed off and whilst soft, the insides of the gouges are cleaned up with a half-round file and sandpaper. The filing/sanding is to remove any hammer marks that would lead to an uneven cutting edge but the use of a wooden swage means that the dents are much smaller than if a metal swage were used.
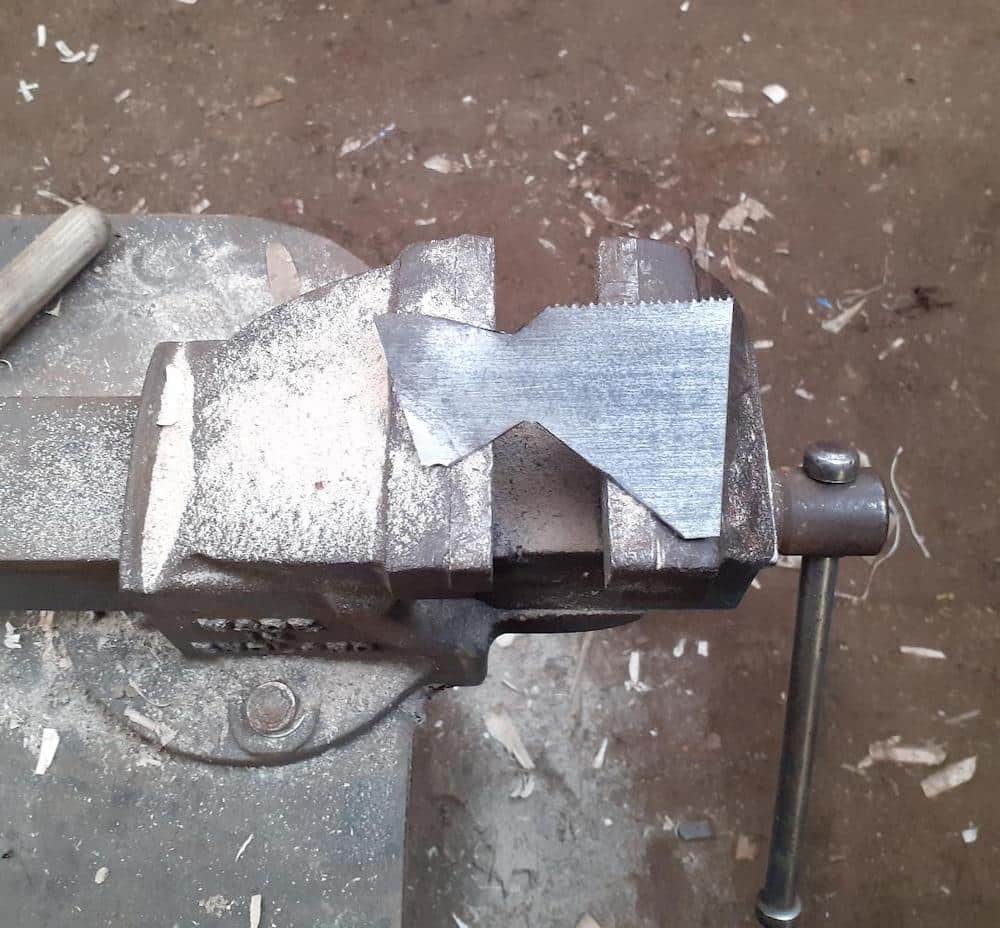
I was going to make a cabinet scraper from a piece of the saw, but lost track of the various offcuts and turned it into an adze instead!

North American style adzes have a relatively thin blade (akin to a plain blade) lashed onto the top of a wooden handle. I’ve never been a fan of that style of adze, but I wanted to see how well it would work with such thin steel as found in a saw.
Due to the huge levering stresses involved I knew a flat adze would just bend and/or snap, so I opted for a curved bowl carving style as it would be much more rigid (just as corrugated roofing is).
The blade itself was shaped in the same way as the gouges, but the very end was bent over using a pair of pliers. I did this because the thin blade would run the risk of being driven through the back of the handle, the fold gives a much broader surface to bear against.
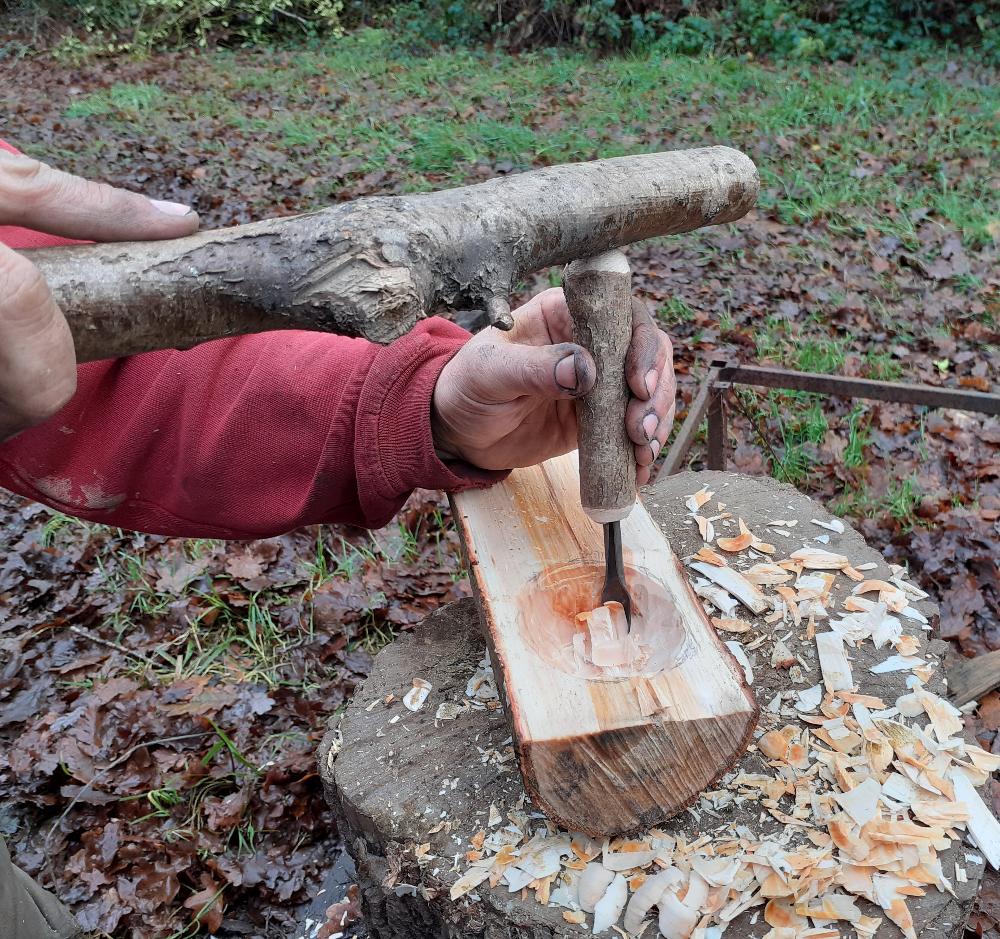
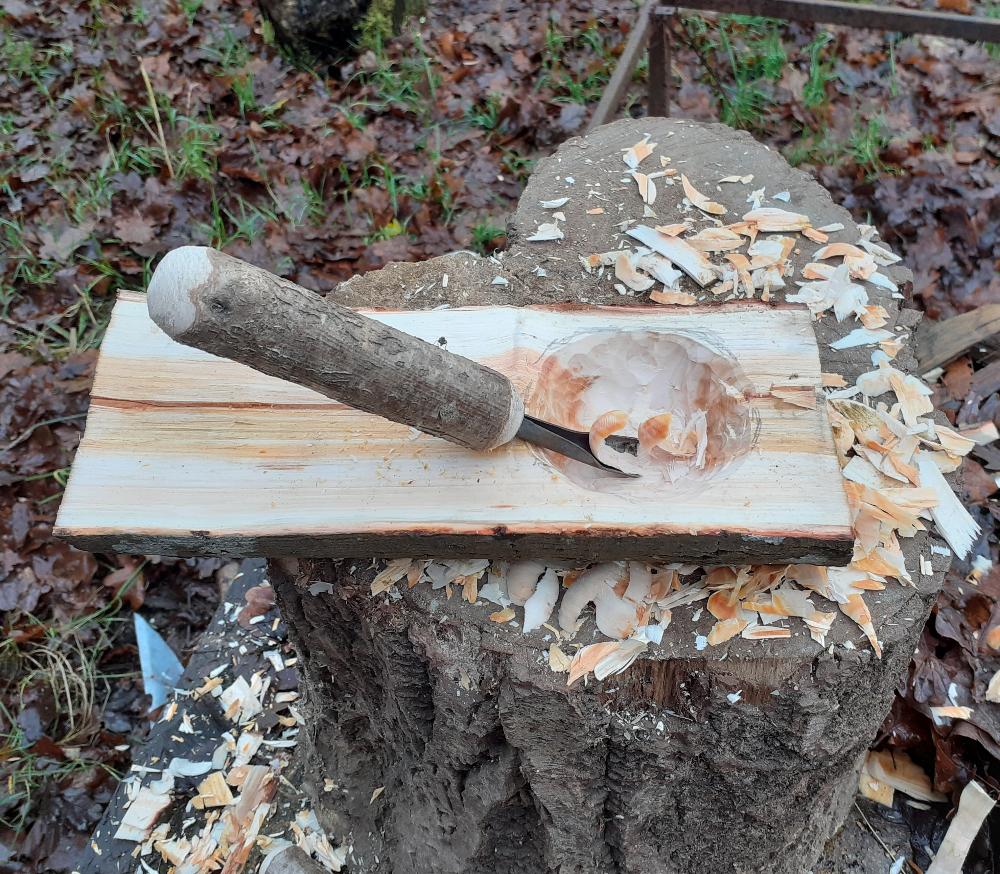
A small spoon hook was made from a sliver of steel. The forming of the shape was done hot with the use of a pair of needle-nosed pliers and then the edges were cleaned up just as the full-sized version last time.
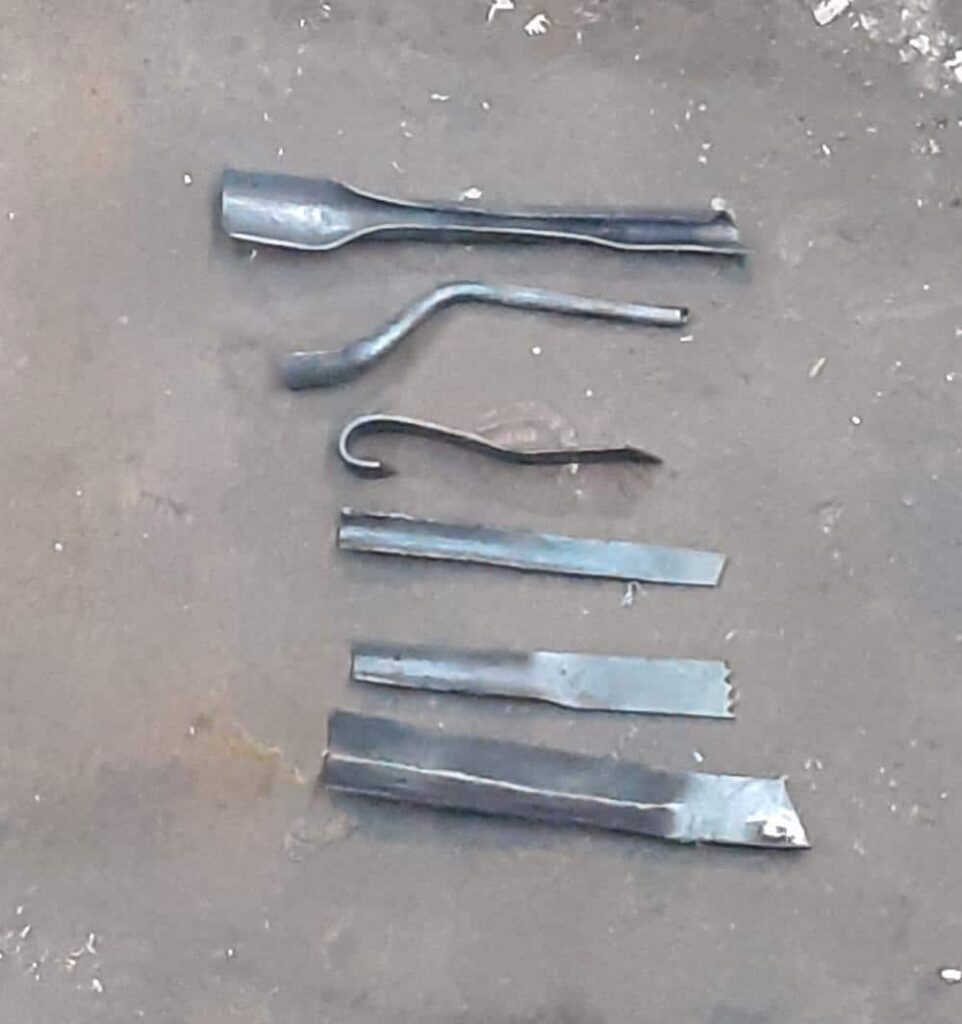
More gouges, but I wanted them to be stiffer than such thin metal would allow. One way to do that is to roll the steel into a tube; it’s not nearly as strong or stiff as a solid rod, but it’s much better than a 1mm thick strip! The stem is forged in much the same way as the channel for the gouges, but as the steel reached a C shape it is closed gently from the outside.
The key is to work gently and evenly along the length and all around the circumference of the tube. If you hit it too hard and the tube collapses, the only solution is to drive a steel rod down it and open it back up; but avoiding collapse is better.
If you want a tidy round tube, then forging it around the steel mandrel is the way to go, but not necessary. The working ends are shaped as before once the tubular shafts are finished and closed up.
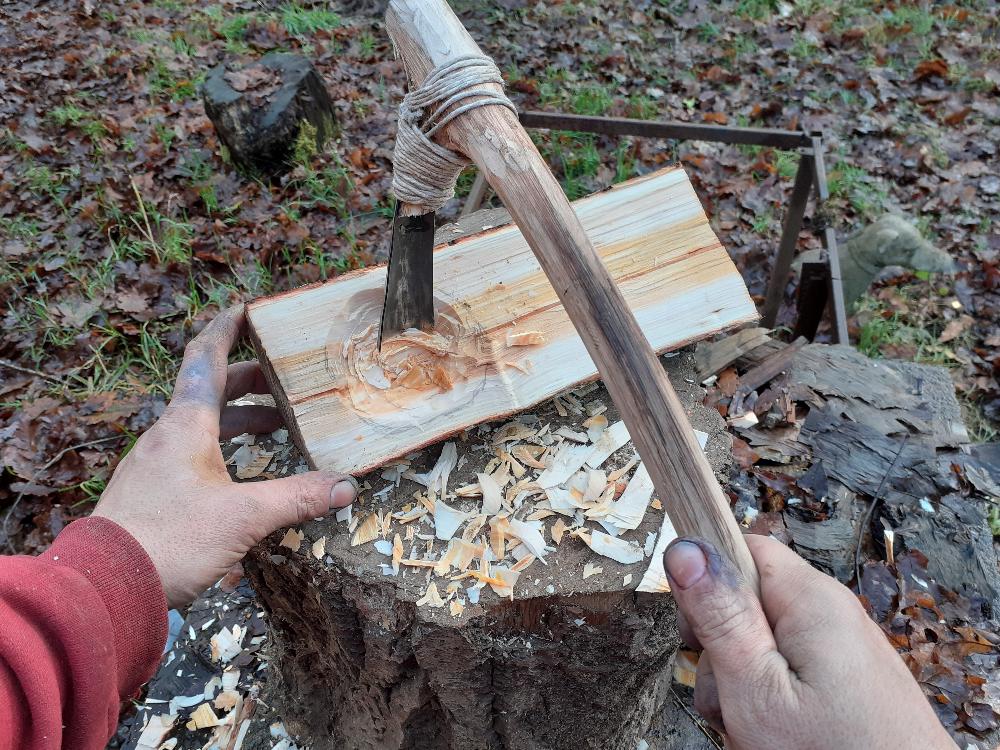
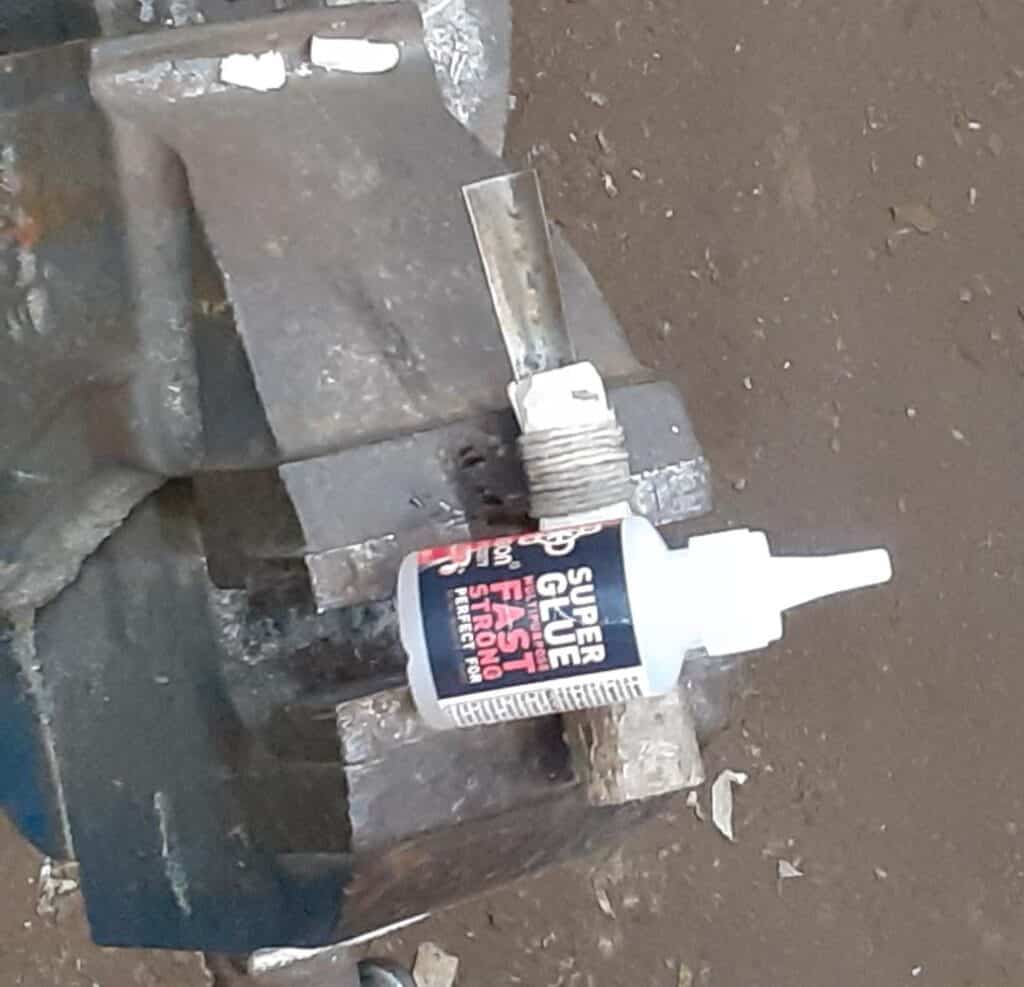
The handles for these gouges were simple, sticks with a hole and some good epoxy or superglue.
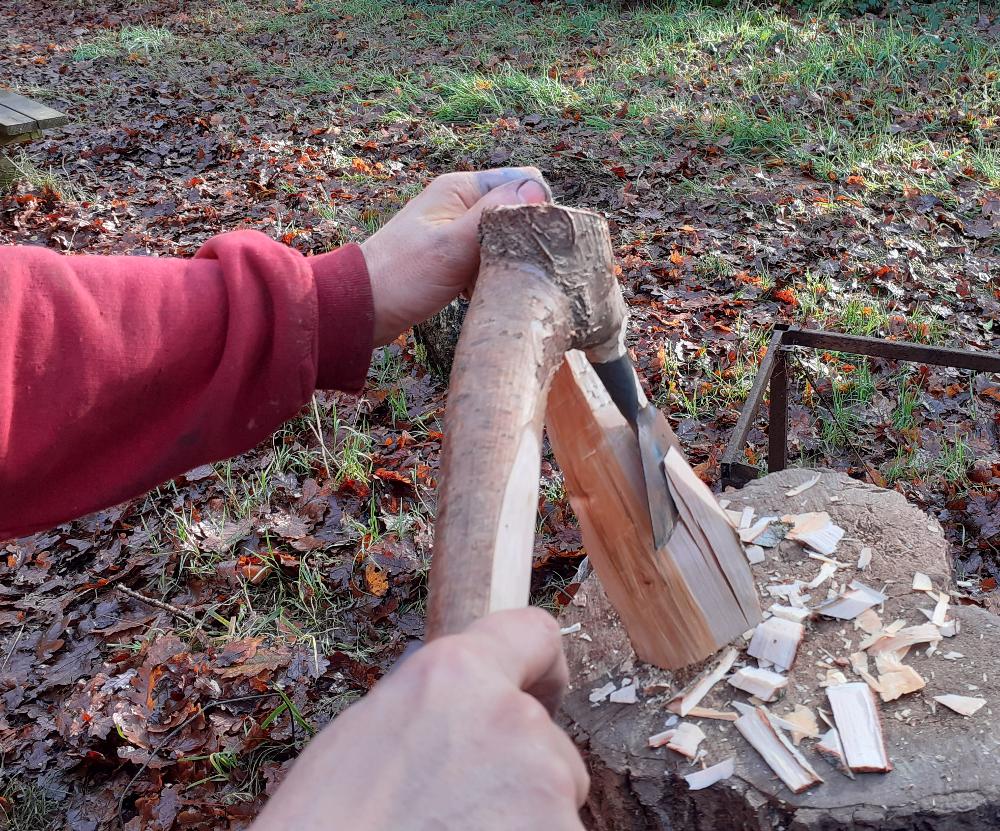
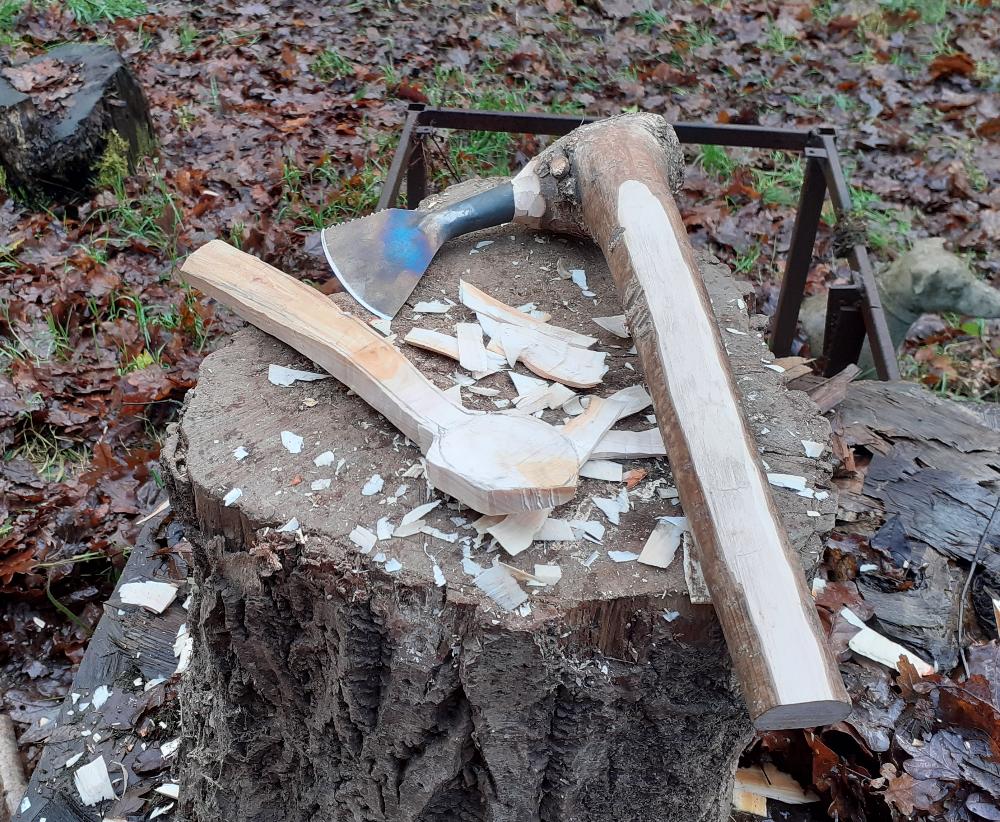
The last tool from this saw was another experiment in what can be accomplished with such thin steel: an axe.
The easiest way to make it would be to cut a slot in the handle and use a couple of pins, like the full tang knife before. The trouble there is that the handle would almost certainly split out where the pins are and the steel would flex/bend where it meet the handle. Of course, I could’ve used a length of pipe to reinforce the wood, but that’s not nearly so elegant or fun.
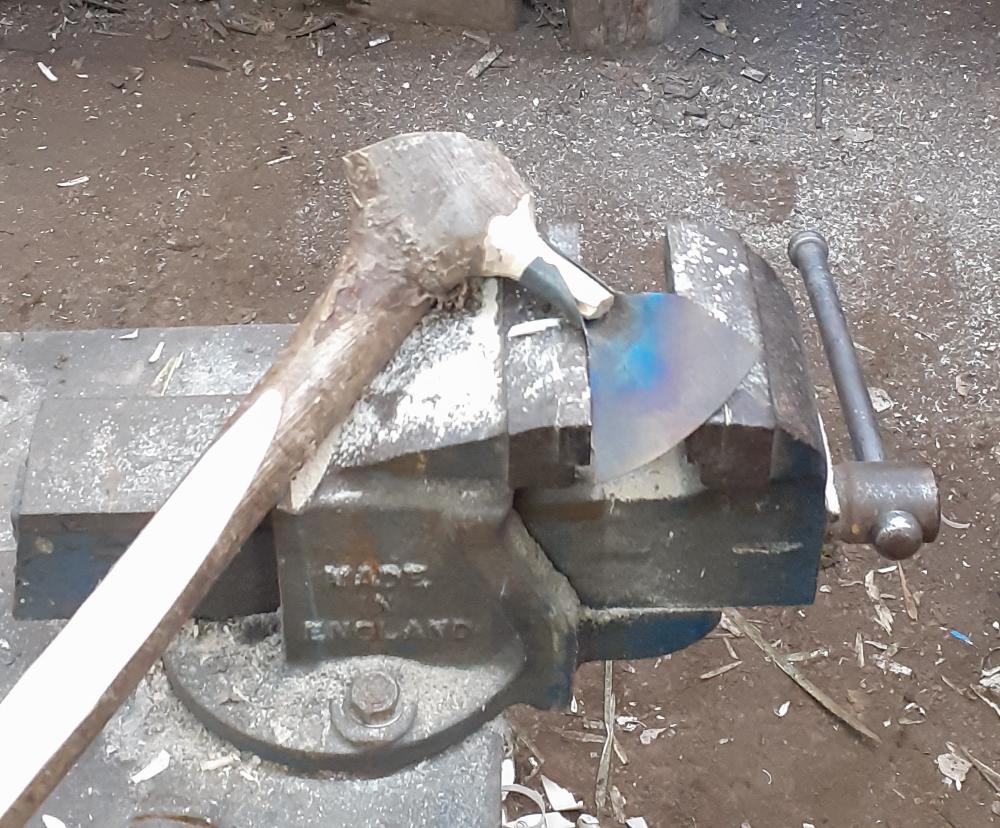
Another solution is to make a socket, akin to the Japanese adze (and in fact the early Iron Age axes/adze of Europe that fell out of favour over 2000 years ago). Again using 1mm thick steel is rather pushing the technique to the limit, but it seemed the best option.
The socket is made in the same way and the tubular shafts, with the exception that the starting shape is triangular.
When forming the socket in the swage, align the cross peen of the hammer with the outside edges, gradually coaxing it into a cone. I brought some of the conical shaping down into the first part of the blade in order to stiffen the axe head and give a little more area for wood to occupy.
The handle for this was carved from a piece of hazel with a side branch for the socket to fit on; the extra wood at the end gave a little more weight to the axe as well extra strength to the area around the socket.
I decided to rely on the springy nature of the open socket to hold it in place; but a small pin, glue, or a binding could all be used to hold it firm if it decides to come off.
The glaring omission in this instalment is that of heat treatment. The hot working of the steel has undone the heat treating that allowed the metal to perform as a saw. So until it has been re-heat treated, nothing will hold an edge.
I’ve mentioned the handles here, but they are not fitted until after the heat treating has been carried out!
So, the next instalment is the rather dry heat treating of these tools…


Dave Budd is a world renowned smith specialising in historic weapons, tools and other period steelwork, he runs knife and axe making courses amongst other things from his woodland in rural Devon.
You can see some of his work and contact him through his website DaveBudd.com