hmmm... time for another epic post... 
As there has been a noted increase in the amount of spoon related posts recently, I thought a spoon tutorial could be in need. For total carving beginners, there is an excellent tutorial here: spoon tutorial in the articles section of the site. This post should serve to be the next to be the next level up")
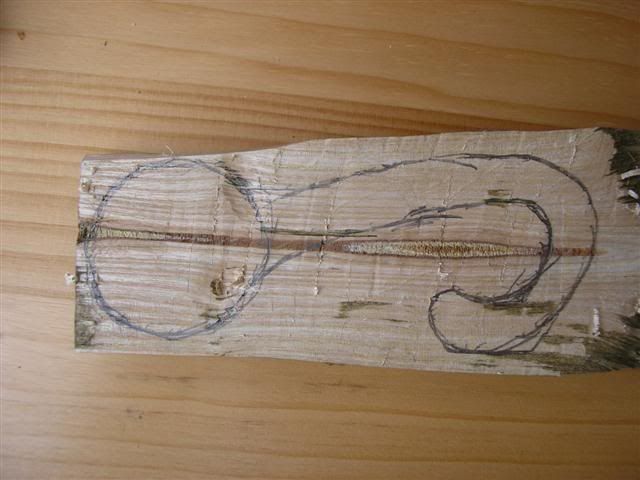
Try and be as imaginative as possible - i went for a curvy design. It tends to help if you draw it out first on your wood - axe it flat then get sketching!
That done work out where you can put some stop cuts in, very useful when carving the fiddlier sections. I have left the top section on mine so I can grip something while carving the top.
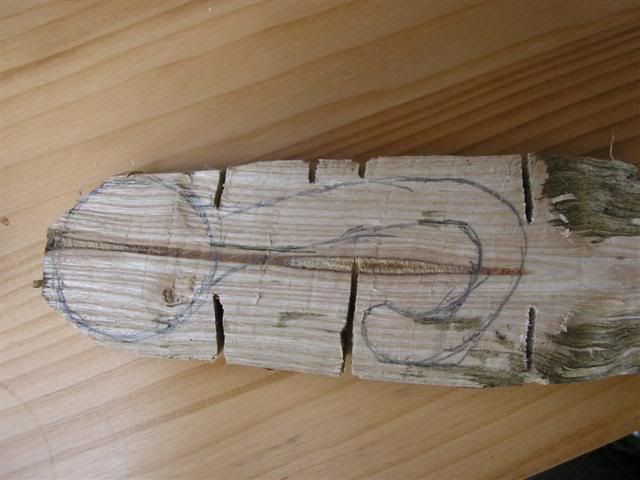
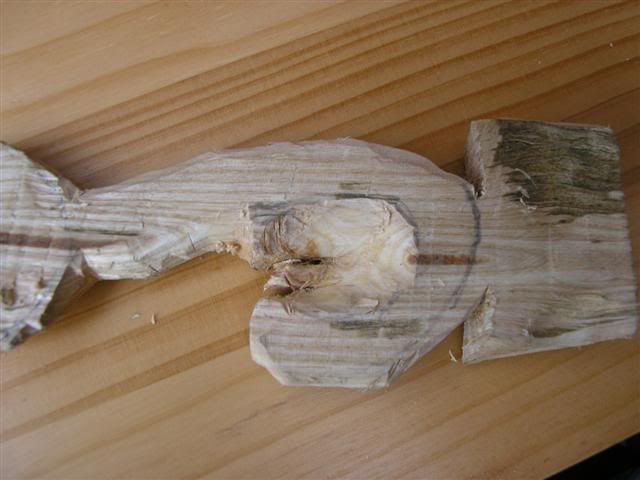
Then using the tip of an axe, split out the sections as close as you dare to the sketch.
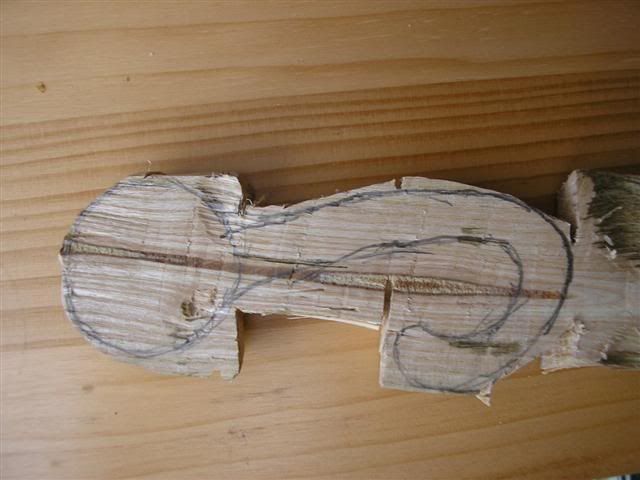
Now the fun can start. Just carve the back of the bowl first, leaving the actual bowl part out until last. This means you can continue to modify the bowl shape as you go, if you want to.
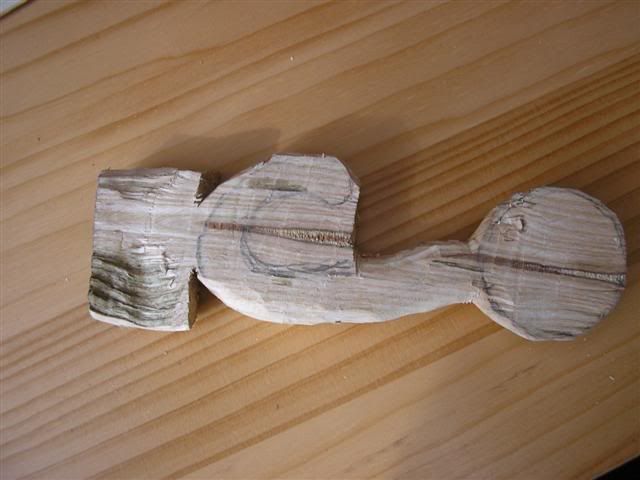
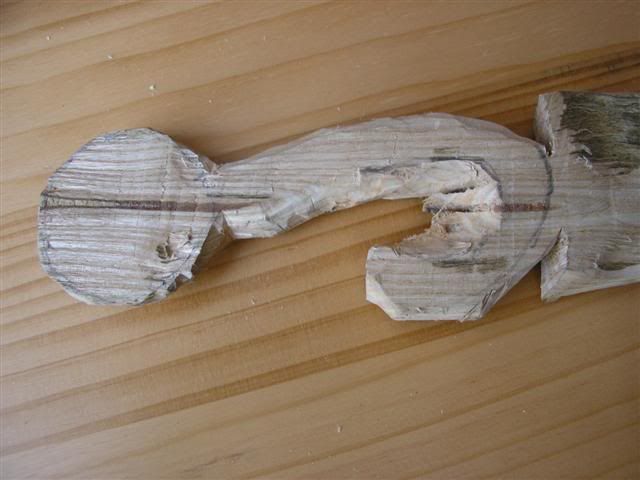
The only difficult part in this is carving the part of the bowl back nearest the handle on either side. You can't carve from the handle out or it splits. Carving toward the handle can be tricky but take it slow and keep modifying your grip/technique untl you get there.
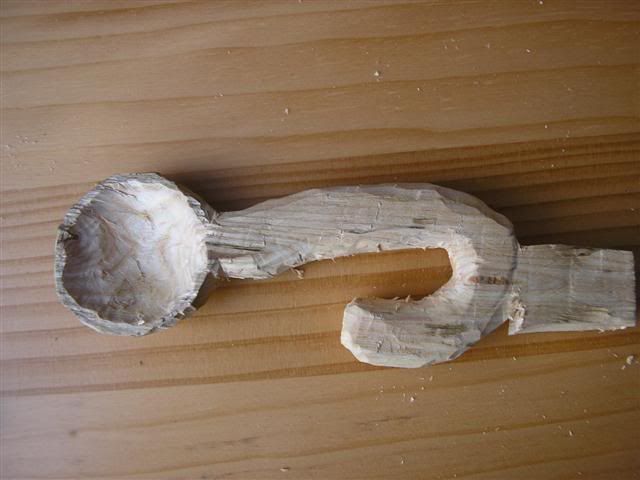
However, by far the hardest part is carving the hooked bit. This is made considerably easier with a crooked knife, use it to thin the scrap part on the top and bottom then with a saw, cut slits then crack them off.
After this is done all that is left to do is clean up the rough parts and the bowl, both bits covered in the BCUK tutorial. Once you are complete in terms of carving, split and carve with axe and knife the remaining scrap at the top.
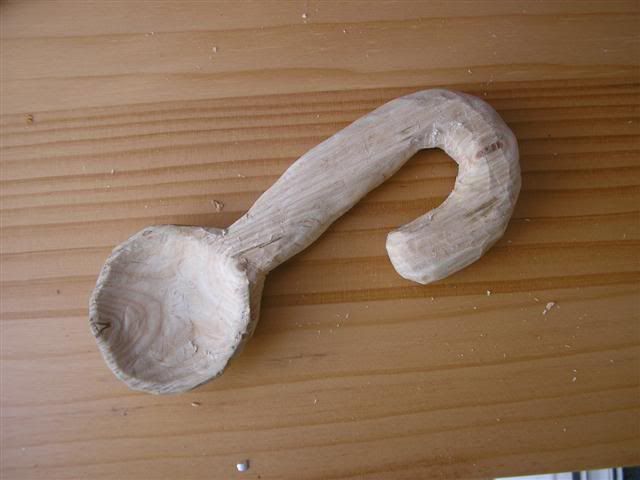
There! You now (hopefully) have a lovely and tactile spoon. This one still needs to be sanded but its essentialy there.
Tools used - saw (bahco laplander), knifex2 a thin mora and one of my own making, axe.
The whole spoon is about 13 cms long, cute yet useful.
I hope this manages to inspire someone out there.")
woodwalker.
btw - any questions on technique, just ask
As there has been a noted increase in the amount of spoon related posts recently, I thought a spoon tutorial could be in need. For total carving beginners, there is an excellent tutorial here: spoon tutorial in the articles section of the site. This post should serve to be the next to be the next level up
Try and be as imaginative as possible - i went for a curvy design. It tends to help if you draw it out first on your wood - axe it flat then get sketching!
That done work out where you can put some stop cuts in, very useful when carving the fiddlier sections. I have left the top section on mine so I can grip something while carving the top.
Then using the tip of an axe, split out the sections as close as you dare to the sketch.
Now the fun can start. Just carve the back of the bowl first, leaving the actual bowl part out until last. This means you can continue to modify the bowl shape as you go, if you want to.
The only difficult part in this is carving the part of the bowl back nearest the handle on either side. You can't carve from the handle out or it splits. Carving toward the handle can be tricky but take it slow and keep modifying your grip/technique untl you get there.
However, by far the hardest part is carving the hooked bit. This is made considerably easier with a crooked knife, use it to thin the scrap part on the top and bottom then with a saw, cut slits then crack them off.
After this is done all that is left to do is clean up the rough parts and the bowl, both bits covered in the BCUK tutorial. Once you are complete in terms of carving, split and carve with axe and knife the remaining scrap at the top.
There! You now (hopefully) have a lovely and tactile spoon. This one still needs to be sanded but its essentialy there.
Tools used - saw (bahco laplander), knifex2 a thin mora and one of my own making, axe.
The whole spoon is about 13 cms long, cute yet useful.
I hope this manages to inspire someone out there.
woodwalker.
btw - any questions on technique, just ask