Wild Stoves Wood gas stove MK II
The Woodgas stove MKII is made by Wild Stoves, a British company that sells a number of different types of stoves and which has its roots in humanitarian work.
The wood gas stove has been designed to be compact, lightweight and to work at a high level of efficiency. For the last month, I have been putting the stove through its paces when I have been out and about.
Personally, I always use a wood burning stove to boil water and to cook meals on. I have nothing against other types of stoves, but for me I will never be far from a source of wood whether I am camping or just out hiking so this type of stove is ideal for my situation.
The specifications are:
Weight (Including carry sack): 288g
Assembled height: 16.3 cm
Packed down height: 6.9 cm
Made from 304- grade stainless steel.
Price: £ 49.95
Parts:
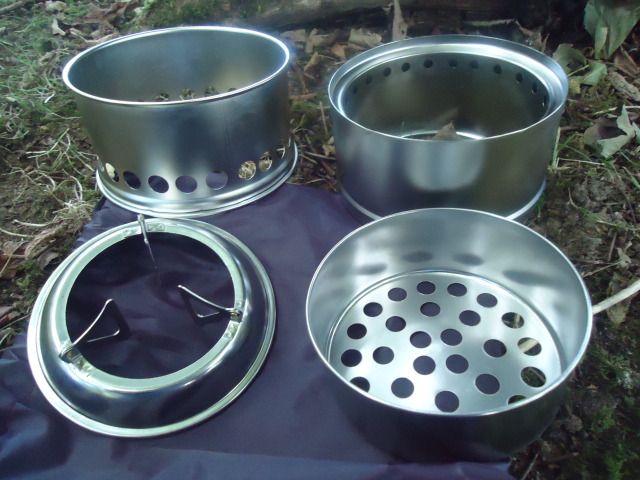
The stove comes in 4 parts which fit together when assembled and nest into each other for packing.
The base:
The base is 6.9cm high with a circumference of 40.2cm. The edges have been rolled over giving the base its strength. From what I have read this base is much stronger than the MK I version. It has 23-air intake holes situated 2 cm (to the middle of the hole) from the bottom. The base has a very little amount of give and feels very sturdy.
Combustion chamber:
The combustion chamber is 6.2 cm high and has a circumference of 39.6cm. The metal is thicker than the metal on the base. This part is double walled with a gap of 0.5 cm between the walls. There is a ridge 1.5cm up from the bottom, this allows the chamber to sit on the base section. There are 24 outlet holes 1.4 cm from the top. This section also has a 1cm shelf at the top to accommodate the pot support. Again, both of the walls edges at the bottom have been rolled over. It is very strong with no give in it at all.
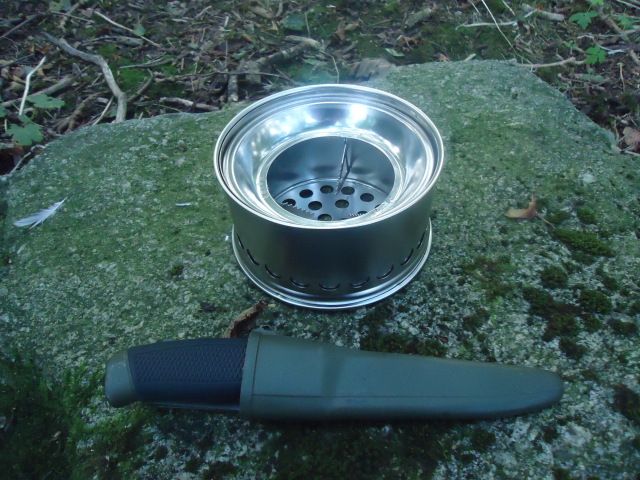
Fire grate:
The fire grate is 4.2cm high with a circumference of 33.3cm. It has the vent/ash holes in the bottom and has been pressed from a single piece of metal that is again thicker than the metal of the base. It also has the top edges rolled.
Pot support:
This section is 3.9cm high (To the top of the supports) and has a max circumference of approx. 38.5cm. It has the lip around the edge and tapers from here to the top.
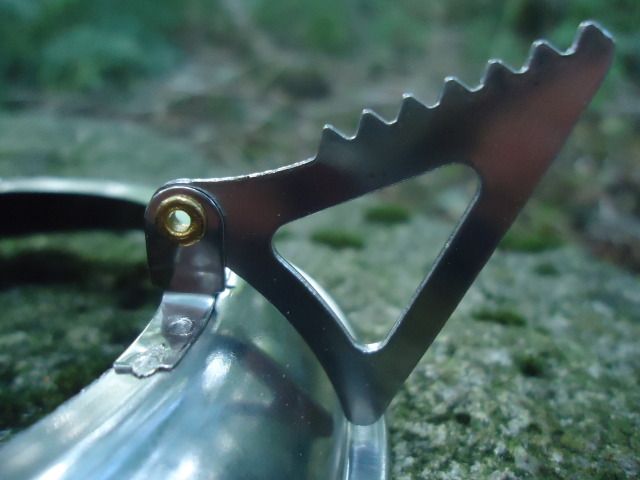
The 3 triangular pot supports are riveted on to their hinges. The have notches cut into the top edge to give grip and have been skeletonized to save on weight. The hinges are spot welded onto the top.
Nylon bag:
The stove comes with its own strong nylon drawstring bag that measures 9 1/4 x 9 . This gives you plenty of room for the stove and a decent amount of kindle and/or tinder. Not only does the bag keep it all together but also it protects the rest of your kit from any soot/dirt that is on the outside of the stove.
Assembly and Packing away:
The stove is very easy to set up and this simplicity allows you to get it going and pack away very quickly with the minimum of fuss.
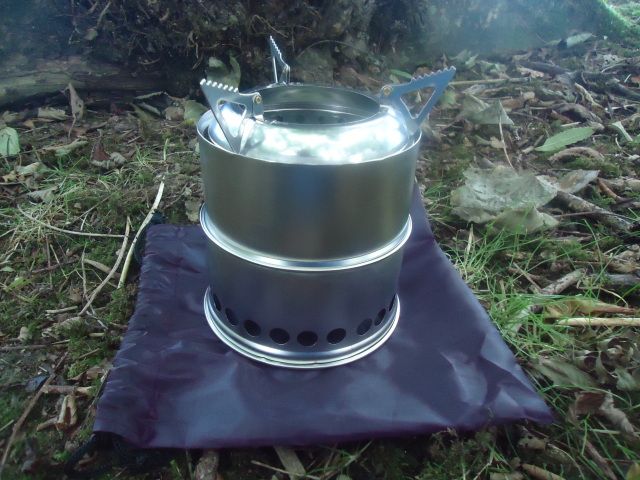
The combustion chambers ridge sits on the lip of the base. The fire grate is then slid into the combustion chamber. The grates top lip sits on top of the chambers inside lip. The pot support is then placed on top where its lip sits into the shelf of the chamber. The supports are then pulled out to their maximum. All the parts sit secure into each other and I have not yet had any problems with them coming apart when using the stove
When you are finished, using the stove you simply pop the grate inside the chamber then put the base over the top. The pot support is then reversed so it sits upside down in the chamber. There is enough room inside to put a decent amount of tinder etc. ready for next time.
How it works:
Some of you will know how a wood gas stove works but for those that do not it works like this:
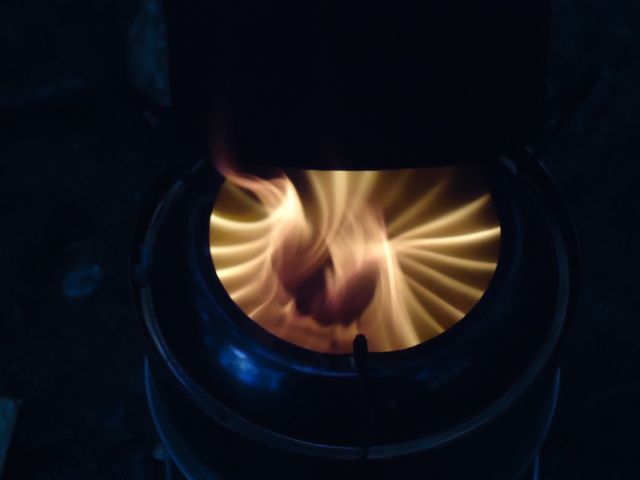
When wood is burned it gives off flammable chemicals that are then vaporized by the heat. This vapour is the Wood gas. When the wood gas combines with oxygen, it sets of a reaction of heating and more combustion.
When you light a fire in the grate of the stove, it creates the woodgas. Air is taken in from the holes in the base and heated. The warm air then rises between the double wall and exits via the air outlet holes at the top where it mixes with the wood gas from the fire. The combination of warmed air and wood gas ignites to give a further burn.
The clever thing about these stoves are their ability to produce a higher heat output but with less smoke, giving a cleaner and longer burn.
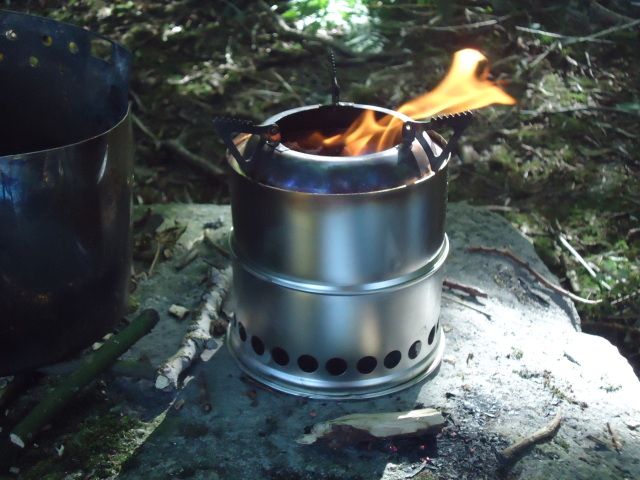
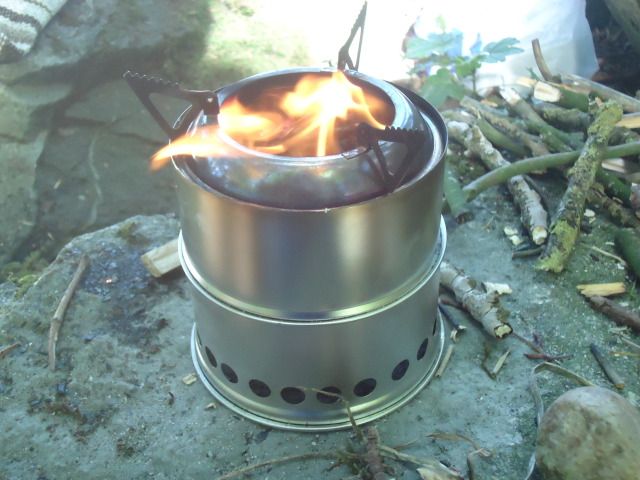
In Use:
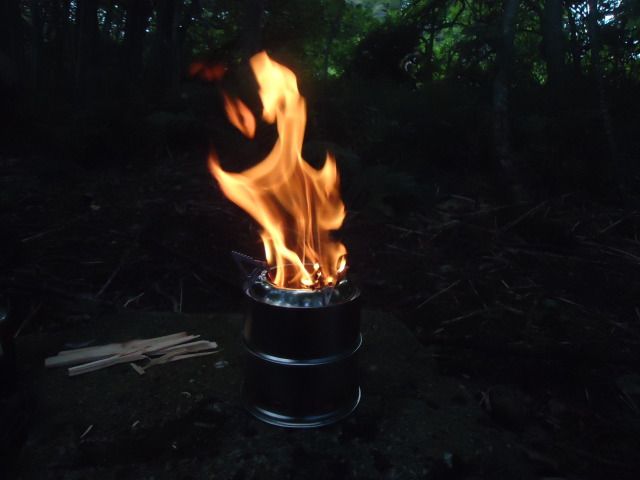
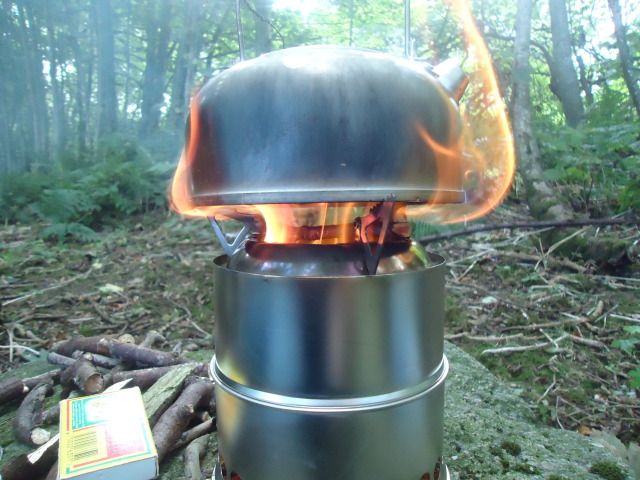
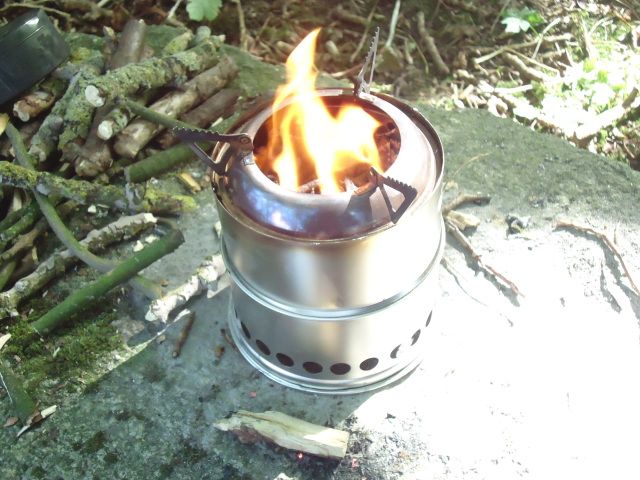
After lighting the fire, it takes around 30 seconds for the first signs of the wood gas jets to appear, then approximately another 30 seconds to 1 minute for all the holes to have the jets coming out of them. As soon as the wood gas ignites, you certainly notice the difference, as the flames are more fierce. When the fire burns down past a certain point, the jets flicker out and you are left with a small fire in the grate that diminishes to coals. I find this stove to be very efficient indeed. Even though I use twigs etc. I do not have to constantly stack it. It burns the charcoal for a long time and right down leaving a surprisingly small pile of ash.
Personally I think, the knack to cooking easily on this stove is getting your fuel right. Thinner twigs are going to burn with a quick fierce heat output whereas thicker ones will give you a longer burn time. After you use the stove, a few times you get a better understanding of what to add and when to add it. Having your fuel already stacked and by the stove means you dont have to leave it at any point.
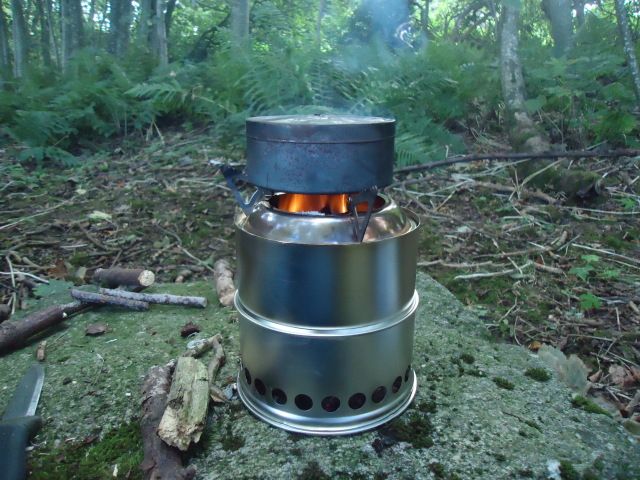
Cooking and Boiling:

I have had no problems cooking my meals on this stove and it boils water very easily. For example I can get a full 2 pint pint kettle to a rolling boil anywhere from 4 min 35 sec to 6 min 10 sec.
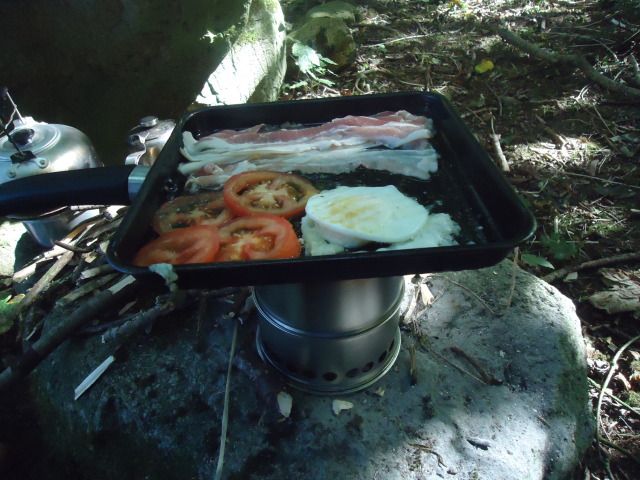
The pot supports will take quite large pans/ mess tins. The largest I use is a griddle pan that measures 24x24 cm . On this I can cook quite a few things at once and it will sit on the supports very stable despite its size. However, the smallest size it will take is a container with a minimum circumference of 28-29 cm. This means that it will not take for example a crusader mug or a tin camping mug. I have been informed that Wild Stoves are working on this and will have it sorted when the next version comes out. Now that isnt to say that you cant use a smaller container at all.
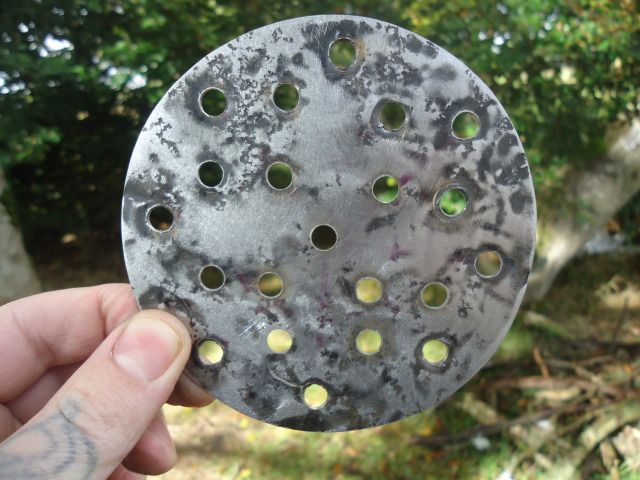
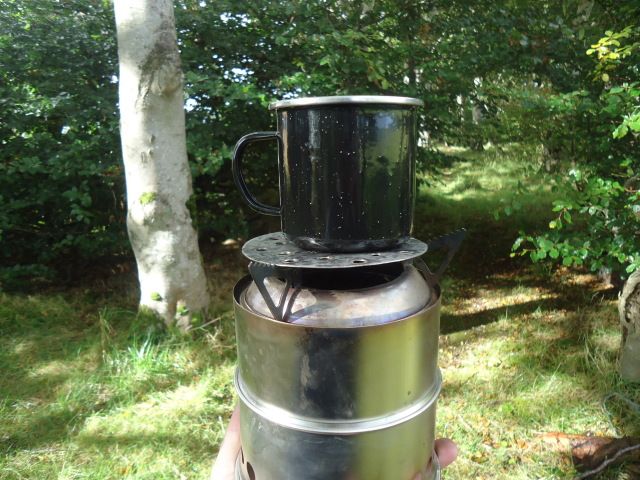
I have made a simple modification where I have taken a piece of thin steel sheet, cut it into a circle with a circumference of 34cm, and drilled a series of holes in the disc to allow the flames through. It is lightweight and able to fit inside the stove when packed away, so I have it with me at all times and I can use as small a container as I want.
As the stove doesnt have a hole in the side, you have to stack it from the top. Now when you have a container on the support the gap between the bottom of your pot and the stove is quite small. If you are careful, you can push thinner twig through this gap but personally, I have no problem just taking the pot off for a few seconds so I can stack the stove and I find it a lot safer. It hardly effects the cooking/boiling time at all.
Another worry I had when I first got the stove was that the pot supports would warp and/or weaken after a couple of weeks of heavy use. I am very pleased that after a month the only difference is one support is slightly looser than the rest when folding them up. The welds have no sign of weakness and there has been no warp to the supports themselves.
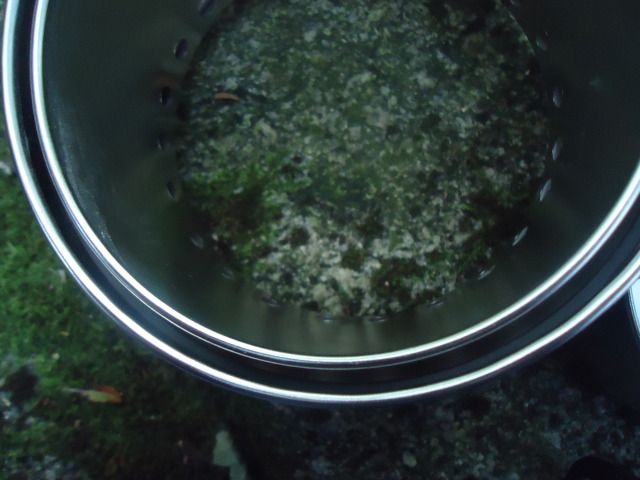
Wood pellets:
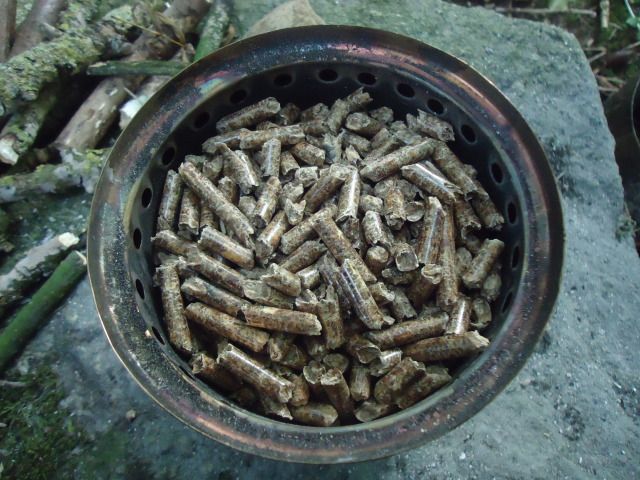
Now I have seen cat litter pellets being used with this stove on the Wild Stoves website and on various forums and I wanted to try it out for myself.
I used 500g of pellets as this keeps it below the outlet holes at the top.
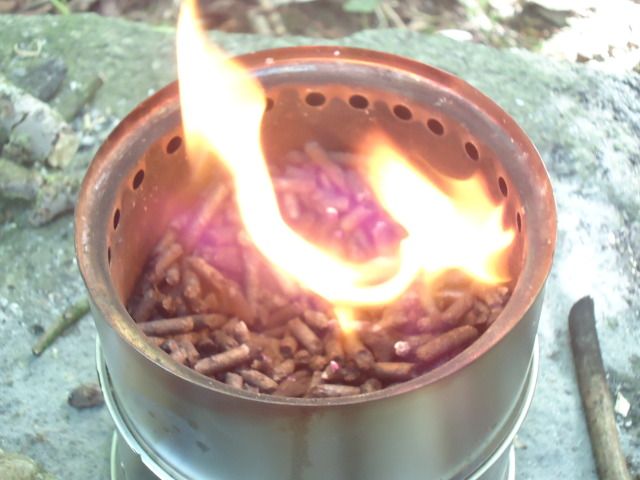
I found it harder to light using my normal method of fire steel and a combination of various tinders and a few times I had to light a fire on top to get the pellets to catch. If you had a fire lighter/ hexi block or used some of the wax paper as suggested by Wild Stoves I am sure it would be no trouble at all to light.
Once the pellets get going, the fire is steady and has a long burn time. I have had a range of times for how long the fire lasts from 56 minutes to 1 hour 16 minutes. Once the main fire burns out you are left with charcoal. This can then be re lit to give you a longer burning time. Again, the range of time has been from 26 minute to 44 minutes.
I have found that when you burn the charcoal you have to keep a closer eye on it and give it a rake through and a blow straight afterward or the flames tend to peter out and the pellets are left smouldering.
The pellets are great for boiling and using to heat things up or when you want a constant heat under your pan but not as good as wood when it comes to frying.
The great thing about using pellets on the stove is you can bag up a few portions and have them with you knowing that even if you cant find any other fuel you will still be able to use the stove. It also means you dont have to spend time preparing your fuel by collecting and cutting etc.
As well as twigs and wood pellets the stove will happily burn wood chips, pinecones and dried animal droppings and if you want to cover all your bases you can use the stove with a trangia / meths stove. Wild stoves have a few options where you can purchase different kits some of which have the trangia with it.
Other uses:
As well as cooking food and boiling water, the stove has come in handy for a few other things as well. I have made char cloth in a sweet tin. Perfect for when you have finished cooking and there is still fuel to burn.

My wax pot was able to fit inside the stove slightly so I was able to melt a full pot and make up some pinecone candles/ firelighters.
In addition, the stove is great for making pine pitch glue on as the melting pot can rest on the supports over a constant heat and I can get the glue mix exactly how I want it.
Conclusion:
I am very happy with how this stove turned out. I think that it has lived up to its description on the Wild Stoves website, and the recommendations of the other forum members.
It is:
Lightweight: Suitable for almost any activity where you need some way to cook your food and boil your water and great for those who count the grams.
Strong and durable: I have had no problems with it getting bent/dented etc. when packed in my rucksack with the other kit. So far, there have been no signs of wear and I expect it to last for many years.
Compact: As it packs down small, it doesnt take a lot of room in the rucksack and is ideal for people looking to save on
space.
Efficient: My use of this stove up to date has proven to me that it is highly efficient at its job. You can do a lot with this stove and with it being designed to burn gasses that a normal campfire doesnt, a little goes a long way here.
The MkII Wood gas stove has outperformed any other stove I have and I am more than happy to stick it in my day bag as well as taking it with me on longer trips. It will also be very handy come winter when it will go in the Car Bag along with a couple of portions of wood pellets.
Thanks for looking.
[b
The Woodgas stove MKII is made by Wild Stoves, a British company that sells a number of different types of stoves and which has its roots in humanitarian work.
The wood gas stove has been designed to be compact, lightweight and to work at a high level of efficiency. For the last month, I have been putting the stove through its paces when I have been out and about.
Personally, I always use a wood burning stove to boil water and to cook meals on. I have nothing against other types of stoves, but for me I will never be far from a source of wood whether I am camping or just out hiking so this type of stove is ideal for my situation.
The specifications are:
Weight (Including carry sack): 288g
Assembled height: 16.3 cm
Packed down height: 6.9 cm
Made from 304- grade stainless steel.
Price: £ 49.95
Parts:
The stove comes in 4 parts which fit together when assembled and nest into each other for packing.
The base:
The base is 6.9cm high with a circumference of 40.2cm. The edges have been rolled over giving the base its strength. From what I have read this base is much stronger than the MK I version. It has 23-air intake holes situated 2 cm (to the middle of the hole) from the bottom. The base has a very little amount of give and feels very sturdy.
Combustion chamber:
The combustion chamber is 6.2 cm high and has a circumference of 39.6cm. The metal is thicker than the metal on the base. This part is double walled with a gap of 0.5 cm between the walls. There is a ridge 1.5cm up from the bottom, this allows the chamber to sit on the base section. There are 24 outlet holes 1.4 cm from the top. This section also has a 1cm shelf at the top to accommodate the pot support. Again, both of the walls edges at the bottom have been rolled over. It is very strong with no give in it at all.
Fire grate:
The fire grate is 4.2cm high with a circumference of 33.3cm. It has the vent/ash holes in the bottom and has been pressed from a single piece of metal that is again thicker than the metal of the base. It also has the top edges rolled.
Pot support:
This section is 3.9cm high (To the top of the supports) and has a max circumference of approx. 38.5cm. It has the lip around the edge and tapers from here to the top.
The 3 triangular pot supports are riveted on to their hinges. The have notches cut into the top edge to give grip and have been skeletonized to save on weight. The hinges are spot welded onto the top.
Nylon bag:
The stove comes with its own strong nylon drawstring bag that measures 9 1/4 x 9 . This gives you plenty of room for the stove and a decent amount of kindle and/or tinder. Not only does the bag keep it all together but also it protects the rest of your kit from any soot/dirt that is on the outside of the stove.
Assembly and Packing away:
The stove is very easy to set up and this simplicity allows you to get it going and pack away very quickly with the minimum of fuss.
The combustion chambers ridge sits on the lip of the base. The fire grate is then slid into the combustion chamber. The grates top lip sits on top of the chambers inside lip. The pot support is then placed on top where its lip sits into the shelf of the chamber. The supports are then pulled out to their maximum. All the parts sit secure into each other and I have not yet had any problems with them coming apart when using the stove
When you are finished, using the stove you simply pop the grate inside the chamber then put the base over the top. The pot support is then reversed so it sits upside down in the chamber. There is enough room inside to put a decent amount of tinder etc. ready for next time.
How it works:
Some of you will know how a wood gas stove works but for those that do not it works like this:
When wood is burned it gives off flammable chemicals that are then vaporized by the heat. This vapour is the Wood gas. When the wood gas combines with oxygen, it sets of a reaction of heating and more combustion.
When you light a fire in the grate of the stove, it creates the woodgas. Air is taken in from the holes in the base and heated. The warm air then rises between the double wall and exits via the air outlet holes at the top where it mixes with the wood gas from the fire. The combination of warmed air and wood gas ignites to give a further burn.
The clever thing about these stoves are their ability to produce a higher heat output but with less smoke, giving a cleaner and longer burn.
In Use:
After lighting the fire, it takes around 30 seconds for the first signs of the wood gas jets to appear, then approximately another 30 seconds to 1 minute for all the holes to have the jets coming out of them. As soon as the wood gas ignites, you certainly notice the difference, as the flames are more fierce. When the fire burns down past a certain point, the jets flicker out and you are left with a small fire in the grate that diminishes to coals. I find this stove to be very efficient indeed. Even though I use twigs etc. I do not have to constantly stack it. It burns the charcoal for a long time and right down leaving a surprisingly small pile of ash.
Personally I think, the knack to cooking easily on this stove is getting your fuel right. Thinner twigs are going to burn with a quick fierce heat output whereas thicker ones will give you a longer burn time. After you use the stove, a few times you get a better understanding of what to add and when to add it. Having your fuel already stacked and by the stove means you dont have to leave it at any point.
Cooking and Boiling:
I have had no problems cooking my meals on this stove and it boils water very easily. For example I can get a full 2 pint pint kettle to a rolling boil anywhere from 4 min 35 sec to 6 min 10 sec.
The pot supports will take quite large pans/ mess tins. The largest I use is a griddle pan that measures 24x24 cm . On this I can cook quite a few things at once and it will sit on the supports very stable despite its size. However, the smallest size it will take is a container with a minimum circumference of 28-29 cm. This means that it will not take for example a crusader mug or a tin camping mug. I have been informed that Wild Stoves are working on this and will have it sorted when the next version comes out. Now that isnt to say that you cant use a smaller container at all.
I have made a simple modification where I have taken a piece of thin steel sheet, cut it into a circle with a circumference of 34cm, and drilled a series of holes in the disc to allow the flames through. It is lightweight and able to fit inside the stove when packed away, so I have it with me at all times and I can use as small a container as I want.
As the stove doesnt have a hole in the side, you have to stack it from the top. Now when you have a container on the support the gap between the bottom of your pot and the stove is quite small. If you are careful, you can push thinner twig through this gap but personally, I have no problem just taking the pot off for a few seconds so I can stack the stove and I find it a lot safer. It hardly effects the cooking/boiling time at all.
Another worry I had when I first got the stove was that the pot supports would warp and/or weaken after a couple of weeks of heavy use. I am very pleased that after a month the only difference is one support is slightly looser than the rest when folding them up. The welds have no sign of weakness and there has been no warp to the supports themselves.
Wood pellets:
Now I have seen cat litter pellets being used with this stove on the Wild Stoves website and on various forums and I wanted to try it out for myself.
I used 500g of pellets as this keeps it below the outlet holes at the top.
I found it harder to light using my normal method of fire steel and a combination of various tinders and a few times I had to light a fire on top to get the pellets to catch. If you had a fire lighter/ hexi block or used some of the wax paper as suggested by Wild Stoves I am sure it would be no trouble at all to light.
Once the pellets get going, the fire is steady and has a long burn time. I have had a range of times for how long the fire lasts from 56 minutes to 1 hour 16 minutes. Once the main fire burns out you are left with charcoal. This can then be re lit to give you a longer burning time. Again, the range of time has been from 26 minute to 44 minutes.
I have found that when you burn the charcoal you have to keep a closer eye on it and give it a rake through and a blow straight afterward or the flames tend to peter out and the pellets are left smouldering.
The pellets are great for boiling and using to heat things up or when you want a constant heat under your pan but not as good as wood when it comes to frying.
The great thing about using pellets on the stove is you can bag up a few portions and have them with you knowing that even if you cant find any other fuel you will still be able to use the stove. It also means you dont have to spend time preparing your fuel by collecting and cutting etc.
As well as twigs and wood pellets the stove will happily burn wood chips, pinecones and dried animal droppings and if you want to cover all your bases you can use the stove with a trangia / meths stove. Wild stoves have a few options where you can purchase different kits some of which have the trangia with it.
Other uses:
As well as cooking food and boiling water, the stove has come in handy for a few other things as well. I have made char cloth in a sweet tin. Perfect for when you have finished cooking and there is still fuel to burn.
My wax pot was able to fit inside the stove slightly so I was able to melt a full pot and make up some pinecone candles/ firelighters.
In addition, the stove is great for making pine pitch glue on as the melting pot can rest on the supports over a constant heat and I can get the glue mix exactly how I want it.
Conclusion:
I am very happy with how this stove turned out. I think that it has lived up to its description on the Wild Stoves website, and the recommendations of the other forum members.
It is:
Lightweight: Suitable for almost any activity where you need some way to cook your food and boil your water and great for those who count the grams.
Strong and durable: I have had no problems with it getting bent/dented etc. when packed in my rucksack with the other kit. So far, there have been no signs of wear and I expect it to last for many years.
Compact: As it packs down small, it doesnt take a lot of room in the rucksack and is ideal for people looking to save on
space.
Efficient: My use of this stove up to date has proven to me that it is highly efficient at its job. You can do a lot with this stove and with it being designed to burn gasses that a normal campfire doesnt, a little goes a long way here.
The MkII Wood gas stove has outperformed any other stove I have and I am more than happy to stick it in my day bag as well as taking it with me on longer trips. It will also be very handy come winter when it will go in the Car Bag along with a couple of portions of wood pellets.
Thanks for looking.
[b
")
 They were in cream and blue paper bags, made in Australia. I got them in Pet City.
")
