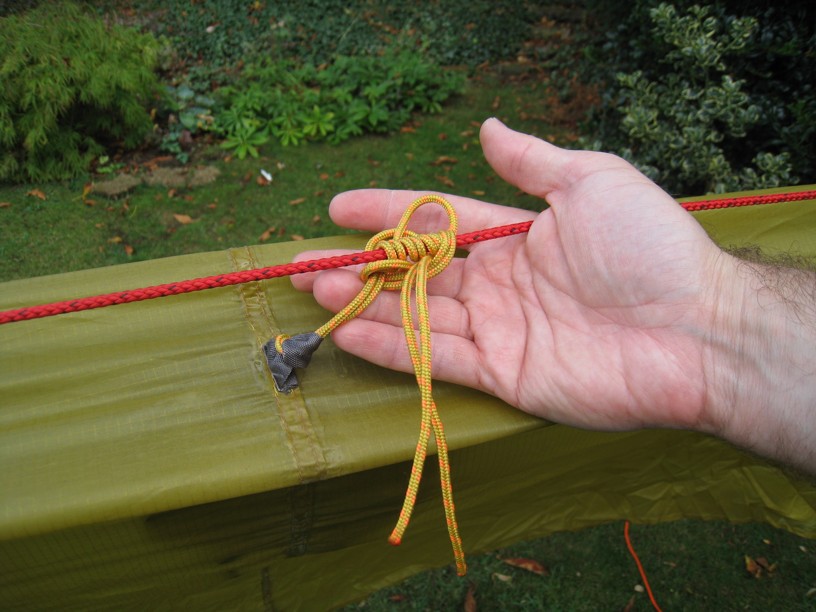
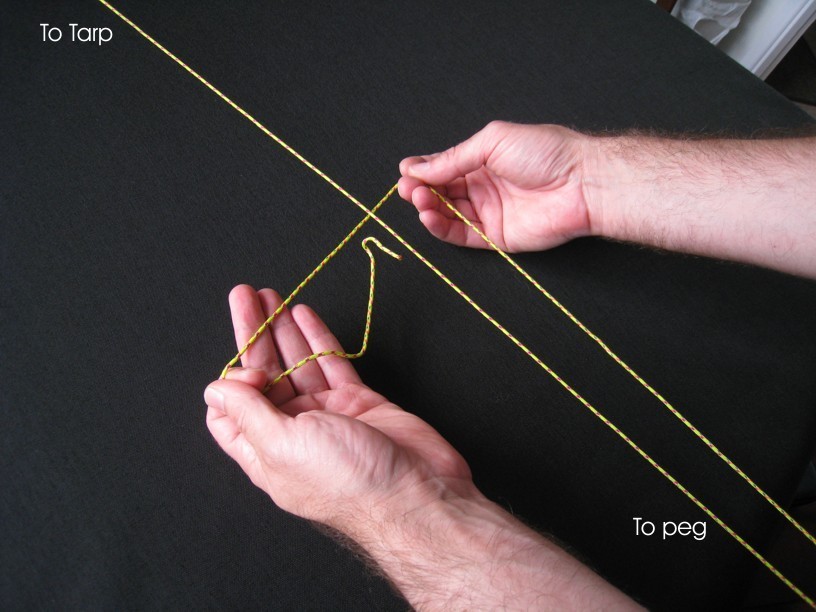
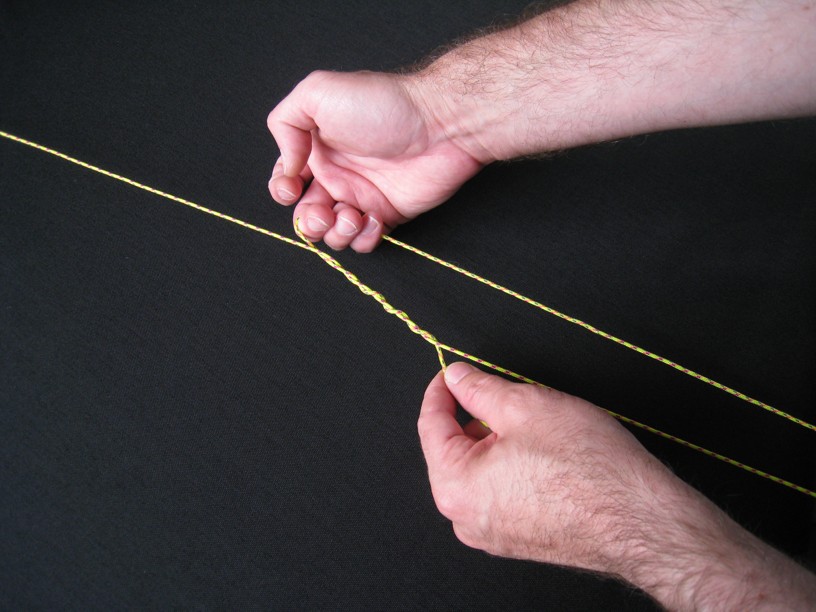
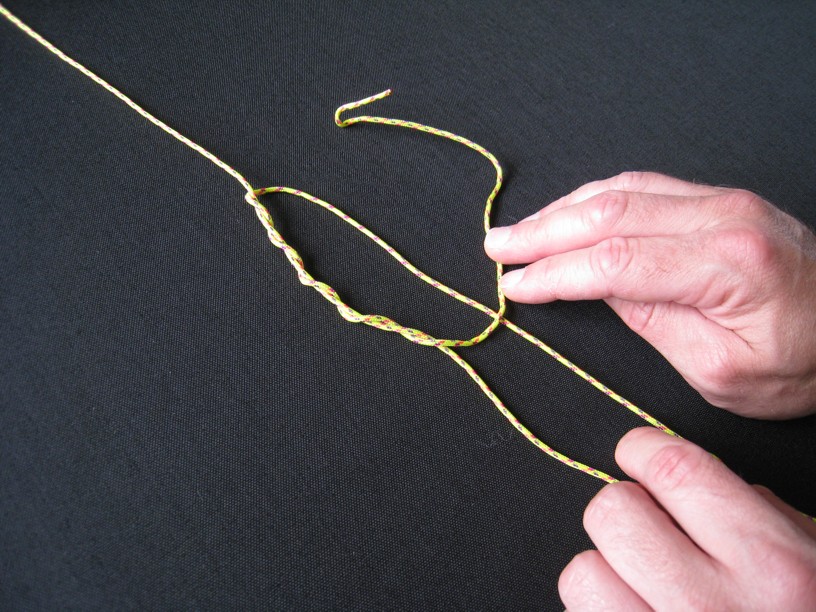
For the last few years I have been one of several people running a tarp and knot workshop at the BushcraftUK summer Bush Moot. More than once I have wished that I had pictures that I could post of the knots that we demonstrate, to make it easier for people to go away and practice at home. The internet is absolutely loaded with knot web pages, bushcraft and tarp demos and many excellent Youtube videos, but despite searching, I couldn't find examples of all the exact knots I use.
I think it is very important to say that while I like how I set up my tarp, there are a LOT of different methods and different knots, cords, fasteners and methods that people use to excellent effect. In addition to putting up the following photos, I will try to explain my reasoning for using these methods.
For a start, I like knots for rigging tarps, rather than clips and cam cleat gizmos, since they are light and I don't have to worry about losing or breaking them. They also allow a lot of versatility.
Ideally all knots are tied to be quick release, meaning that they come apart when you want with just a tug on the free end, even after they have been worked on by wind and water.
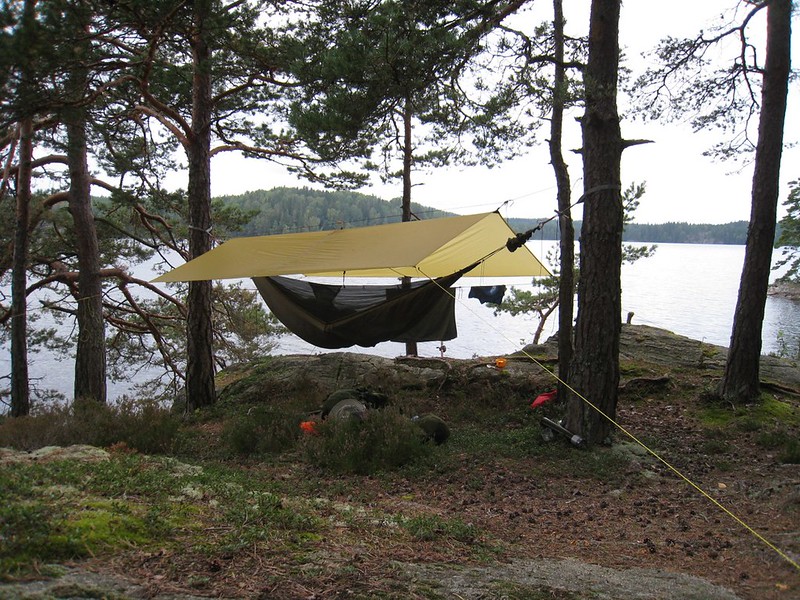
This is my example set up:
 img_5334 by Last Scratch, on Flickr
I use a ridgeline strung between trees (or poles), which goes up first. I believe that a separate ridge prevents me applying excessive tension to the tarp, allows for easier repositioning or re-tensioning of the tarp, and makes packing up easier and cleaner. I put the ridge above the tarp, rather than throw the tarp over it, because it removes the risk of water wicking down the ridgeline under the tarp, and that of the tarp fabric becoming worn where it rubs on the line. It does however mean that if I want a gear hanging line, I need to rig another cord.
For the ridge I like 3mm polyester sailing line, something like Excel Pro. 8 strand plait is a little grippier, but the 16 plait is nicer to handle, I think. Polyester does not stretch, which has its pros and cons. It doesn't tend to sag when it gets wet, as nylon does and tension on the guy lines don’t cause the tarp to sink towards the ground. On the other hand, it is unforgiving of poor knots when you are trying to maintain tension. It is either tight, or not. Stretchy line, nylon say, can be stretched a lot, and have more tension, or a little less, and still be almost as tight.
Anchoring
One end of the ridge is tied with either an Evenk Slippery Figure of Eight, or a Falconer's Knot. The Evenk is a little more secure and can be tied in mittens or heavy gloves. The Falconer's is certainly good enough, strength-wise, and can be tied with one hand, a distinct advantage if you are setting up in very muddy conditions, say in the jungle.
Evenk Hitch on Youtube
Falconer's knot on Youtube
I have photos of tying the falconer's knot, but since both falconers and bushcrafters use the knot, there are more and better videos out there showing how it is tied...even some of our own Stuart, teaching in the forests of Borneo
Falconer's knot slide show
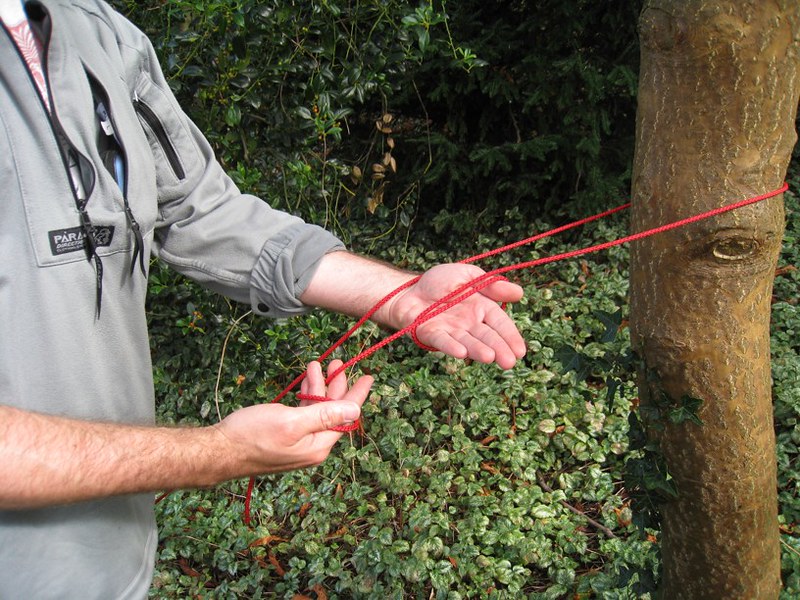
The Evenk:
 img_6710 by Last Scratch, on Flickr
For a right hander the working end is wrapped around the left hand. Where you wrap is up to you, if you only encompass your fingers then you will probably find you have to do the later pull-through with just your fingers. This method allows for the wearing of gloves in cold weather too.
 img_6711 by Last Scratch, on Flickr
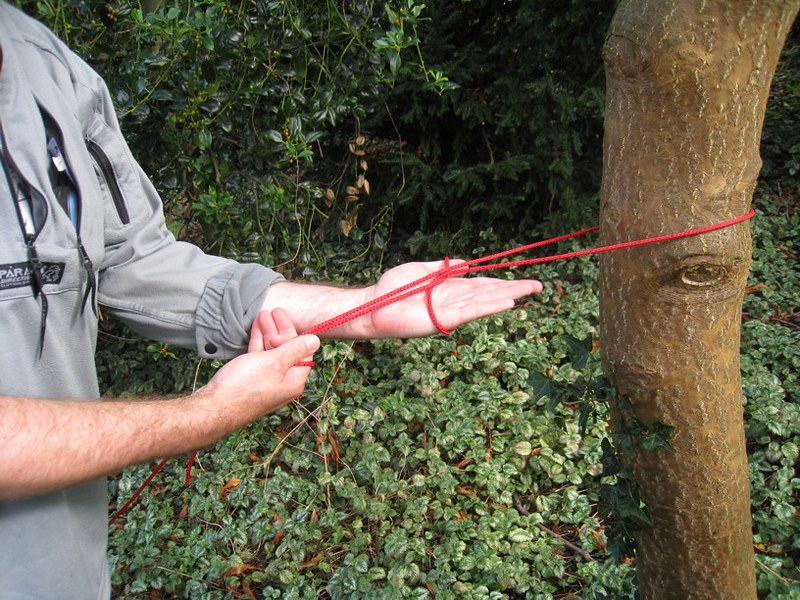
The left hand is rotated to point at the supporting tree,
 img_6714 by Last Scratch, on Flickr
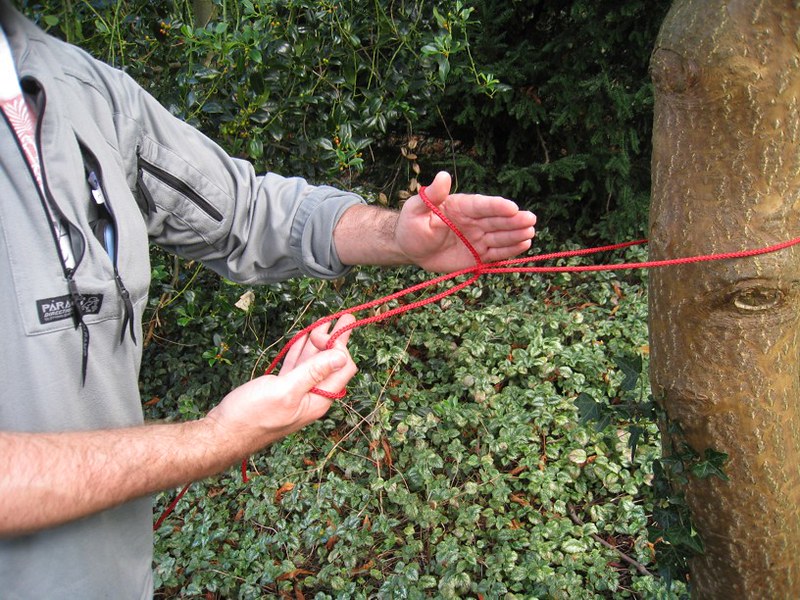
reaches over the top, note that this is easier when the right hand is keeping a little tension on both cords.
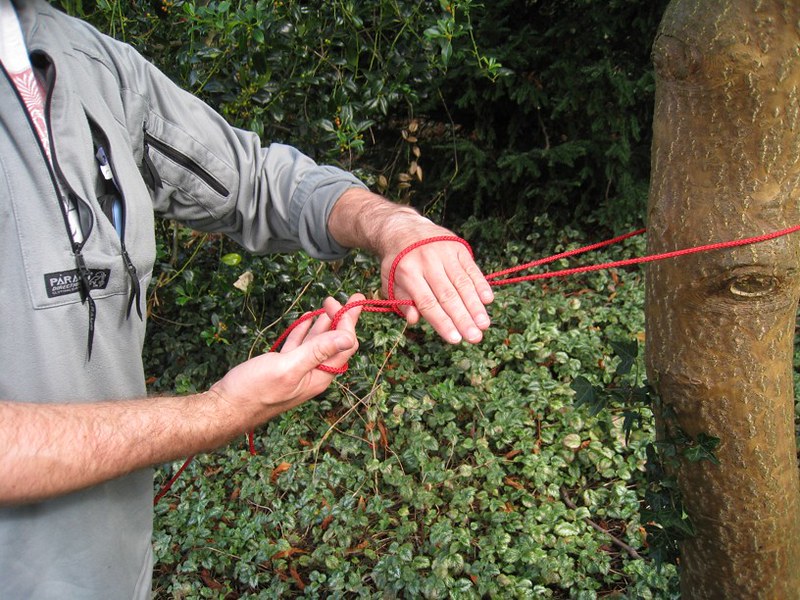 img_6713 by Last Scratch, on Flickr
The working end of the ridgeline is grabbed by the left hand, in this case, because the thumb was included in the wrap, it is caught using the thumb and fingers.
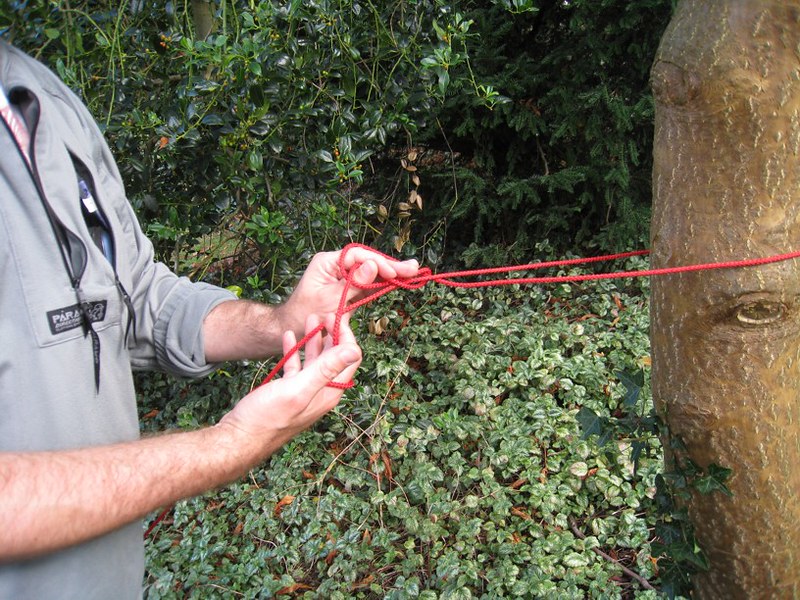 img_6715 by Last Scratch, on Flickr
A loop of the working end of the line is pulled through.
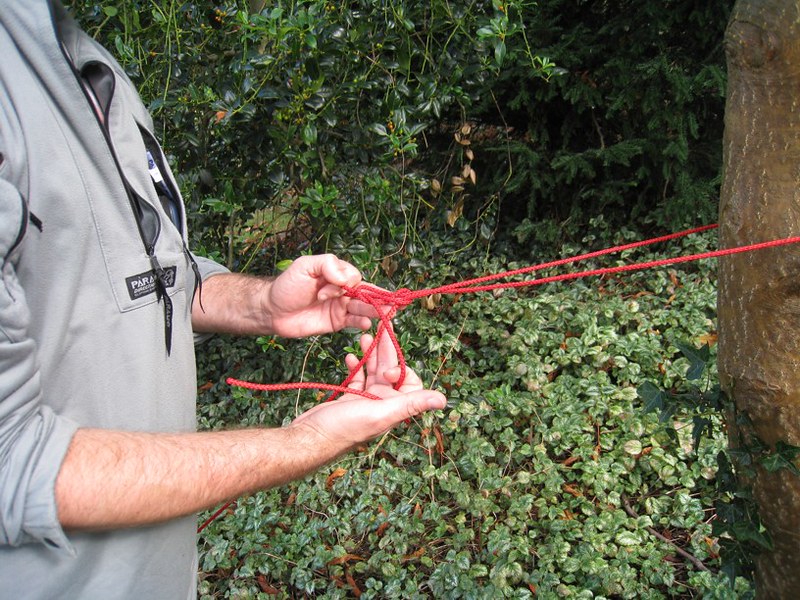 img_6716 by Last Scratch, on Flickr
The loop is pulled in such a way as to tighten the knot, keep tension on the standing part of the line and pull firmly to fully tighten the figure of eight.
 img_6717 by Last Scratch, on Flickr
If the knot does not look like this, it may need to be capsized and tightened, just lightly grip the two lines from the tree with your right hand and wipe/pull your hand towards you, over the knot. This will flip the knot, if needed, and give the shape shown.
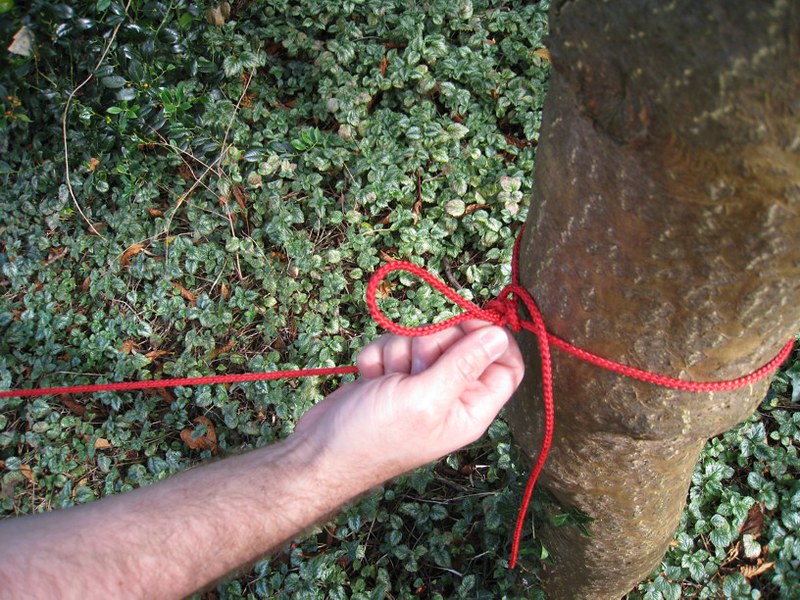 img_6718 by Last Scratch, on Flickr
Slide the knot up snugly against the tree. If the knot was not tightened before being slid up the line it may open up and become less secure, though only rarely come un-done.
I think it is very important to say that while I like how I set up my tarp, there are a LOT of different methods and different knots, cords, fasteners and methods that people use to excellent effect. In addition to putting up the following photos, I will try to explain my reasoning for using these methods.
For a start, I like knots for rigging tarps, rather than clips and cam cleat gizmos, since they are light and I don't have to worry about losing or breaking them. They also allow a lot of versatility.
Ideally all knots are tied to be quick release, meaning that they come apart when you want with just a tug on the free end, even after they have been worked on by wind and water.
This is my example set up:
 img_5334 by Last Scratch, on Flickr
I use a ridgeline strung between trees (or poles), which goes up first. I believe that a separate ridge prevents me applying excessive tension to the tarp, allows for easier repositioning or re-tensioning of the tarp, and makes packing up easier and cleaner. I put the ridge above the tarp, rather than throw the tarp over it, because it removes the risk of water wicking down the ridgeline under the tarp, and that of the tarp fabric becoming worn where it rubs on the line. It does however mean that if I want a gear hanging line, I need to rig another cord.
For the ridge I like 3mm polyester sailing line, something like Excel Pro. 8 strand plait is a little grippier, but the 16 plait is nicer to handle, I think. Polyester does not stretch, which has its pros and cons. It doesn't tend to sag when it gets wet, as nylon does and tension on the guy lines don’t cause the tarp to sink towards the ground. On the other hand, it is unforgiving of poor knots when you are trying to maintain tension. It is either tight, or not. Stretchy line, nylon say, can be stretched a lot, and have more tension, or a little less, and still be almost as tight.
Anchoring
One end of the ridge is tied with either an Evenk Slippery Figure of Eight, or a Falconer's Knot. The Evenk is a little more secure and can be tied in mittens or heavy gloves. The Falconer's is certainly good enough, strength-wise, and can be tied with one hand, a distinct advantage if you are setting up in very muddy conditions, say in the jungle.
Evenk Hitch on Youtube
Falconer's knot on Youtube
I have photos of tying the falconer's knot, but since both falconers and bushcrafters use the knot, there are more and better videos out there showing how it is tied...even some of our own Stuart, teaching in the forests of Borneo
Falconer's knot slide show
The Evenk:
 img_6710 by Last Scratch, on Flickr
For a right hander the working end is wrapped around the left hand. Where you wrap is up to you, if you only encompass your fingers then you will probably find you have to do the later pull-through with just your fingers. This method allows for the wearing of gloves in cold weather too.
 img_6711 by Last Scratch, on Flickr
The left hand is rotated to point at the supporting tree,
 img_6714 by Last Scratch, on Flickr
reaches over the top, note that this is easier when the right hand is keeping a little tension on both cords.
 img_6713 by Last Scratch, on Flickr
The working end of the ridgeline is grabbed by the left hand, in this case, because the thumb was included in the wrap, it is caught using the thumb and fingers.
 img_6715 by Last Scratch, on Flickr
A loop of the working end of the line is pulled through.
 img_6716 by Last Scratch, on Flickr
The loop is pulled in such a way as to tighten the knot, keep tension on the standing part of the line and pull firmly to fully tighten the figure of eight.
 img_6717 by Last Scratch, on Flickr
If the knot does not look like this, it may need to be capsized and tightened, just lightly grip the two lines from the tree with your right hand and wipe/pull your hand towards you, over the knot. This will flip the knot, if needed, and give the shape shown.
 img_6718 by Last Scratch, on Flickr
Slide the knot up snugly against the tree. If the knot was not tightened before being slid up the line it may open up and become less secure, though only rarely come un-done.
Last edited:

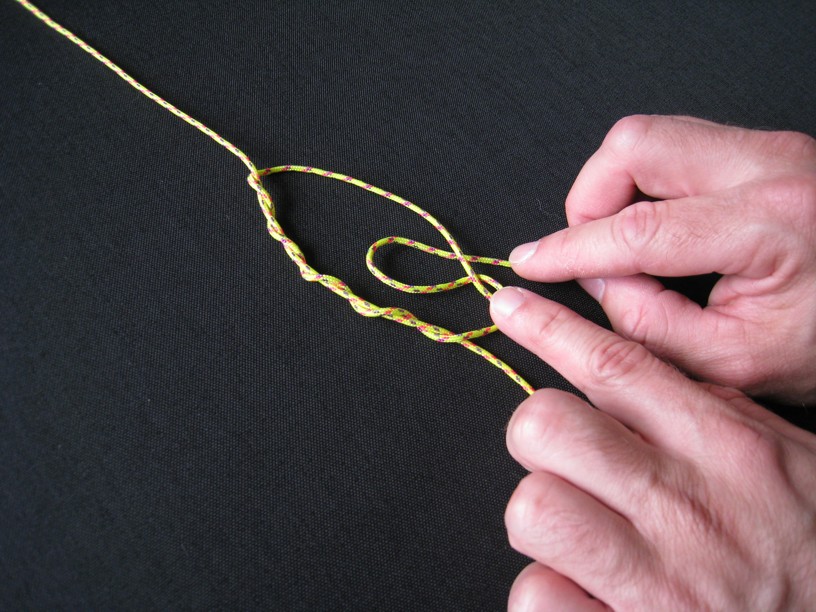
 img_6678
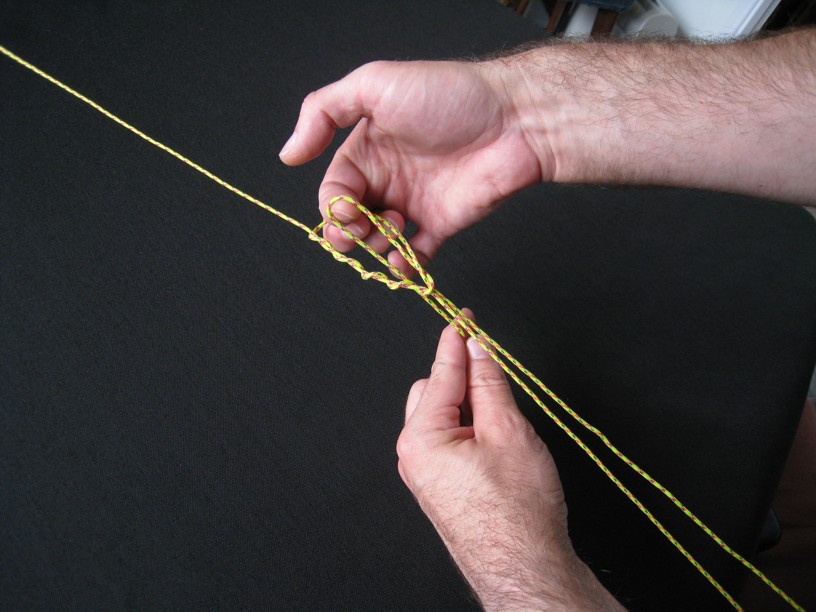
 img_6679
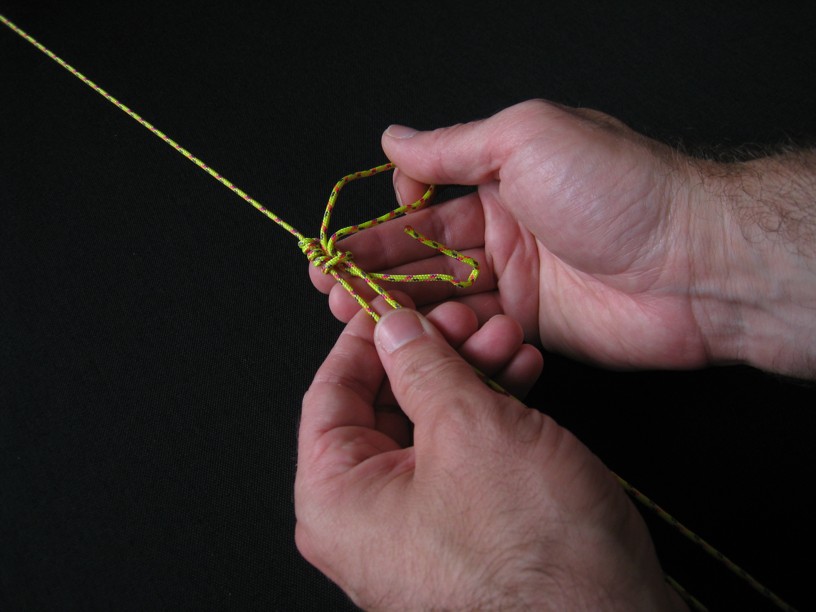
 img_6680
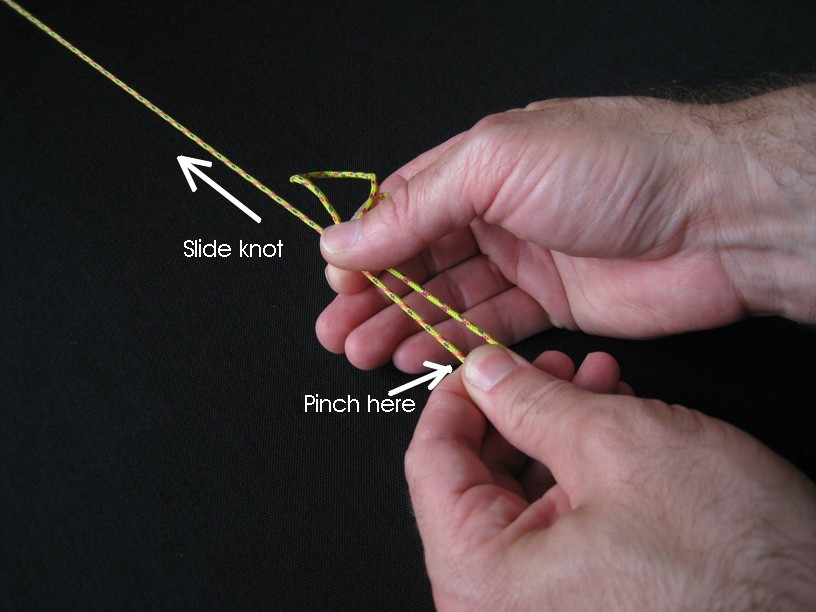
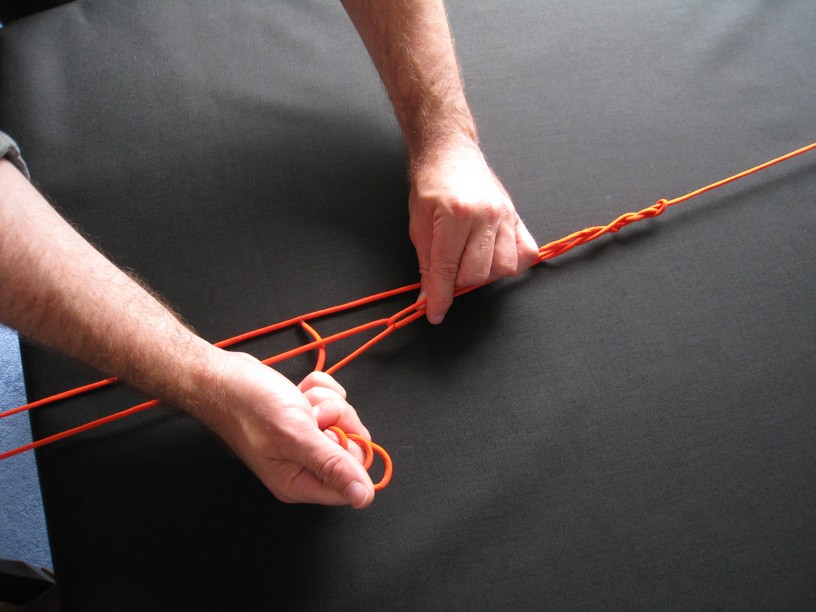 img_6684
 img_6685
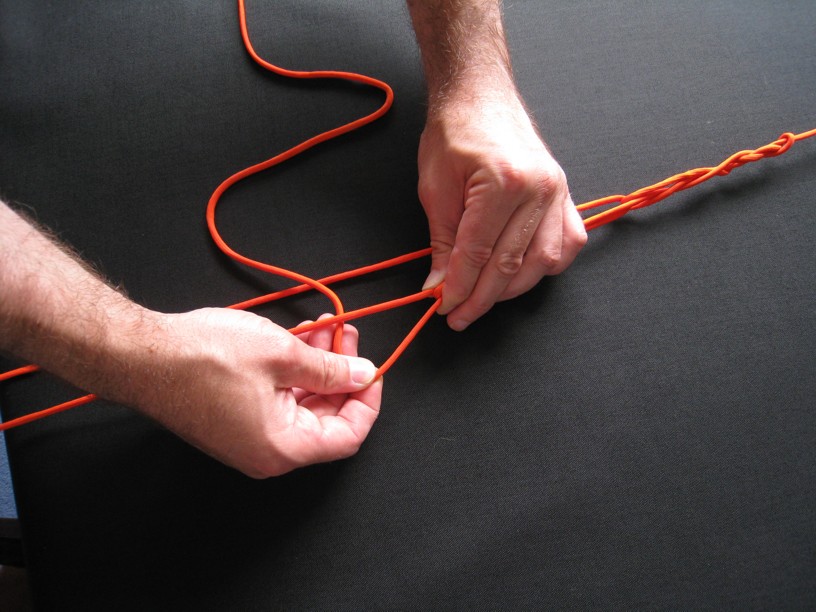 img_6686
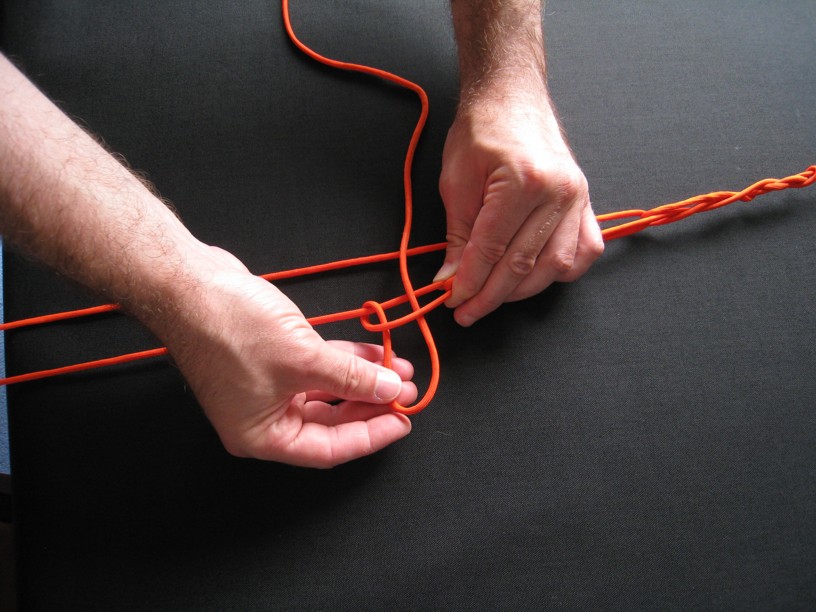 img_6687
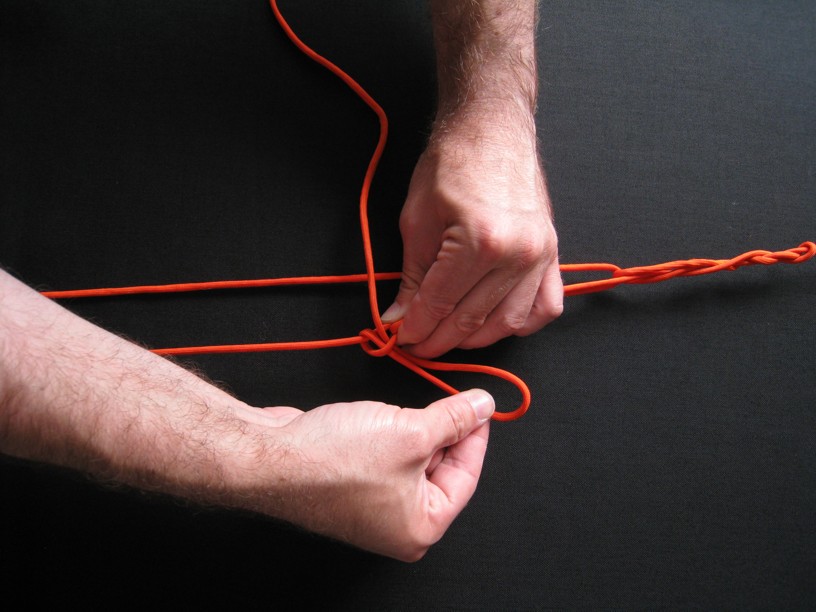 img_6688
 img_6689
 img_6690
 Truckers_Hitch