Small antler knife WIP finished
- Thread starter Niels
- Start date
-
Come along to the amazing Summer Moot (21st July - 2nd August), a festival of bushcrafting and camping in a beautiful woodland PLEASE CLICK HERE for more information.
You are using an out of date browser. It may not display this or other websites correctly.
You should upgrade or use an alternative browser.
You should upgrade or use an alternative browser.
So, after an evening and an afternoon of sanding, I'm done.
These are the tools I use for polishing. Good quality wet and dry paper from brisa, a brush to clean the sandpaper every once in a while, and a pencil. You don't really need a pencil, but most scratches you can only see in the light, and I tend to forget their location so with the pencil I can mark where to sand.
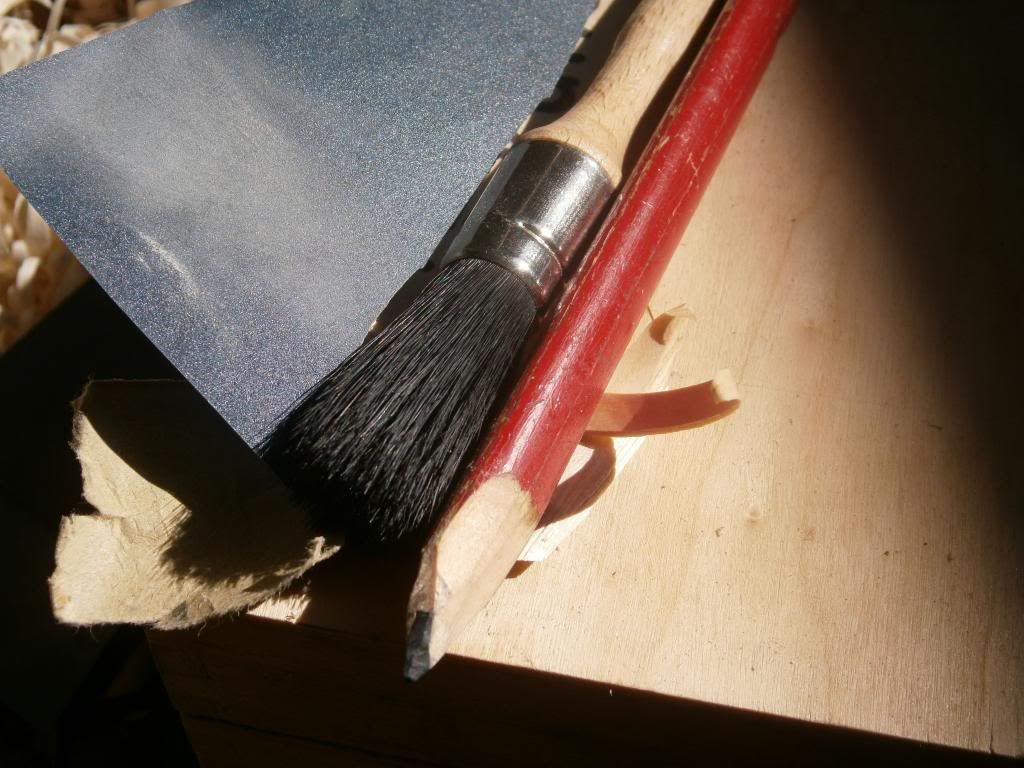
The grits I go through are 150, 400, 800, 1500 (you can stop here unless your obsessed with shineyness like me ), and then 2000 and 2500.
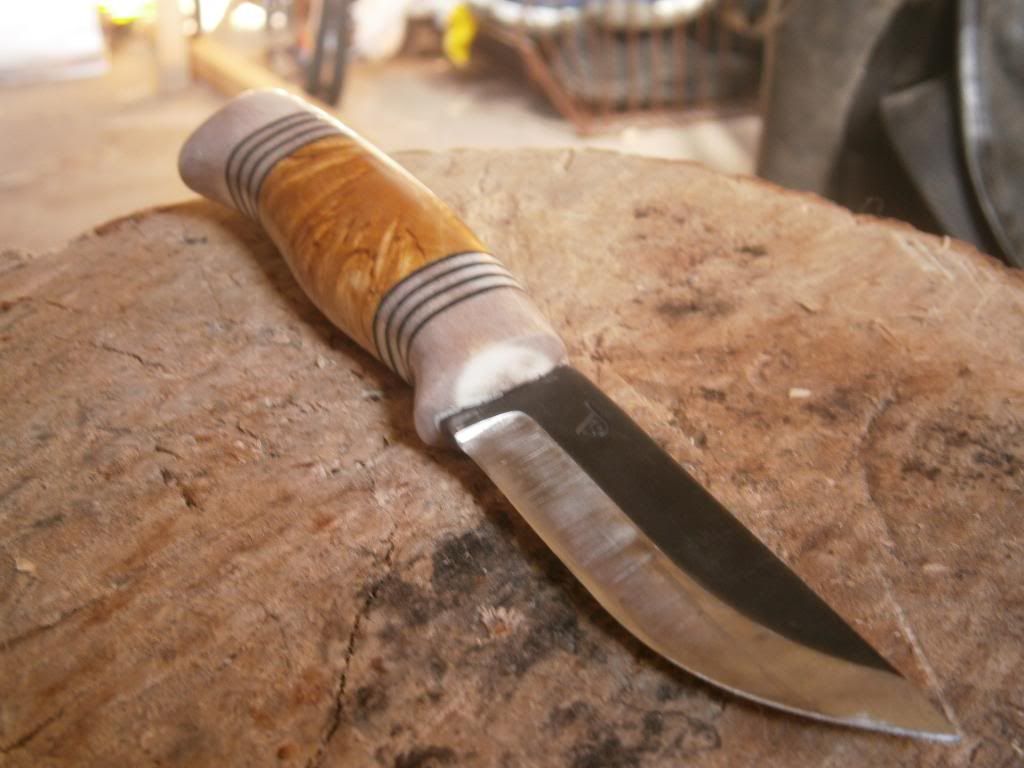
Here it is sanded to 150 grit:
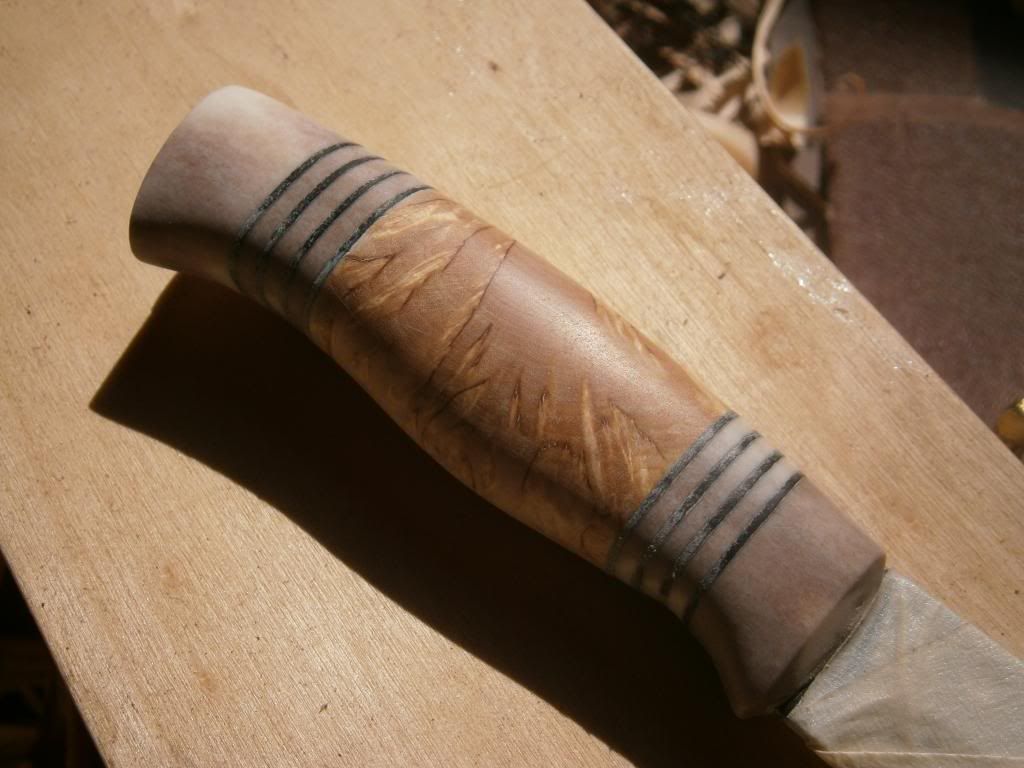
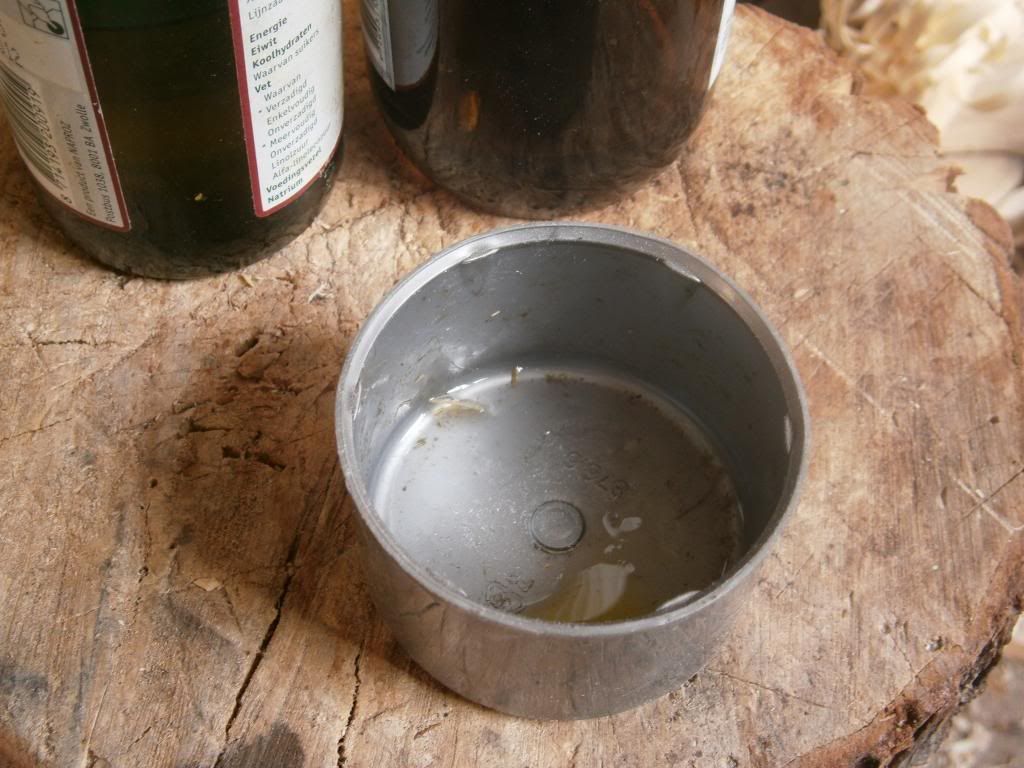
I then apply a 50:50 mixture of turpentine and linseedoil to the wood. The turpentine is to make the oil soak in properly. I don't put any oil on the antler as it could go yellow.
You only need about a teaspoon full of each.
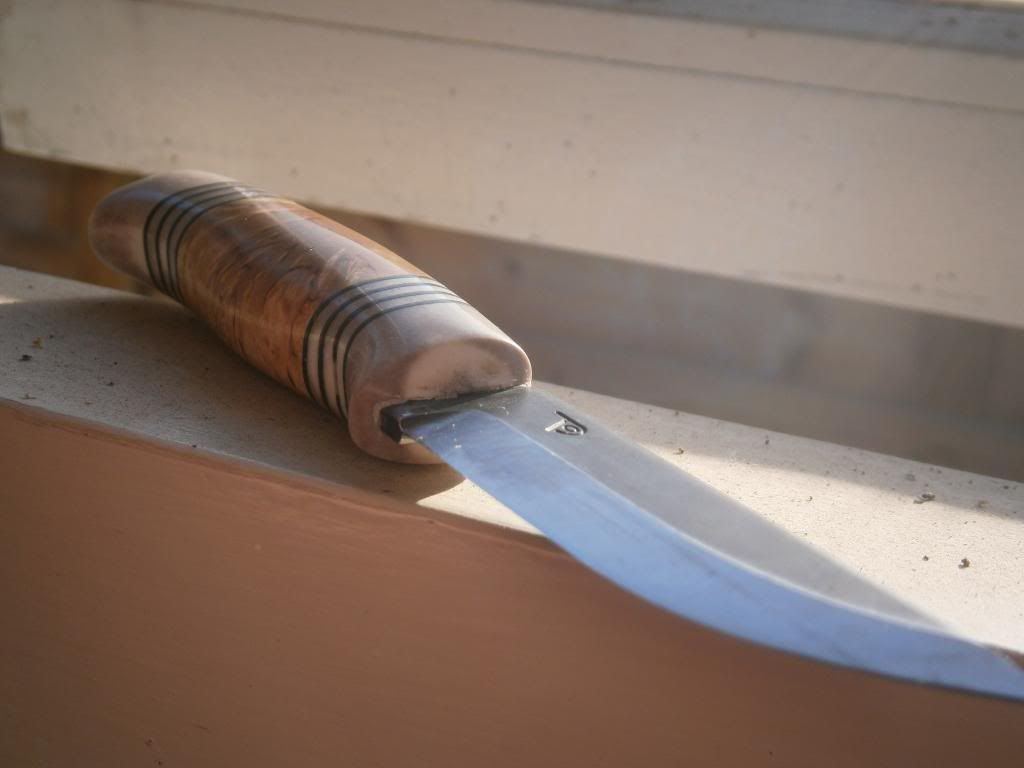
And there she is, all done:
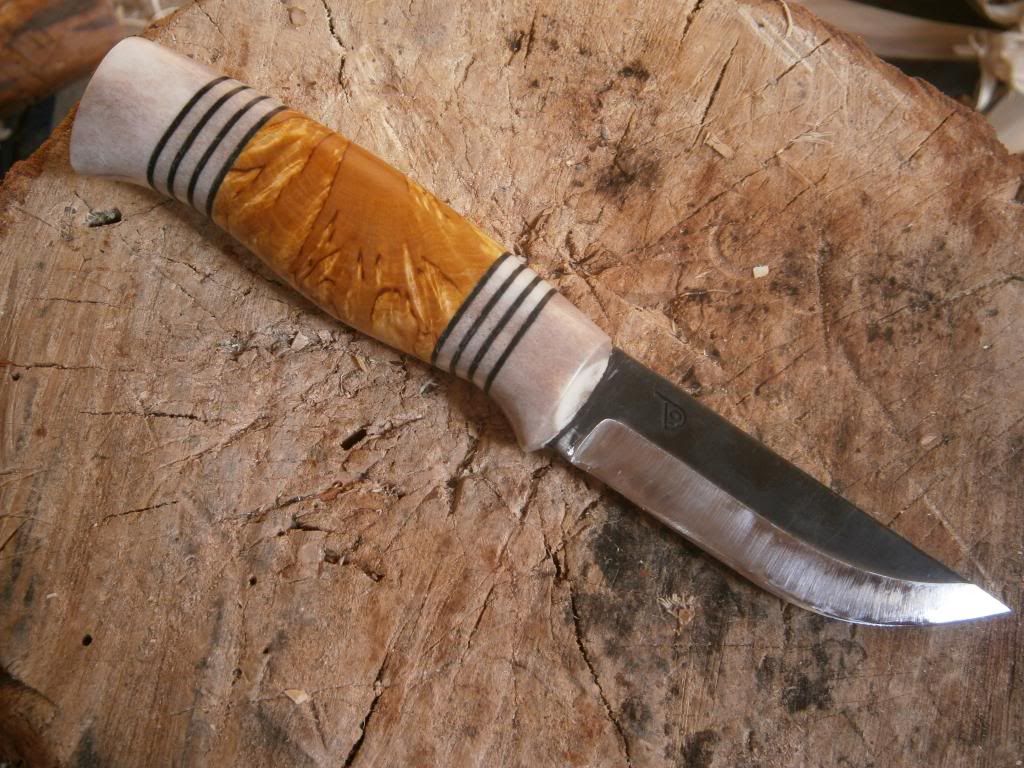
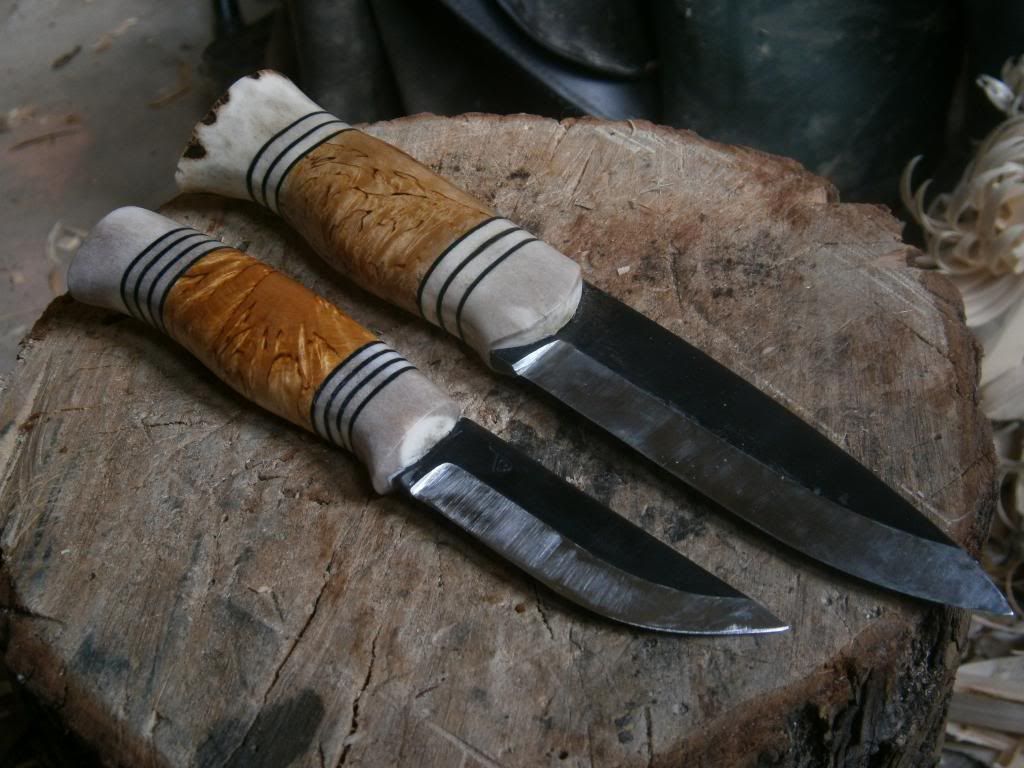
A comparison photo with a woodie sized knife, just to give you an idea of scale. Note the difference in pattern with the curly birch. The woodie has a normal cut, and the necker has a cross cut from the same block.
And this was the only good picture I good get to show the gloss")
I hope you enjoyed that. Next installment I'll try my luck with a leather sheath. Thanks for reading, feel free to ask anything
These are the tools I use for polishing. Good quality wet and dry paper from brisa, a brush to clean the sandpaper every once in a while, and a pencil. You don't really need a pencil, but most scratches you can only see in the light, and I tend to forget their location so with the pencil I can mark where to sand.

The grits I go through are 150, 400, 800, 1500 (you can stop here unless your obsessed with shineyness like me
), and then 2000 and 2500. Here it is sanded to 150 grit:

I then apply a 50:50 mixture of turpentine and linseedoil to the wood. The turpentine is to make the oil soak in properly. I don't put any oil on the antler as it could go yellow.
You only need about a teaspoon full of each.

And there she is, all done:


A comparison photo with a woodie sized knife, just to give you an idea of scale. Note the difference in pattern with the curly birch. The woodie has a normal cut, and the necker has a cross cut from the same block.

And this was the only good picture I good get to show the gloss

I hope you enjoyed that. Next installment I'll try my luck with a leather sheath. Thanks for reading, feel free to ask anything
Dreadhead
Bushcrafter through and through

Thanks a lot guys I'm gonna try to make it a neck sheath. Life as a neck knife would suit it I think.
I'm gonna try to make it a neck sheath. Life as a neck knife would suit it I think.Thanks for the build along. What a stunning knife and a great job you've done. That curly birch is stunning.
Niels that is beautiful - you should be really proud to make something both beautiful and functional. I am deeply impressed!
Very impressive Niels. That is a beautiful and very usable knife. I shall look forward to seeing your future projects.
Thanks a lot guys, I have now made a sheath for it. It's not really a necksheath, but I figured you could just put some cordage through the belt loop and wear it around your neck.
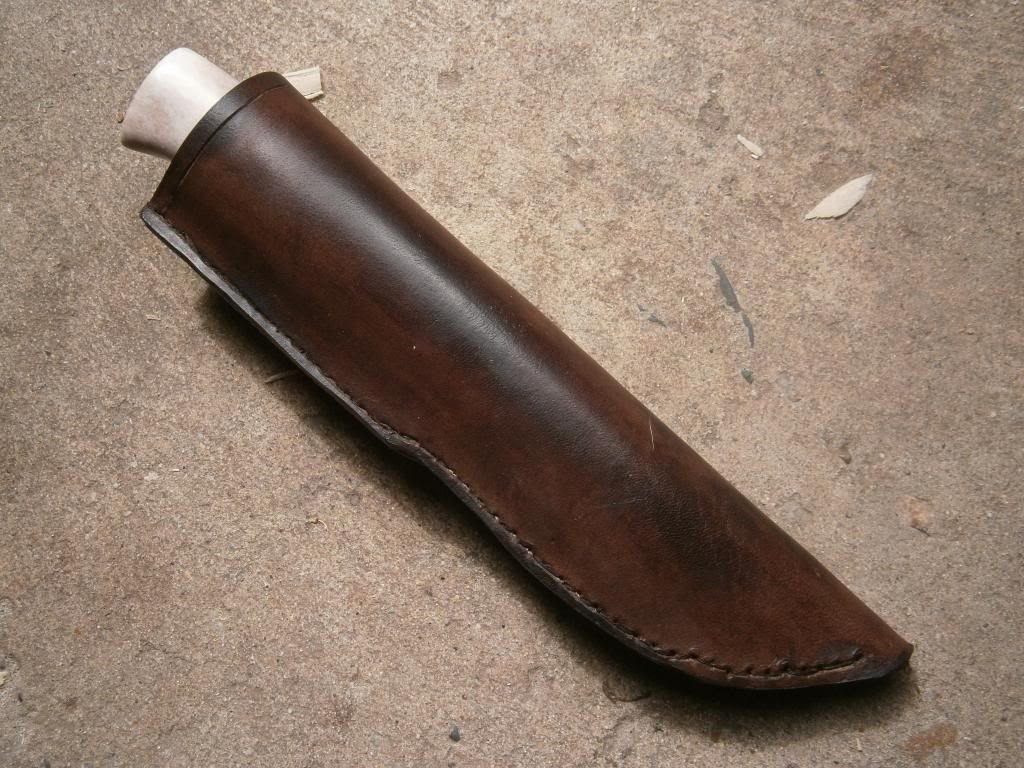
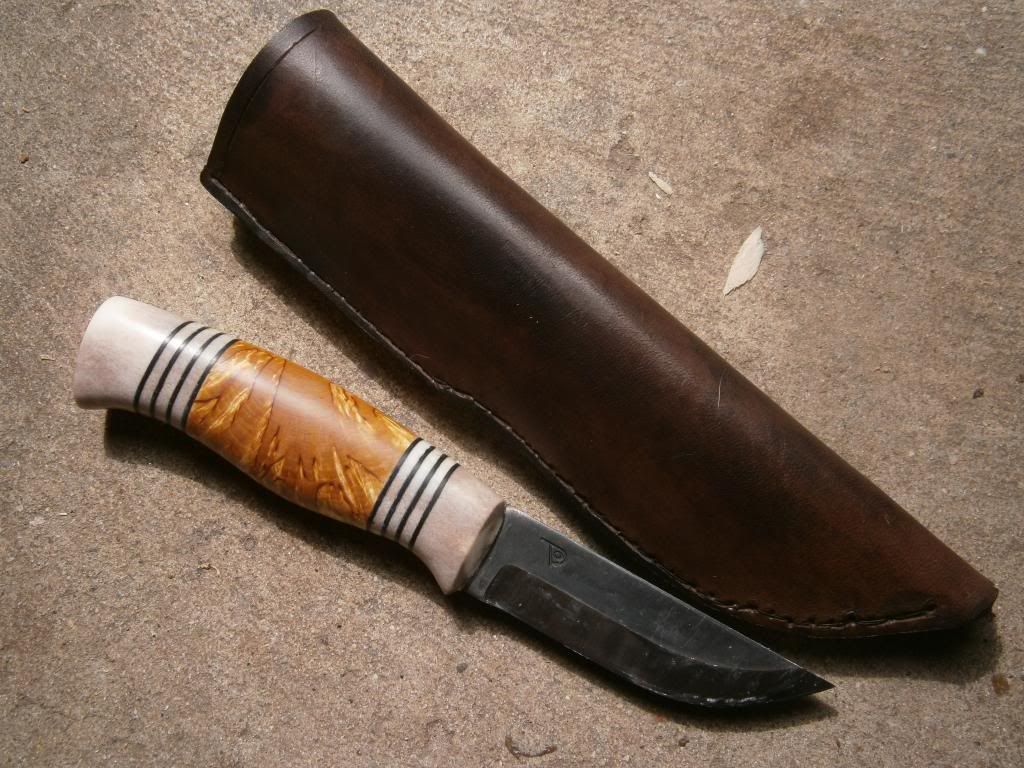
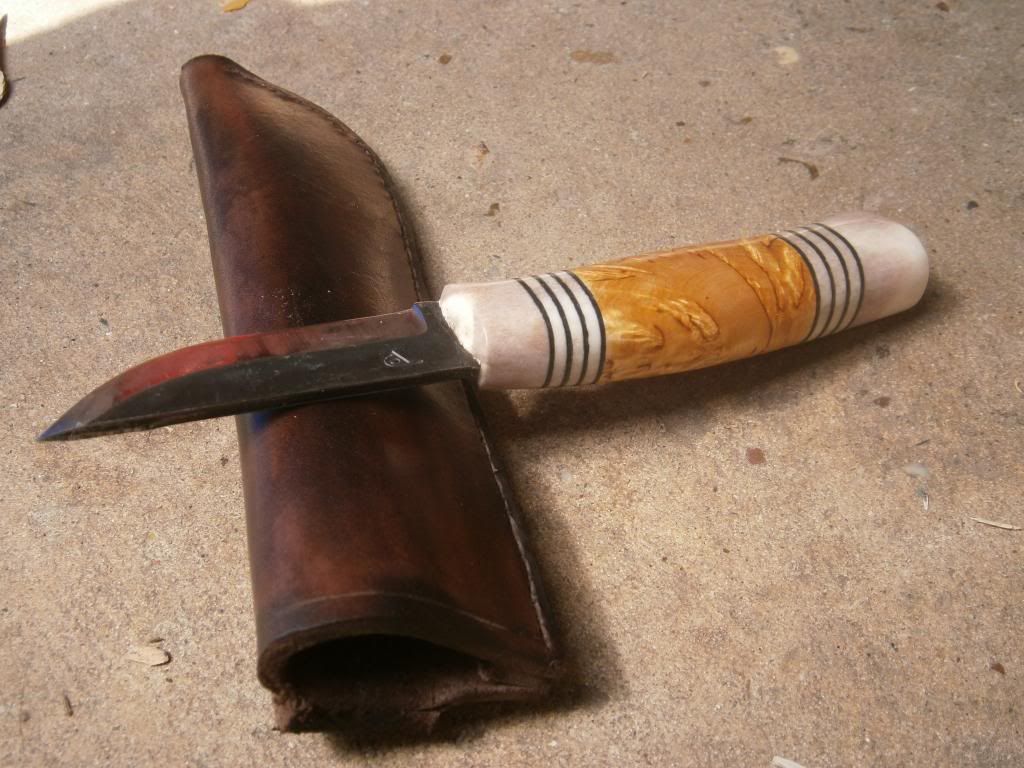
The sheath was a right pain to do. The most important lesson is that you need to pierce all 3 layers of leather in one go, or the holes won't be in line and the sewing will be difficult. I also learn that my awl won't go through 12 mm of veg tan. I'm using a drill next time.
It's not really a necksheath, but I figured you could just put some cordage through the belt loop and wear it around your neck. 


The sheath was a right pain to do. The most important lesson is that you need to pierce all 3 layers of leather in one go, or the holes won't be in line and the sewing will be difficult. I also learn that my awl won't go through 12 mm of veg tan. I'm using a drill next time.
Last edited:
You must be a happy camper with that Niels, from start to finish the skill and attention to detail has been great. Aesthetically it's a nice balance of quantities of materials and it looks like physically it would be nice to handle too. So after the rest from making this knife, what's the next project? Or are you just going to gloat how well it turned out.
All the best,
Colin.
All the best,
Colin.
You must be a happy camper with that Niels, from start to finish the skill and attention to detail has been great. Aesthetically it's a nice balance of quantities of materials and it looks like physically it would be nice to handle too. So after the rest from making this knife, what's the next project? Or are you just going to gloat how well it turned out.
All the best,
Colin.
Thanks Goatboy. I've commisioned another blade from Mark Hill for my birthday this friday. I'm really looking forward to making a handle for that
I also have a lauri fillet blade laying around somewhere, that needs a handle and sheath.
Similar threads
- Replies
- 1
- Views
- 3K
- Replies
- 0
- Views
- 708
- Replies
- 24
- Views
- 2K