I foolishly said I would make a Sgian Dubh for a mates upcoming wedding, perhaps 2 months ago, its this Saturday :yikes:
The brief was;
Pewter with an aged look, with celtic motif, particularly a celtic dog. Everything else was up to me.
In a moment of absolute madness I decided on Water Buffalo horn for both the handle and sheath, with a cast or etched bolster and pommel.
I’ve only ever made one knife before this, an SC_Barker PSK blade that I handled and sheathed. I know I’m an idiot ! Oh and the Sgian Dubh blade was a stick tang, never done one of those before either.
3 weekends ago I was still at the design stage, I had etched some pewter, and got good results;

But I wanted to try casting, (more on that later).
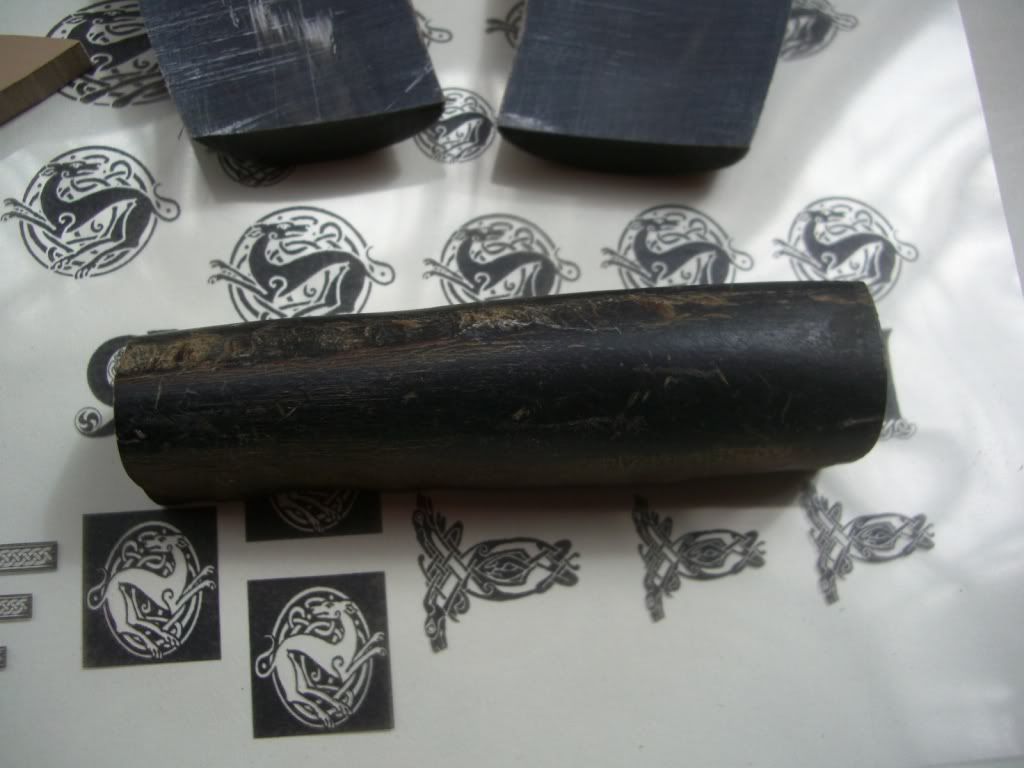
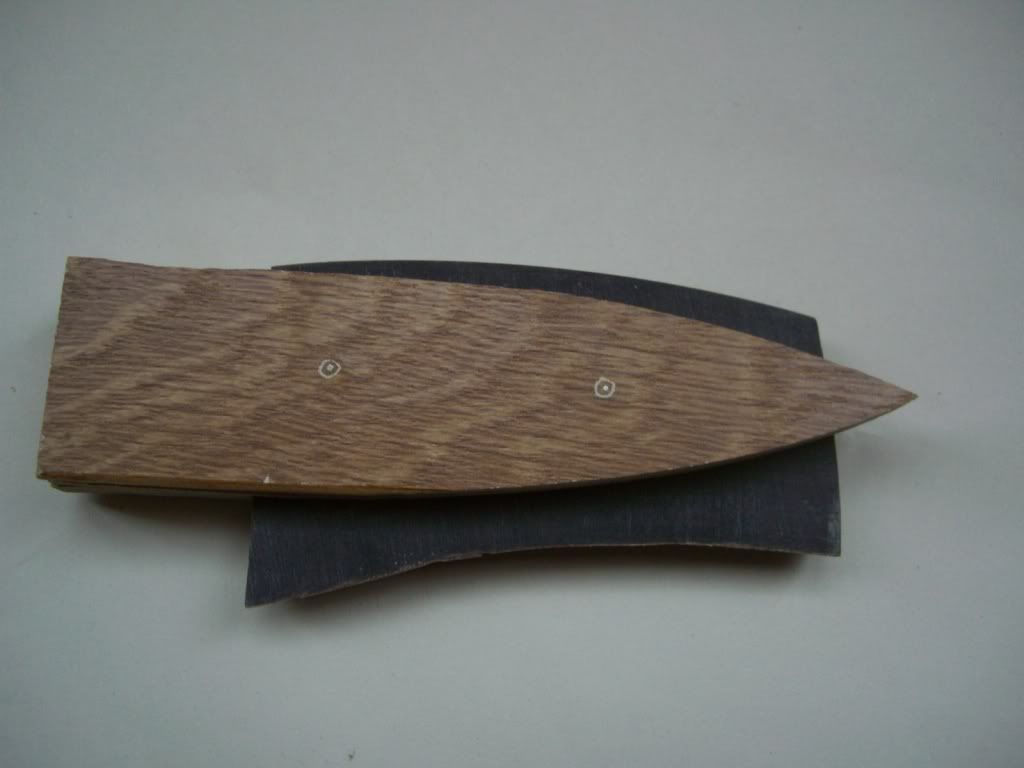
Next the Buffalo horn, I had some but they were quite thin in cross section, so I bought some more pre cut sections (and the blade) from here.
The Handle was first; I measured the stick tang on the blade and found it was all over the place, so squaring and flattening that was my first task.
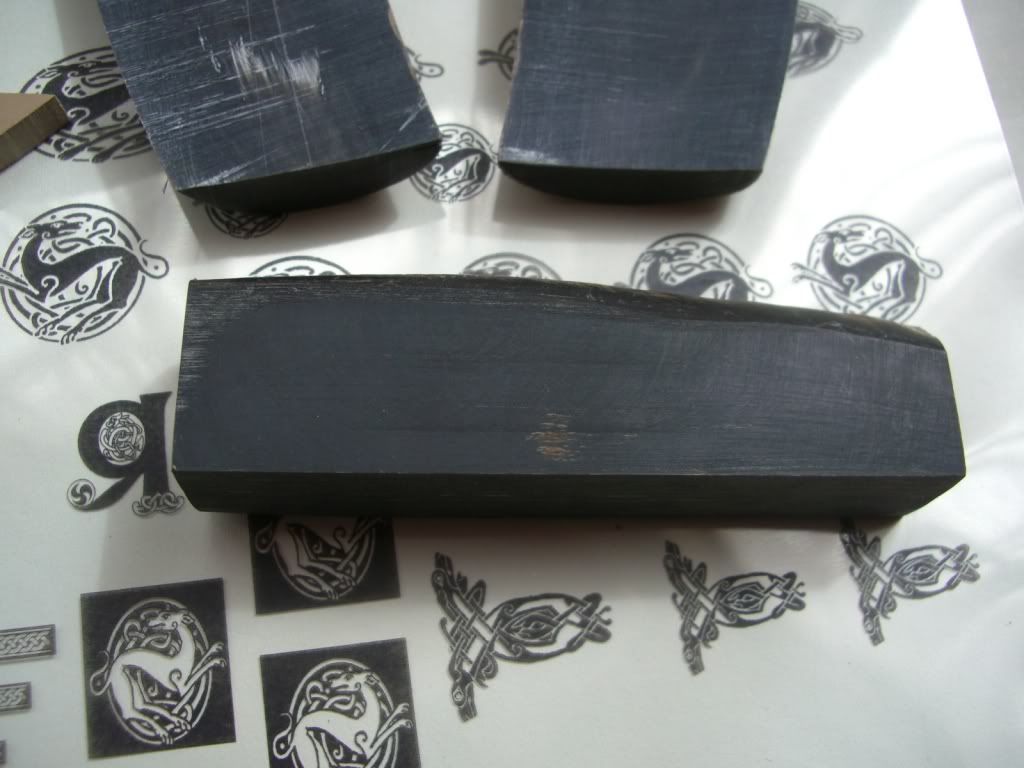
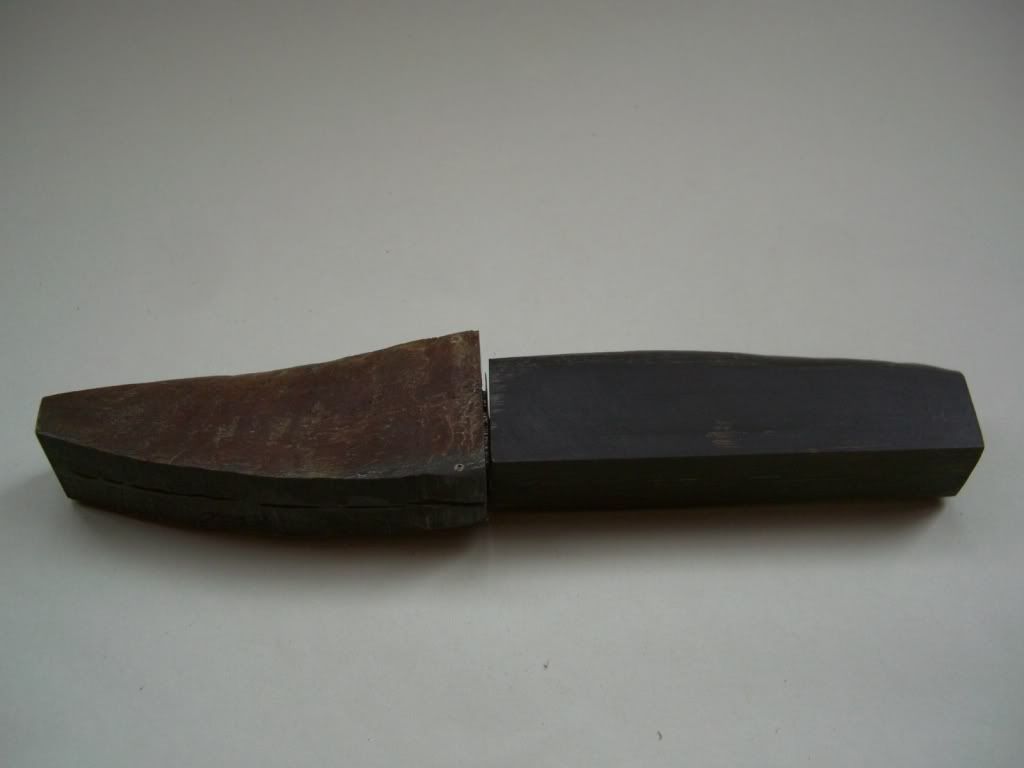
Then I took a section of horn and flattened and squared off 2 sides, really just to give me something familiar to work with, and off. I also squared (or so I thought) one end.
I used drills smaller then the thickness of the tang, (2mm) and drilled 3 holes close together to create the basic shape then used 2 junior hacksaw blades taped together to open it up, (I didn’t have needle files small enough to do the job).
I opened up the hole enough to fit the tang, and found it wasn’t running parallel with the faces. However it was the only decent sized piece I had for the handle so I wasn’t going to bin it. Light bulb, use the other end and try again, which is what I did.
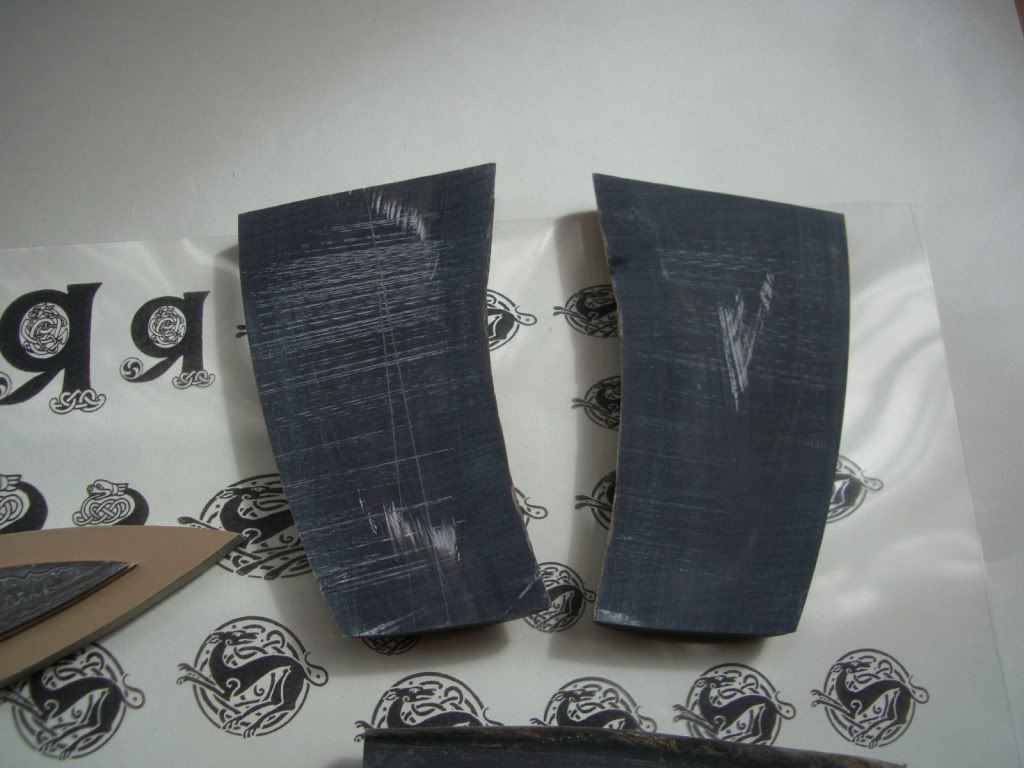
Next came the sheath, I actually though this would be fairly easy, as I was splitting it and fitting the blade into both sides, silly me.
My first attempt is documented on BritishBlades, it didn’t go well, one side bowed out after cutting and smoothing, presumably with tensions built up inside the horn.
So I tried again, this time when I cut the horn section in 2, I made sure the 2 half's were approx the same cross section, and after flattening both faces using oxide paper on a flat marble tile I clamped them back together again, and left then for 3-4 days to acclimatise.
When they were separated they were still flat.
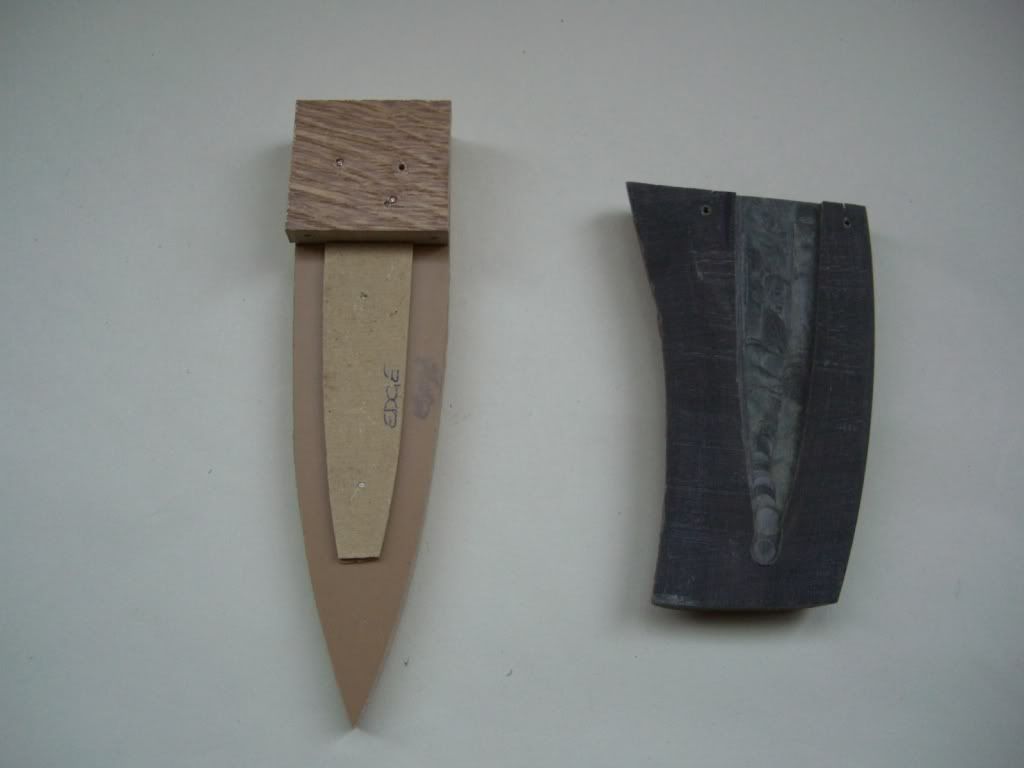
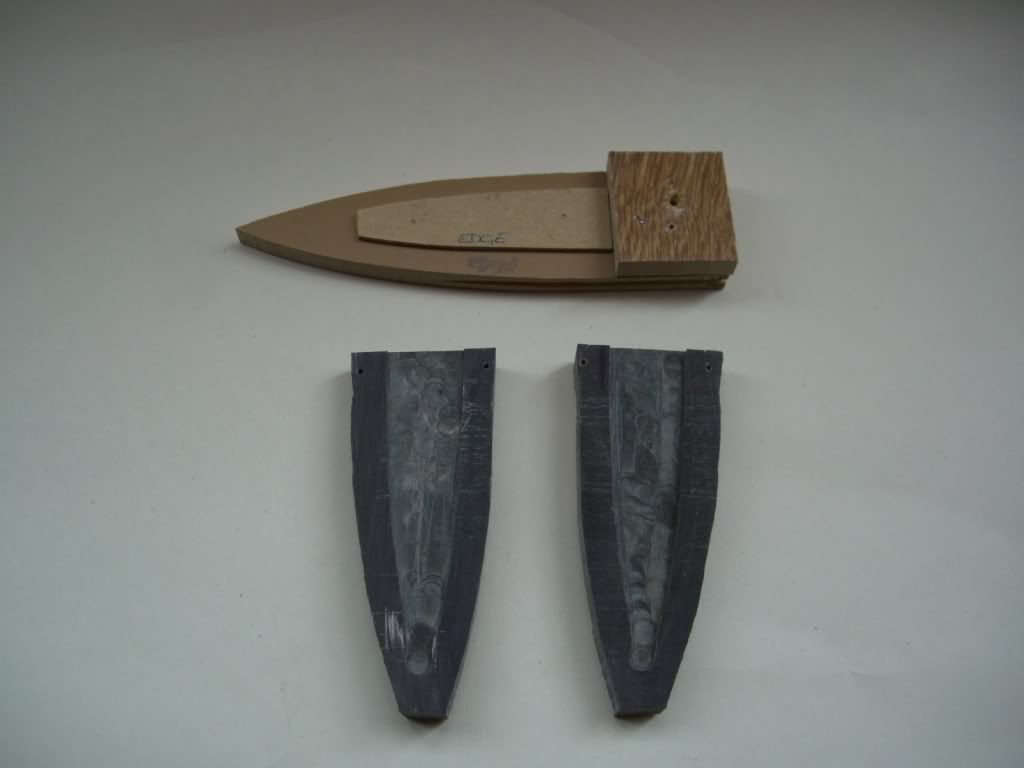
Next stage was the cut-out to accept the blade and shaping the sheath, I had decided early that I would use jigs, if I could, so I had made various ones up using off cuts from a laminated floor I had had laid a few years back, very stable, the jigs were;
• To do the cut outs on the 2 sheath sides, BTW the blade was not symmetrical.
• To rough cut the outside shape of the sheath leaving 3-4 mm all round as a gluing surface.
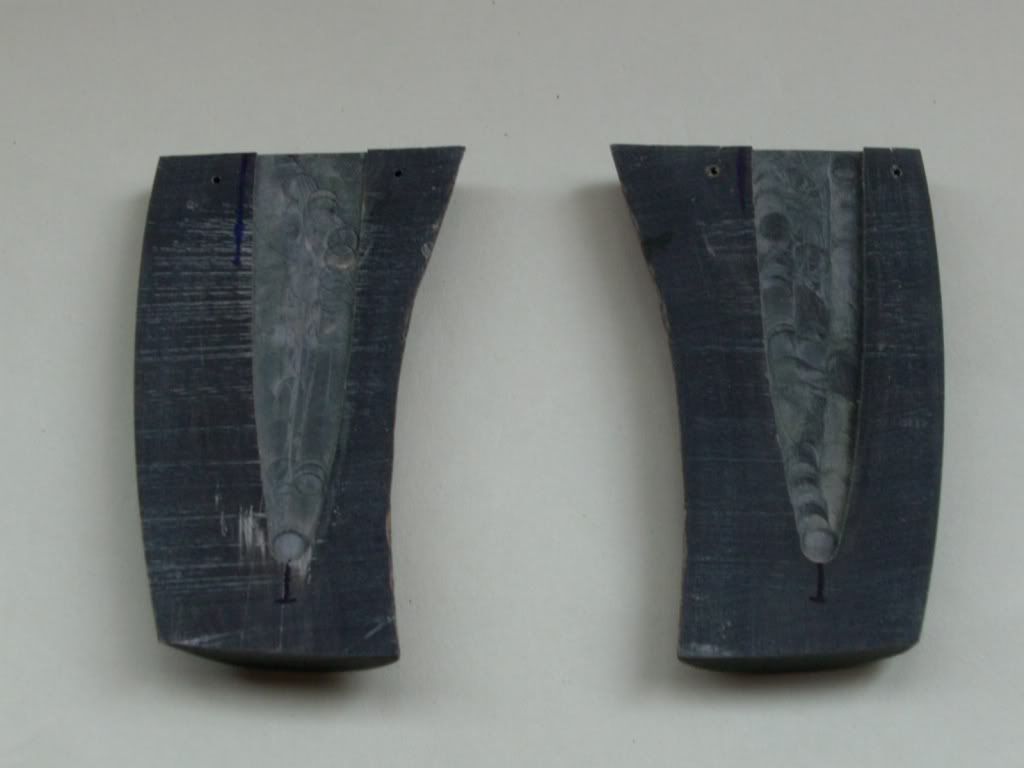
As you can see that worked quite well.
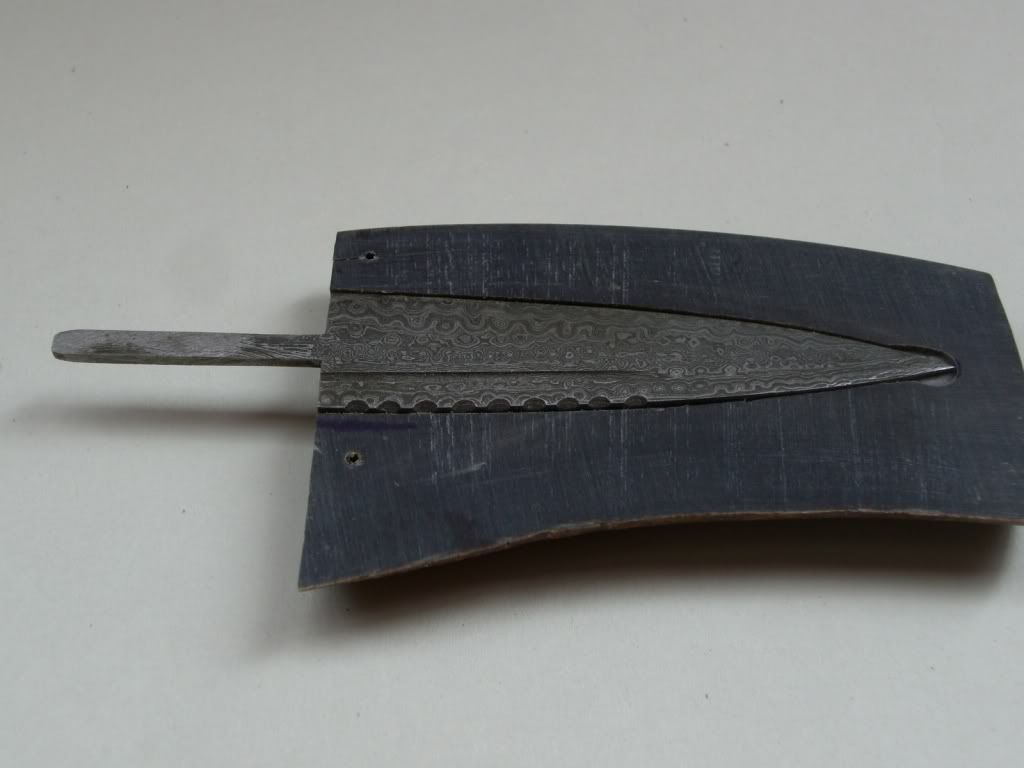
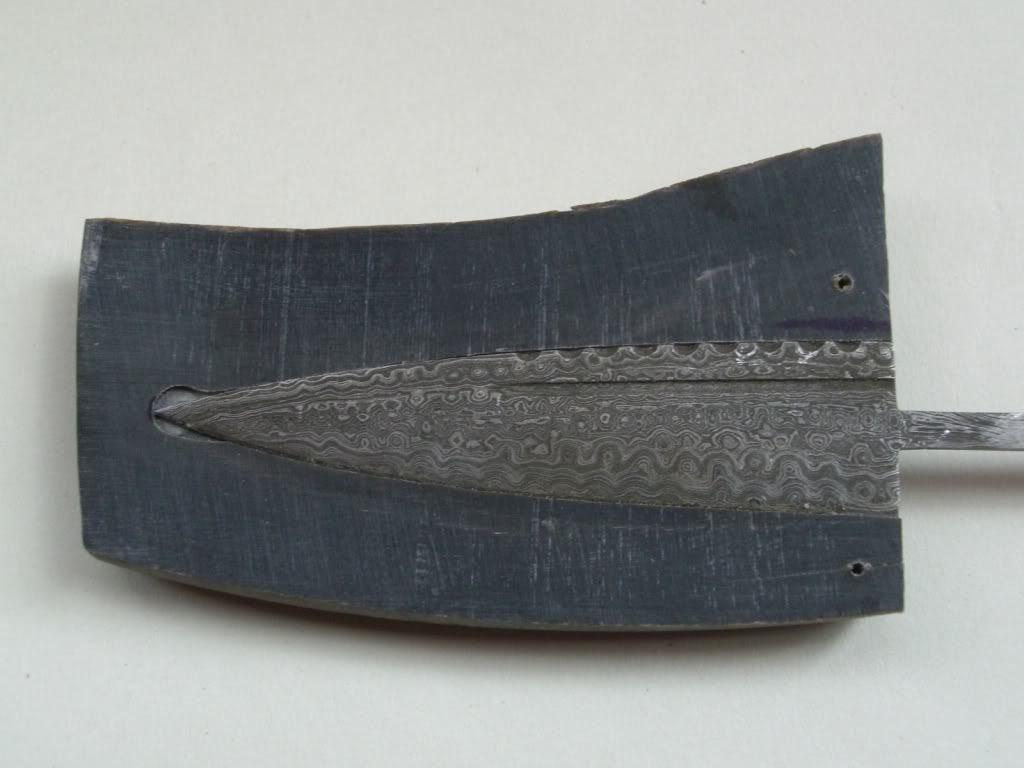
Now to roughly cut out the shape of the finished sheath
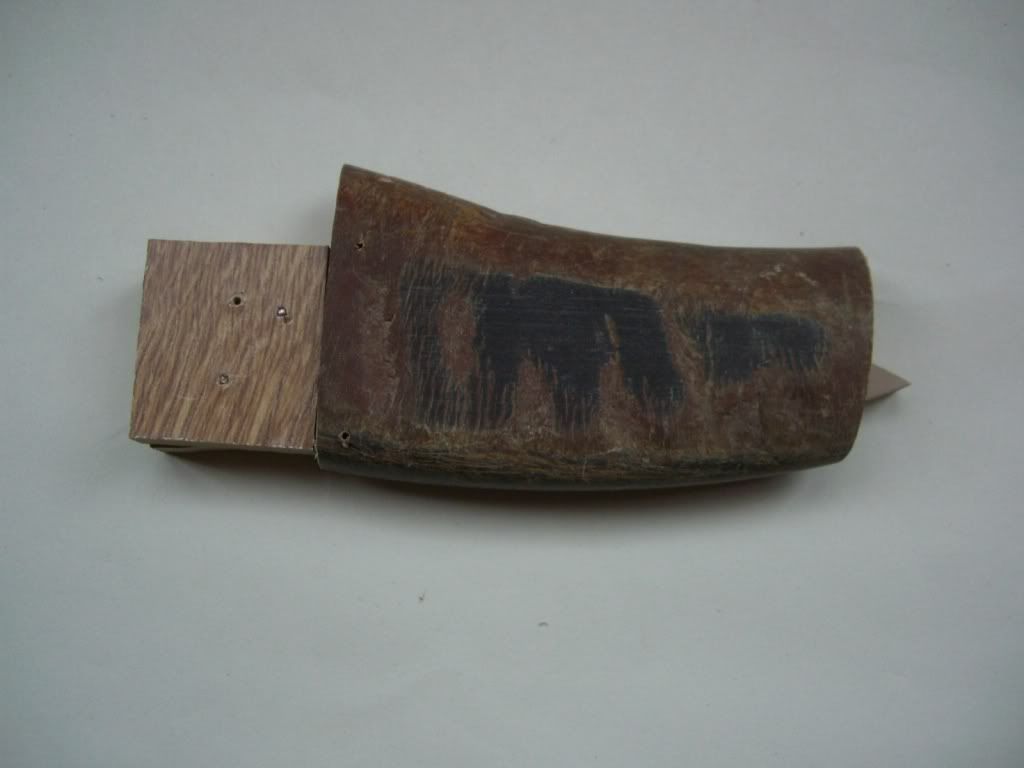
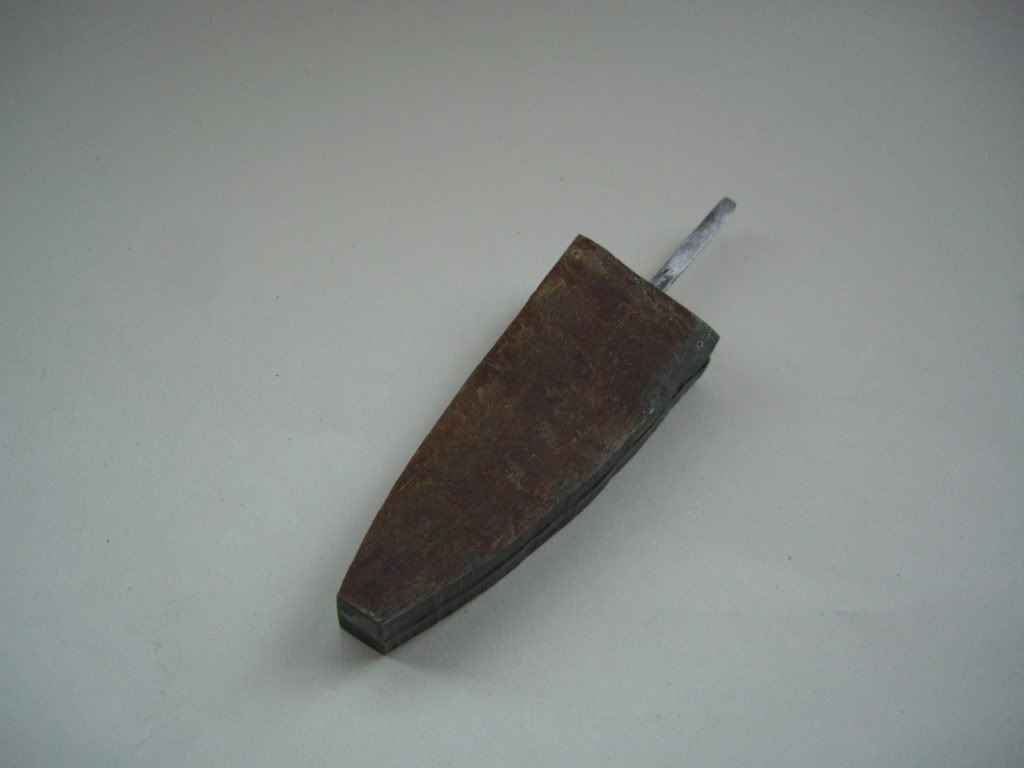
The 2 half’s epoxied, and the blade inserted to check fit.
Time now to cast some pewter, I had found a supplier here, they also provided me with plaster of Paris and casting sand.
I had cast some bit and pieces, basically just trying out the equipment I had, nothing fancy, old small camping pots, a camping gas stove and my brazing torch, did the job admirably. From a small off cut I hammered flat a small piece to about 1mm, this would be the sheath bolster.
Two weekends ago (02-05-09)
Here's where I stood on the build
I can just see my mate walking down the aisle with that strapped to his leg !
I was REALLY under the cosh now! and I still hadn’t really got it together, time to get busy;
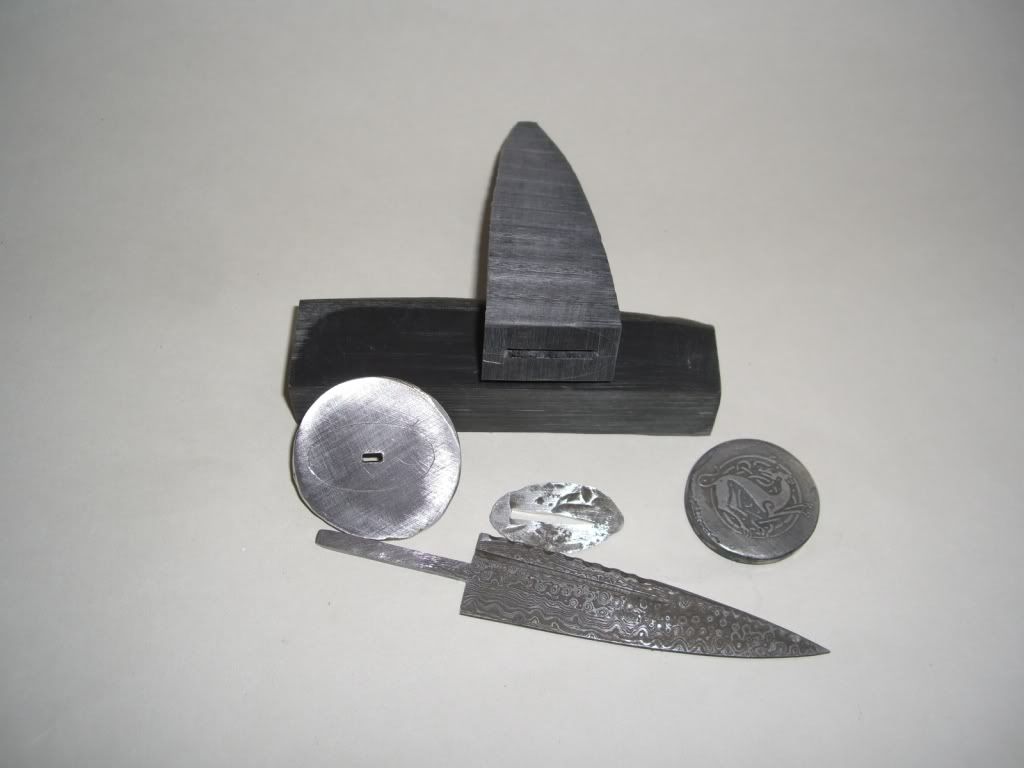
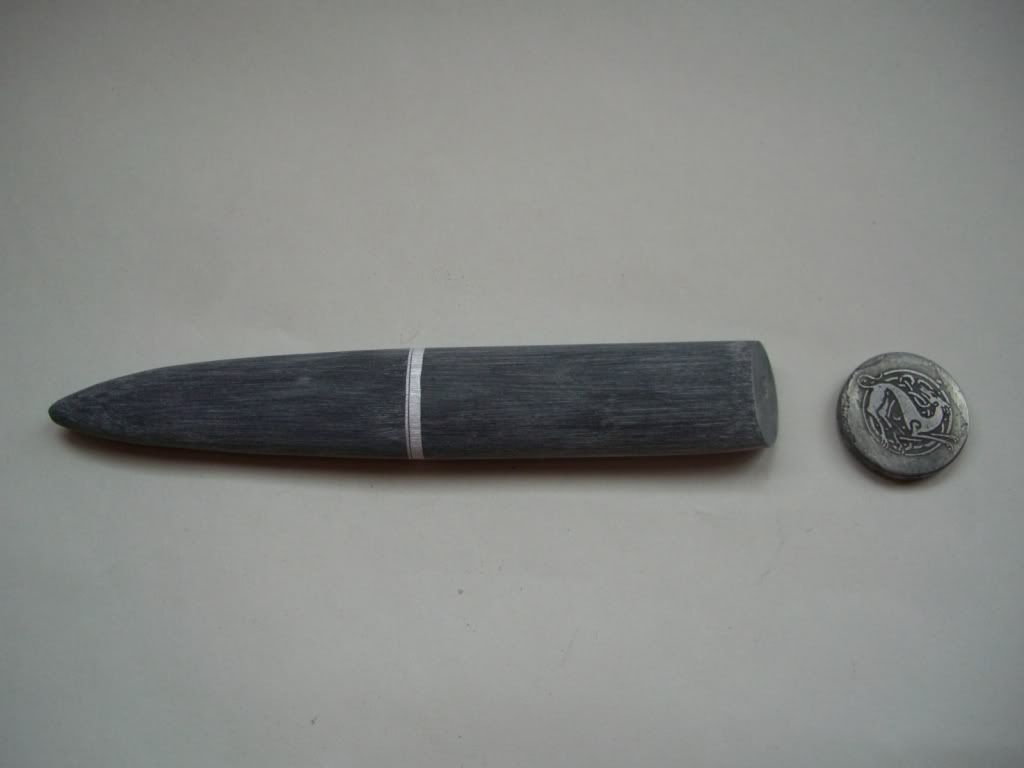
I had decided, due to time constraints that the bolster on the handle would be plain, (originally it was suppose to be either an etch or cast Celtic rope detail). So I cast an approx 3mm disc, maybe 30mm diameter, seen on the left hand side of the pic above, its rough there, I cut it out roughly to shape then took it to 8000 grit using Jeds magic paper.
That was epoxied to the blade and handle, also the sheath bolster was epoxied to the sheath, all fitted together and checked for fit will the epoxy was still wet.
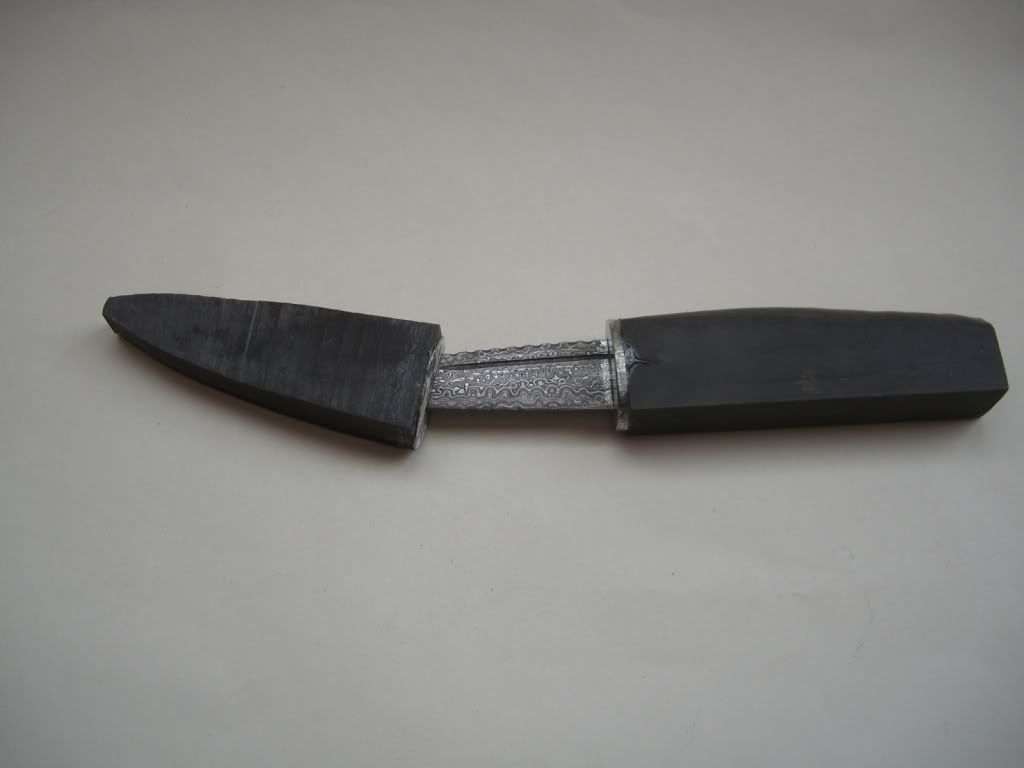
I screwed up here, I let the epoxy cure to long, and damaged the handles bolster finish getting the epoxy off.
Time to sand, I decided to do the handle first and fit the sheath to it, I used a mechanical sander, thru to 240 grit.
I then mated the 2 together, and shaped the sheath again using the mechanical sander to 240 grit.
Sunday, now I was stuck, I hadn’t received the moulds I needed for the pommel, and I didn’t want to take the sanding any further than 240 until the pommel was in place.
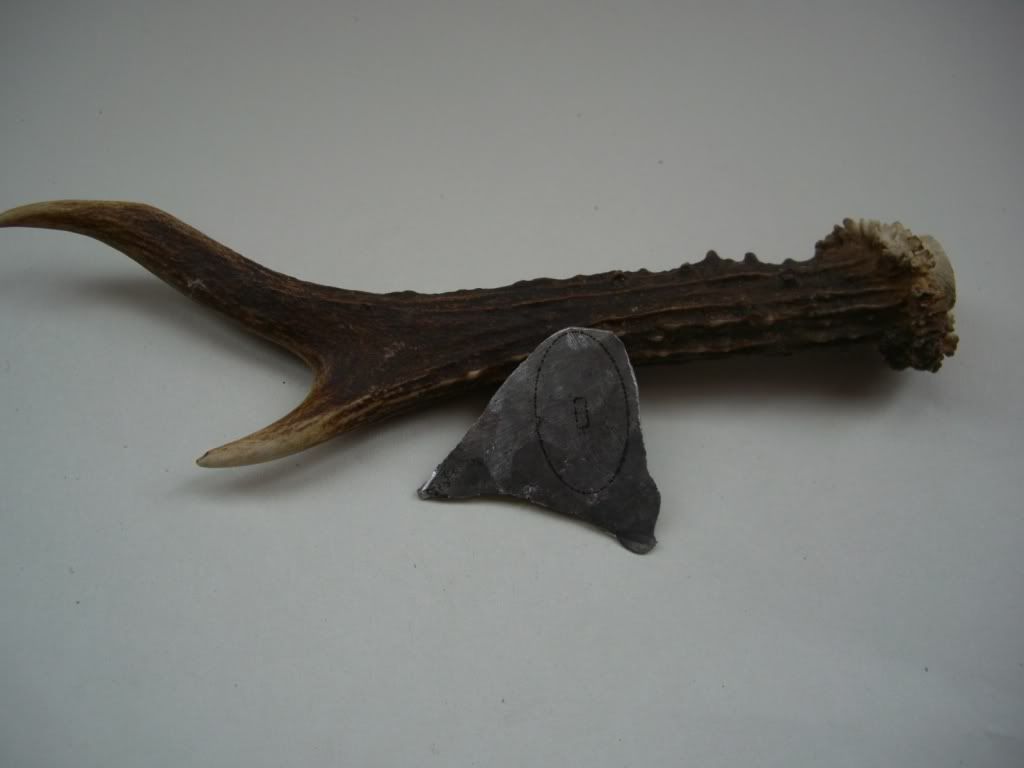
Monday, The moulds arrived from Kerne, absolutely beautiful, works of art. I made up some plaster of Paris, and produced a negative, after it had gone off I remove the mould and dried it in the oven at a low setting.
Tuesday, casting day, set up the mould, melted some pewter and cast it, unfortunately Kerne’s concerns came true, the detail was too fine, it didn’t cast.
Luckily I had produced a backup, another 30mm disk of pewter, this time with a 5mm dia by 5mm high hub on the back. I dug out my etching equipment, (9volt battery and some wires basically) I had some PCB transfer sheets made up with various motifs, so utilized that to make a pattern, and etched it into the new disc.
This was then epoxied into place then shaped
Wednesday, I have 2 nights including tonight to finish this knife, I have to deliver it Friday morning, sanded to 600 grit
Thursday, last night, delivery tomorrow, sanded to 1600 grit
I had been seriously annoyed with myself when I got home, the handle bolster had deep scratches on it, ( I think I must have dropped it on something), typically on the side facing out, nothing to do but re sand from 240 grit to get rid of them.
I had used ferric chloride to etch the pewter, now I used it to lose the shine and age it, it worked very well.
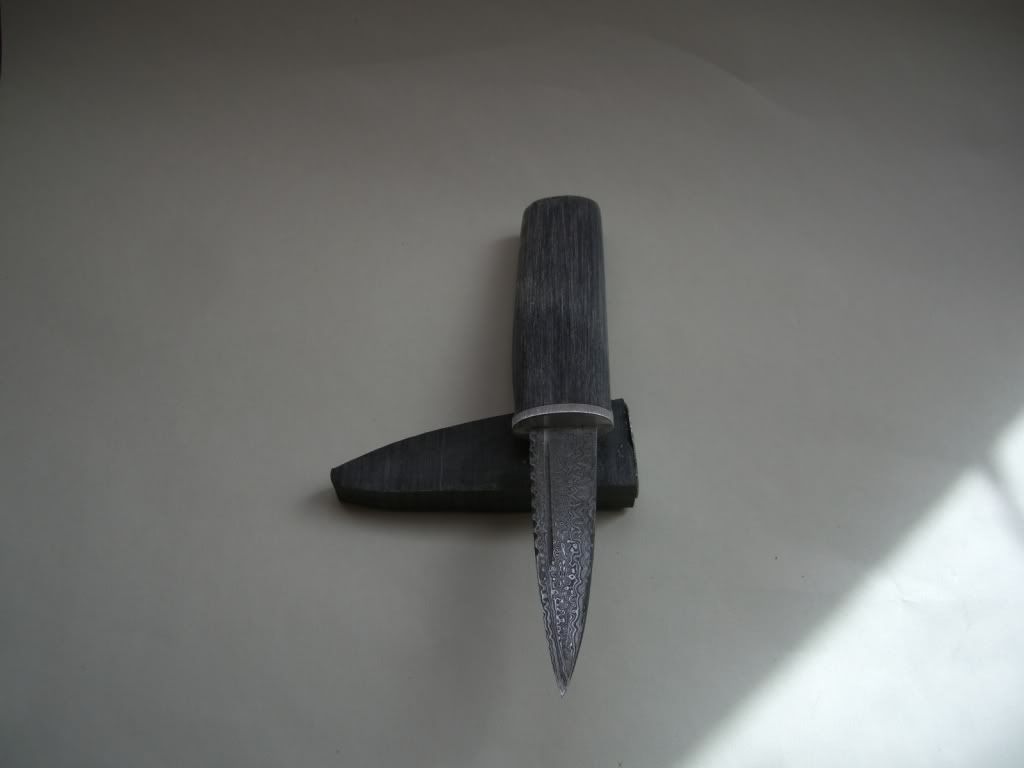
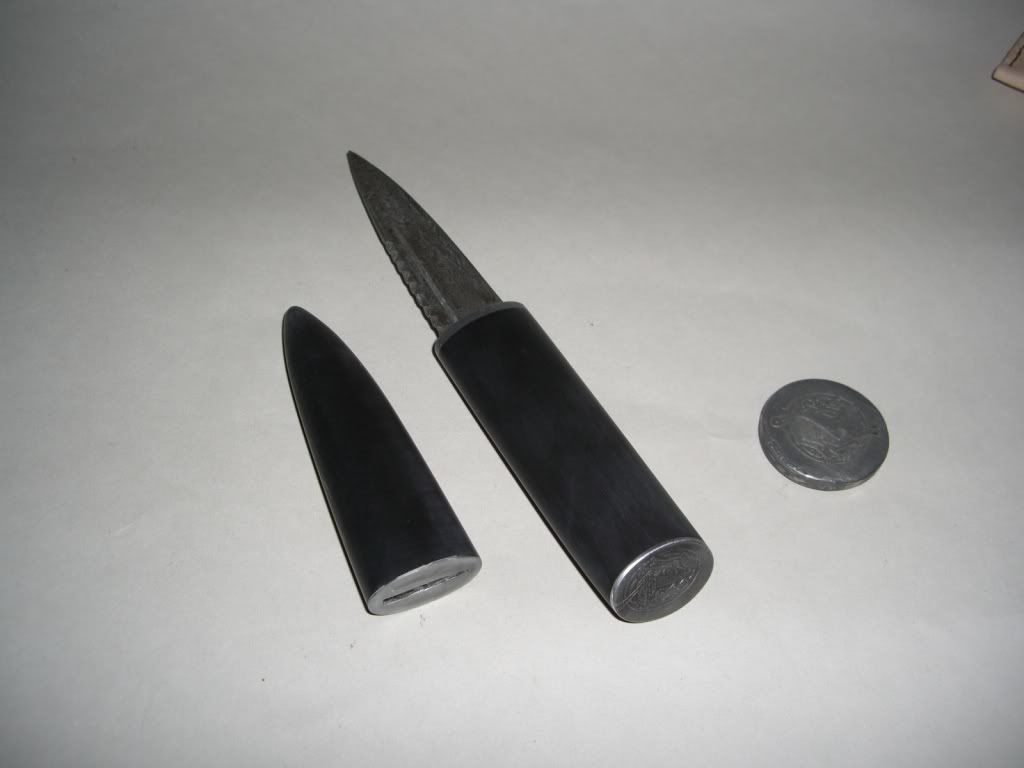
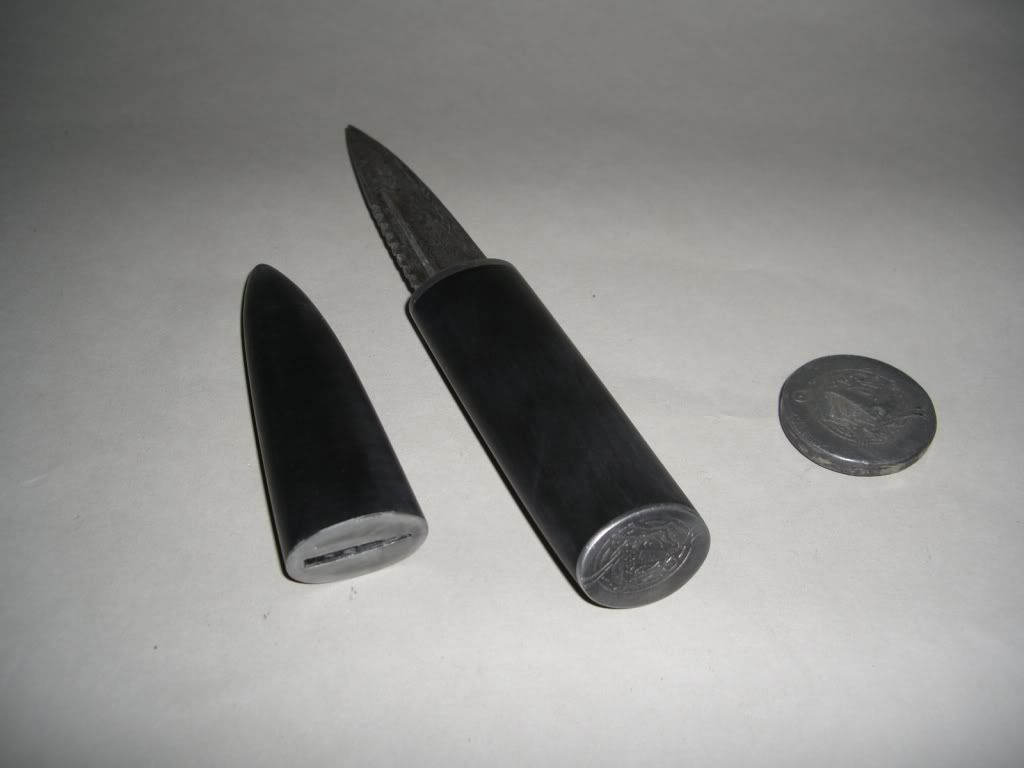
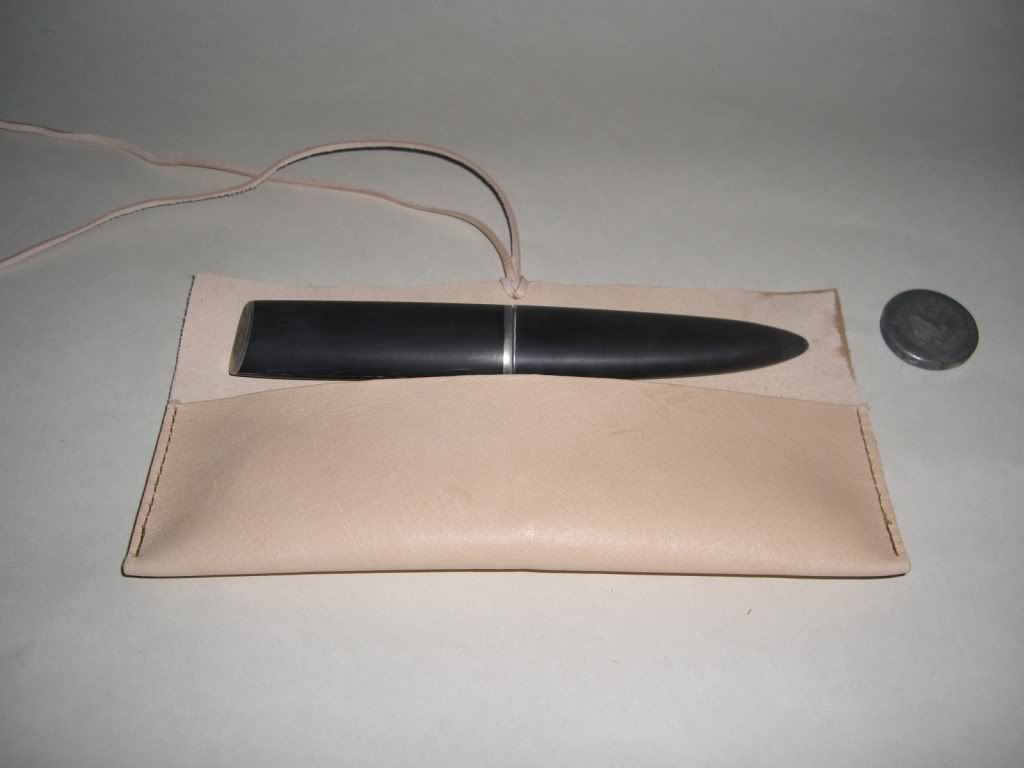
This is the finished article, I’m not happy with it, I can see, and had made mistakes making it, but hopefully that means the next one will be better.
I’m going to go drink a lot of beer and then go lie down.
Cheers
Stephen
The brief was;
Pewter with an aged look, with celtic motif, particularly a celtic dog. Everything else was up to me.
In a moment of absolute madness I decided on Water Buffalo horn for both the handle and sheath, with a cast or etched bolster and pommel.
I’ve only ever made one knife before this, an SC_Barker PSK blade that I handled and sheathed. I know I’m an idiot ! Oh and the Sgian Dubh blade was a stick tang, never done one of those before either.
3 weekends ago I was still at the design stage, I had etched some pewter, and got good results;
But I wanted to try casting, (more on that later).
Next the Buffalo horn, I had some but they were quite thin in cross section, so I bought some more pre cut sections (and the blade) from here.
The Handle was first; I measured the stick tang on the blade and found it was all over the place, so squaring and flattening that was my first task.
Then I took a section of horn and flattened and squared off 2 sides, really just to give me something familiar to work with, and off. I also squared (or so I thought) one end.
I used drills smaller then the thickness of the tang, (2mm) and drilled 3 holes close together to create the basic shape then used 2 junior hacksaw blades taped together to open it up, (I didn’t have needle files small enough to do the job).
I opened up the hole enough to fit the tang, and found it wasn’t running parallel with the faces. However it was the only decent sized piece I had for the handle so I wasn’t going to bin it. Light bulb, use the other end and try again, which is what I did.
Next came the sheath, I actually though this would be fairly easy, as I was splitting it and fitting the blade into both sides, silly me.
My first attempt is documented on BritishBlades, it didn’t go well, one side bowed out after cutting and smoothing, presumably with tensions built up inside the horn.
So I tried again, this time when I cut the horn section in 2, I made sure the 2 half's were approx the same cross section, and after flattening both faces using oxide paper on a flat marble tile I clamped them back together again, and left then for 3-4 days to acclimatise.
When they were separated they were still flat.
Next stage was the cut-out to accept the blade and shaping the sheath, I had decided early that I would use jigs, if I could, so I had made various ones up using off cuts from a laminated floor I had had laid a few years back, very stable, the jigs were;
• To do the cut outs on the 2 sheath sides, BTW the blade was not symmetrical.
• To rough cut the outside shape of the sheath leaving 3-4 mm all round as a gluing surface.
As you can see that worked quite well.
Now to roughly cut out the shape of the finished sheath
The 2 half’s epoxied, and the blade inserted to check fit.
Time now to cast some pewter, I had found a supplier here, they also provided me with plaster of Paris and casting sand.
I had cast some bit and pieces, basically just trying out the equipment I had, nothing fancy, old small camping pots, a camping gas stove and my brazing torch, did the job admirably. From a small off cut I hammered flat a small piece to about 1mm, this would be the sheath bolster.
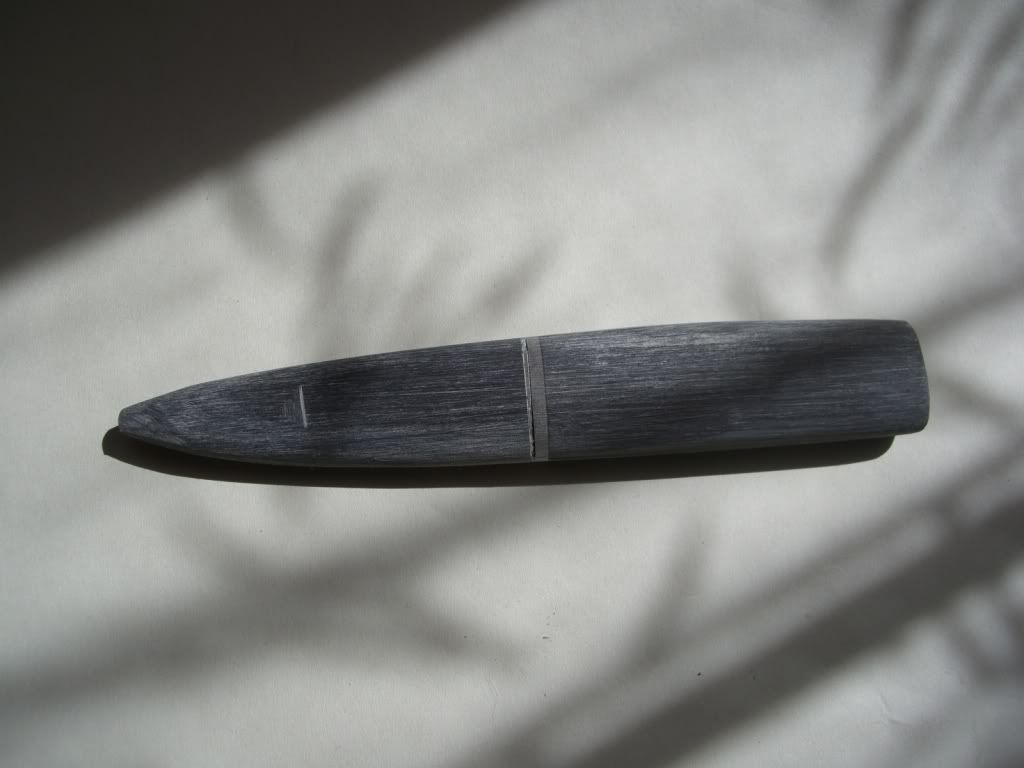
Two weekends ago (02-05-09)
Here's where I stood on the build
I can just see my mate walking down the aisle with that strapped to his leg !
I was REALLY under the cosh now! and I still hadn’t really got it together, time to get busy;
I had decided, due to time constraints that the bolster on the handle would be plain, (originally it was suppose to be either an etch or cast Celtic rope detail). So I cast an approx 3mm disc, maybe 30mm diameter, seen on the left hand side of the pic above, its rough there, I cut it out roughly to shape then took it to 8000 grit using Jeds magic paper.
That was epoxied to the blade and handle, also the sheath bolster was epoxied to the sheath, all fitted together and checked for fit will the epoxy was still wet.
I screwed up here, I let the epoxy cure to long, and damaged the handles bolster finish getting the epoxy off.
Time to sand, I decided to do the handle first and fit the sheath to it, I used a mechanical sander, thru to 240 grit.
I then mated the 2 together, and shaped the sheath again using the mechanical sander to 240 grit.
Sunday, now I was stuck, I hadn’t received the moulds I needed for the pommel, and I didn’t want to take the sanding any further than 240 until the pommel was in place.
Monday, The moulds arrived from Kerne, absolutely beautiful, works of art. I made up some plaster of Paris, and produced a negative, after it had gone off I remove the mould and dried it in the oven at a low setting.
Tuesday, casting day, set up the mould, melted some pewter and cast it, unfortunately Kerne’s concerns came true, the detail was too fine, it didn’t cast.
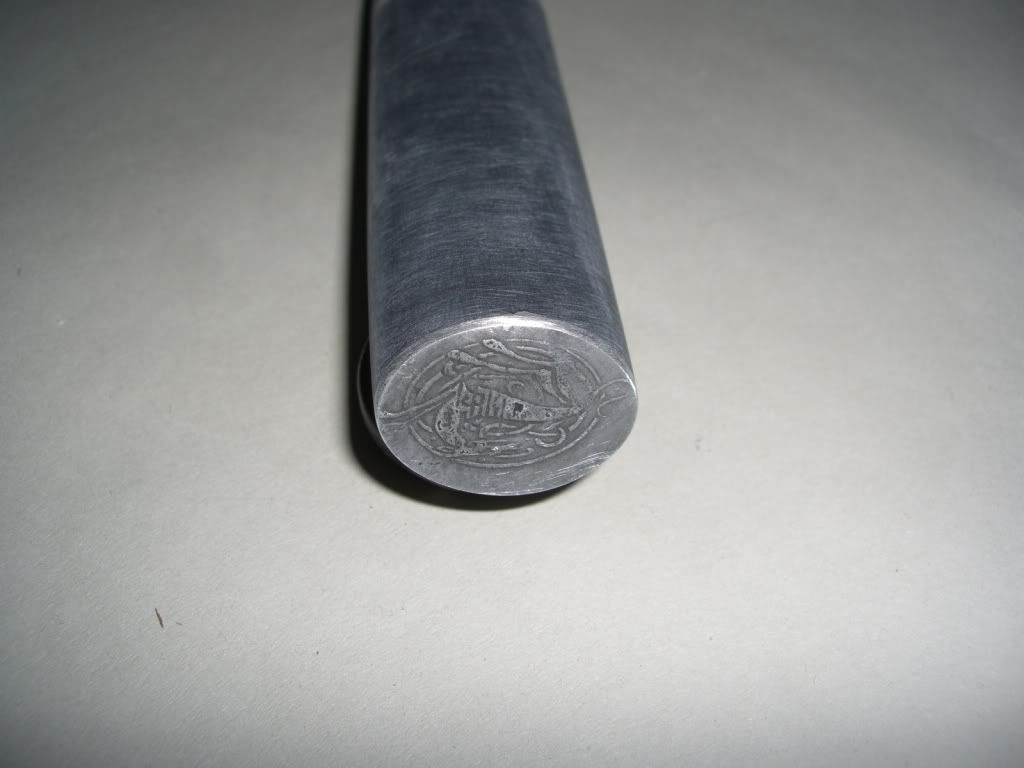
Luckily I had produced a backup, another 30mm disk of pewter, this time with a 5mm dia by 5mm high hub on the back. I dug out my etching equipment, (9volt battery and some wires basically) I had some PCB transfer sheets made up with various motifs, so utilized that to make a pattern, and etched it into the new disc.
This was then epoxied into place then shaped
Wednesday, I have 2 nights including tonight to finish this knife, I have to deliver it Friday morning, sanded to 600 grit
Thursday, last night, delivery tomorrow, sanded to 1600 grit
I had been seriously annoyed with myself when I got home, the handle bolster had deep scratches on it, ( I think I must have dropped it on something), typically on the side facing out, nothing to do but re sand from 240 grit to get rid of them.
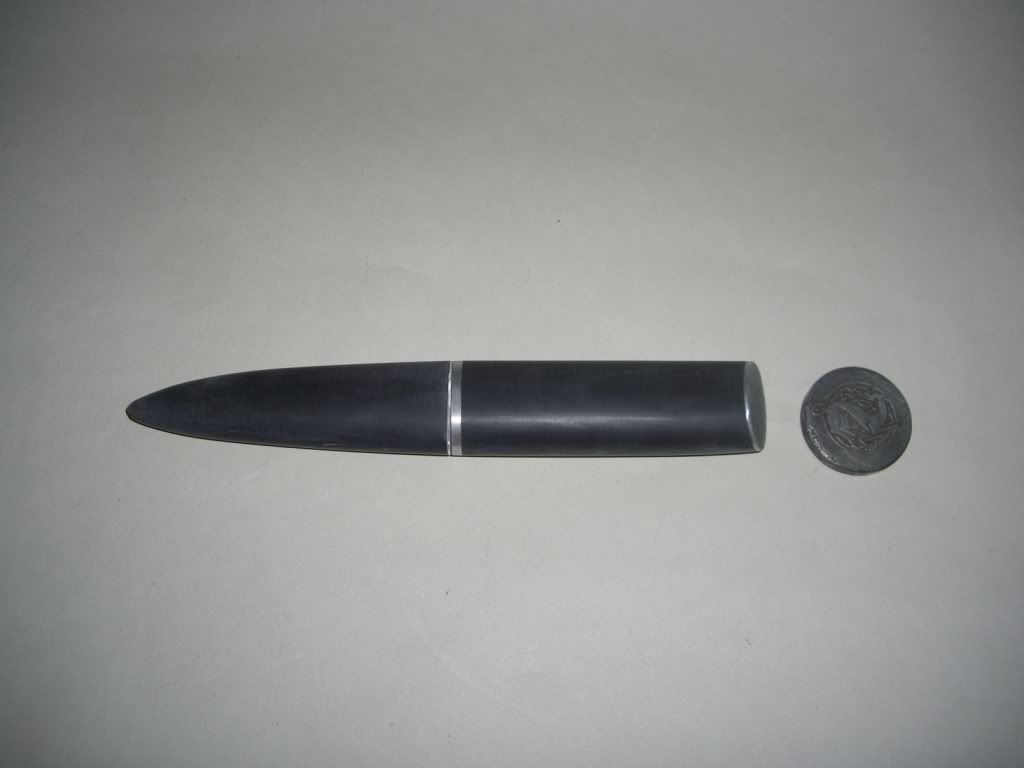
I had used ferric chloride to etch the pewter, now I used it to lose the shine and age it, it worked very well.
This is the finished article, I’m not happy with it, I can see, and had made mistakes making it, but hopefully that means the next one will be better.
I’m going to go drink a lot of beer and then go lie down.
Cheers
Stephen
 .
. and lie down , because you definitely earned it