There has been a Kitchen Carving Knife in my mums knife drawer, unused, for years. It came from my uncle who worked on Naval Ships in the 80's and It's believed to come from there. As the handle is wasting away, I'd love to re-handle it and get it all sharp and clean again, but I've never done this before.
I'd like to ask you very experienced and skilled lot on here for some pointers and advice if you would be so kind")
After some research, I know I'm gonna need to get some pins/rivets to replace the originals, and I'm gonna have to clean up the blade and tang, rehandle and then sharpen. I'm only just beginning to research, but is the blade potentially 'Parkerized' ? As it has a very dark colour to it that looks like it has some kind of finish on it. What metal is it likely to be?
Should I have a go with some wirewool/fine sandpaper, or should I soak it in something first?
Also: the wood for the handle... I assume most woods are gonna be fine but as this would the main carving knife for the kitchen, I'd like to give it something dense and hard wearing that will last for many years to come. I have some well seasoned Yew, and some Purple Cherry Plum (which will hopefully yeild enough for a full handle) - or am I better off using another wood?
Should I begin to remove the tattered handle? then remove the rivets?
Are some simple Corby bolts (copper, brass, which type?) good enough or do I have a knife that requires something a bit more special? (The existing rivets look like brass, but I'm no metal ID expert!)
There might be a few questions that further research will answer so if anyone wants to give me some starter points, I don't expect a full "this is what you do, step-by-step"...unless you want to (!) or there is a very good and reliable tutorial out there that the knife makers/fixer-uppers can recommend.
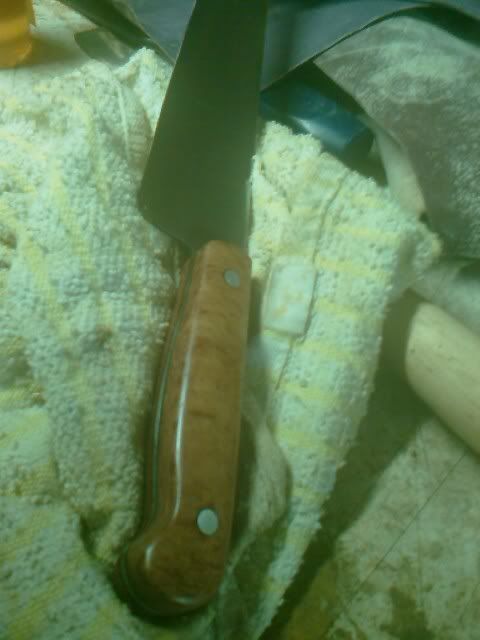
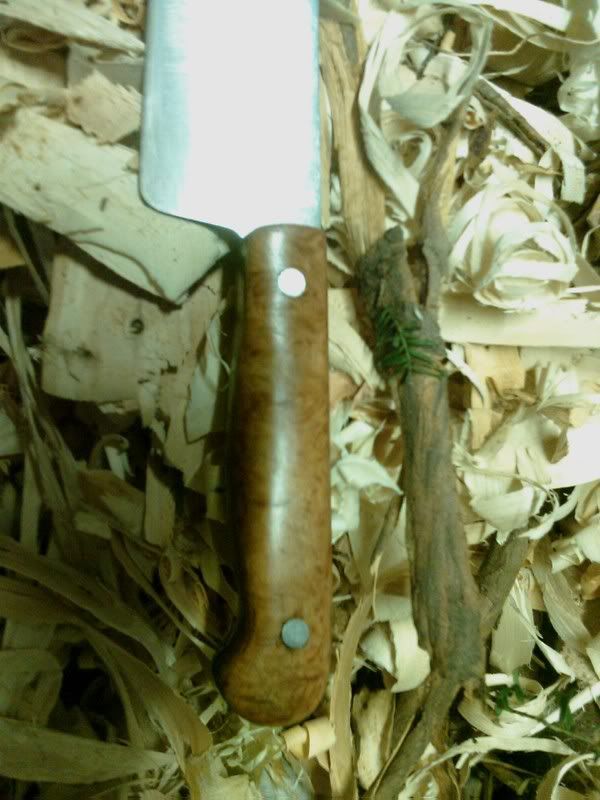
This is the knife in question.
To be honest, the yellowing in the pic below is not what it looks like in normal light, but there is small surface rust to the blade face:

Again, the rust is mostly surface rust, but I'm sure I'll have a better idea once the old handle is removed.
Looking down on to the top of the handle:


Looking up at the bottom of the handle:

I would just get stuck into cleaning this up and removing the handle but I don't want to mess it up as it has a lovely balance, and was always a pleasure to use when growing up and carving roasts....
So any advice pre-clean up would be most valued.
I'd like to ask you very experienced and skilled lot on here for some pointers and advice if you would be so kind
After some research, I know I'm gonna need to get some pins/rivets to replace the originals, and I'm gonna have to clean up the blade and tang, rehandle and then sharpen. I'm only just beginning to research, but is the blade potentially 'Parkerized' ? As it has a very dark colour to it that looks like it has some kind of finish on it. What metal is it likely to be?
Should I have a go with some wirewool/fine sandpaper, or should I soak it in something first?
Also: the wood for the handle... I assume most woods are gonna be fine but as this would the main carving knife for the kitchen, I'd like to give it something dense and hard wearing that will last for many years to come. I have some well seasoned Yew, and some Purple Cherry Plum (which will hopefully yeild enough for a full handle) - or am I better off using another wood?
Should I begin to remove the tattered handle? then remove the rivets?
Are some simple Corby bolts (copper, brass, which type?) good enough or do I have a knife that requires something a bit more special? (The existing rivets look like brass, but I'm no metal ID expert!)
There might be a few questions that further research will answer so if anyone wants to give me some starter points, I don't expect a full "this is what you do, step-by-step"...unless you want to (!) or there is a very good and reliable tutorial out there that the knife makers/fixer-uppers can recommend.
This is the knife in question.
To be honest, the yellowing in the pic below is not what it looks like in normal light, but there is small surface rust to the blade face:
Again, the rust is mostly surface rust, but I'm sure I'll have a better idea once the old handle is removed.
Looking down on to the top of the handle:
Looking up at the bottom of the handle:
I would just get stuck into cleaning this up and removing the handle but I don't want to mess it up as it has a lovely balance, and was always a pleasure to use when growing up and carving roasts....
So any advice pre-clean up would be most valued.