So I needed a cooker for when I can't have an open fire, I trawled the net looking for something I could buy as a cooker and I even had a look at the hexi's but they weren't for me. I couldn't get the tablets locally and it looked like it could become pretty expensive very quickly... Not my style.
It needed to be cheap, have fuel locally and not run on wood. I remembered reading about the pepsi/coke can stove and how it was based on the trangia design. I had cooked with a trangia before and I quite liked it, simple easy and pretty quick so I went on a mission to find some plans.
Google is my friend.
I found the site where the can cooker had been posted but unfortunately the site had expired and the plans were no longer there. It was a sad moment.
I got fed up looking for the plans on other sites and as it was my day off I went over to youtube and started watching bushcrafting vids as you do, and on a whim I typed in 'can cooker' and do you know, a whole bunch of vids popped up!
Most of them were under 30 secs of a stove working but a couple showed how to make it.
I don't have any fancy electrical power tools so the cooker I finally made was an amalgamation of various cookers...
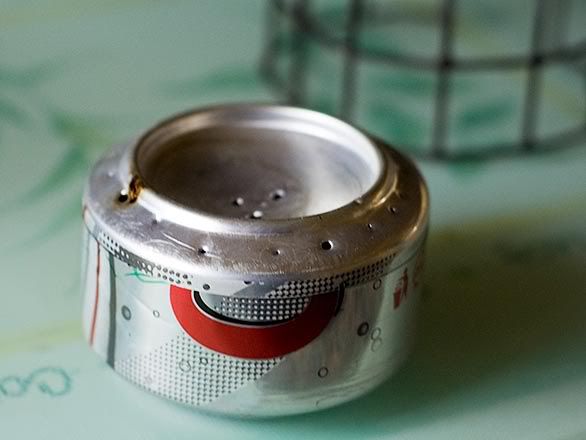
It has an inner ring but I don't think it needs it as it's not tight in there so doesn't help create the pressure. The stove itself is two cans cut with scissors and the holes are punched in with a thin panel pin and a solid hammer.
Putting the two cans together was a little difficult and the one can bent, but it doesn't seem to make much difference.
The can also needed a priming pan (a priming pan is a shallow dish that contains a splash of fuel and the cooker. The fuel is lit and heats the cooker up to create pressured gas which is lit automatically from the burning priming fuel, the burning gas then keeps the cooker hot and the pressure up until it runs out of fuel. Burning the pressurised gas conserves fuel and allows a hotter flame, greatly reducing boiling time.)
I tried using a baked bean tin, but the fit was too tight and the fuel wouldn't light, I tried adding holes but that didn't work either. I looked through the kitchen for a wider tin and came across a tuna tin, it was perfect. After a bit of trial and error I added three holes to the edge of the tin and it lit like a dream while being protected from the wind! Good
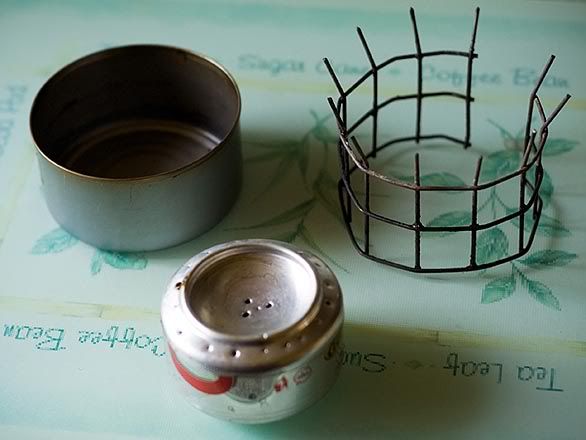
I needed something to hold the billy away from the top of the cooker, I tried some chicken wire but that just crumpled when I set a full pan of water on it. The vids showed a square mesh like wire but I didn't have any... apart from the grill rack... bye bye grill rack... Hello pot stand!
For your viewing pleasure:
TL: Primer pan
TR: Pot Stand
BC: Cooker
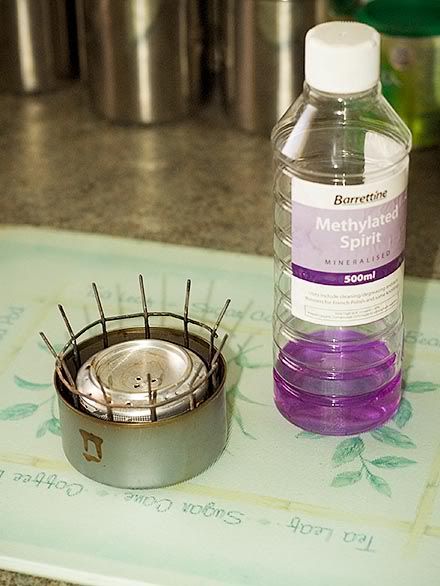
Assembled stove and fuel.
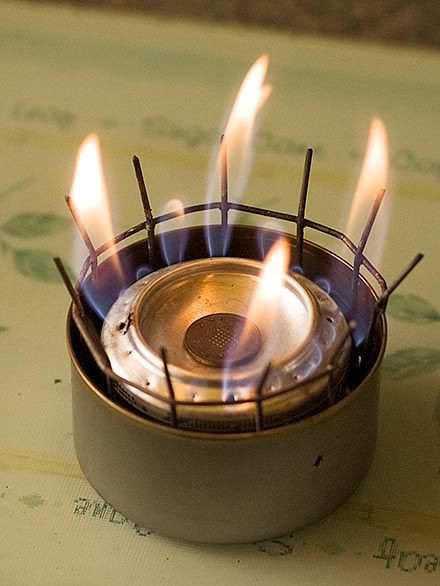
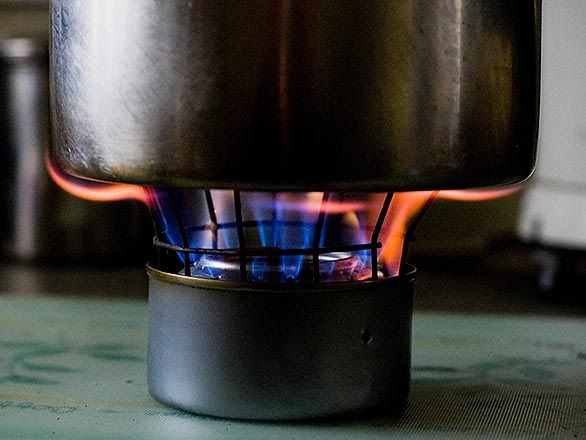
Lit and cooking
Medium sized billy with 1 mug of water.
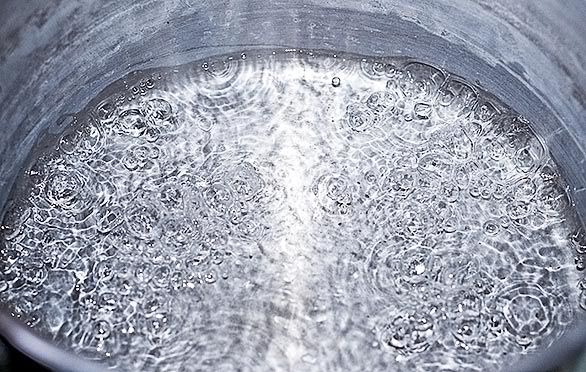
Three mins to roiling boil.
It needed to be cheap, have fuel locally and not run on wood. I remembered reading about the pepsi/coke can stove and how it was based on the trangia design. I had cooked with a trangia before and I quite liked it, simple easy and pretty quick so I went on a mission to find some plans.
Google is my friend.
I found the site where the can cooker had been posted but unfortunately the site had expired and the plans were no longer there.
It was a sad moment.I got fed up looking for the plans on other sites and as it was my day off I went over to youtube and started watching bushcrafting vids as you do, and on a whim I typed in 'can cooker' and do you know, a whole bunch of vids popped up!
Most of them were under 30 secs of a stove working but a couple showed how to make it.
I don't have any fancy electrical power tools so the cooker I finally made was an amalgamation of various cookers...
It has an inner ring but I don't think it needs it as it's not tight in there so doesn't help create the pressure. The stove itself is two cans cut with scissors and the holes are punched in with a thin panel pin and a solid hammer.
Putting the two cans together was a little difficult and the one can bent, but it doesn't seem to make much difference.
The can also needed a priming pan (a priming pan is a shallow dish that contains a splash of fuel and the cooker. The fuel is lit and heats the cooker up to create pressured gas which is lit automatically from the burning priming fuel, the burning gas then keeps the cooker hot and the pressure up until it runs out of fuel. Burning the pressurised gas conserves fuel and allows a hotter flame, greatly reducing boiling time.)
I tried using a baked bean tin, but the fit was too tight and the fuel wouldn't light, I tried adding holes but that didn't work either. I looked through the kitchen for a wider tin and came across a tuna tin, it was perfect. After a bit of trial and error I added three holes to the edge of the tin and it lit like a dream while being protected from the wind! Good
I needed something to hold the billy away from the top of the cooker, I tried some chicken wire but that just crumpled when I set a full pan of water on it. The vids showed a square mesh like wire but I didn't have any... apart from the grill rack... bye bye grill rack... Hello pot stand!
For your viewing pleasure:
TL: Primer pan
TR: Pot Stand
BC: Cooker
Assembled stove and fuel.
Lit and cooking
Medium sized billy with 1 mug of water.
Three mins to roiling boil.
Thank you for reading
 Brilliant bit of lateral thinking on using the grill mesh too, that's sturdy enough not to crumple