I have posted this on Britishblades and thought someone here may also be interested.
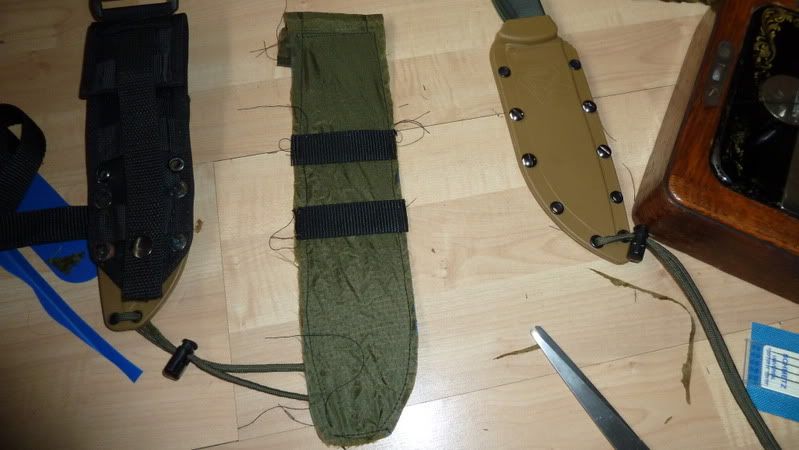
Sitting at home last night after putting a convex edge on my ESEE-6 over the weekend, I looked at My ESEE-3 and thought "I could use a molle back for the six". Looking online the price for back on its own is in the region of £40-£60, did I want one that badly?
So I took a better look at the back on the three, and having recently got an old hand cranked Singer sewing machine, decided to make one out of bits I had lying around.
Materials:
Webbing, for the edges and straps, I used 25mm black on this one.
A plastic sheet for rigidity. Morrisons sell a four pack of flexible chopping boards for £1.99, these are thin enough for the sewing machine to punch through whilst being thick enough to remain rigid.
Fabric for the covering: I used some parachute fabric from Endicots, I would have preferred Cordura, I may have some in time for the MKII.
Some hollow rivets, I had these left over from a Kydex sheath I made for my F1.
A sewing machine. This can be made by hand sewing, but the machine made it so much easier. I used a hand cranked Singer 128k, which can apparently sew through anything. I don't know if a modern electric machine will be powerful enough to punch through the plastic.
A permanent marker.
Some Velcro.
To begin:
Trace the outline of the sheath onto the board and cut it. you want the board to protrude about half an inch above where the handle ends, and about quarter of an inch below where the sheath ends (these measurements are optional, you can make this back to conform to whatever you need).Ignore the cat, he is not necessary for this project.
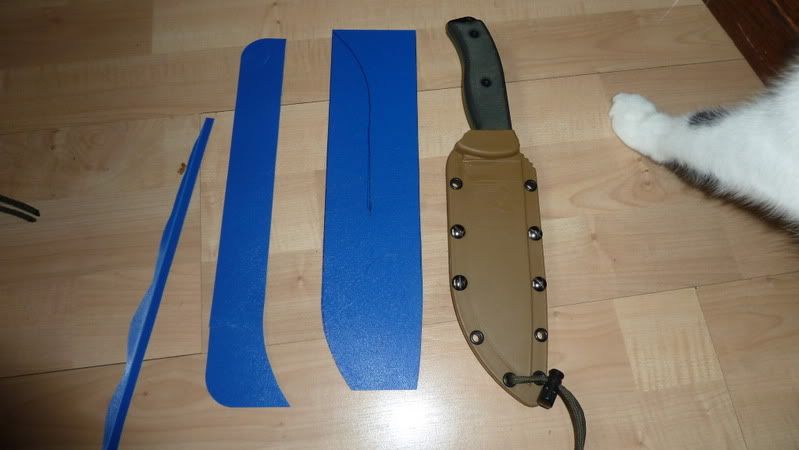
Next cut the fabric to overlap the board a bit at the sides, and about six inches at the top, and sew both sides on with the stitches about one quarter of an inch from the edge of the board all around, this I did in one operation.
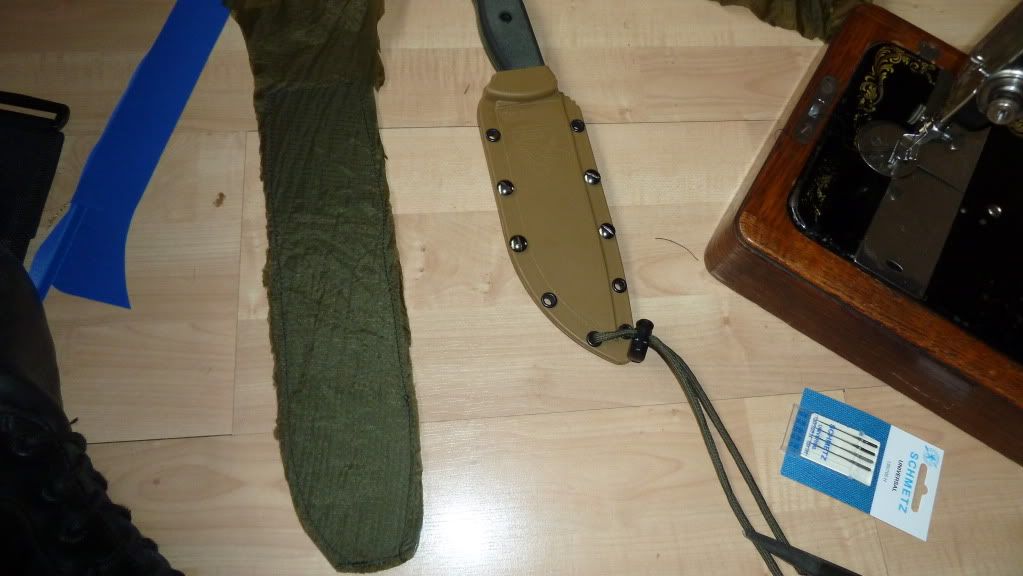
Next take the six inches at the top, and halfway down sew a piece of webbing across that point at the back.
Now fold the material at the top over this webbing towards the back, so that the farthest edge meets the plastic sheath and roll over the edge that meets the plastic. Sew this along the edges and onto the plastic backing.
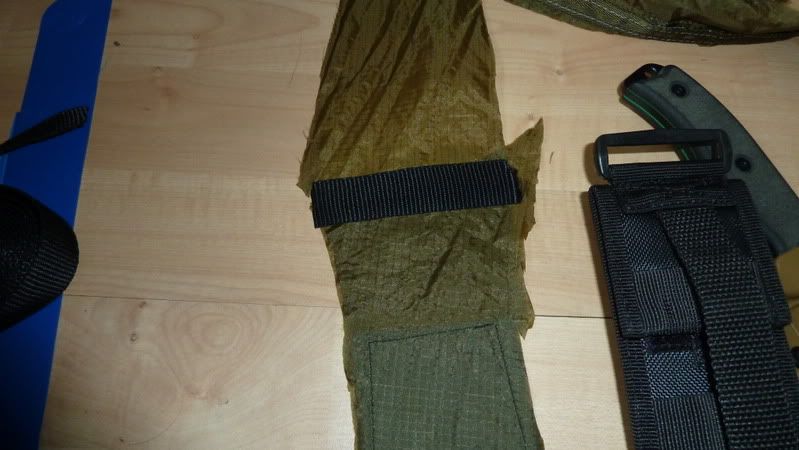
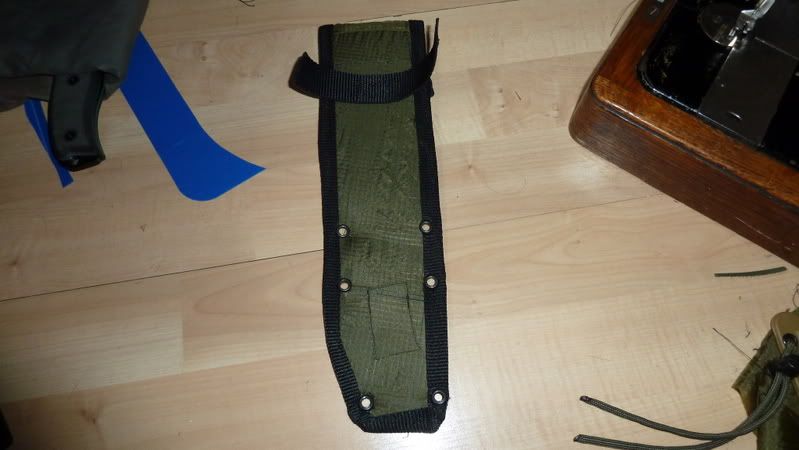
At this stage I trimmed the material around the edges, and the sewed on two strips of webbing across the back using the three's back as a template for placement. This comes out at about one inch below the hem of the top piece when folded over, and one inch below that.
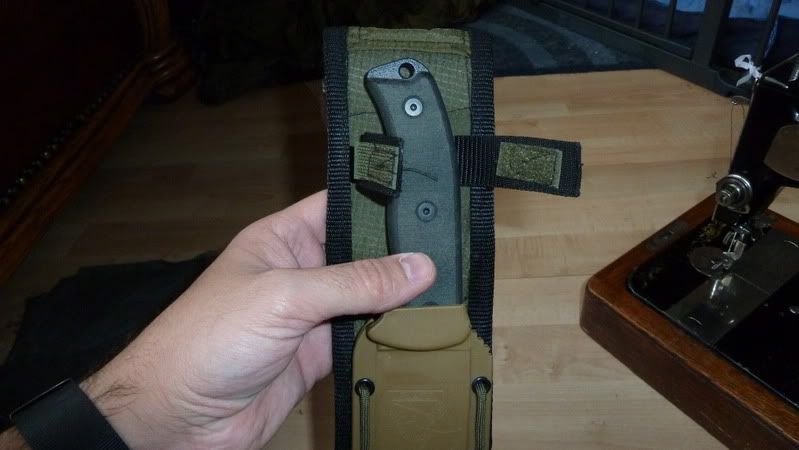
I then sewed a piece of Velcro across the top hem and the point where it meets the plastic back.
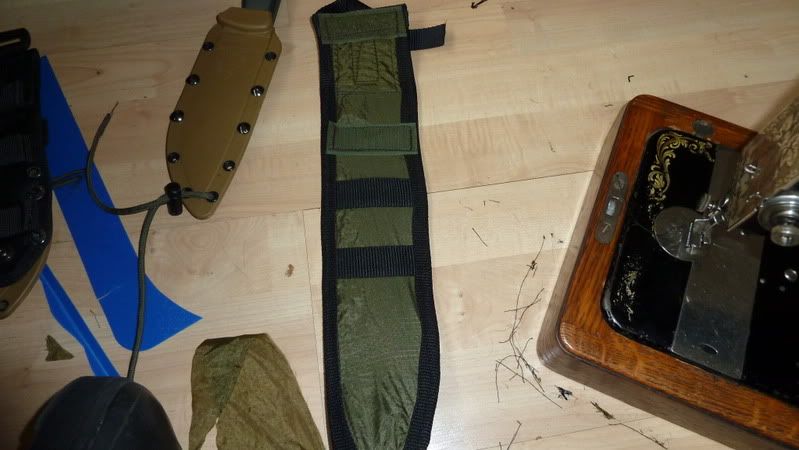
Next sew a piece of webbing about four fifths of the backs length onto the folded over piece, sewing a piece of Velcro onto the end and the plastic back. You could of course use a popper button as per the original, this is something I may do on the MKII.
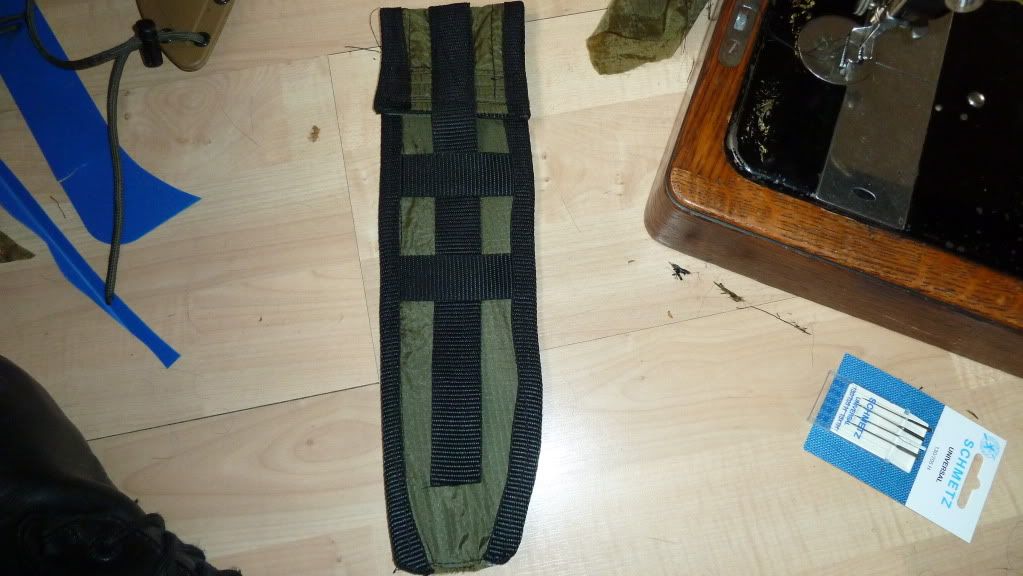
Sew on the edges by folding a piece of webbing over the edge. I did this in three sections as I was using scraps, it should be possible to do it in one piece. Use a lighter to seal the edges of the webbing.
Now, using the sheath as a guide, mark and either drill or punch out the holes for the hollow rivets, and apply them. I used a press drill for this, it was fine on the plastic, but the webbing caught and had to be trimmed with a knife prior to setting the rivets.
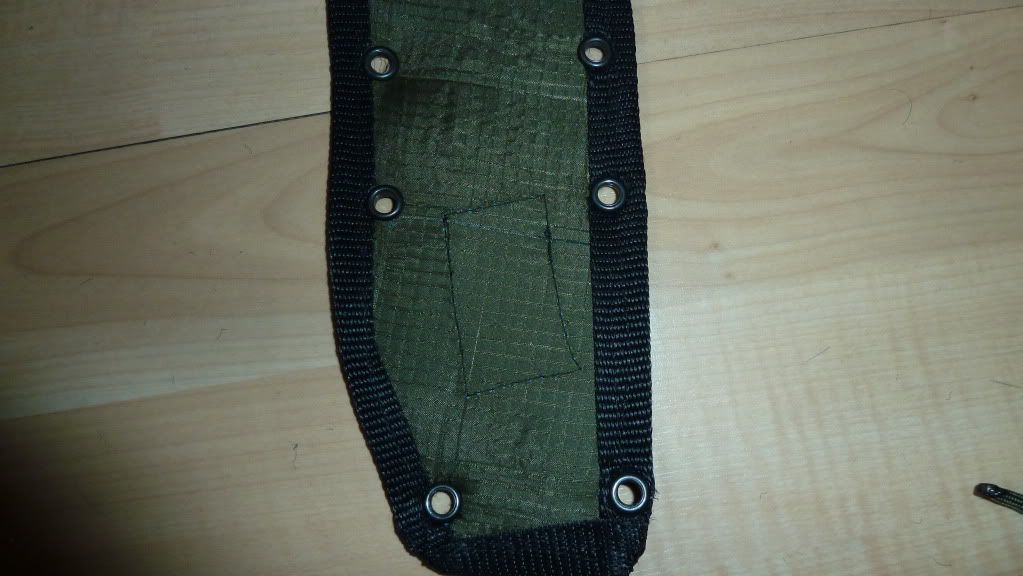
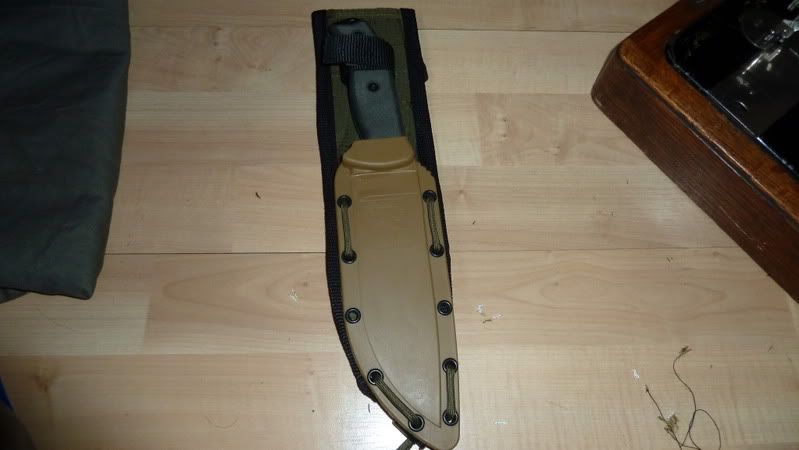
Place the knife in the sheath and line it up with the holes you made, and choosing a point about one and a half inches below end of the handle, sew a piece of webbing long enough to wrap around the handle in the centre, the stitches should only occupy about one inch of the centre. I sewed Velcro onto this piece, I should have done this before stitching it to the back, which is something I will bear in mind for the future. You could of course use a popper button for the fastening.
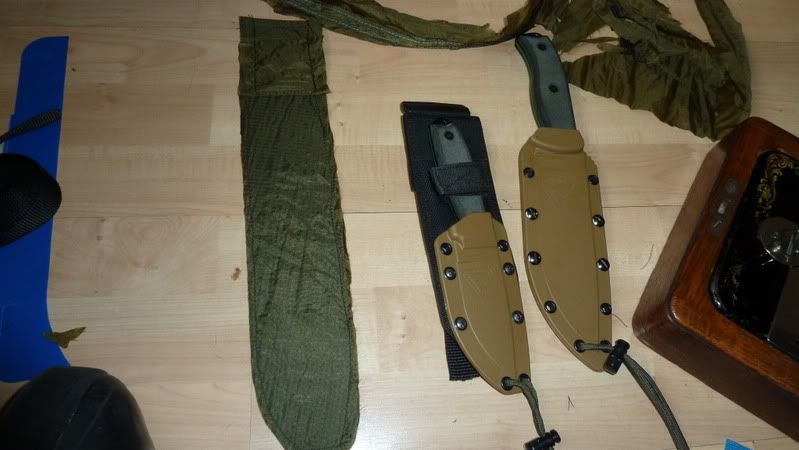
I attached the sheath using para-cord as I didn't have Chicago screws long enough, this turns out to be surprisingly strong.
And here is the finished article.
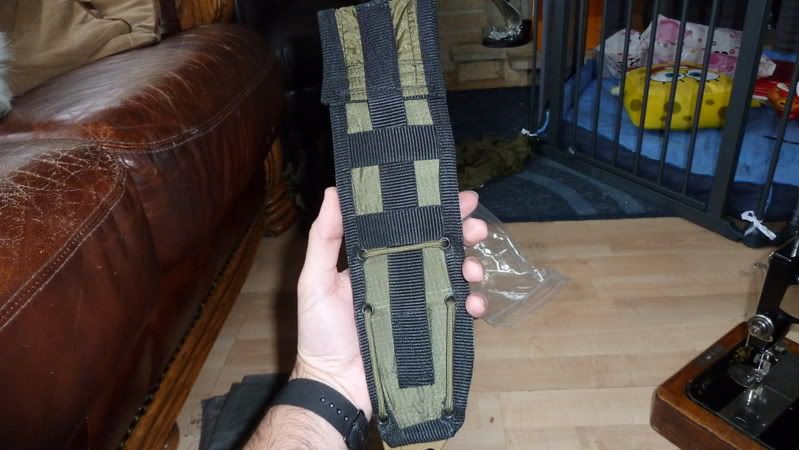
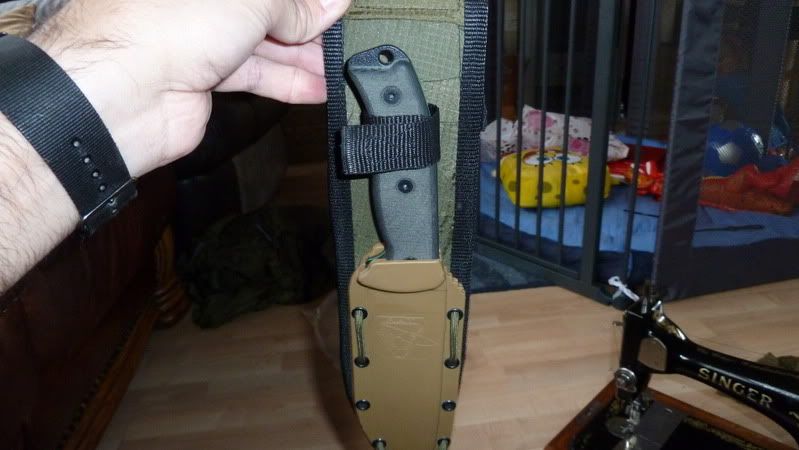
It is rough I admit, but was a very valuable learning experience and I can do a better job next time. This back plate can be used and modified to fit a variety of plastic or kydex sheaths, and customised to include a firesteel holder, pouch, baldric or anything you can think of. You could also use leather or a brightly coloured fabric ( I would recommend a synthetic to dry faster if wet) to match those Orange G-10 scales or Kydex).
I hope this post will be of use to those of you who want a different carry system without breaking the bank, or who prefer to make their own kit.
Sitting at home last night after putting a convex edge on my ESEE-6 over the weekend, I looked at My ESEE-3 and thought "I could use a molle back for the six". Looking online the price for back on its own is in the region of £40-£60, did I want one that badly?
So I took a better look at the back on the three, and having recently got an old hand cranked Singer sewing machine, decided to make one out of bits I had lying around.
Materials:
Webbing, for the edges and straps, I used 25mm black on this one.
A plastic sheet for rigidity. Morrisons sell a four pack of flexible chopping boards for £1.99, these are thin enough for the sewing machine to punch through whilst being thick enough to remain rigid.
Fabric for the covering: I used some parachute fabric from Endicots, I would have preferred Cordura, I may have some in time for the MKII.
Some hollow rivets, I had these left over from a Kydex sheath I made for my F1.
A sewing machine. This can be made by hand sewing, but the machine made it so much easier. I used a hand cranked Singer 128k, which can apparently sew through anything. I don't know if a modern electric machine will be powerful enough to punch through the plastic.
A permanent marker.
Some Velcro.
To begin:
Trace the outline of the sheath onto the board and cut it. you want the board to protrude about half an inch above where the handle ends, and about quarter of an inch below where the sheath ends (these measurements are optional, you can make this back to conform to whatever you need).Ignore the cat, he is not necessary for this project.
Next cut the fabric to overlap the board a bit at the sides, and about six inches at the top, and sew both sides on with the stitches about one quarter of an inch from the edge of the board all around, this I did in one operation.
Next take the six inches at the top, and halfway down sew a piece of webbing across that point at the back.
Now fold the material at the top over this webbing towards the back, so that the farthest edge meets the plastic sheath and roll over the edge that meets the plastic. Sew this along the edges and onto the plastic backing.
At this stage I trimmed the material around the edges, and the sewed on two strips of webbing across the back using the three's back as a template for placement. This comes out at about one inch below the hem of the top piece when folded over, and one inch below that.
I then sewed a piece of Velcro across the top hem and the point where it meets the plastic back.
Next sew a piece of webbing about four fifths of the backs length onto the folded over piece, sewing a piece of Velcro onto the end and the plastic back. You could of course use a popper button as per the original, this is something I may do on the MKII.
Sew on the edges by folding a piece of webbing over the edge. I did this in three sections as I was using scraps, it should be possible to do it in one piece. Use a lighter to seal the edges of the webbing.
Now, using the sheath as a guide, mark and either drill or punch out the holes for the hollow rivets, and apply them. I used a press drill for this, it was fine on the plastic, but the webbing caught and had to be trimmed with a knife prior to setting the rivets.
Place the knife in the sheath and line it up with the holes you made, and choosing a point about one and a half inches below end of the handle, sew a piece of webbing long enough to wrap around the handle in the centre, the stitches should only occupy about one inch of the centre. I sewed Velcro onto this piece, I should have done this before stitching it to the back, which is something I will bear in mind for the future. You could of course use a popper button for the fastening.
I attached the sheath using para-cord as I didn't have Chicago screws long enough, this turns out to be surprisingly strong.
And here is the finished article.
It is rough I admit, but was a very valuable learning experience and I can do a better job next time. This back plate can be used and modified to fit a variety of plastic or kydex sheaths, and customised to include a firesteel holder, pouch, baldric or anything you can think of. You could also use leather or a brightly coloured fabric ( I would recommend a synthetic to dry faster if wet) to match those Orange G-10 scales or Kydex).
I hope this post will be of use to those of you who want a different carry system without breaking the bank, or who prefer to make their own kit.