Modellers Corner
- Thread starter Trig
- Start date
-
Come along to the amazing Summer Moot (21st July - 2nd August), a festival of bushcrafting and camping in a beautiful woodland PLEASE CLICK HERE for more information.
You are using an out of date browser. It may not display this or other websites correctly.
You should upgrade or use an alternative browser.
You should upgrade or use an alternative browser.
I recently restored and rewired a dolls house made by Deb's father back in 2000 and it's given me a taste for doing a bit of model making, which I haven't done since I was a teenager.
I quite like the 1/12th scale that dolls houses use for the wide availability of accessories and while looking for something for the dolls house, I came across a Gypsy Caravan kit by McQueenie Miniatures which caught my interest somewhat.
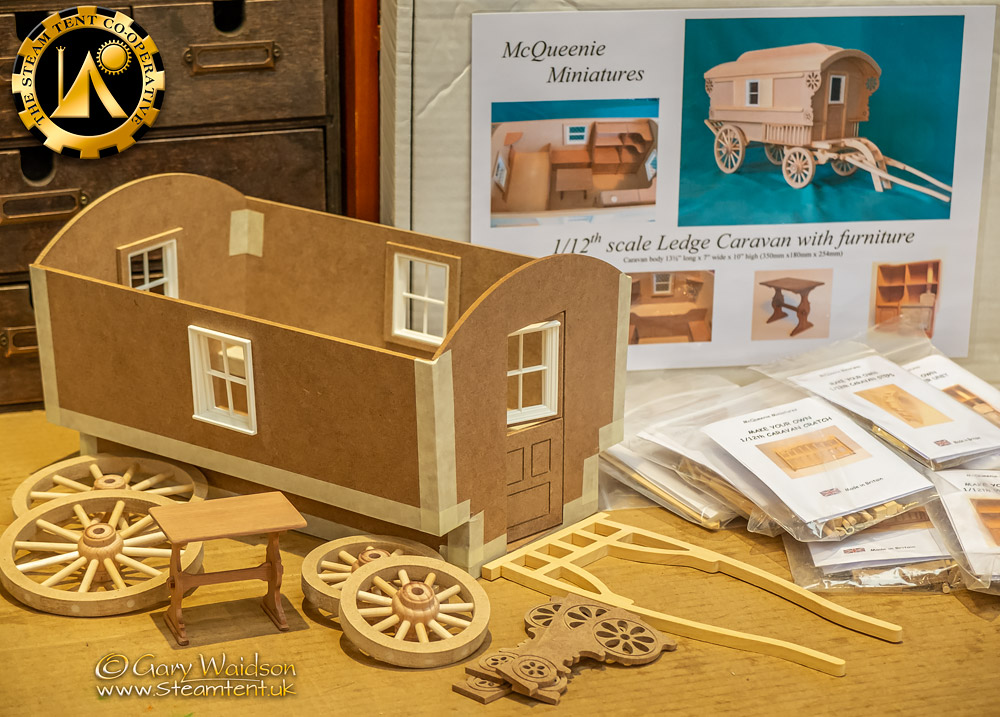
Treating myself for jól, I ordered one and this is what arrived. I've just taped the major parts together here to check the fit ( all good ) and suss out what modifications to make. ( It wouldn't be me if I just put it together as standard. )
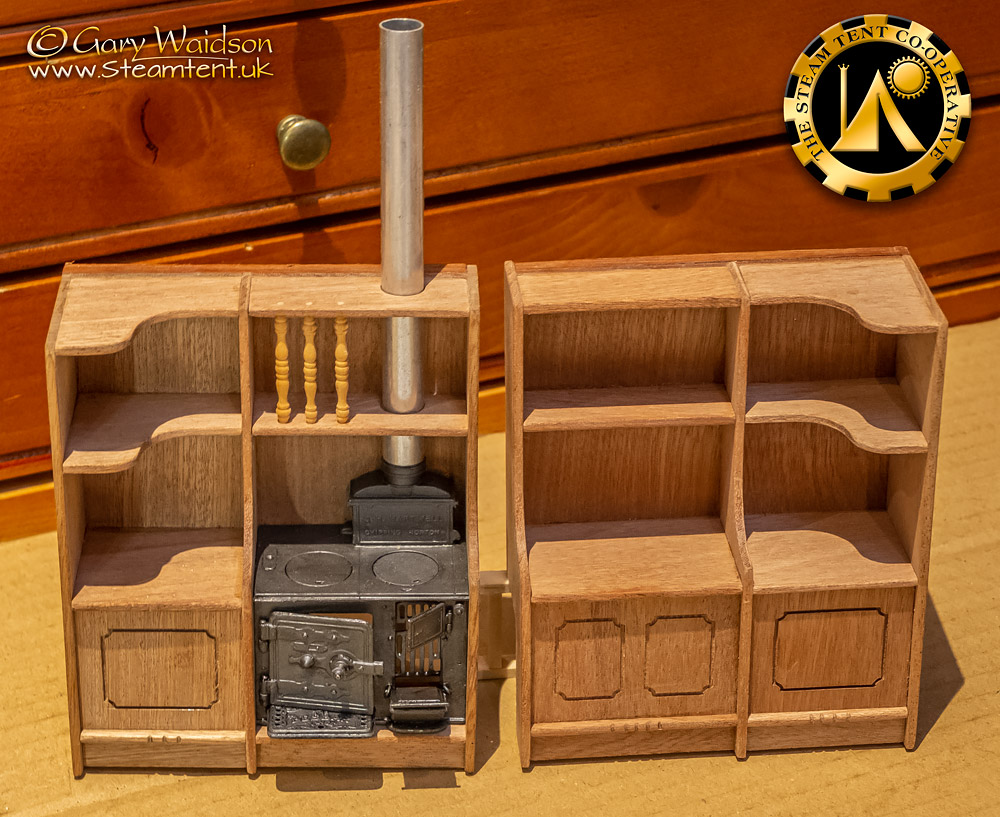
The first parts I put together were the two internal furnishings that came with the kit. Simple enough although I added some spindles to make a plate rack over the stove. Then I turned my attention to the white metal stove.
It was supplied with a wooden stove pipe which I swapped for a section of aluminium tube I found in the workshop and looking at the instructions it seemed that the stove doors were made to be glued either open or shut. Well there's my first challenge, that's not good enough, I want properly hinged doors...
Out came the pin vice and a half mm drill bit. Sorting through Deb's pin cushion I foud three suitable pins and the workshop provided some ss wire to build hinges for the drop plate.
An hour or so later, opening doors all sorted.
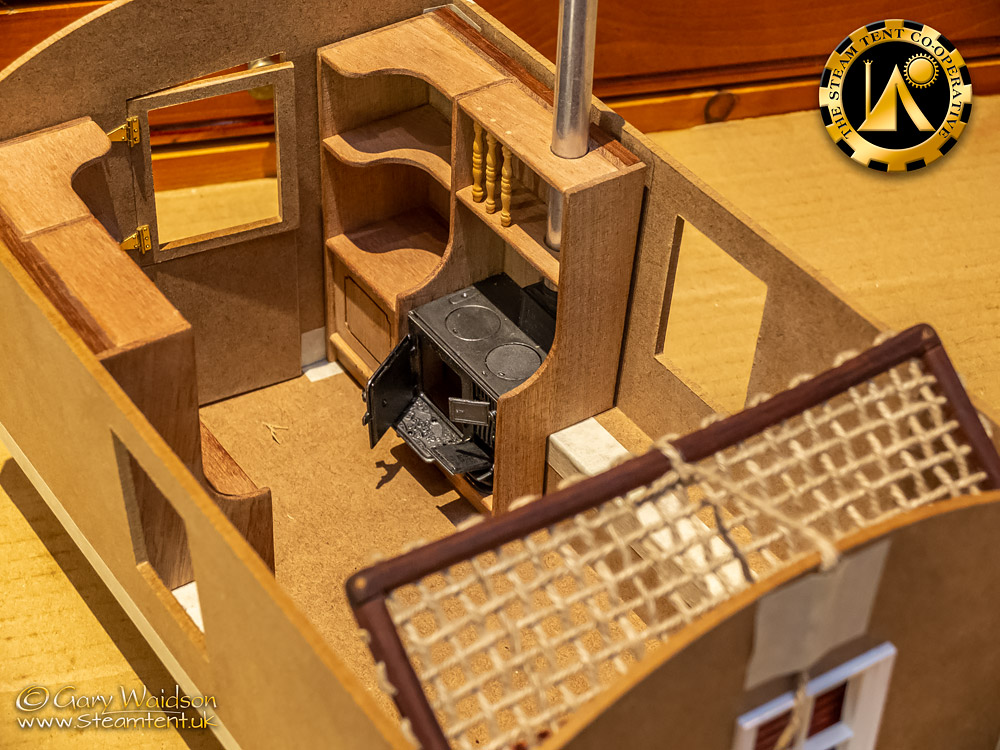
I'm not going for a traditional caravan layout for this. I thought I would make it the way I would set out the interior.
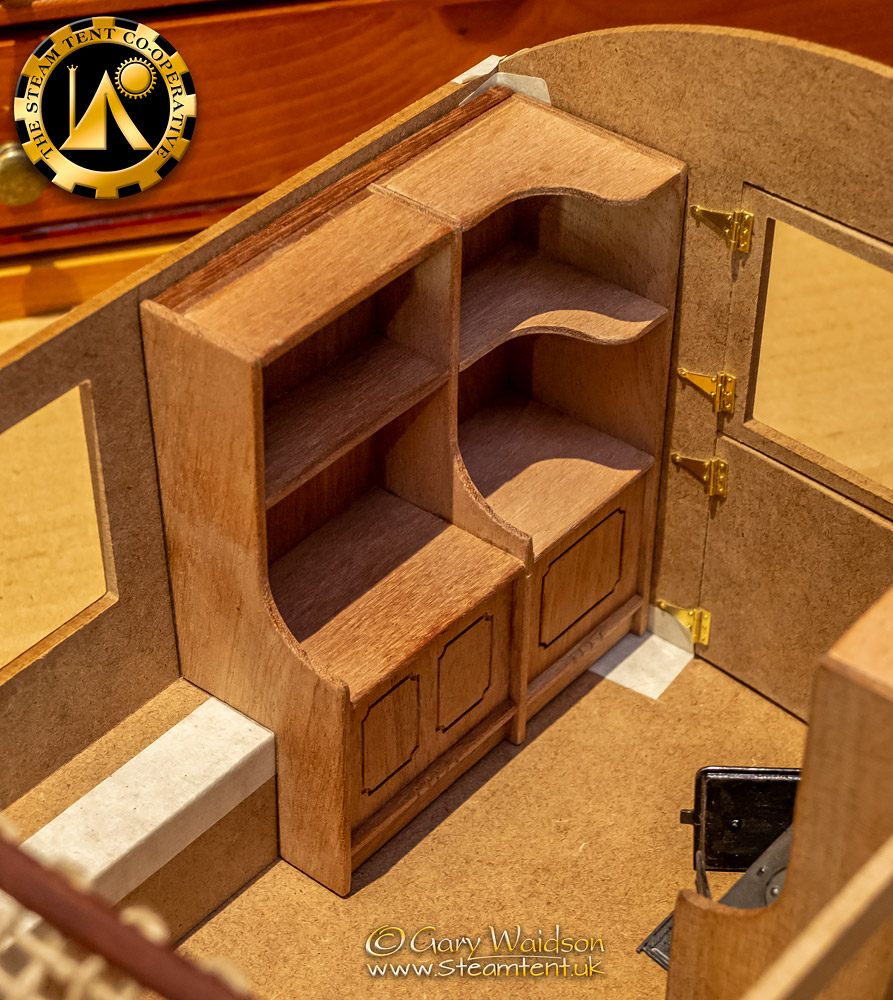
The supplied furnishings for the doorway end seemed practical enough but the other end was completely taken up by the bed.
I wanted something more like an adventurers study with a writing desk and all.
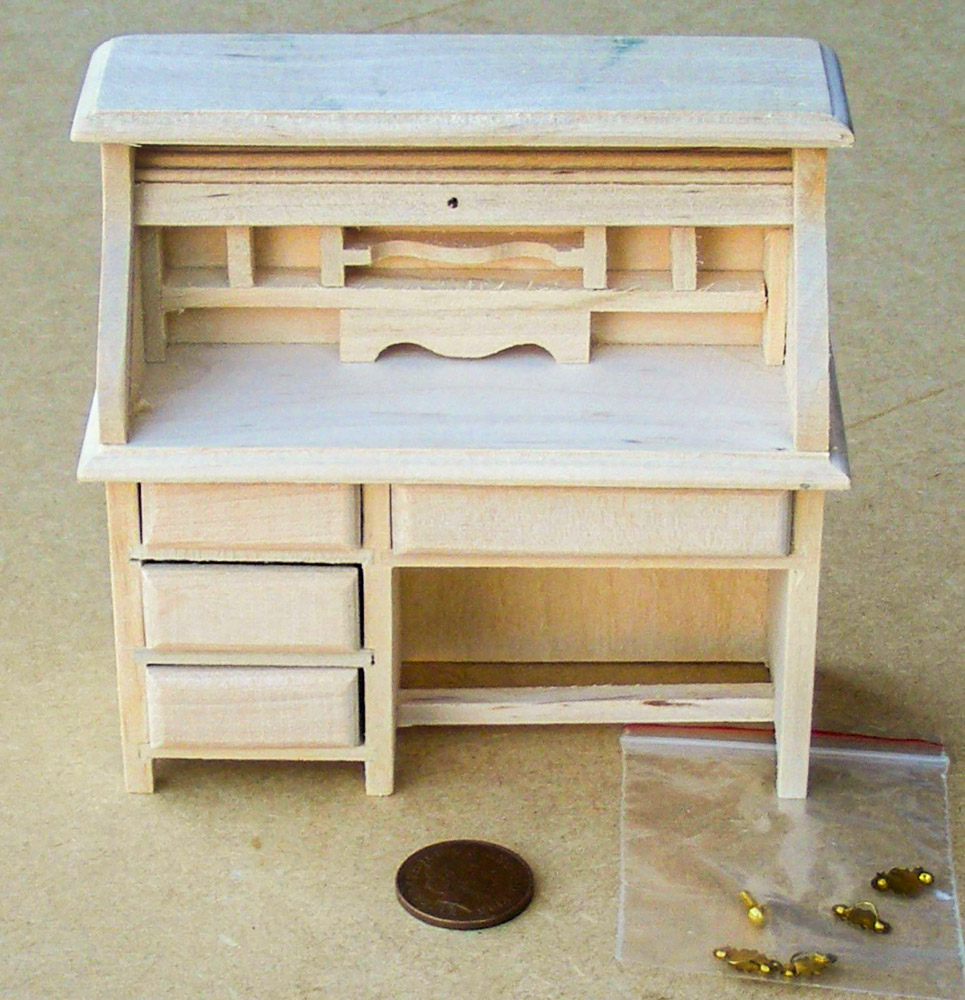
I found this on FleaBay, which looked adaptable enough and when it arrived I set to work on it.
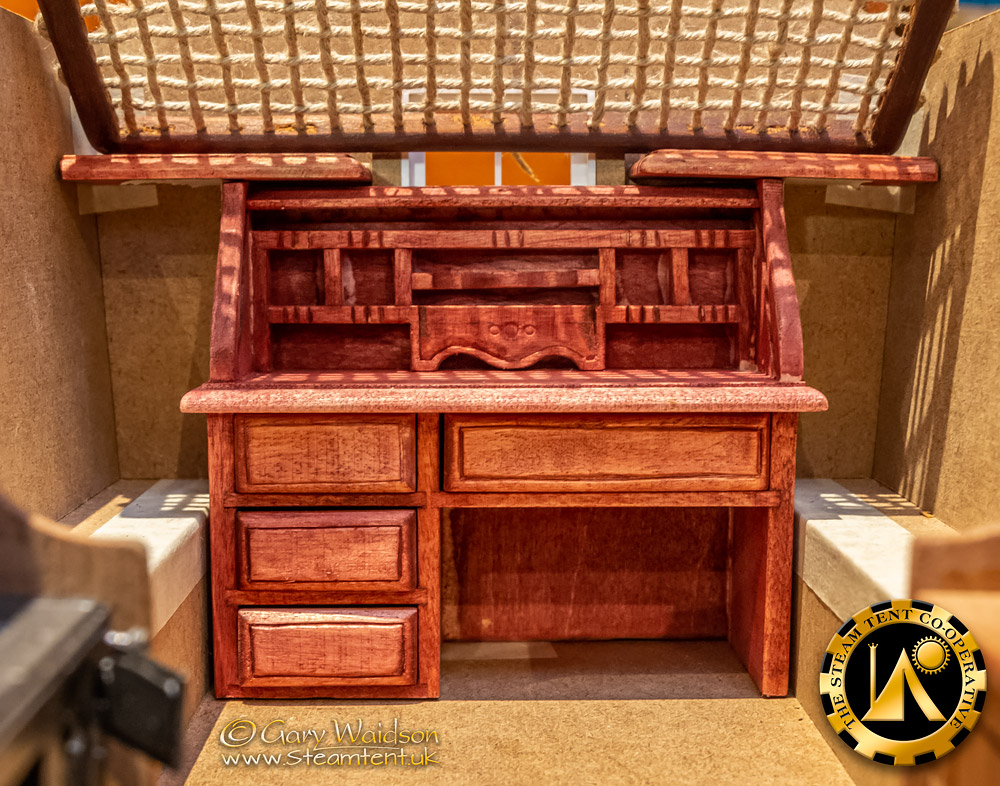
A little off the height, some simple carving and it fits with just enough room for a rope framed bed to sling over the top of it.
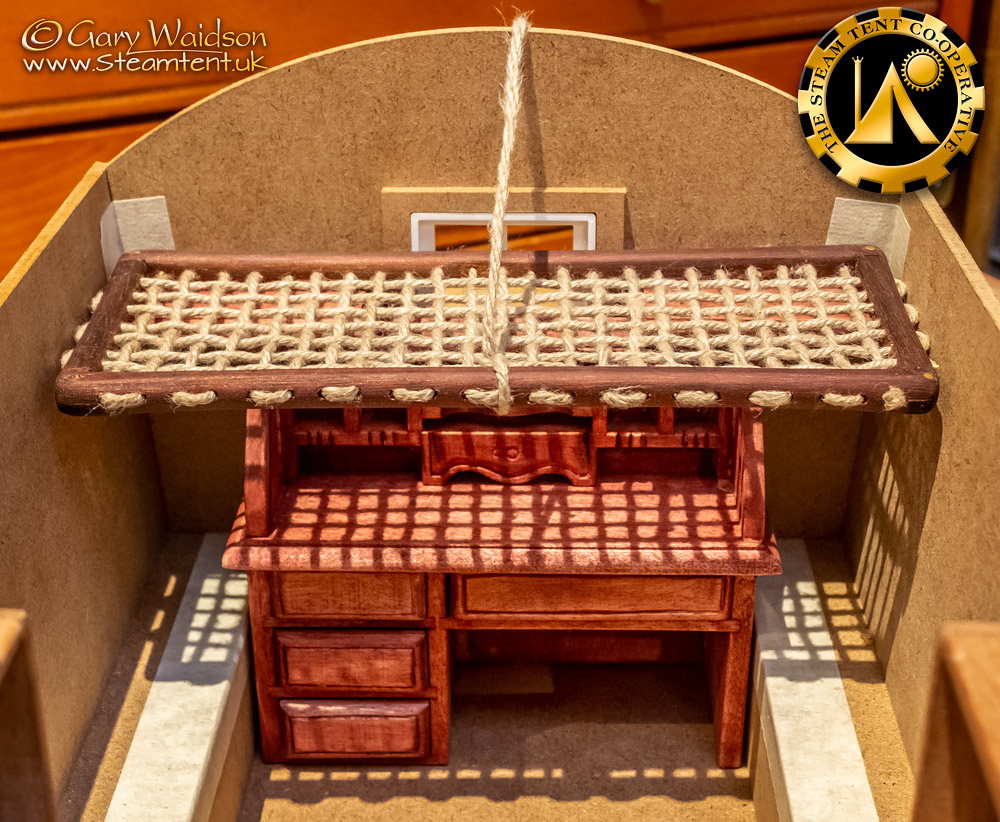
I'll work out the fine detail of hanging it later.
A decent enough start I reckon.
I quite like the 1/12th scale that dolls houses use for the wide availability of accessories and while looking for something for the dolls house, I came across a Gypsy Caravan kit by McQueenie Miniatures which caught my interest somewhat.

Treating myself for jól, I ordered one and this is what arrived. I've just taped the major parts together here to check the fit ( all good ) and suss out what modifications to make. ( It wouldn't be me if I just put it together as standard. )

The first parts I put together were the two internal furnishings that came with the kit. Simple enough although I added some spindles to make a plate rack over the stove. Then I turned my attention to the white metal stove.
It was supplied with a wooden stove pipe which I swapped for a section of aluminium tube I found in the workshop and looking at the instructions it seemed that the stove doors were made to be glued either open or shut. Well there's my first challenge, that's not good enough, I want properly hinged doors...
Out came the pin vice and a half mm drill bit. Sorting through Deb's pin cushion I foud three suitable pins and the workshop provided some ss wire to build hinges for the drop plate.
An hour or so later, opening doors all sorted.

I'm not going for a traditional caravan layout for this. I thought I would make it the way I would set out the interior.

The supplied furnishings for the doorway end seemed practical enough but the other end was completely taken up by the bed.
I wanted something more like an adventurers study with a writing desk and all.

I found this on FleaBay, which looked adaptable enough and when it arrived I set to work on it.

A little off the height, some simple carving and it fits with just enough room for a rope framed bed to sling over the top of it.

I'll work out the fine detail of hanging it later.
A decent enough start I reckon.
Last edited:
That's cool, I often see things I want to make but finding the time seems to be hard. That's a lot more appealing than a dolls house I have to say.
Good job on the mod, and I'm looking forward to seeing the end result...
Good job on the mod, and I'm looking forward to seeing the end result...
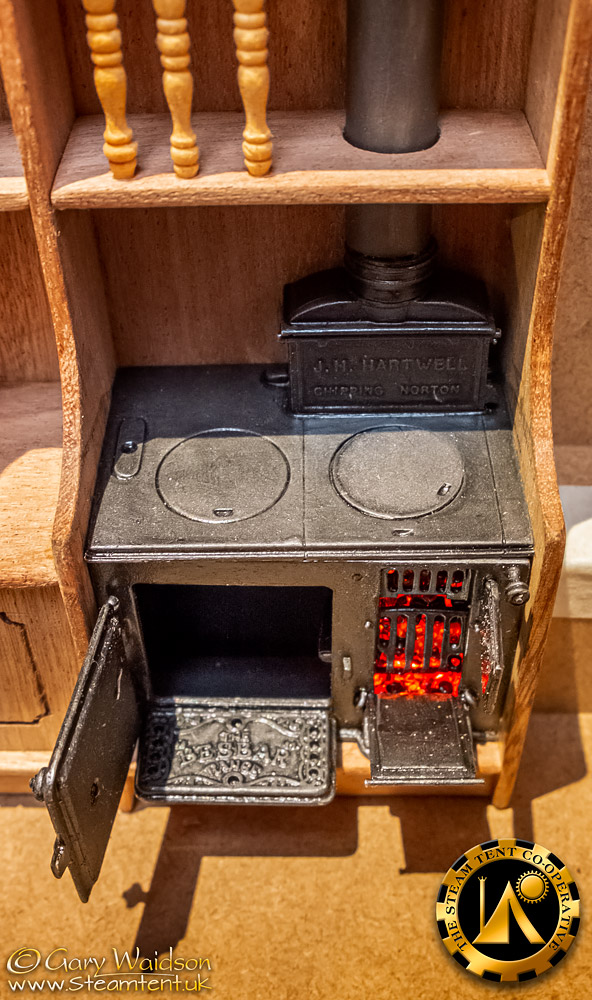
This is why I modified the stove doors to be openable. I wanted to build an illuminated "fire" in the grate.
I've used a mixture of red, orange and black seed beads imbedded in clear hot melt adhesive for the coals and they are illuminated by three flickering LEDs, red, yellow and orange. The differing positions and colours create subtle shifting light and tone through the translucent beads, creating a very realistic effect I think.
Last edited:
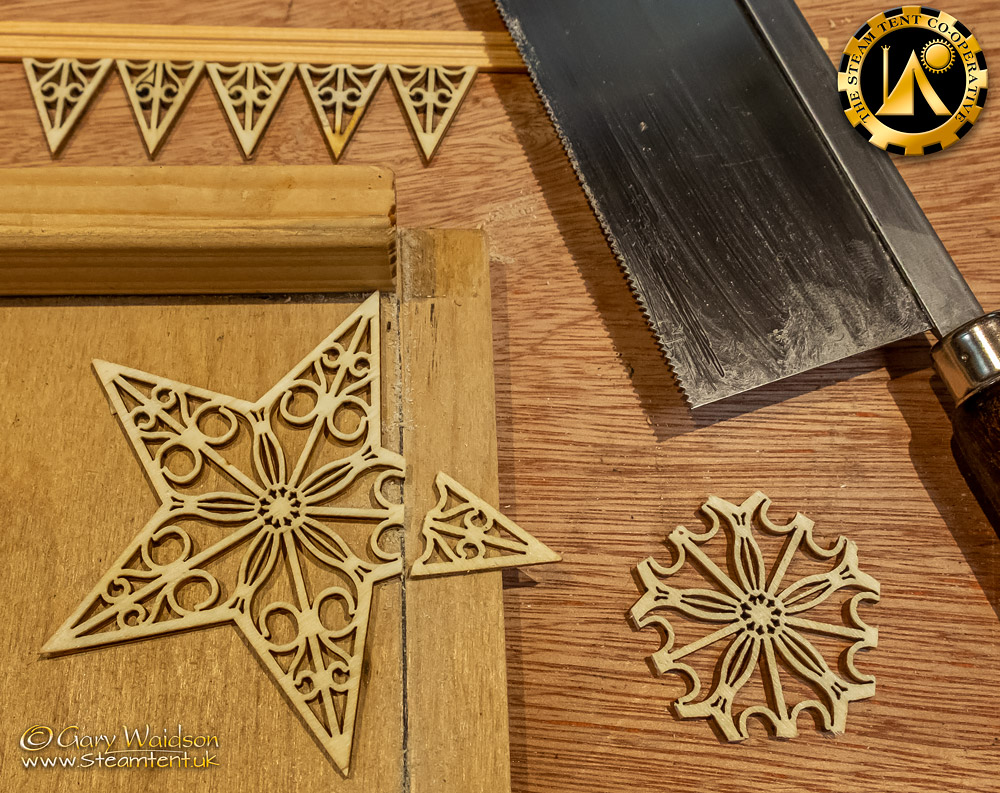
Today I have mainly been butchering Xmas decorations.
Laser cut plywood stars which will provide some nice "carved" elements for decorating the side.
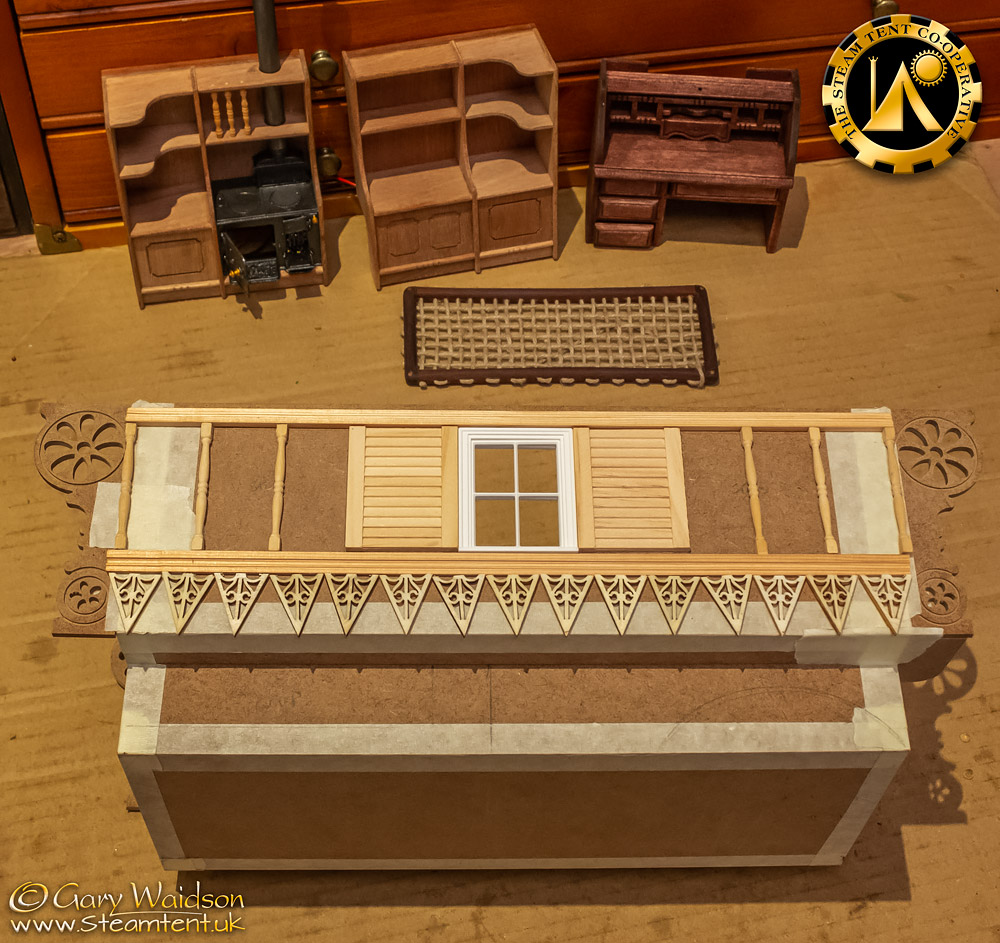
That's cool, I often see things I want to make but finding the time seems to be hard. That's a lot more appealing than a dolls house I have to say.
Good job on the mod, and I'm looking forward to seeing the end result...
I quite enjoyed working on the house. It's late Victorian/ early Edwardian so it fits in with the Steampunk aesthetic which interests me but I think I'm going to have a lot more fun with the Vardo.
That's realy cool Wayland. I made a vardo back in the 80s. Can't remember what happened to it. Even had a tacked up China horse for it.
I still have a half finished dolls house that I started in the 90s.
I do like making the stuff for the inside such as books for the bookcases and things like that.
This year I made some wildlife dioramas in large matchboxes. Sadly no photos as they were gifts for the grandkids.
I still have a half finished dolls house that I started in the 90s.
I do like making the stuff for the inside such as books for the bookcases and things like that.
This year I made some wildlife dioramas in large matchboxes. Sadly no photos as they were gifts for the grandkids.
I'm starting to run out of space in my house for the stuff I make so making miniatures fills a satisfying gap for me.
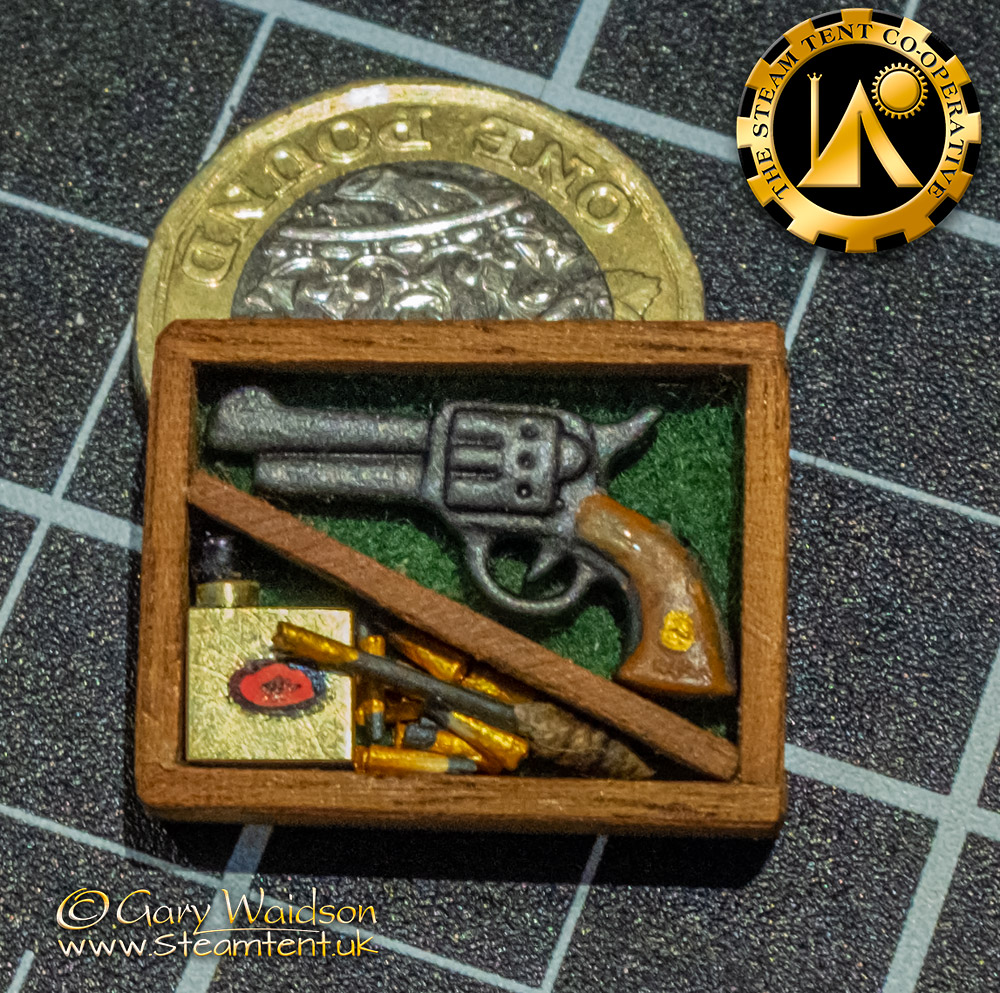
Not the best picture, my compact camera is playing up at the moment, but I've been playing around with some of the set dressing for the desk drawers.
The pistol was bought in but all the rest is scratch built and yes, the stopper does come out of the oil bottle.
Last edited:
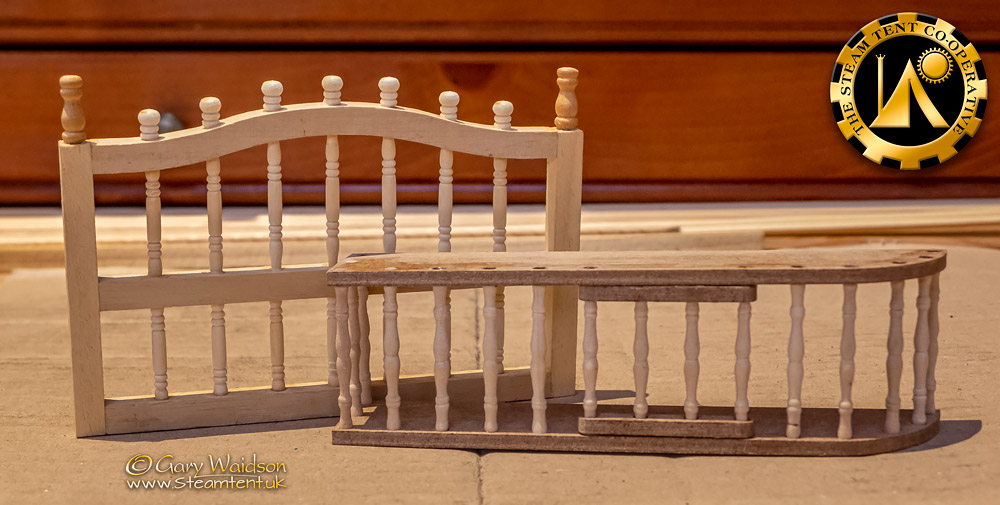
Yesterday I was working on some of the external fixtures, on the left is the cratch which slings at the back and one of the chicken coups, which mounts under the ledge above the wheel near the front. ( I'm replacing the other coup with a chuck box type affair. )
The kits for these fittings come with simple dowels for construction but I've replaced them with turned spindles because almost every peice of wood on the original caravans was carved, painted or turned.
I'm working out of the recommended order of construction because I want to improve details like this and have them ready when I start the main build.
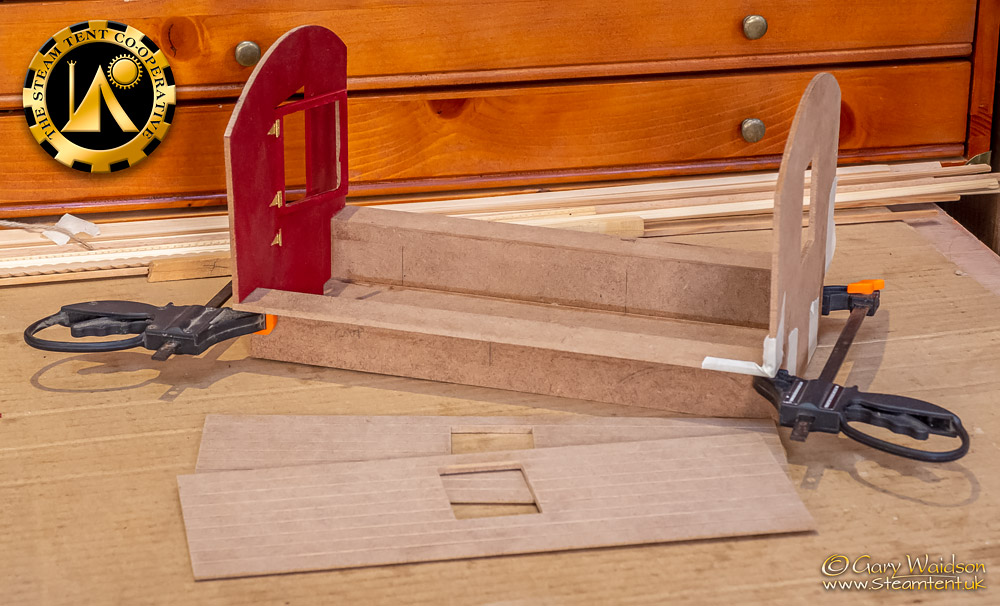
And so the build begins.
I bought a few of these little trigger clamps years ago and I've lost count of the number of times they have proved really useful. I'm using them here with a bit of masking tape as well to keep the joints nice and tight while the glue dries.
You can also see the first hint at the internal colour scheme in this shot. I painted the end wall before construction because it was easier to avoid the hinges that way.
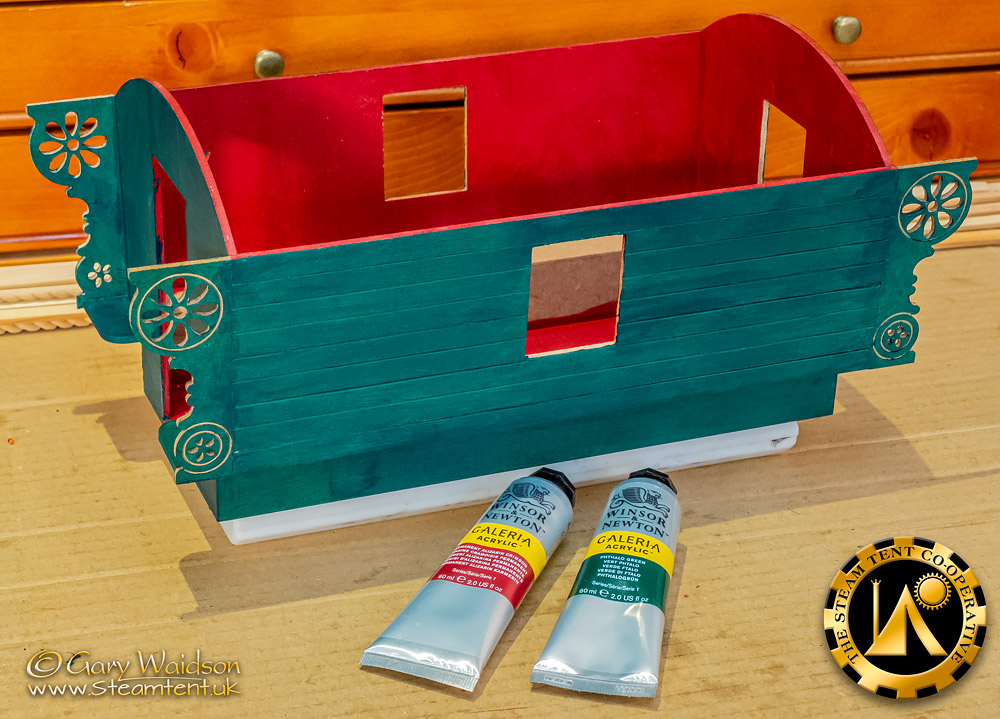
Here's the main body built and given their first base coats of paint.
This gives you a pretty good idea of the colour scheme with most of the undercarriage and detailing in Deep Hue Cadmium Yellow.
I've decided I'm going to keep the furnishings in waxed wood.
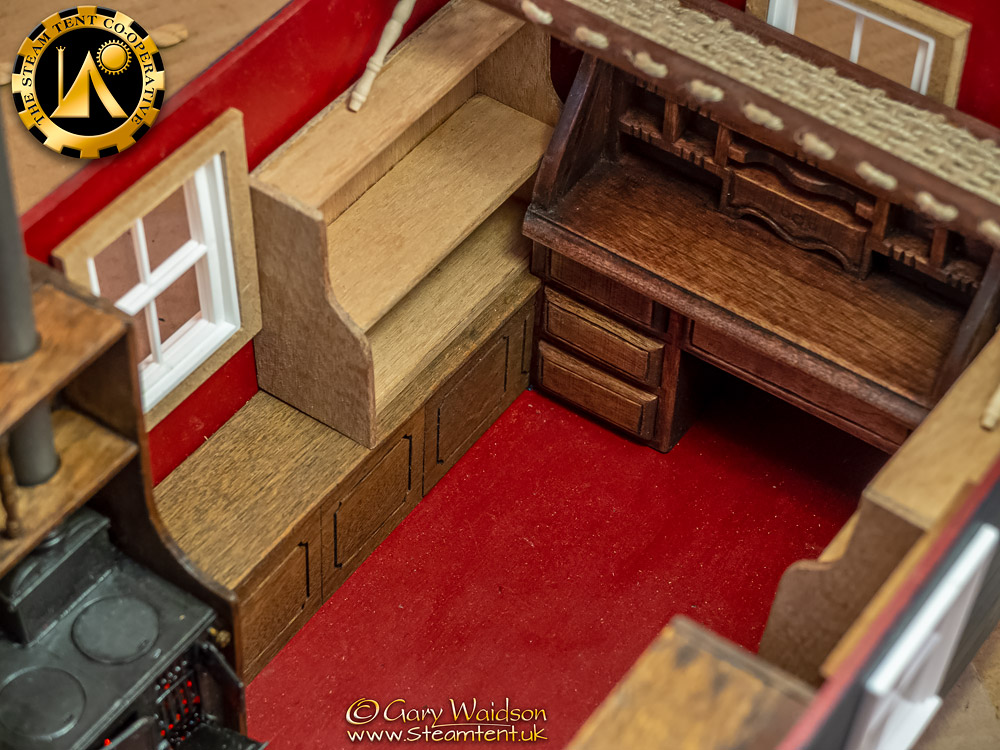
A bit more furniture for the Vardo.
First of all finishing the bench panelling. The original kit came with two side benches but only enough panelling to reach the bed cabinet. However, the bed cabinet also had panelling that were a close match to the bench panels so I butchered them to complete the side panels.
The corners by the desk had been nagging me a bit. Dead areas that couldn't be easily accessed or seen.
I wanted more shelving for stuff and I realised that a shelving unit could be made that would slide in and out of the corners. It would also provide the support for the rope bed in the sleeping position.
The glue is still curing so I haven't waxed them in this picture but you can see them here in the out position.
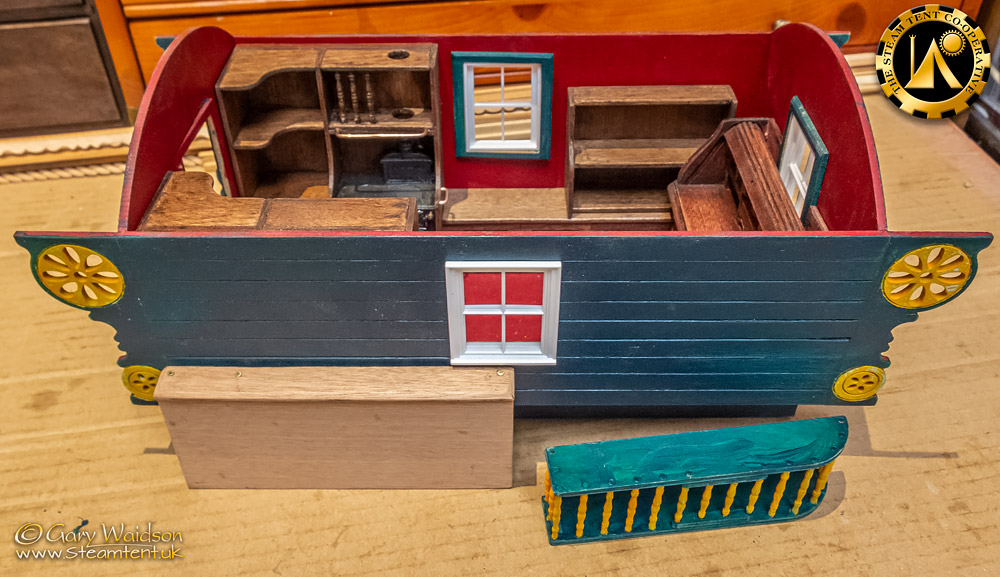
I mentioned that the kit came with two chicken coups but I was only using one, which will be mounted on the other side of the vardo.
Well, this is what I wanted the space for on this side.
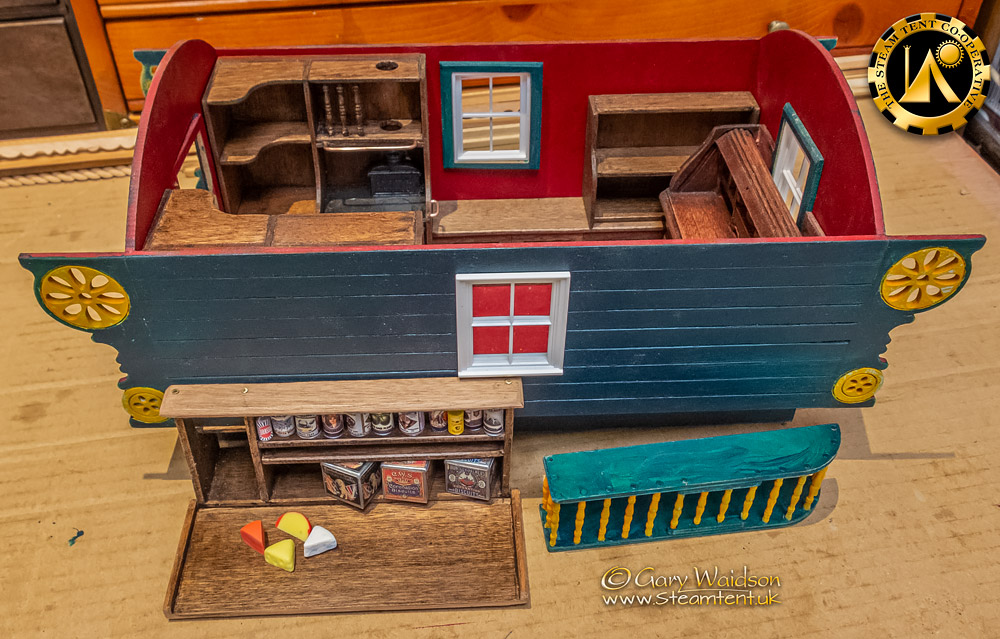
I'm definitely giving Riam credit for the inspiration for this. A wagon mounted chuck box with fold out table based upon the one he has on his Living Van.
Another scratch build from re-cycled mahogany. I'll paint the outside to blend in with the van but I've waxed up the inside as you can see.
If you compare the two pictures you can also see how the desk side shelving slides into the corner for transit.
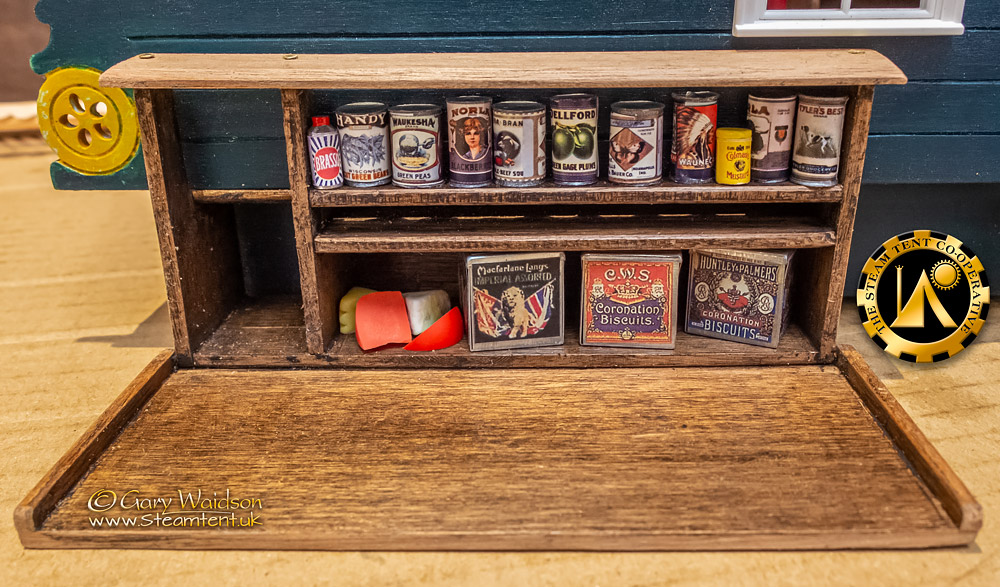
The space on the left will be a game larder and I will make some drawers for the narrow shelf which extends under the ledge.
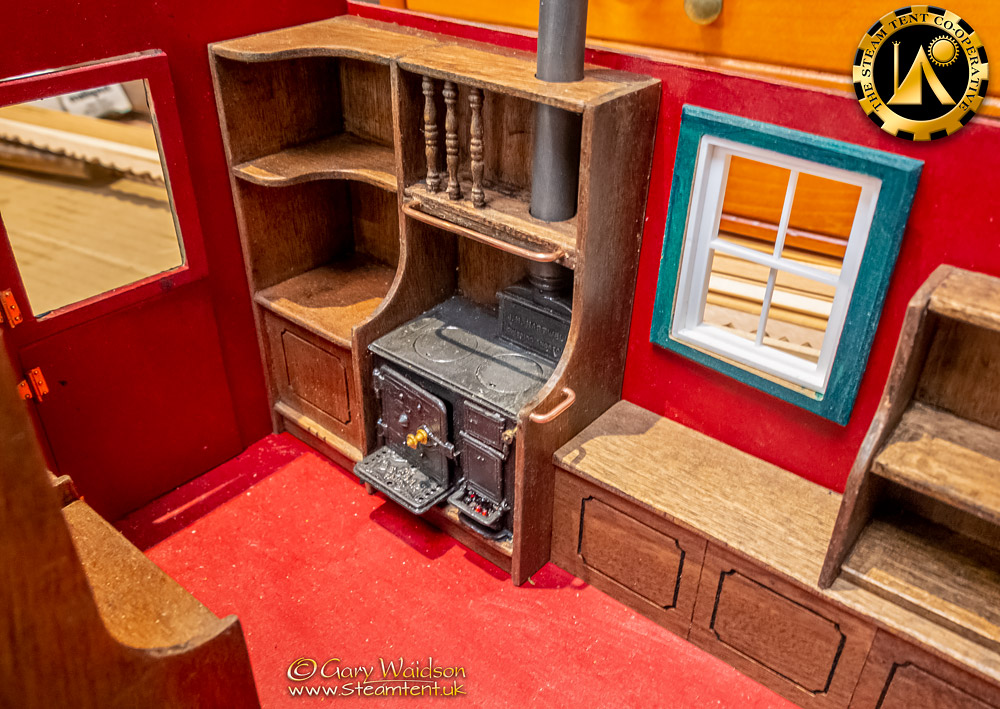
I also used a bit of copper electrical wire to make a couple of rails near the stove. One for utensils and the other for a towel.
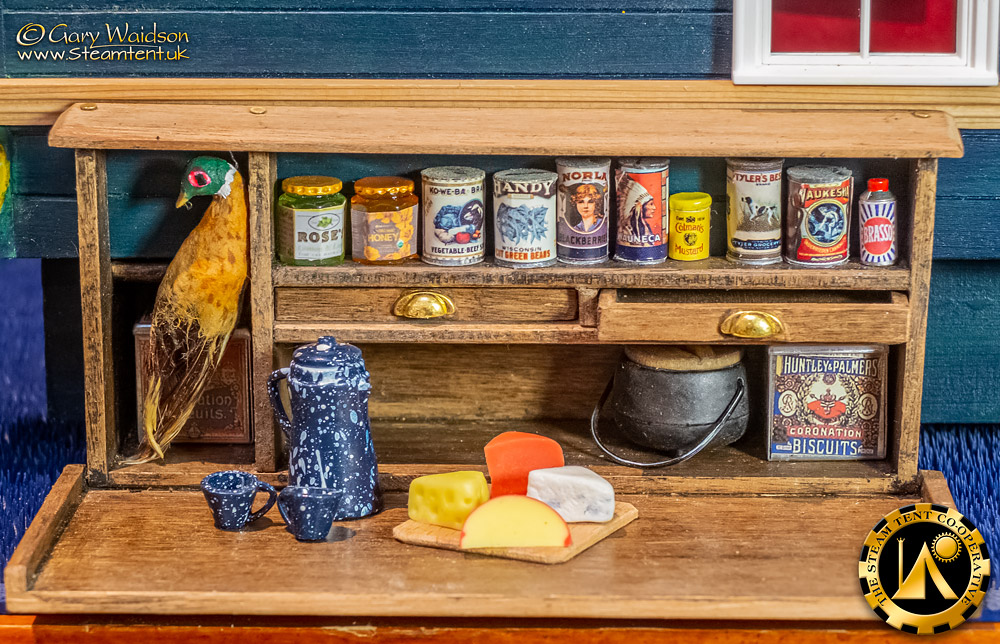
An updated picture now that I have fitted the drawers and the game bird has arrived.
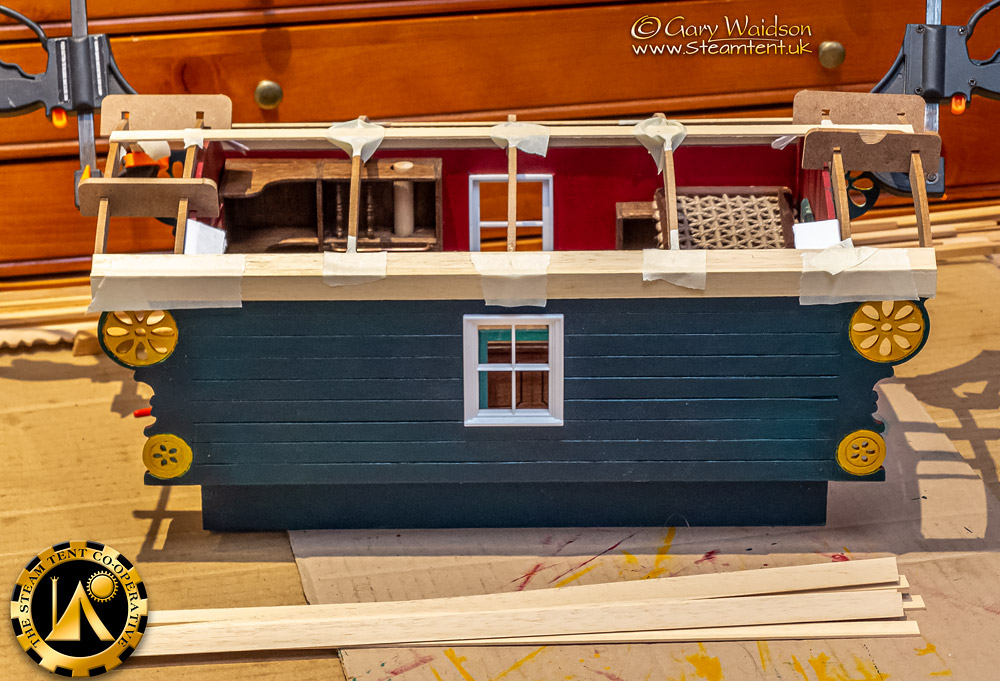
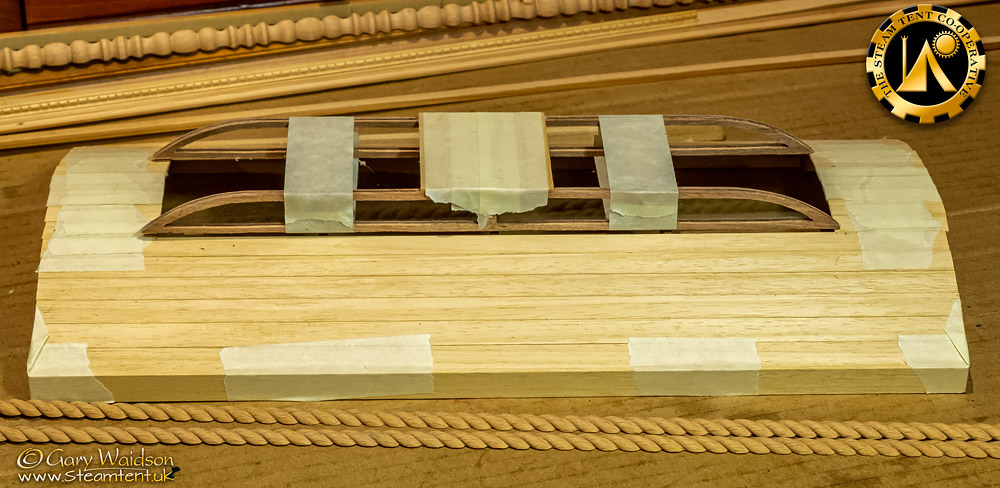
Here we go, one of the more complex jobs, constructing the roof.
The instructions are fairly straight forward and there are bits supplied to help you with the spacing but what the instructions do not mention is that this is a lot easier with a roll of masking tape to hold bits together while they glue.
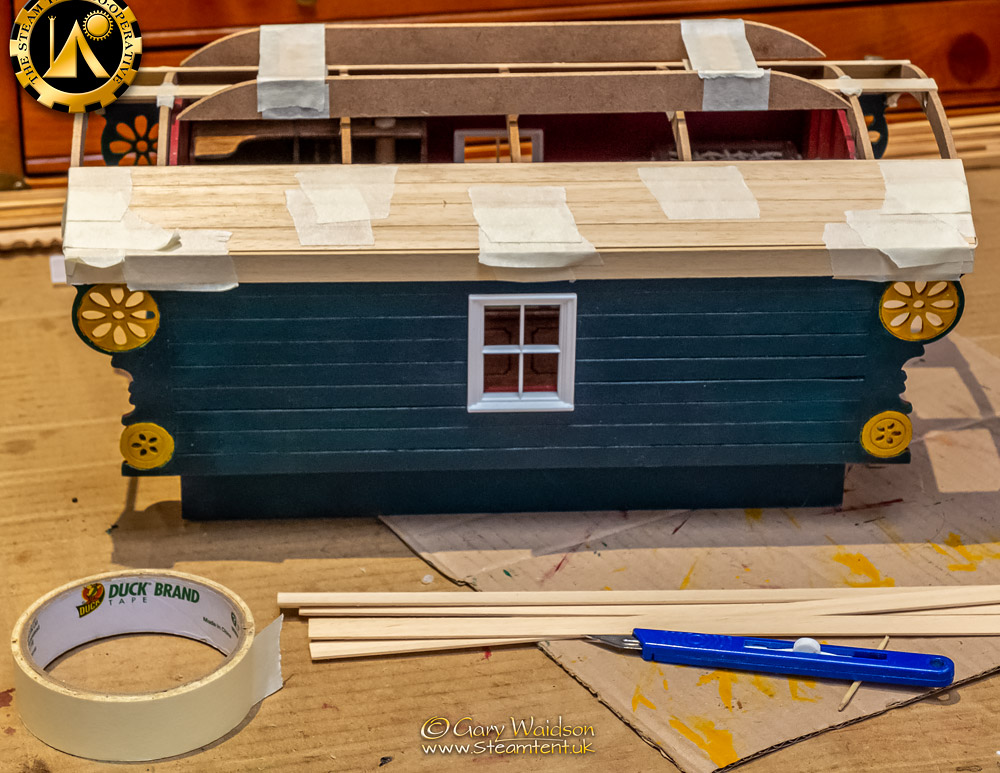
Again, I am modifying things a bit. The kit comes with a vent for the roof but the instructions just show it being added to the top instead of being a functional “mollicroft” which often had windows for extra light. You can see the position of the non functional vent in this picture.
To do this properly, the roof needed to be put together a bit differently. First of all, it will need better structural integrity so instead of just spot gluing the planks to the ribs they are also glued along the edges to the adjacent planks.
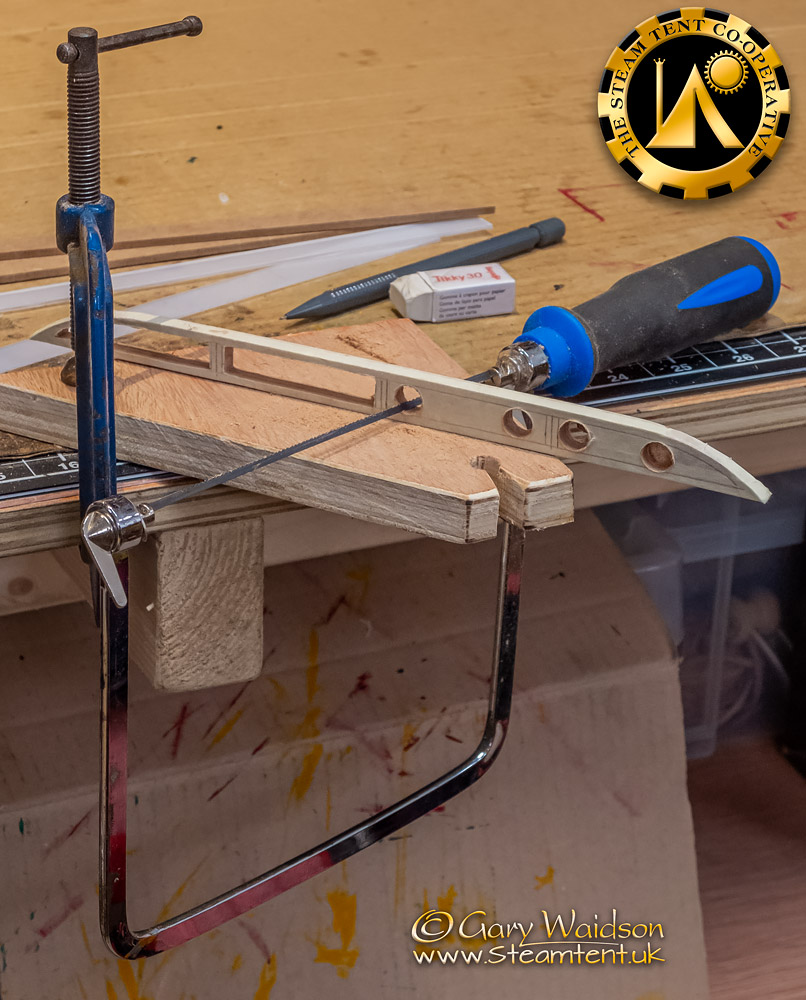
To make the windows I taped together four strips of wood and set to with a coping saw.
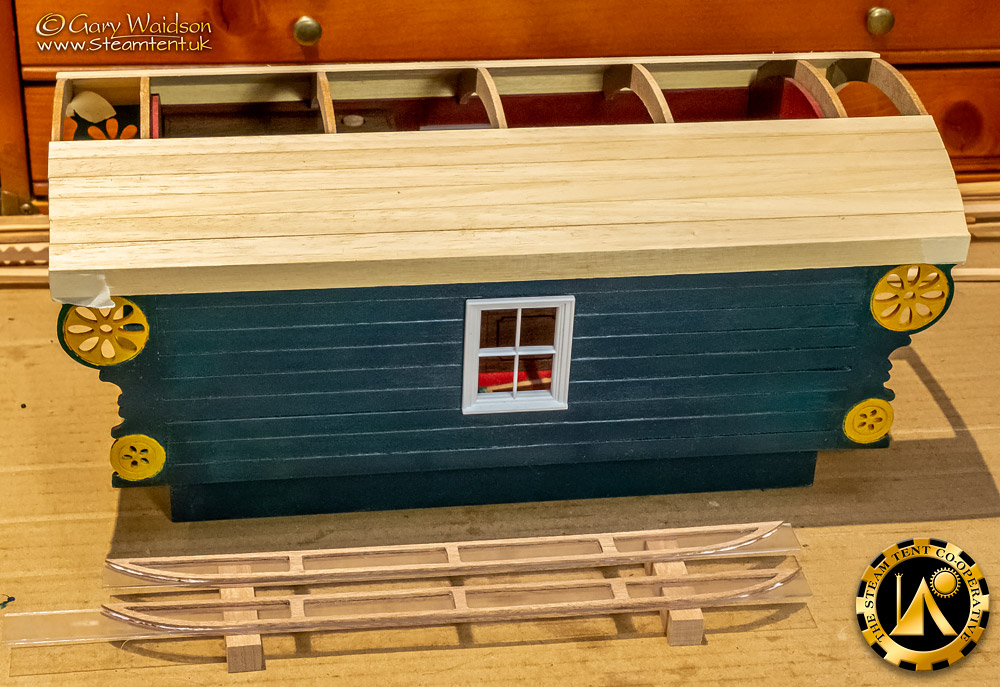
These pierced strips were then glued to a glazing strip and the whole composite will be shaped to match and replace the original vent walls.
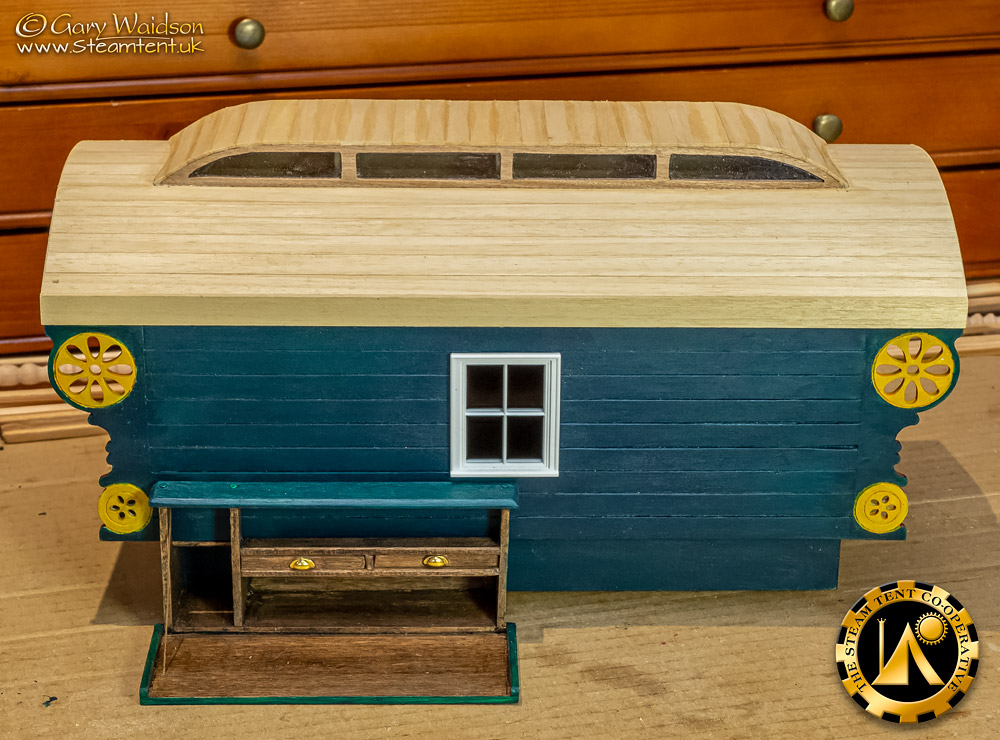
This is the completed roof and mollicroft.
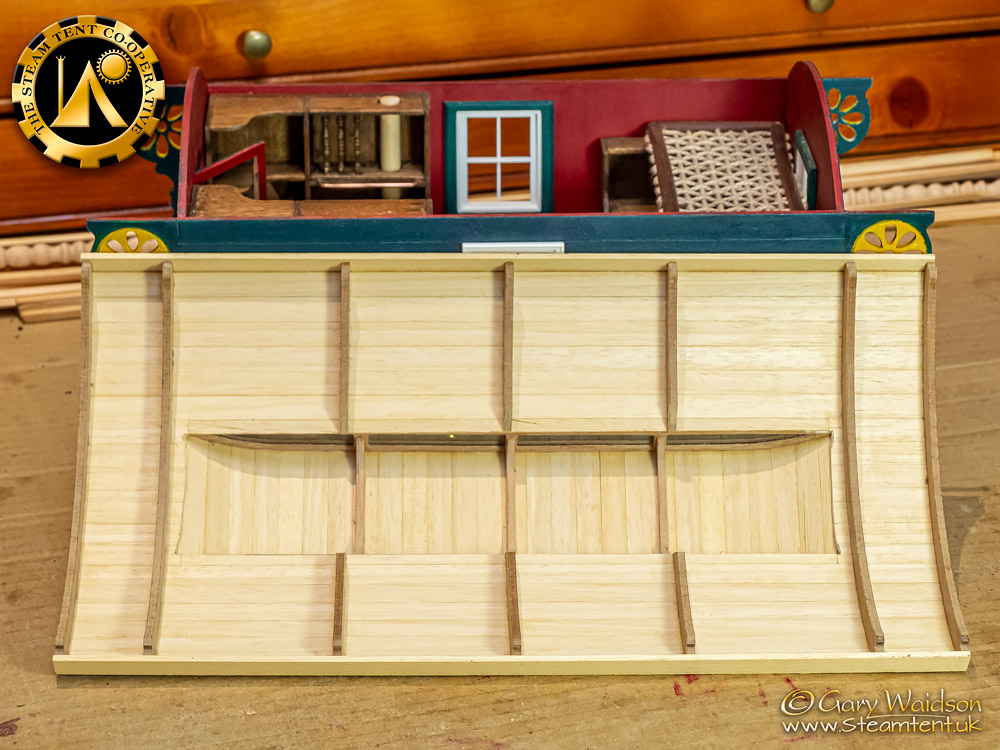
And the roof turned over so you can see the construction inside.
If I had planned it a bit better I would have set the roof braces in a position that would line up with the mollicroft braces but that’s too late now.
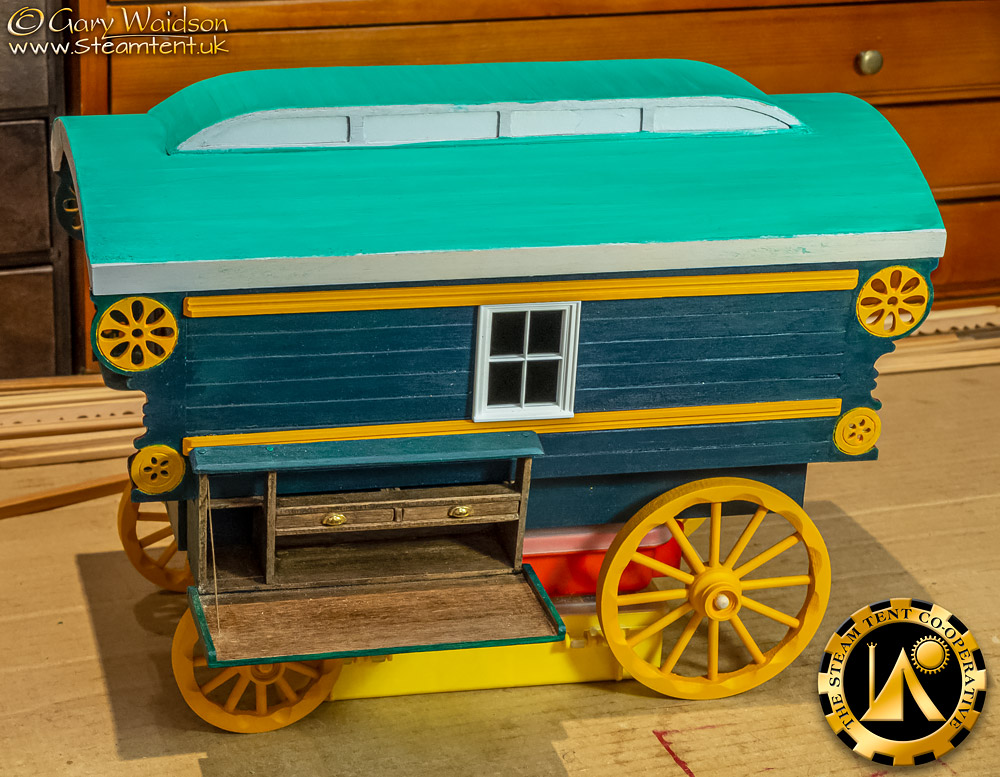
A good number of pictures and illustrations of traditional Vardos show them with mint green roofs, presumably roofing felt of some kind.
I’m aiming for something along the same lines although it will be darker than thins base coat.
You can also see the window boards have been fitted now, the first parts of the applied decoration for the outside on the van. I’ve masked the mollicroft windows for painting.
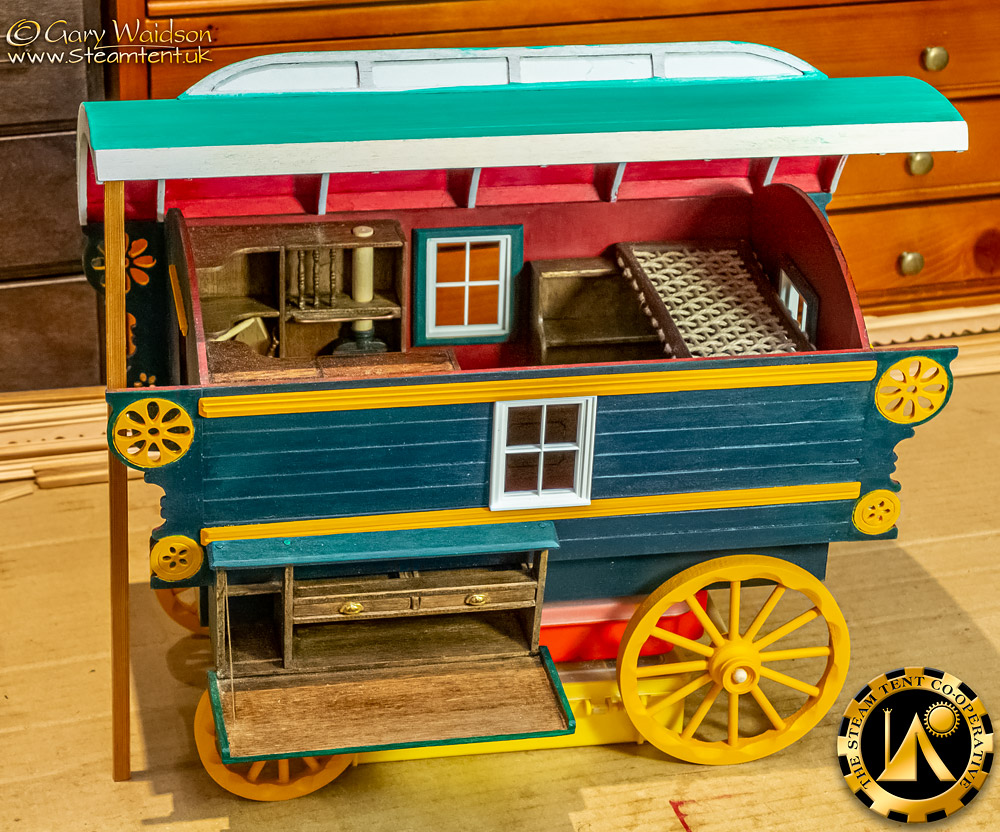
When displayed, it will have the roof propped open, more or less as you see it here. I’m putting some thought into the idea of adding a mirror somewhere so the near side interior can be viewed as well.
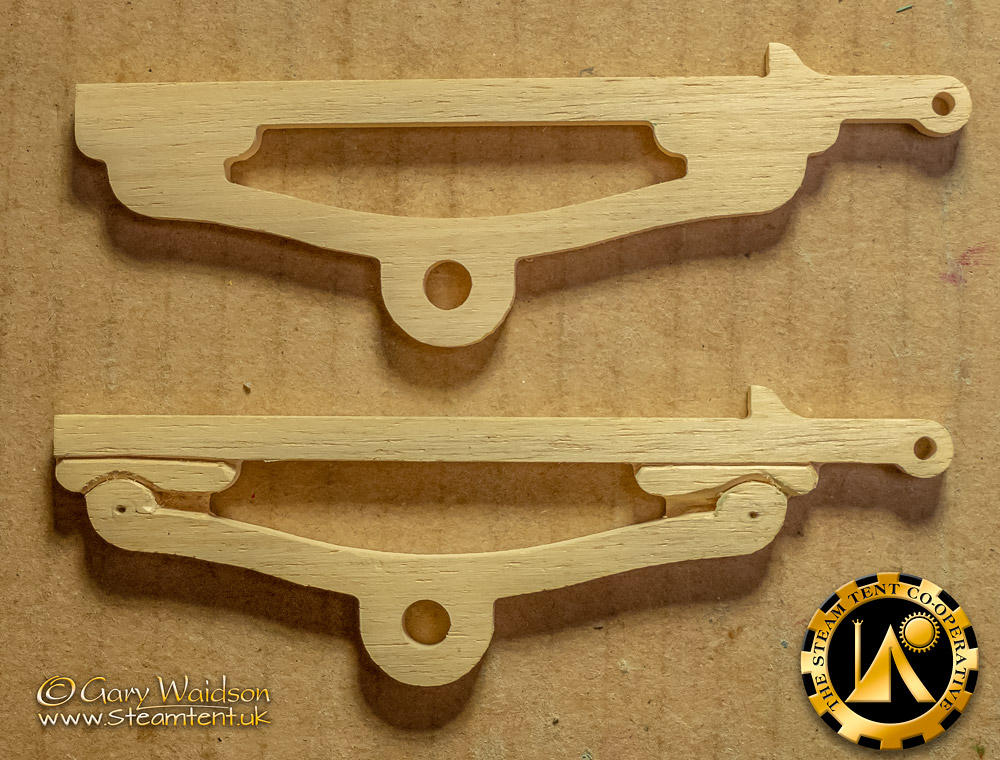
Turning my attention to the under carriage, I looked at the axle mountings first. These are made to simulate the leaf spring suspension but as simple cut outs they looked a bit crude.
In fairness, they live behind the wheels and are not easy to see but you can see them so for the sake of a few minutes carving with a craft knife, putting a little more detail into them is worth the effort.
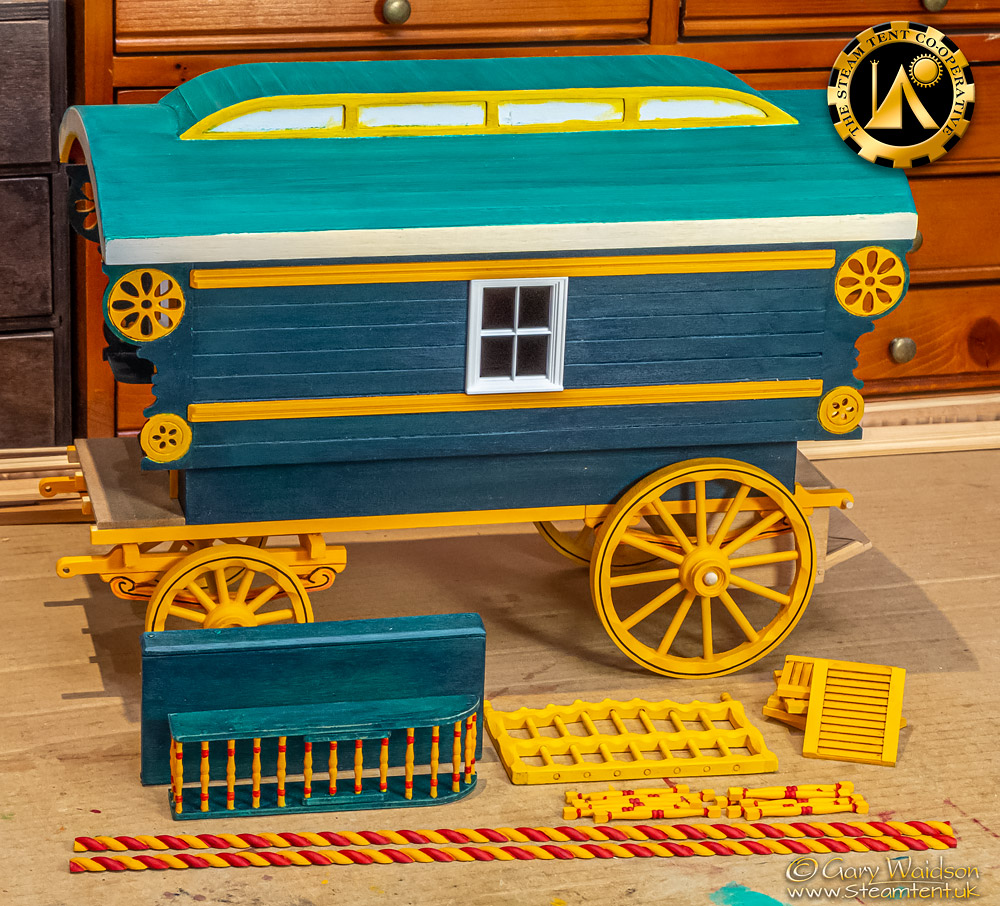
It's on wheels now.
You might also notice the back box behind he rear axle. This is another storage area with a drop front for display. What will not be on display is the power distribution board the sits in the top of the box.
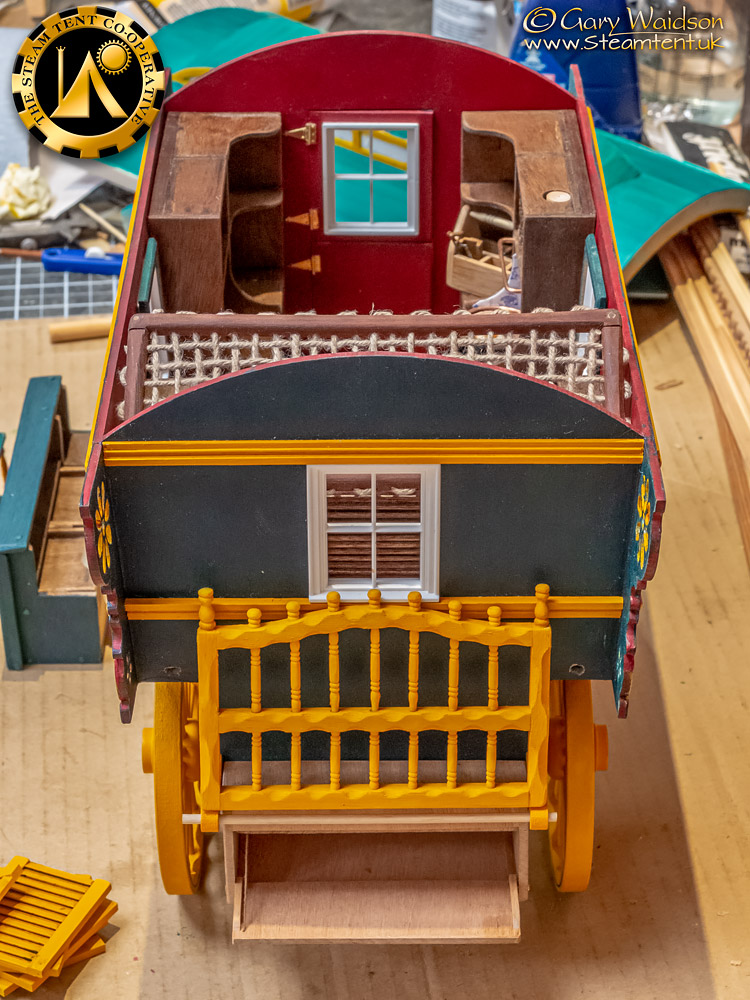
The cratch has had it's first coat of paint and the decoration for the roof edge has had it's last. The spindles are almost ready to go between the window bars and the shutters are in the process of being weathered.
Another view showing the back box in more detail.
You can also just see the wiring holes for the rear carriage lights.
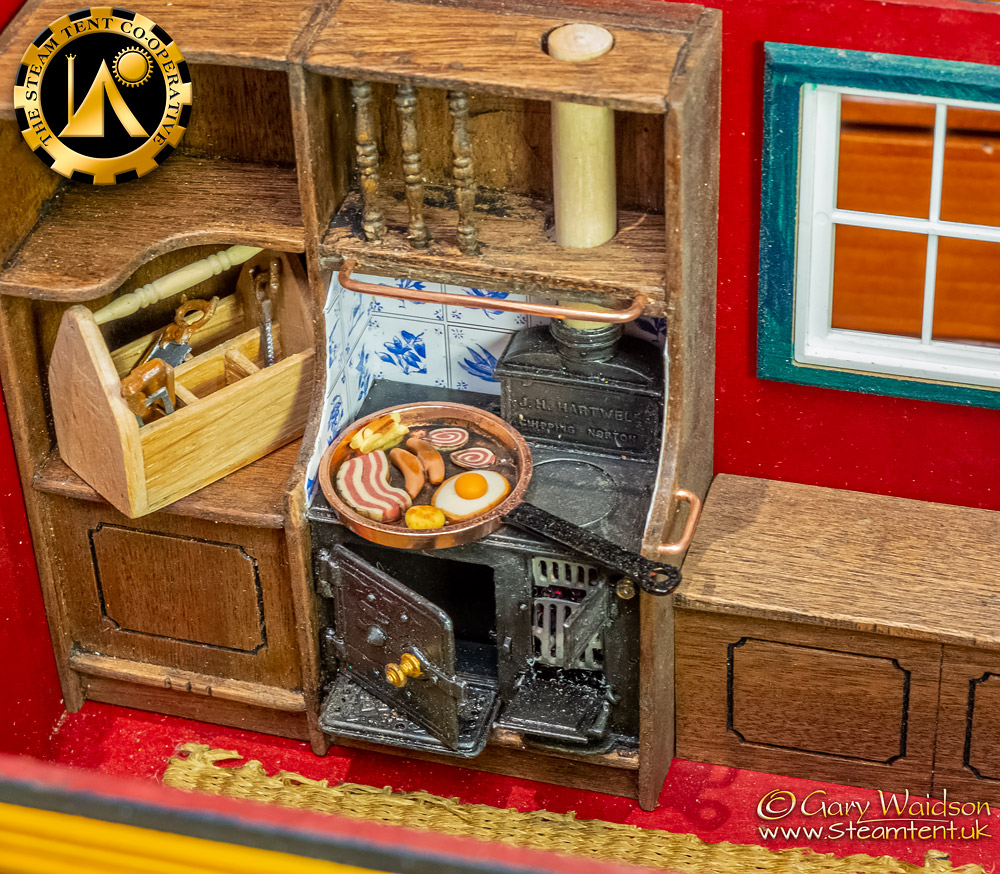
Inside, I've tiled around the back of the stove, built a tool box which needs more tools, Debs wove me a rush mat and someone appears to be having a fry up.
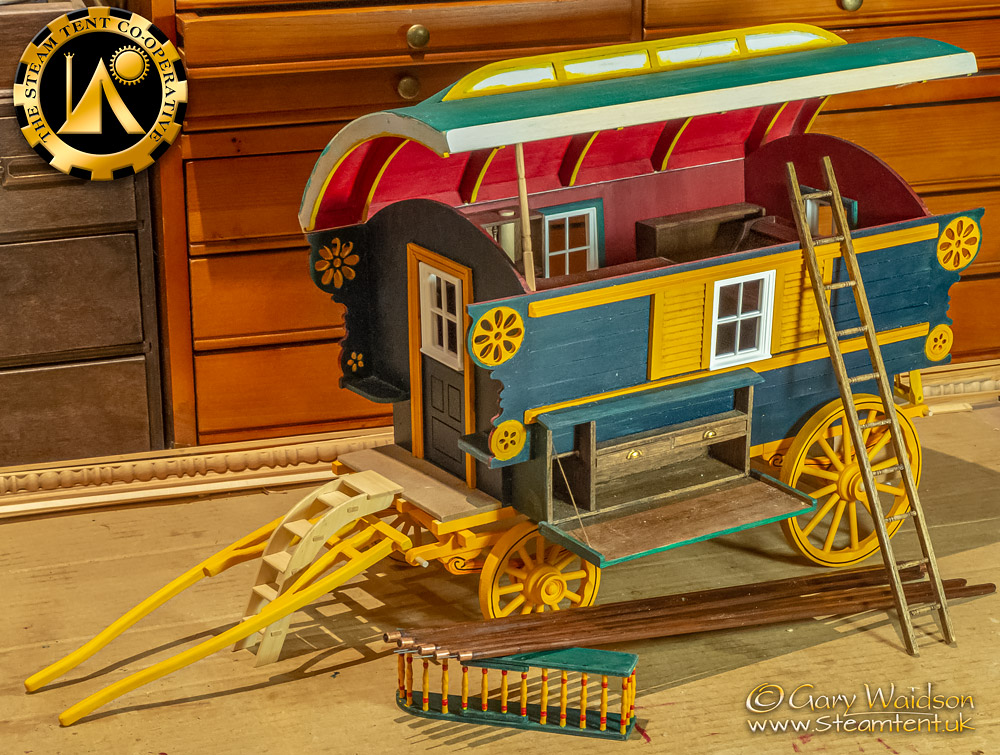
Small steps today, really small steps.
The steps that lead into the caravan come as part of the kit. I'll work on them a bit to make more of them.
something that came almost as standard with the original Vardos was a narrow ladder which slides under the van bed between the summer bars. Mine was made from the redundant window bars which I replaced and some more turned spindles.
Other than that, I've made some poles for the awning and I've attached the chuck box to the van body. ( Still got to do the chicken coup. )
I've also shaped up the shaft and given it a lick of paint ready for a few modifications.
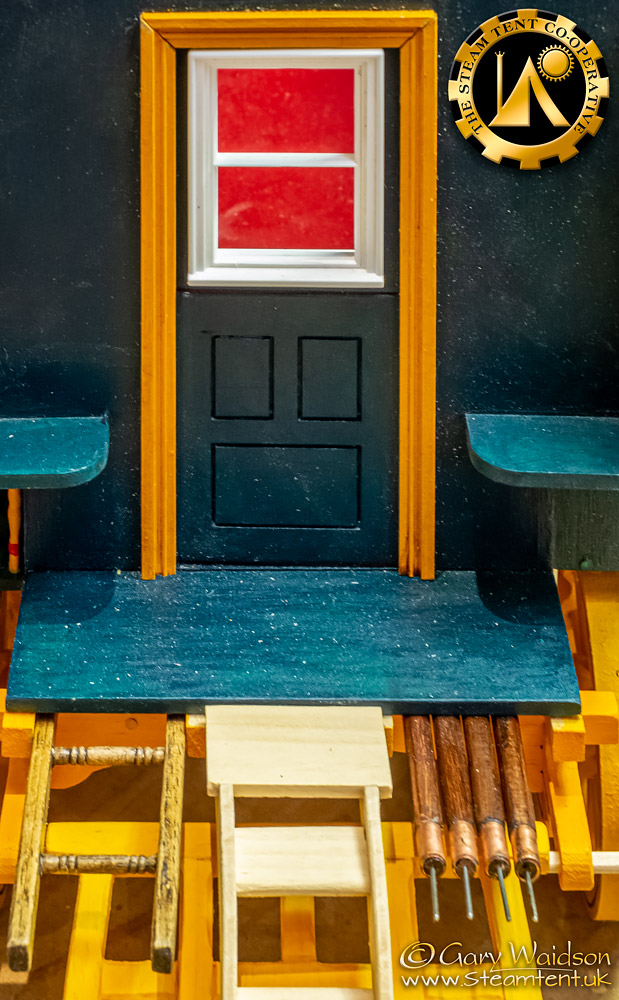
And just a quick shot to show you how the ladder and the awning poles stash away.
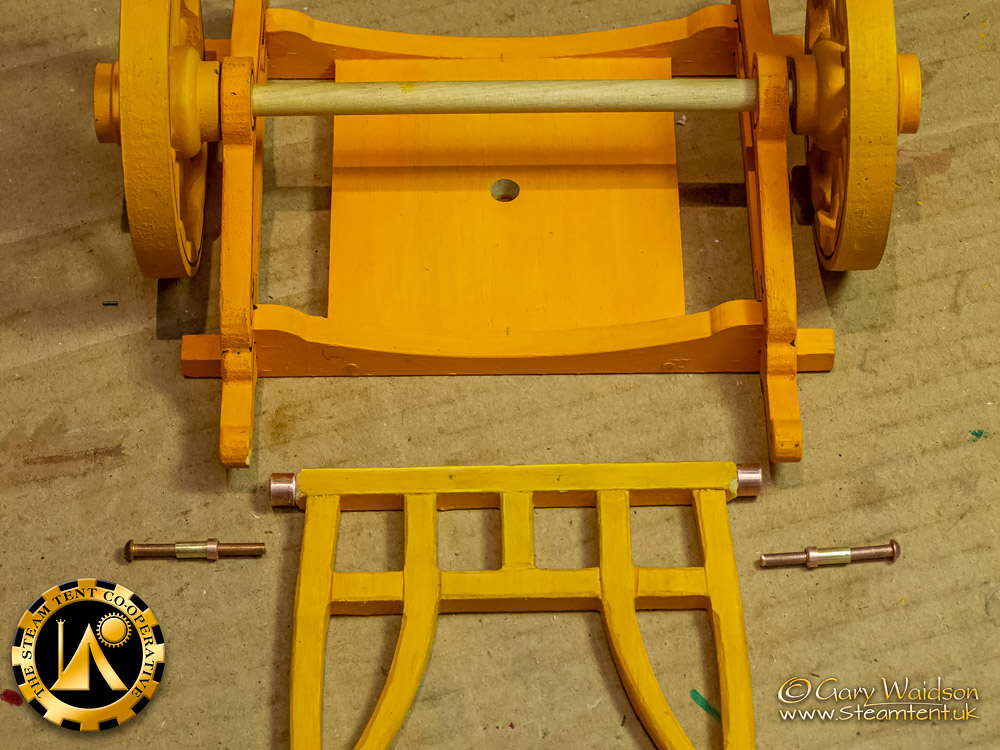
Sometimes it is the smallest of details that pushes a model closer to reality.
The kit came with a simple and practical method for mounting the shaft which mimicked some of the original Vardos but looked a bit “modelish”, if that makes sense.
As I looked for a better looking solution, I realised that it would not be that difficult to do it properly by building a simple bearing using scraps of piping from my store.
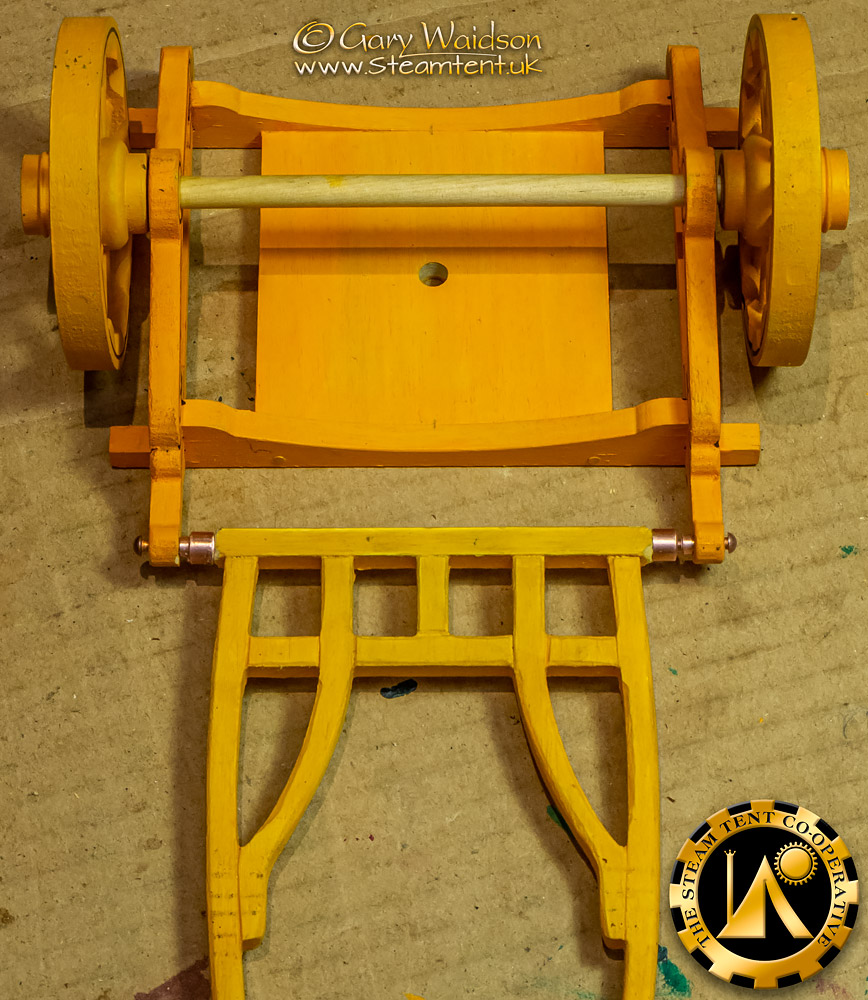
There was always a reason things were done certain ways and this is a good example.
The resulting pivot will be stronger than the kit method while still allowing the shaft to be easily removed for any reason in the future.
So, we have the shaft in place now and also the spindles between the window bars.
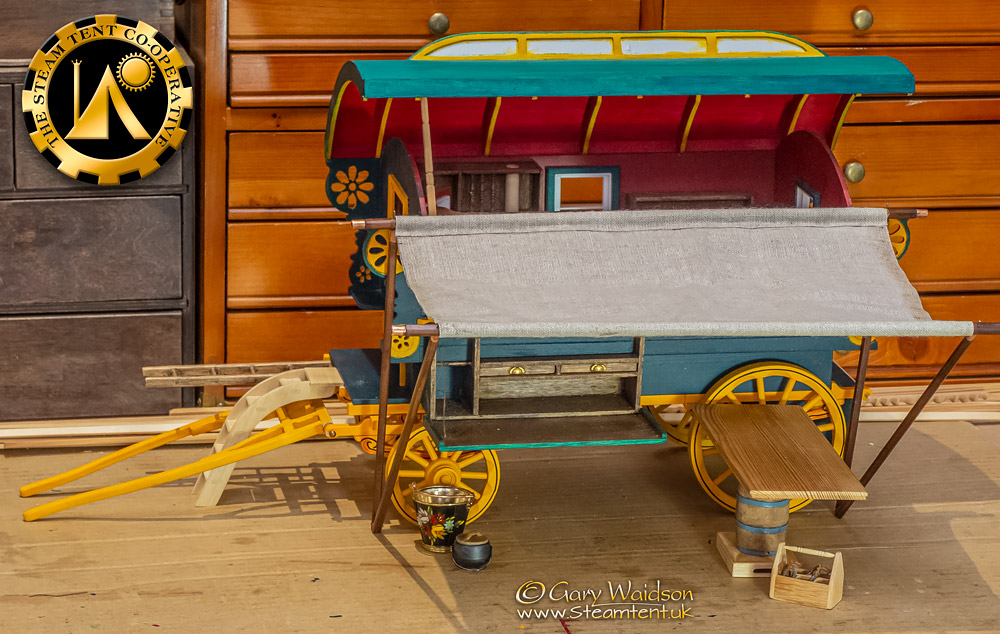
My intention is to set this out as a camp scene and for that an awning is a must in my opinion. The roof being open like this is for display as the originals were obviously fixed.
The table that you see here needs some proper legs, I’m just standing it on the barrel to check the fit.
I’ll add a camp fire with chitty irons and cookware at some stage too.
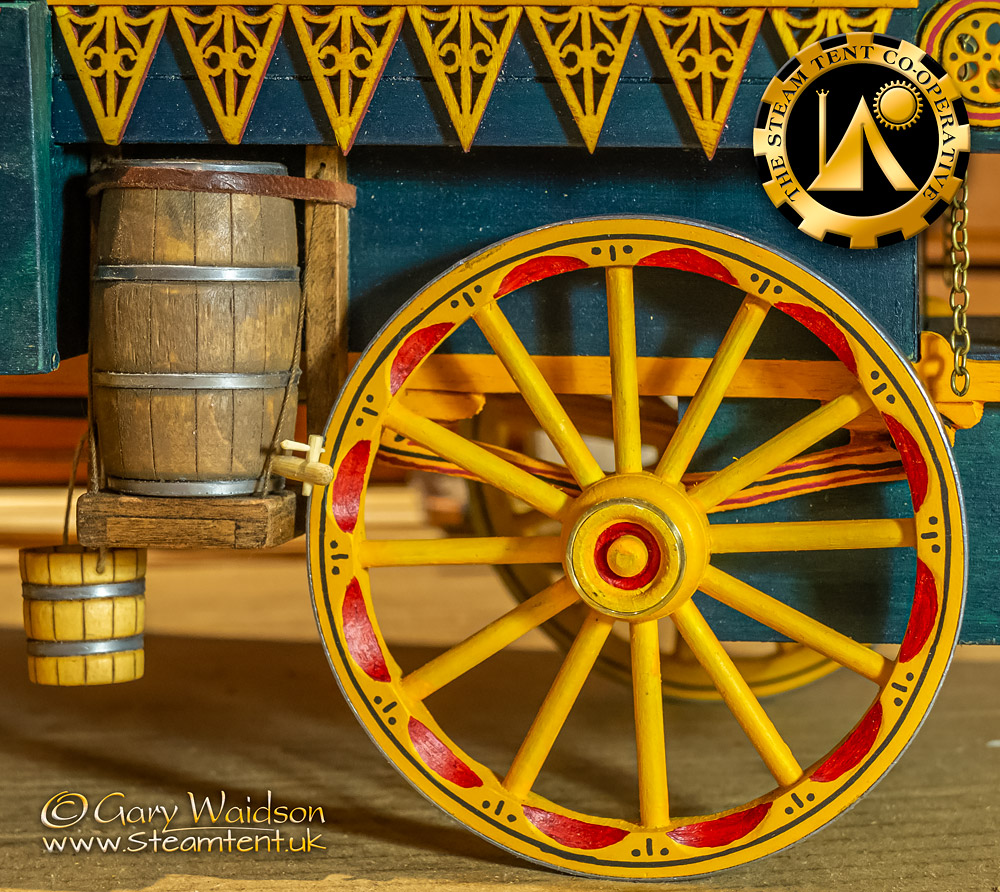
To tyre the wheels, I’ve used strips of self adhesive lead.
I used the same stuff for flashing on Debs dolls house roof which is what gave me the idea. It will dull down in time which should look better.
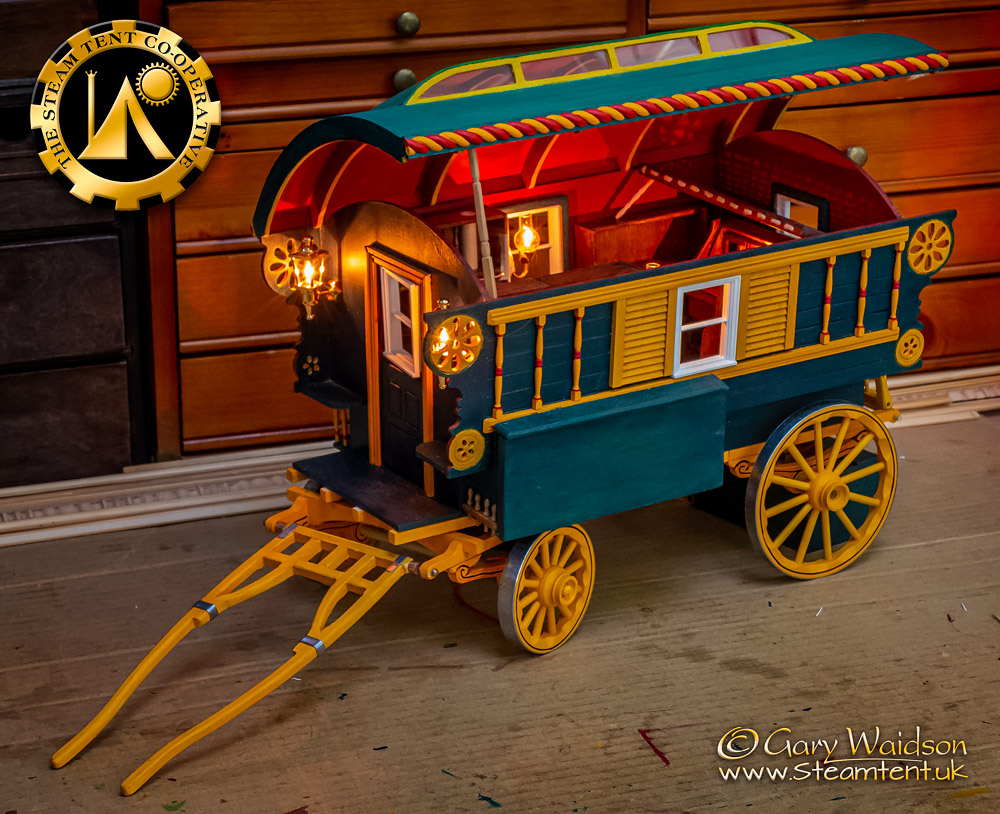
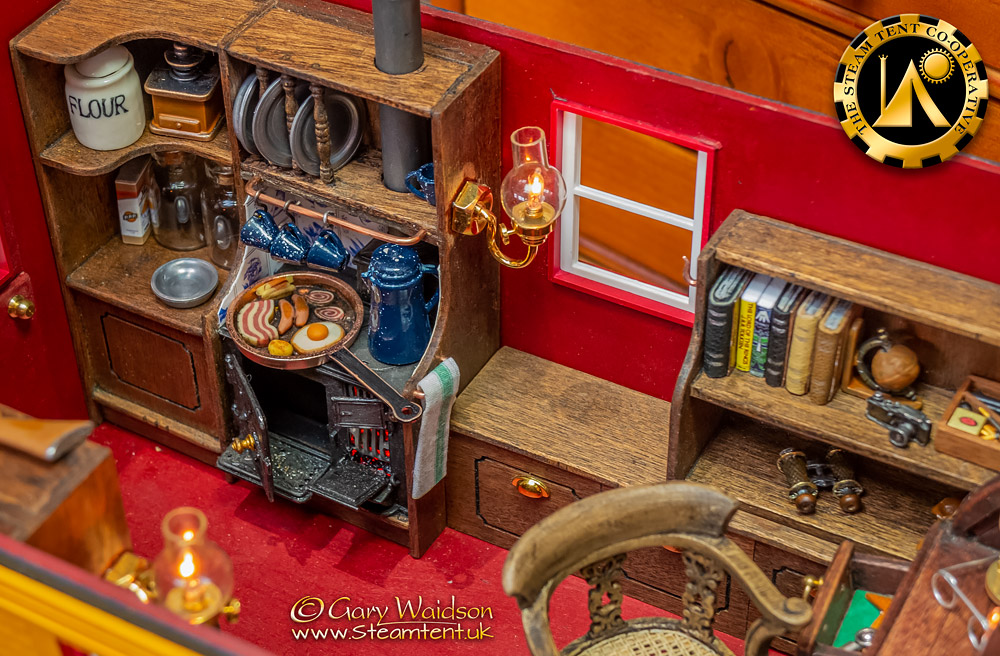
And today, the work I put in to the wiring a while ago, started to pay off.
This is not quite the finished lighting but it gives you a good of how it should work.
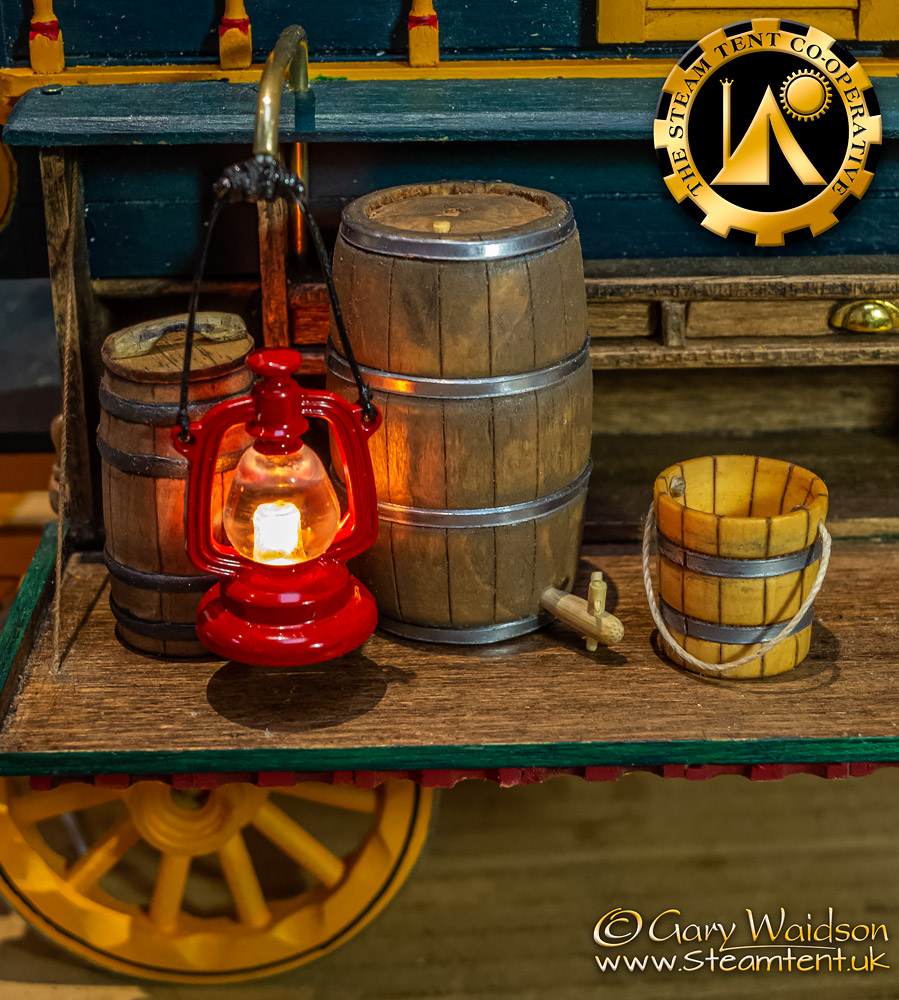
I quite enjoy working on the details. I wanted a couple of barrels for the build and I ordered two from FleaBay that turned out to be a little uninspiring. One was unfinished with a hole drilled for the inside and had raised bands of wood included in the turning. The other had grooves where the bands were filled with grey vinyl thonging.
Out came the scalpel and off came the vinyl. All the closed ends were flat so I carved in the barrel ends. I used a technique called “Kolrosing” to mark in the barrel staves and then painted the wooden bands on the small barrel.
For the large barrel I used some trimmings of the lead tape that I had used to tyre the wheels with. You might also notice some scraps that I used to add iron work to the cart shaft in the picture above this one. Useful stuff that.
The barrel bung on the top is just the point of a cocktail stick and I’ve knocked up a wooden barrel tap from a 2mm cocktail stick and a 4mm garden cane. I made a lid for the top of the open barrel.
One of the things that I have found disappointing is the lack of good quality storm lanterns available in 1/12th scale.
The only working ones I could find ran off button cells and that would soon work out expensive.
I did manage to find some non working ones though and I decided to have a go at adapting one.
In case you haven’t worked it out yet, the handle is the wiring for a small “grain of wheat” bulb drilled up into the base of the solid resin “glass”.
The power supply is the same that runs the rest of the vans lighting and is connected through the tube acting as the hanging arm.
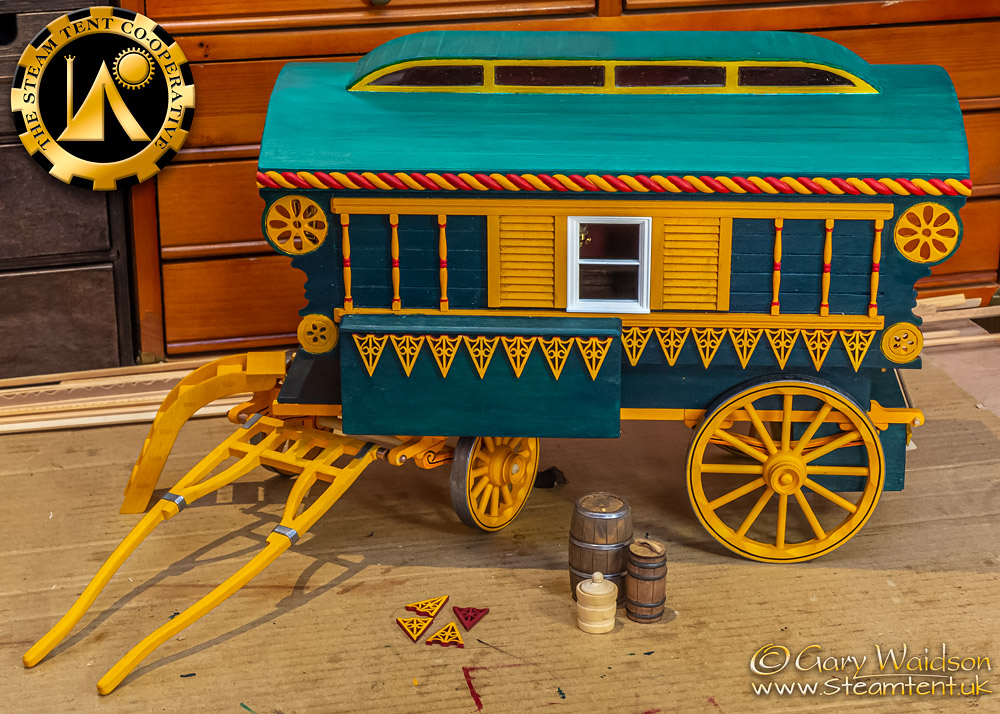
If you have been following this build since the beginning, you might remember me cutting up some Xmas decorations a while back. Well here they are again. Sprayed red to fill the edges and then surface painted with the yellow to match the other trimmings.
This picture also gives you an idea of what the barrels looked like before being tinkered with. The untreated "biscuit barrel" in this picture was converted into the half descent wooden bucket you can see in the last shot.
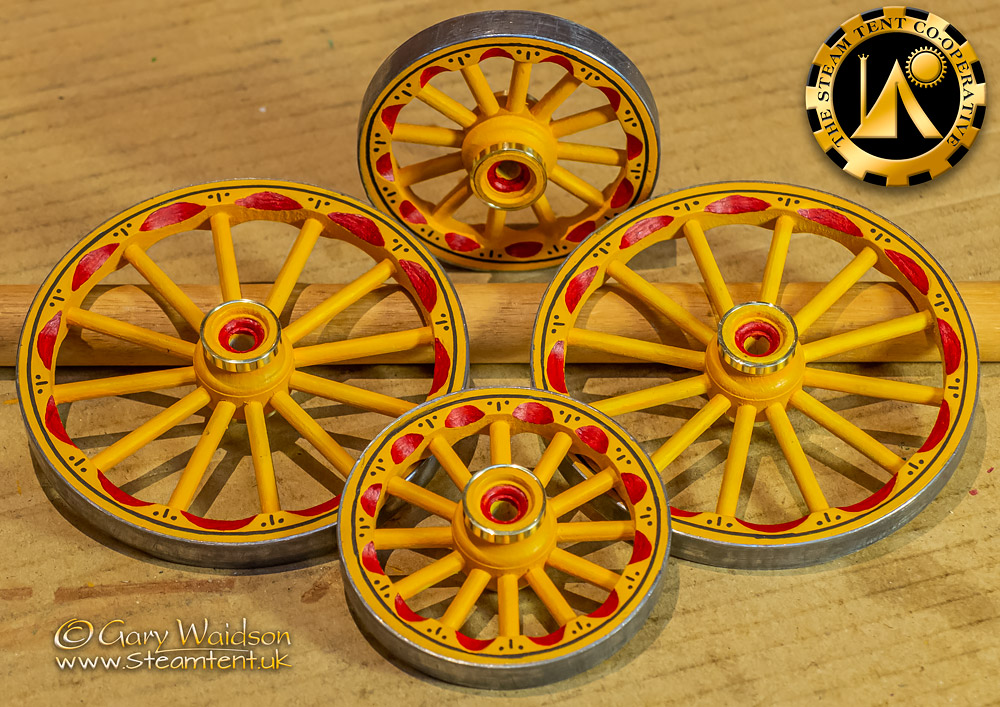
I also put in a little bit more paintwork on the wheels and added hub rings cut from a piece of brass pipe.
Last edited:
Finally got around to setting up the barrel carriage a few days ago but forgot to post it up.
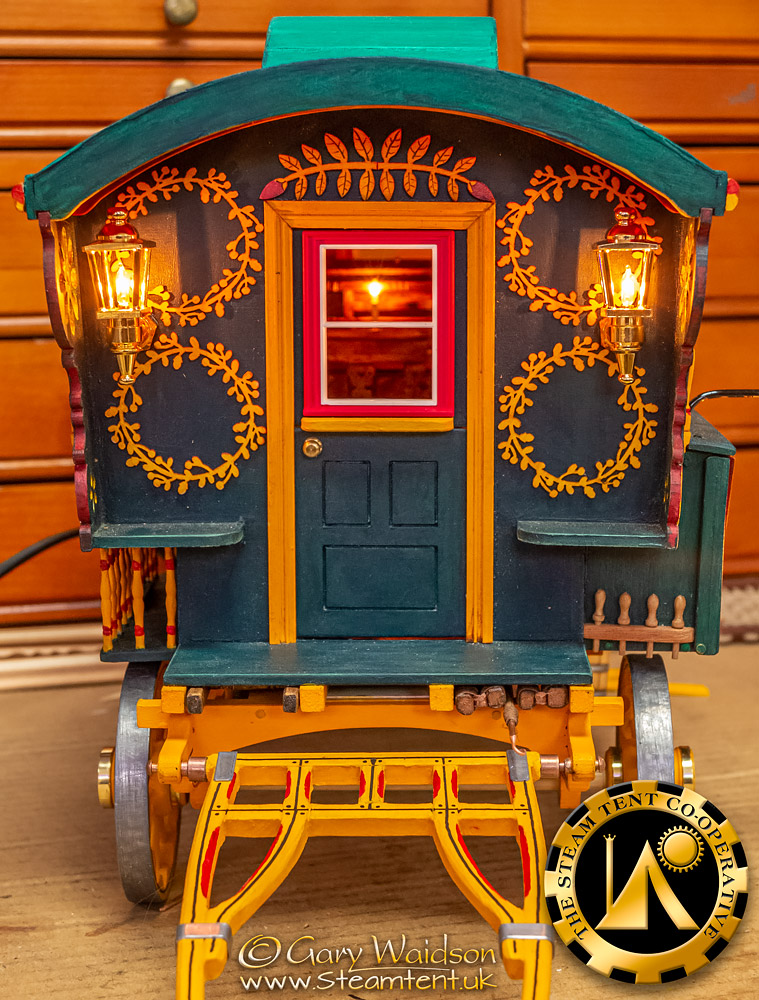
I also added some decoration to the porch.
Laser cut wood again but this time some “crafty” bits that I found in my local art store.
You might just be able to see a long pole hook which I also made to slide in between the awning poles under the van bed.
Traditionally these were used to hook dead branches out of trees for firewood.
Another job that I did that I had been putting off for a while, is building the trestles for the table.
I kept flip flopping between making them solid or packable. In the end I decided to go the packable route, which was a bit trickier but gave me more options.
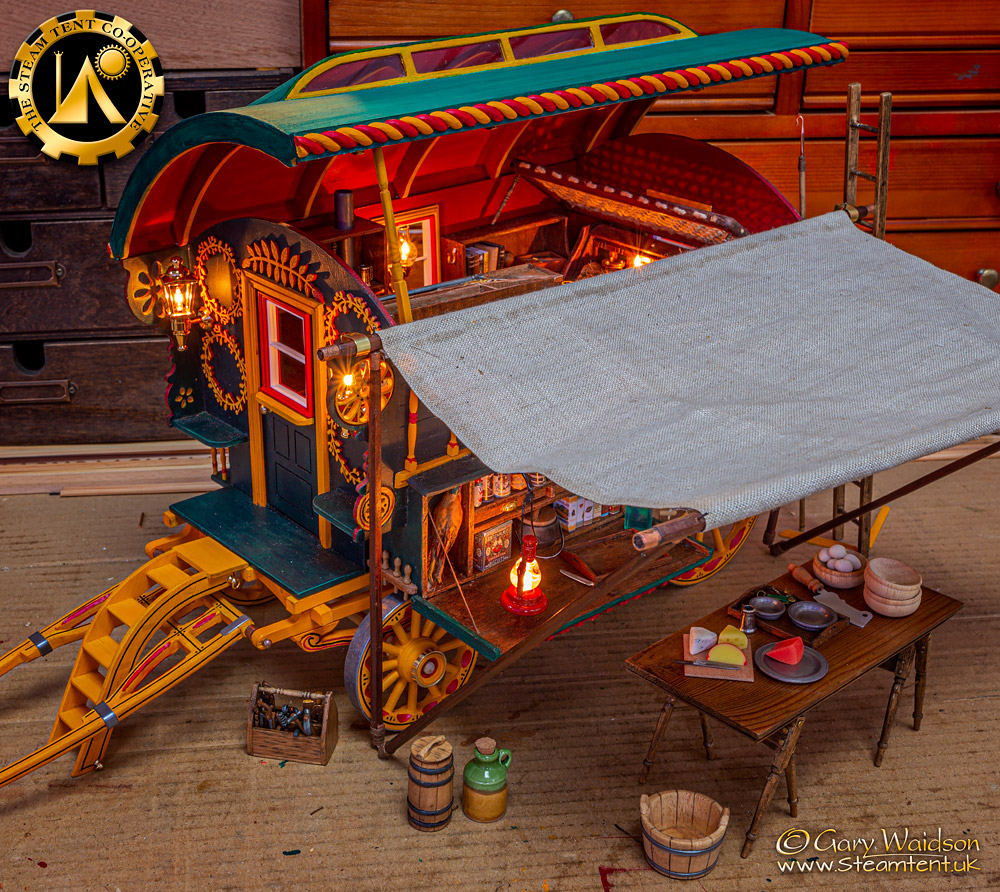
I’m not sure about the awning at the moment. I like the material but I’m starting to think it is too heavy for the scale it is supposed to be. Might have to re-do that.
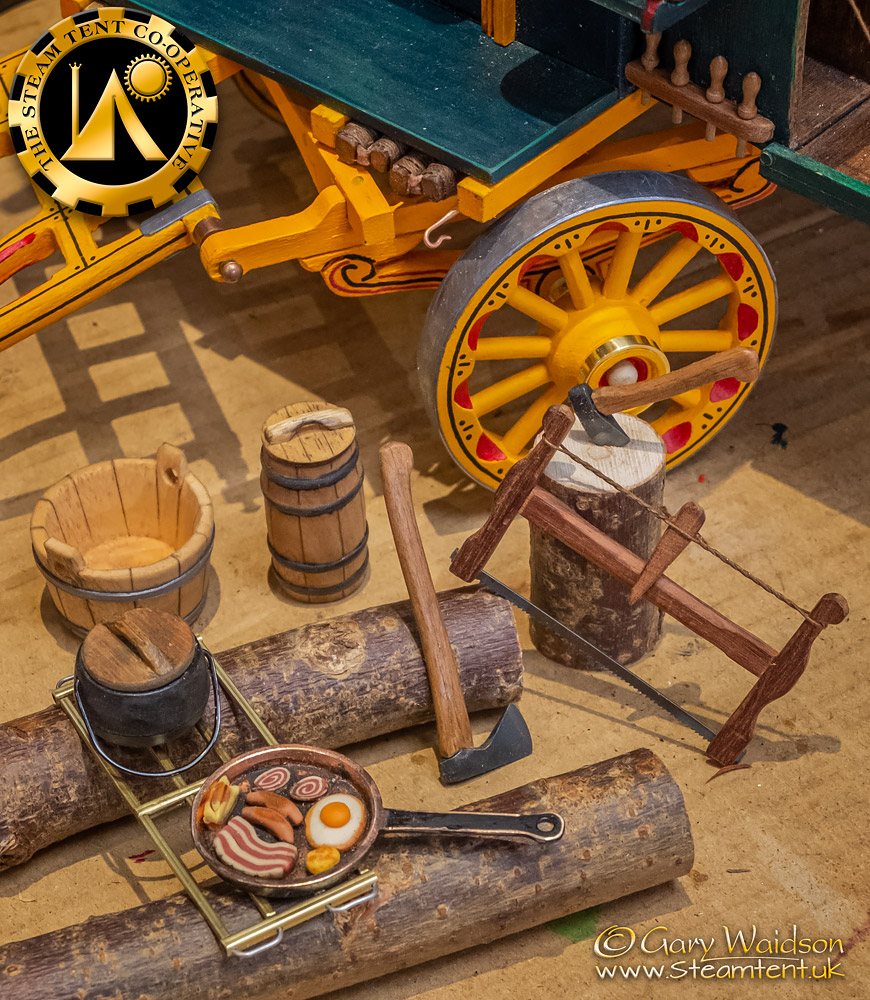
Starting to look at the camp furnishings, it wouldn’t be me if I didn't have a camp fire with some cooking equipment.
While looking through my drawer of metal off cuts, I spotted some brass box section that I thought I could turn into a grill. A little bit of drilling and filing later and this is what we have.
I had intended to secure it with glue but actually it friction locks well enough that I don’t think its needed.
The idea of course is to build an illuminated fire pit between the logs, in pretty much the way we tend to on sites that we can have a ground fire. A lot more work to be done on that part.
What I was originally looking through the drawer for was some bits that I could use to make the rest of the chitty irons with, so expect more on this subject.
Had a bit of spare time yesterday and thought those sawn log ends need a bit of justification so knocked up a little frame saw too. Used an old coping saw blade.
This morning I turned out a pair of axes from a piece of 01 tool steel, differentially hardened and given a decent edge on the whetstone. ( Definitely not toys! ).
Holy smokes, Gary! You're on a roll, there. Love the work!
A lot of wargaming and other interesting subjects from the others as well. Love it!
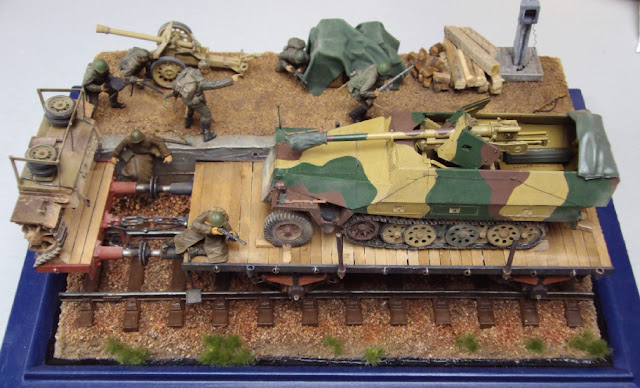
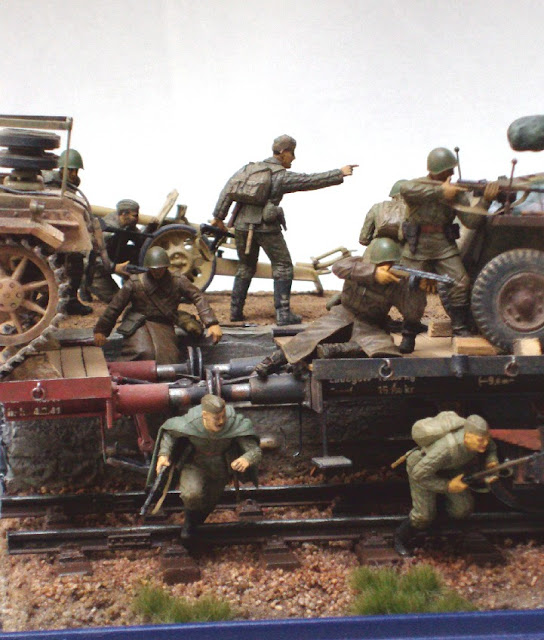
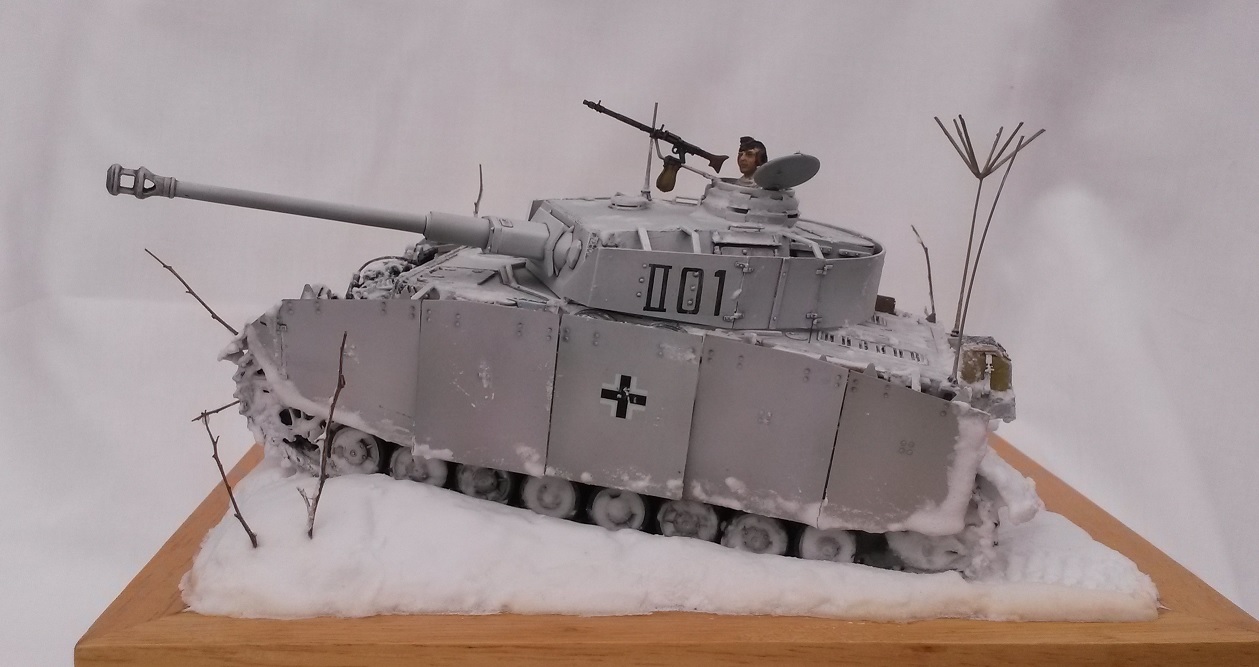
I used to do a lot of military in 1/35, but have been venturing out into larger scales and other subjects.
Here's some of my work:
1/20 maschienenkrieger:


1/35 scale

A lot of wargaming and other interesting subjects from the others as well. Love it!
I used to do a lot of military in 1/35, but have been venturing out into larger scales and other subjects.
Here's some of my work:
1/20 maschienenkrieger:


1/35 scale


Similar threads
- Replies
- 5
- Views
- 222
- Replies
- 27
- Views
- 1K
- Replies
- 0
- Views
- 209
- Replies
- 0
- Views
- 145

