Today, first steps!
The woolen jacket-shirt
A guide to drafting, cutting and sewing a good fitting high performance outergarment
Foreword
This small guide will be posted every now and then, and please let me finish each part without interrupting, as every part will probably take a couple of posts, so wait with comments until I have said I'm finished for today..
")
This guide will only help you if you follow it and do the steps as described, if you skip steps or start making stuff up, your on your own. At times, you will be on your own, and you will have to be able to improvise, try and develop during the process.
Chapter 1
What to expect, features, design, tools and so on
Introduction
This is a guide on how to make a shirt/jacket or jacshirt for short. I have been looking at swanndris, filsons and bemidji woolen mills jackets and shirts for a long time, and although I own and love my Bemidji jacshirt, I feel it's design (and fit, turns out I wasn't an american XL Long after all) was lacking something I expect from a modern garment. Swanndri's offerings suffer from the same problems. Filson on the other hand have some which are are beatifully cut but comes with a, for me at least, hefty price tag.
Looking thru the webs offerings on DIY stuff and patterns there isn't really so much that I like. Most of it are indian style or pioneer style rectangular cut shirts, which are in their simplicity good for what they are, but I'd rather put more time in design, draft, cut and construction than have a garment I don't like. That's just me though. If you like looking like some lost LARP:er or a Tolkien reenactor, then you go right ahead!
Wool
I won't go into all of wools fantastic features, most people reading this are probably very aware of all of that. My thought with this project is to make the jacshirt out of army blankets. Why? Blankets are thick, semi-felted and most important cheap (compared to same quality coating wool). The features of blankets I like:
- Almost windproof
- Fire retardant
- Good water repellancy
- Ok abrasion resistance (depending on Polyamide or Polyester content)
- Good price!
There of course a huge offerings of different army blankets out there, also some civilian emergency type blankets. I look for the following, high wool contents (look close at fibers, are they recycled, different colours, how is the weave?), I also look for the size, how the edges are (frayed or selvedged?), I preferably don't want stripes, but sometimes striped blankets are of the best quality so you have to be ready to make compromises.
I usually wash them repeatedly to get the funky smell out, to remove all the lanoline (
yes, you read it correctly! I remove the pricipal reason that wool is such a fantastic material, I will replace it with new fresh lanoline later, don't worry!) and to felt the blanket somewhat more.
Design & Construction principles
I start most of my drafts with a boxy semi shaped block called a sloper. There are numerous ways of doing this, I follow a book I found in an used book shop. It works for me, it should work for you. But if you have abnormal measurements, there might be some hidden traps. I will try to deal with them but you will have to be ingenious.
The jacshirt will be made up of the following parts:
- Two foreparts
- Sleeves (hopefully two)
- Two or one backpart
- Yoke, either a whole yoke or a split
- A Collar, or hood. Both alternatives will most likely consist of several parts
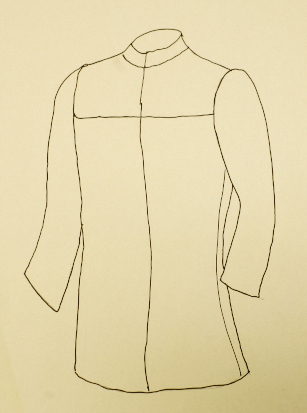
I'm really not a good sketch artist, but this is my feeble rendering:
To get maximum seam strength and maintain wind and water resistance I insist to use a flat felled seam. It's the kind of seam you will find on the inside of the leg on a pair of jeans. Or in a dress shirt. Hopefully you will know the kind. I do intend to show, in great detail, how to do it on a single needle sewing machine, since I doubt many of the readders here own and know how to operate a double needle sewing machine. Another beautiful thing with this seam is that it doesn't demand any edge finishing of the parts, edge finishing is one area where it is easy to spot an amateurly made garment. Zig zagged edges makes my eyes hurt! And it always causes distortion in the edge, stretches and compression, it's the worlds biggest myth that zig zag is appropriate for edge finishing! I'd rather overcast by hand (which I do, when I want a thin nice edge!).
As you will see I'm pretty hard with pressing. Pressing is the process which you use an iron to manipulate the fabric. It's not ironing! Ironing is something you do with finished garments. Construction pressing is a whole different matter. That is also one of the good things with wool. It takes a pressing really well! A slight warning though, blanketing with high synthetic contents does not like high temperatures, and will not keep it's shape as good as 90-100% wool blankets. You will have to experiment to find out what works for you.
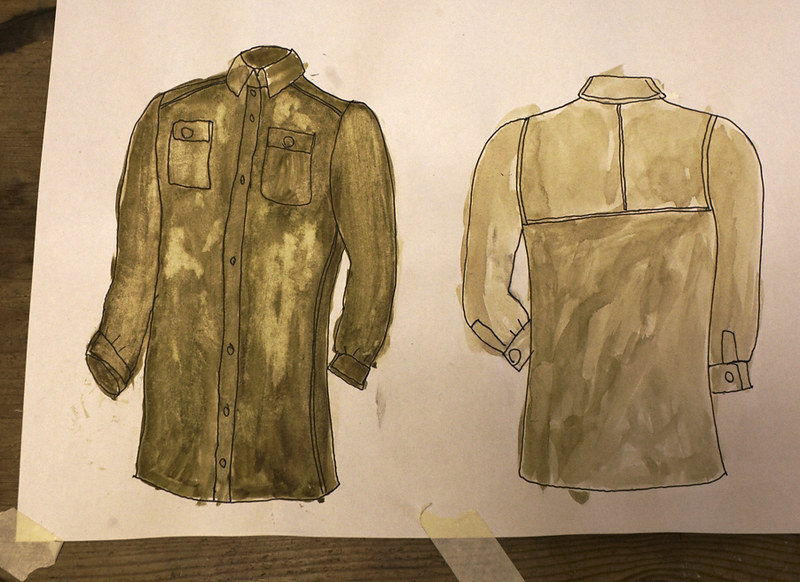
I will let you decide what kind of pockets you wanted. And what kind of hood or collar you like. So there is a lot design choices to make, and by doing those you also decide on what level of complexity you want. From simple style with the weight on shirt rather than jacket you can make a simple buttoned shirt with minimal button plackets, simple shirt cuffs and sleeve plackets, ordinary flapped flat patch pockets, although split yoke for a more following back (yoke halfs on the bias have more stretch..). Like this (again, I'm no sketch artist
):
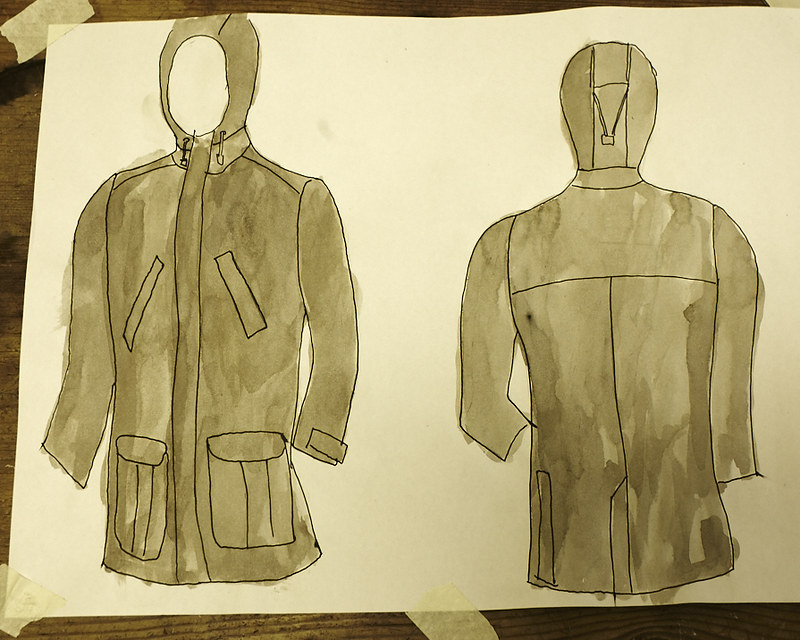
Or you can step it up and go more for jacket design. With split back, back vent, jetted hand warmer pockets, pouchers back pocket, a fitted compressible hood and what not. Like this:
This isn't necessarily much harder to do. It just takes a bit more time, and dedication.
My suggestion is to have some spare toile type (any cheap cotton) fabric at hand to try out steps unfamiliar to you, before starting to cut and sew in the actual garment. By doing that you will minimise failures although there will probably numerous times when you start to think 'what the h3ll have I've gotten myself into?'. Relax, finish for the day and take it up when you feel like it. It's always a bad idea to rush things. And if you're starting to get sloppy, better to finish for the day and take it up when you feel for it. Just my honest opinion. No-one is getting paid so there is no idea of having strict dead lines!
Tools of the trade
You will require some tools. Most of these you will already have. Or you should have. Others you will be able to borrow. I will go thru the different tools and possible substitutes.
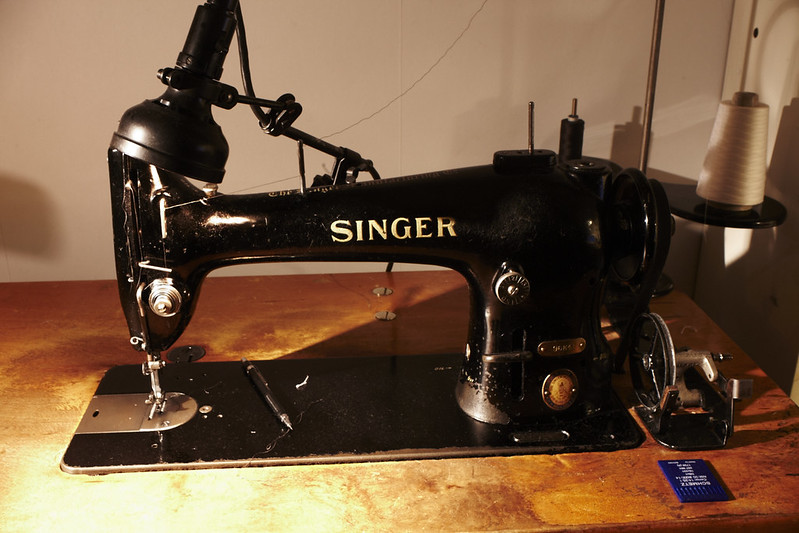
The most important tool is the sewing machine. This my single needle lockstitch machine:
It's an industrial. It does straight stitches. Only. That is what it does. But it does it fantastically well. This unit produces fantastic stitches in thin, medium and heavy fabric, leather, plastic, foams, basically whatever I put it thru. Not all industrials are made equal mind you. Domestic machines will work well too. As long as they make straight stitch, it will work. But some of the more plastic units may require some help with feeding. You will have to try and figure out how to make it work. Older metal machines will work better, and machines that only do straight stitches will produce better seams than machines designed to do zig zag. You will need ordinary needles, size 70-90 basically. The fabric decides the thread, and the thread decides the needle!
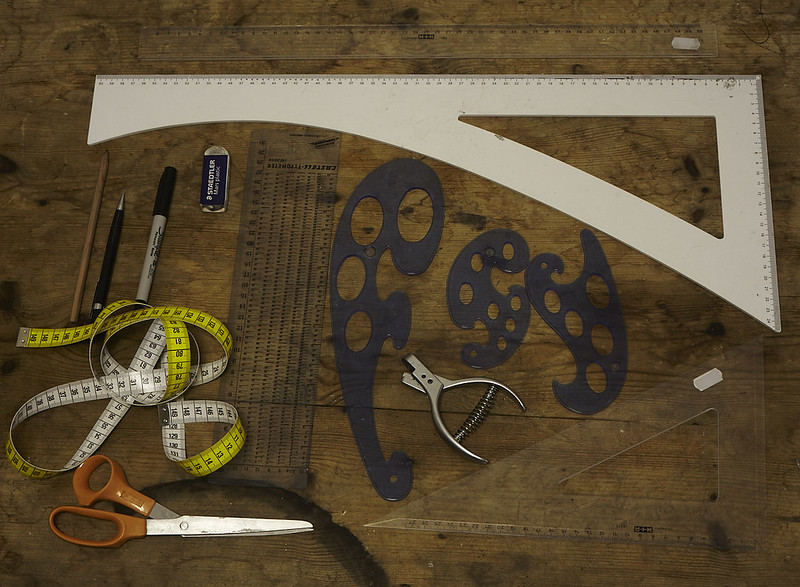
Next unit of tools, tools for drafting:
Some of these are selfexplanatory, but I will say something anyway. The curved ruler and square are a very nice tool to have. Usually called hipcurve, dressmakers ruler and whatnot. Works nice for making long even curves and as a long square. Very nice tool as mentioned.
An ordinary straight ruler is nice. The longer the better! A smaller square is also nice. I use three different in different sizes. Measuring tape is a must, and doesn't cost much. How will you otherwise take accurate measurements? The bezier curves are also nice, but no must. If you are good with freehand curves they are not necessary, and if you use the armhole templates that I will link to later they are surely unnecessary. The seethru quilting ruler is also a luxury, but I still like it. Pens, wll, they are pens. I prefer ordinary hb lead. The sharpie is a sharpie. Not much more to say.
The scissors, well they are my dedicated paper scissors, not used fo anything else. Maybe some poultry now and then. The plier looking thing is a pattern notcher. A good investment if you intend on doing a lot of patterns. I forgot two items. Hole punches. One small, and one big. The small one is used to mark up where pockets and details are placed on the pattern. The big one is used to make holes for hanging up the pattern from. A revolver type plier for leather will do in a pinch!
Tools for cutting out:
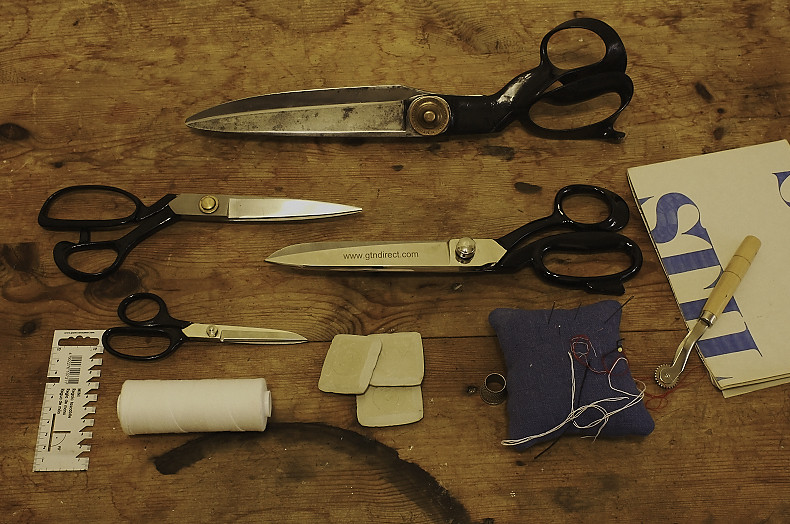
The most important here are the scissors. I like my scissors big! While there is little reason for anybody interested in making a jacshirt for themselves to go and by a proffessional 15" shears, they are fantastic! In a pinch a cheap small one (like the 8" x'sor below, £20-ish) will work fine. We'll cut out everything on folded blanketing so it requires some effort. Chinese 'tailors shears' from ebay works too. But are not as good. The 12" in the pictures was made in italy and was £30, and it's okay. Plastic fiskars clones from IKEA are not what you want. Borrow one if you don't want to spend much, rather than buying a cheap one that will only frustrate you. A pair of small trimming scissors is also vital. Tailors chalk is better than any pen or marker I have so far tried. Sharpen it by scraping with a old knife or old paper scissors, not the plastic sharpener it's sometimes supplied with. Basting cotton is used (with needles and thimble!) for marking thru the two layers, seam lines, and marks for pockets and so on. Basting cotton is cheap, and very very useful. Infact I almost never use pins anymore, once your used with basting, pins are useless. I also use a marking wheel and tracing paper, but they are not required.
Tools for construction and pressing:
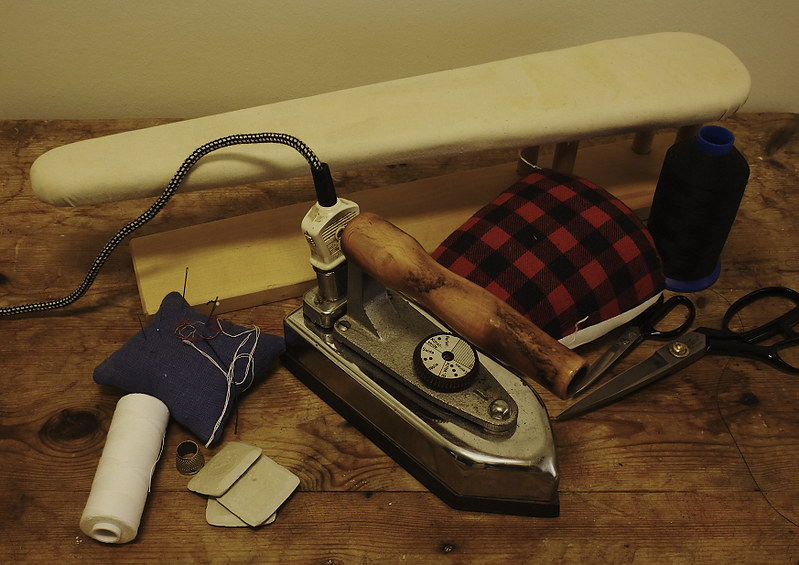
The central piece here is the pressing iron. Your ordinary household iron is nothing more than a heated piece of plastic. It will do in a pinch, but is far from ideal. Your grannys old heavy dry iron is far better. Oh, you got one of them fancy steam generators? Hint, it's as useles as an ordinary iron, if not worse! The pressure is too low to generate decent dry steam, and if you lack the proffessional suction table you are just gonna wet thing down. My rating of pressing irons is as follows: Proffessional steam generator with vacuum table, heavy dry iron, domestic steam generator, household iron. Don't be deterred, use what you have, but keep an eye open when you're in a charity shop or a boot sale. Heavy dry irons are amazing, works wonders for dress shirts and trousers too! What isn't pictured here are two things an iron needs. Pressing rag (cotton or linen muslin, white hankerchief) and spraybottle. You all have those. You'll also would like a sleeve board, although not totally necessary, but extremely nice to have. Next a tailors ham, not necesary but makes everything easier. A well pressed garment looks a lot more proffessional and will wear better! Shears and scissors are selfexplanatory. Always have a small scissors by your machine. Handsewing needles are very much needed. And a very small investment too. I use in betweens, that is short needles. They are easier to work with. I prefer milwards or john james needles. For basting and buttonholes I use size 3-4 and for ordinary sewing I use 5-7 so an assortment pack is nice to have at hand. I always use a thimble, with the hole in it. More comfort for long sewing sessions. Learn how to use a thimble. It's worth it! Oh, forgot bees wax in the photo. Not needed, but good to have!
On thread
Most guys (yes, guys...) would rush to think that the tougher and stronger the thread the better. Well, yes, that is the first thought. But let us not stop there. If your garment would brake, where would you rather have the rip? In the seam or in the fabric? Everybody who answered the fabric should take a long hard think about their answer.. It is much harder repairing a hole in the fabric compared to stitching up a seam. Note, that as we are using a fell seam, the seams will be pretty tough anyway. I would use of the shelf ordinary poly. Or poly-cotton. With this kind of seam, it will work fine. If you wanna make a good bargain, buy an industrial 5000 meter cone. It's about the same price as a 500 bobbin from the high street sewing/crafts/hobby store. If you really wanna have a strong seam go for #69 or higher bonded nylon.
Basting cotton, as mentioned, is needed, but you could just use any mercurised cotton which rips easily. Basting cotton is very cheap though, so no idea going for anything else.
For buttonholes, a reinforcement thread, called gimp (yeah, like the guy in pulp fiction) is used. You don't have to buy proffessional gimp. Any thick strong thread can be corded and used. For the actual sewing of the buttonhole, a thick nice thread is needed. For normal clothes I use silk buttonhole twist. This is sensitive for moisture. Typically a bad idea in an outdoorsy garment. Better to use thick nice linen, polyester, nylon or cotton thread. 15/2 linen is nice, 18/3 nicer. A #20 bond nylon works ok, but sure is hard to find in small quantities. Jeans cotton threads works okay too. Ask your sewing notions shop on what they recommend, everything that isn't silk will work.
A personal tip is the British army linen repair thread. I bought a huge cone for like £8 and there is thousands of meters on it. Works wonderful for leather, buttonholes, buttonhole gimp (when four corded) and as a general repair thread. Good to have in an emergency kit. Just buy a roll.
Well that's it for todays guide. Tomorrow or at least during the weekend I will provide you with the drafting instruction. Gather your stuff, start sketching your design and report back in this thread! Taa