How would a person make cord for snares
- Thread starter Al88b
- Start date
-
BushMoot: Come along to the amazing Summer Moot 31st July - 5th August (extended Moot : 27th July - 8th August), a festival of bushcrafting and camping in a beautiful woodland PLEASE CLICK HERE for more information.
You are using an out of date browser. It may not display this or other websites correctly.
You should upgrade or use an alternative browser.
You should upgrade or use an alternative browser.

Cord is easy to make from various kinds of plant fiber, the most common being nettle fiber, brambles, inner bark of willow and inner bark of limewood.
Willow Bark
Willow bark makes my favourite cordage and, compared to some bark cords at least, is simple to produce. You can make tanned willow bark or green willow bark cords, but the tanned version should last longer. Willow bark cord is best made in Spring when the bark is easiest to harvest.
First of all you want to choose lengths of willow that have few, if any, side shoots and are between thumb and wrist thick. Once you have cut your sections, the unused tops can be pushed into the ground and may well take and grow as new trees.
The first job is to scrape off the outer, green bark – the back of your knife is the ideal tool – and collect it, then pull the inner bark or “bast” off the wood. Split the outer bark into strips a few millimetres wide.
Take an equal amount of wood ash and the green bark scrapings and boil these up with the bast strips with enough water to allow the bark to move around and not burn in the container you use. The lye and tannins in the ash and bark effectively tan and preserve the bast fibres. You will know when it is done (around half an hour to a couple of hours) when the bast is a deep tan colour. Rinse the bast and it is ready to use or store for future use.
You may want to use a leather apron on your thigh for the cord twisting to turn the bast into cord. Loosely knot two unequal lengths of fibres, hold them by the knot and put a loose twist into each piece. Start twisting the cord by holding the knot in your left hand and with your palm flat down, covering both pieces of bast, push away so that the bast pieces roll on themselves, but not together.
At the end of the stroke, keep the bast trapped against your leg under your palm and let go with your left hand. The two pieces of bast should twist together by themselves, but you can twist them tighter to help the cord.
Pinch the cord where it disappears under your right hand and roll again as before. Keep up the “pinch and roll” until you come close to the end of the shorter piece. To extend the cord, twist a new length of bast onto the short end and keep “pinching and rolling” and laying in new pieces of bast until the cord is as long as you want it. Finish with a figure 8 stopper knot.
Trim off any ends and your cord is ready to use.
If you decide your cord is too thin, fold it in half and, working from the folded end, twist it together with a “pinch and roll”, but this time pulling your palm towards you, not away from you.
Cords can be waxed to help preserve them.
.JPG")
.JPG")
.JPG")
.JPG")
.JPG")
.JPG")
.JPG")
.JPG")
.JPG")
.JPG")
Willow Bark
Willow bark makes my favourite cordage and, compared to some bark cords at least, is simple to produce. You can make tanned willow bark or green willow bark cords, but the tanned version should last longer. Willow bark cord is best made in Spring when the bark is easiest to harvest.
First of all you want to choose lengths of willow that have few, if any, side shoots and are between thumb and wrist thick. Once you have cut your sections, the unused tops can be pushed into the ground and may well take and grow as new trees.
The first job is to scrape off the outer, green bark – the back of your knife is the ideal tool – and collect it, then pull the inner bark or “bast” off the wood. Split the outer bark into strips a few millimetres wide.
Take an equal amount of wood ash and the green bark scrapings and boil these up with the bast strips with enough water to allow the bark to move around and not burn in the container you use. The lye and tannins in the ash and bark effectively tan and preserve the bast fibres. You will know when it is done (around half an hour to a couple of hours) when the bast is a deep tan colour. Rinse the bast and it is ready to use or store for future use.
You may want to use a leather apron on your thigh for the cord twisting to turn the bast into cord. Loosely knot two unequal lengths of fibres, hold them by the knot and put a loose twist into each piece. Start twisting the cord by holding the knot in your left hand and with your palm flat down, covering both pieces of bast, push away so that the bast pieces roll on themselves, but not together.
At the end of the stroke, keep the bast trapped against your leg under your palm and let go with your left hand. The two pieces of bast should twist together by themselves, but you can twist them tighter to help the cord.
Pinch the cord where it disappears under your right hand and roll again as before. Keep up the “pinch and roll” until you come close to the end of the shorter piece. To extend the cord, twist a new length of bast onto the short end and keep “pinching and rolling” and laying in new pieces of bast until the cord is as long as you want it. Finish with a figure 8 stopper knot.
Trim off any ends and your cord is ready to use.
If you decide your cord is too thin, fold it in half and, working from the folded end, twist it together with a “pinch and roll”, but this time pulling your palm towards you, not away from you.
Cords can be waxed to help preserve them.

Nettle cord
The humble nettle is a versatile plant - amongst other things giving us good food, good drink and good cordage. I do not know why they are thought of as weeds!
Making nettle cordage is the same as making willow bark cord – once you have prepared the fibres.
Nettles for cordage are best picked after the plant flowers and the best nettles have reddish stems. Using gloves, pick a good bundle of stems and rub them well to remove leaves and stinging spines. Once well rubbed they will not sting you.
Remove the pith from the centre of the nettle. This is best done by gently pounding the stems – not enough to break the fibres, but enough to loosen them from the pith, especially where the leaves were attached. Run a thumb nail down the side of the stem and flatten it from a tube into a sheet, then peel the fibres off the pith. A showy and effective way of doing this is to bend the nettle in the middle until the pith breaks upwards and free from the fibres. Drape the fibres over your index finger and your thumb over the fibres, but under the pith, and pull on the other end of the nettle so the pith is stripped away. Repeat the operation for the other end of the nettle.
Once you have your nettle fibres free of pith, you will need to dry them until they are so dark green as to be almost black before you work them. Any pith you left attached will look white on the now dark fibres and should be picked off. You may need to slightly dampen the fibres to work them, but if you do not dry the fibres from their raw state they will dry and shrink once the rope is twisted and ruin the work.
There are loads of other plants that make good cords, but this should give you lots to work with!
Sorry - I failed to line up the pictures with the text....
I've moved the thread to a more appropriate forum.
Hey Al88b, it's good to have you on Bushcraft UK, would you take the time to introduce yourself in the welcome and introductions forum, your first post is fairly blunt, although a good question.
Fenna, good job sir
Hey Al88b, it's good to have you on Bushcraft UK, would you take the time to introduce yourself in the welcome and introductions forum, your first post is fairly blunt, although a good question.
Fenna, good job sir
Le Loup
Settler
How would a person make cord for snares in the wild if they did not have any cord? Thanks.
https://woodsrunnersdiary.blogspot.com/2012/04/traps-and-trapping.html
I hope this helps Al.
Regards, Keith.
This is really interesting, thank you for sharing.Cord is easy to make from various kinds of plant fiber, the most common being nettle fiber, brambles, inner bark of willow and inner bark of limewood.
Willow Bark
Willow bark makes my favourite cordage and, compared to some bark cords at least, is simple to produce. You can make tanned willow bark or green willow bark cords, but the tanned version should last longer. Willow bark cord is best made in Spring when the bark is easiest to harvest.
First of all you want to choose lengths of willow that have few, if any, side shoots and are between thumb and wrist thick. Once you have cut your sections, the unused tops can be pushed into the ground and may well take and grow as new trees.
The first job is to scrape off the outer, green bark – the back of your knife is the ideal tool – and collect it, then pull the inner bark or “bast” off the wood. Split the outer bark into strips a few millimetres wide.
Take an equal amount of wood ash and the green bark scrapings and boil these up with the bast strips with enough water to allow the bark to move around and not burn in the container you use. The lye and tannins in the ash and bark effectively tan and preserve the bast fibres. You will know when it is done (around half an hour to a couple of hours) when the bast is a deep tan colour. Rinse the bast and it is ready to use or store for future use.
You may want to use a leather apron on your thigh for the cord twisting to turn the bast into cord. Loosely knot two unequal lengths of fibres, hold them by the knot and put a loose twist into each piece. Start twisting the cord by holding the knot in your left hand and with your palm flat down, covering both pieces of bast, push away so that the bast pieces roll on themselves, but not together.
At the end of the stroke, keep the bast trapped against your leg under your palm and let go with your left hand. The two pieces of bast should twist together by themselves, but you can twist them tighter to help the cord.
Pinch the cord where it disappears under your right hand and roll again as before. Keep up the “pinch and roll” until you come close to the end of the shorter piece. To extend the cord, twist a new length of bast onto the short end and keep “pinching and rolling” and laying in new pieces of bast until the cord is as long as you want it. Finish with a figure 8 stopper knot.
Trim off any ends and your cord is ready to use.
If you decide your cord is too thin, fold it in half and, working from the folded end, twist it together with a “pinch and roll”, but this time pulling your palm towards you, not away from you.
Cords can be waxed to help preserve them.
View attachment 58078View attachment 58080View attachment 58081View attachment 58082View attachment 58083
View attachment 58084
View attachment 58085View attachment 58087View attachment 58088View attachment 58089
I'm curious about tanning cordage. Is this something you stumbled upon or is there a source you're working from? Can you tan other plant cordage and would it give similar effects or does it only work with willow? How does the ratio work? Do you have any books or articles you can point me to? I've no experience in tanning so I didn't even know this was a thing!
I am no expert at tanning, I am afraid - this is just the way I learned to make Willow cord.... many years ago!
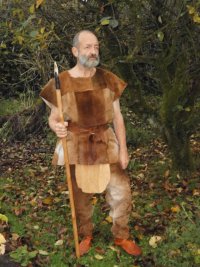
I have done a little amateur "Experimental Archaeology" when I worked at Castell Henllys Iron Age fort in Pembrokeshire. Needles can be fun") If you heat a line along Antler (with the hot end of a smoldering stick) it give a bit of a breaking line ... not sure if it works with bone... I just shattered bone and hoped for the best or at best scored it with flint flakes to give a break line - long, time consuming work!
If you heat a line along Antler (with the hot end of a smoldering stick) it give a bit of a breaking line ... not sure if it works with bone... I just shattered bone and hoped for the best or at best scored it with flint flakes to give a break line - long, time consuming work!
Some of my experimental bits ...
.JPG")
 bone needles and awl.JPG")
.JPG")
.JPG")

.JPG")
.JPG")


I still have most of my pieces although I sold a lot to the Pembs Coast Nat Park archaeologist, for his handling collection, when I retired.
Have fun!
I have done a little amateur "Experimental Archaeology" when I worked at Castell Henllys Iron Age fort in Pembrokeshire. Needles can be fun
If you heat a line along Antler (with the hot end of a smoldering stick) it give a bit of a breaking line ... not sure if it works with bone... I just shattered bone and hoped for the best or at best scored it with flint flakes to give a break line - long, time consuming work!Some of my experimental bits ...
I still have most of my pieces although I sold a lot to the Pembs Coast Nat Park archaeologist, for his handling collection, when I retired.
Have fun!
Attachments
i remember reading somewhere that native americans in the boreal forest used spruce roots, but i haven't tried it myself...
Horsehair snares were used to trap small birds. You can use plaited sinew thread too for snares.
 www.komitee.de
Horsehair Snares / Komitee gegen den Vogelmord e. V.
Horsehair snares have been in use since the Stone Age. The trapping method is as simple as it is insidious: hair from a horses tail (or a nylon thread) is used to make a wafer-thin loop, which is positioned next to fresh rowan berries. If a bird attempts to take the bait, the noose falls over...
www.komitee.de
When did horses evolve? Have we been around longer than the horse?But probably not in really prehistoric times as they had no horses.
But probably not in really prehistoric times as they had no horses.
Derrr... horse meat was one of the many sources of Mesolithic food!
They hunted horses though.But probably not in really prehistoric times as they had no horses.
Oh! That seems more realistic in my mind.Derrr... horse meat was one of the many sources of Mesolithic food!
We have horse bones dating back 700,000 years in the UK, though those from Boxgrove are dated c500,000 years ago.Not in this country.
We have them in more recent grave finds, like the Neolithic tombs of the Severn-Cotswold type, c 3,500 bce.
By the time the Romans came here the Britons had had horse drawn chariots for at least two thousand years.
As for eating them, well if you're an omnivore why not ?
Similar threads
- Replies
- 6
- Views
- 257
- Replies
- 8
- Views
- 415