Our self sufficiency goals this year included producing our own source of sugar.
I have written threads on our beekeeping and sugar beet growing. The third strand of our attempt was to grow Yacon.
Part 1 - About Yacon
Yacon is a tuber bearing plant from the Andes - originally grown by the Incas. Its a member of the sunflower family with sweet, crisp, tuberous roots. In Brazil a tea is made from the leaves that is, allegedly, antidiabetic.
Yacon tubers are full of fructooligosacharides (FOS). FOS are a subset of inulin sugars - complex fructose polymers that, whilst tasting sweet, are not metabolisable by the human intestine. So all the sugar taste - no blood sugar (useful to diabetics) or weight gain.
A nutrional study in overweight premenopausal women shows weight loss following a regular intake - but judge that for yourself!
http://download.journals.elsevierhealth.com/pdfs/journals/0261-5614/PIIS0261561409000302.pdf
I'm interested in a plant that can produce a large crop of edible tubers (nice raw or cooked), edible leaves ..or as a sugar source.
I found one source of Yacon in the UK - but their whole crop was wiped out by rabbits
Part 2 - Growing Yacon
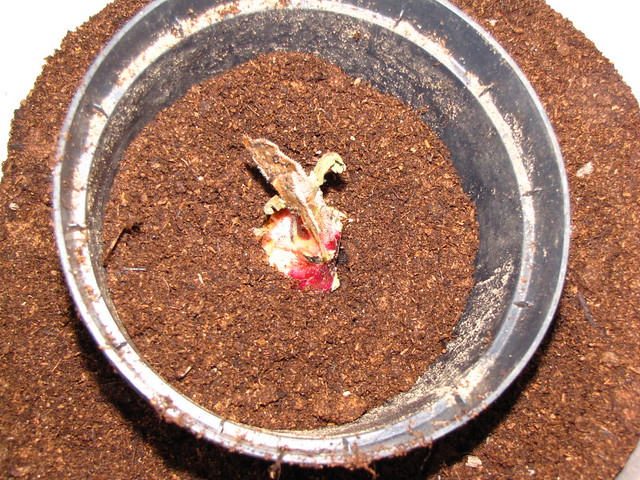
Enter slowworm of BCUK - who kindly send me some growing tubers (they have two sorts - growing tubers which make next years plants and storage tubers which are harvested). The growing tubers were received last Winter. Sort of like small red seed potatoes. They aren't very frost hardy, so I potted them up immediately in large pots of damp compost. They did nothing at all in early Spring.
However come mid April and they all popped up!
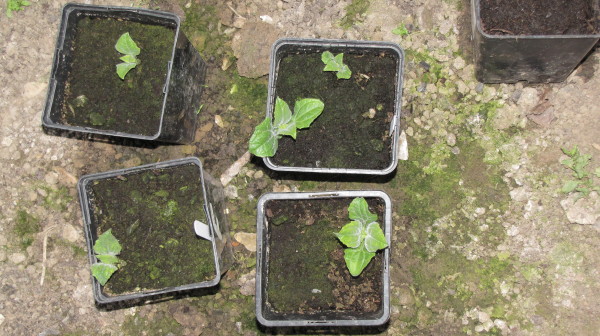
Yacon 22-4 by British Red, on Flickr
We grew them on for a month and planted them out in mid May
Yacon 25-05 by British Red, on Flickr
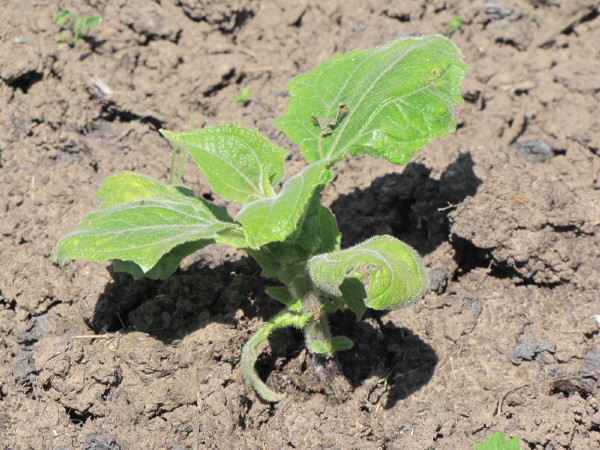
They were pretty slow growers to begin with - this was them in June
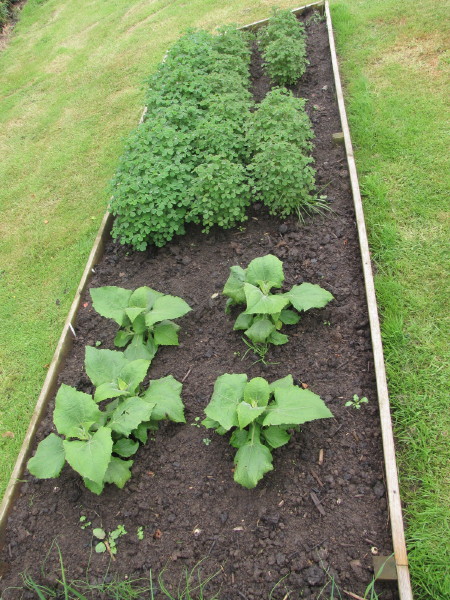
Yacon and Oca 22-06 by British Red, on Flickr
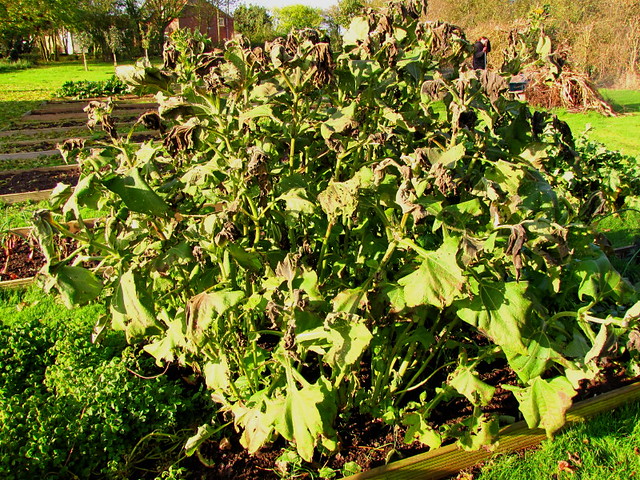
They do well in Autumn - they were about 6 foot tall by the end of October
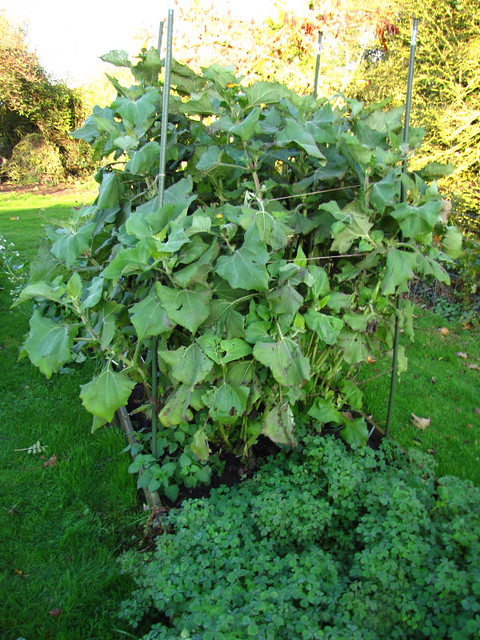
full sized yacon by British Red, on Flickr
When the Yacon flowers, you can certainly see the family resemblance to sunflowers and Jerusalem artichokes
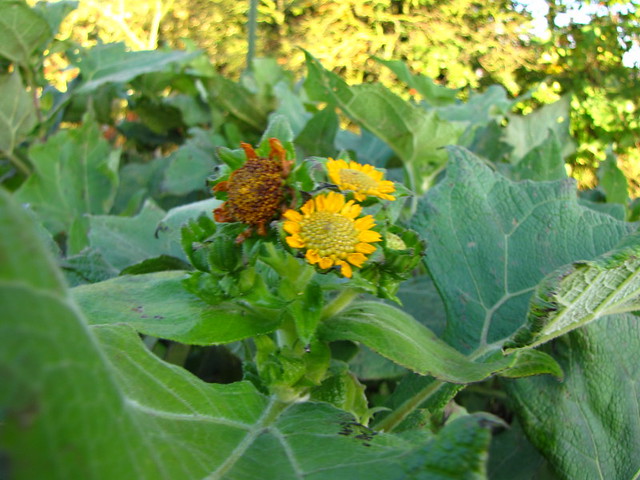
by British Red, on Flickr
Now the tubers need as long as possible to grow - but need to be lifted once frosts start. One morning the top growth showed frost nip

Yacon frost Burn by British Red, on Flickr
I decided this was the time to lift them
Part 3 - Lifting the Tubers
Given our high winds, I had staked and supported the plants. First thing to do was to remove the stakes and bindings
Yacon supports removed by British Red, on Flickr
I then cut away the top growth to abouot 18" to give room to work
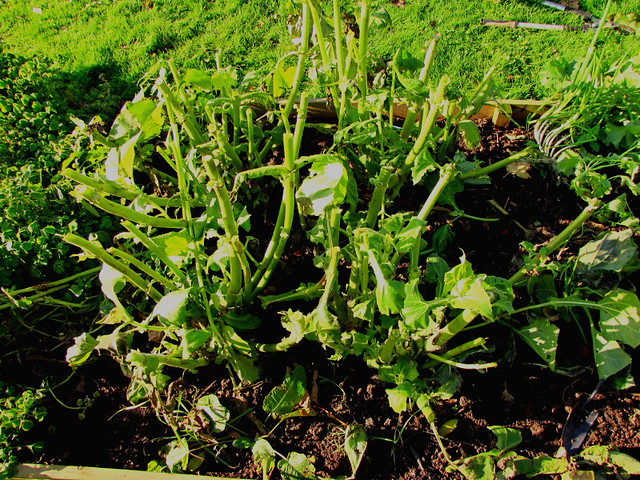
Yacon Top Growth Cut by British Red, on Flickr
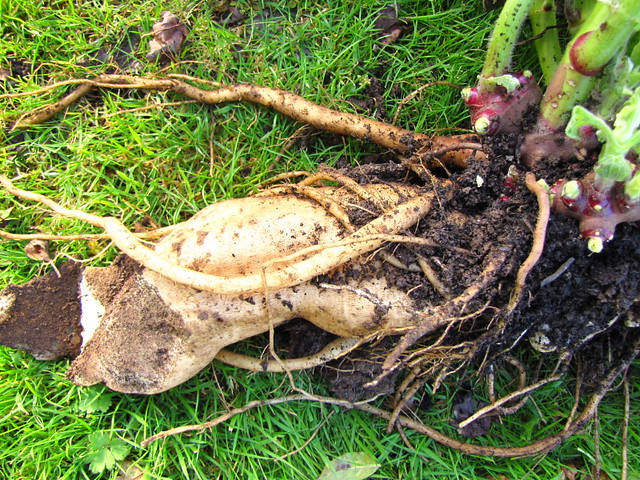
Now, if you are harvesting Yacon, you can't dig them up. The big storage tubers are fragile. Imagine a cucumber - like that. If you yank on them, they break. If you lever on them, they break. Now Yacon will keep like potatoes - but not if broken. So my technique was to dig a hole off to the side and then brush away the dirt like this
Yacon storage tuber by British Red, on Flickr
The tubers go down a foot or more - so haveing a well prepared bed helps easy removal. I found lifting the big tubers one at a time helped
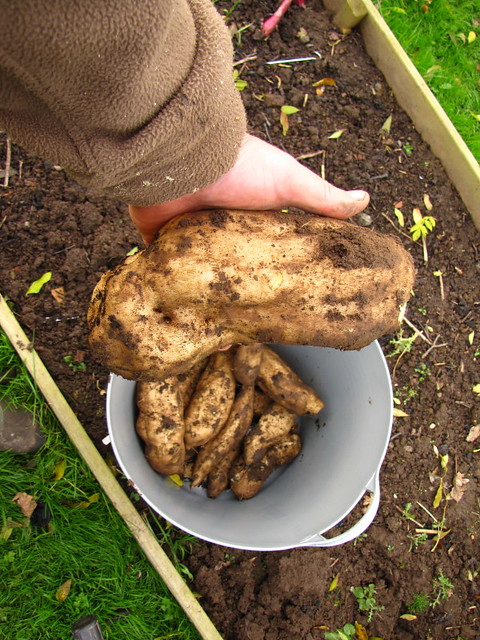
Yacon Tuber by British Red, on Flickr
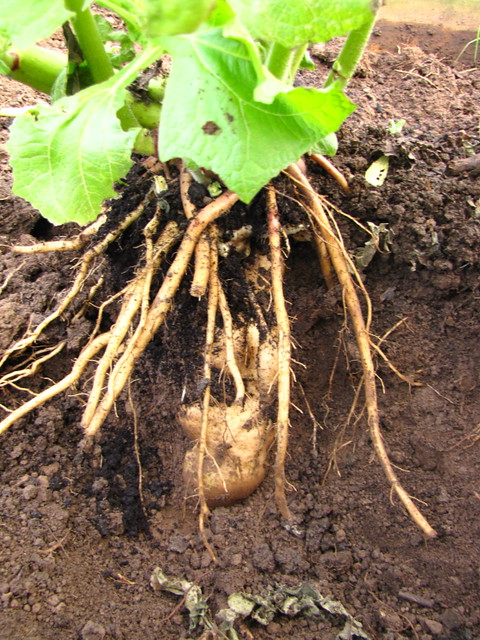
Eventually you can lift the crown
Yacon Plant by British Red, on Flickr
At this point I separated all the storage tubers
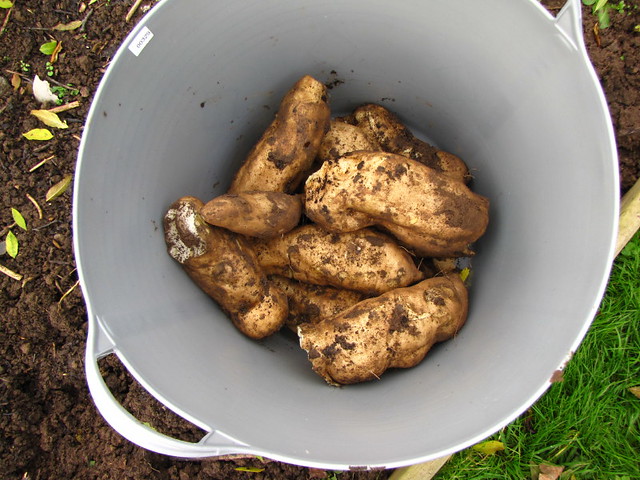
Yacon Harvest by British Red, on Flickr
The crowns I kept for propogating next years crop
Part 4 - Propogating for next year
One of the great things with Yacon is that you can harvest all the storage tubers and still have growing tubers for next year. To divide these, first I cut away the top growth
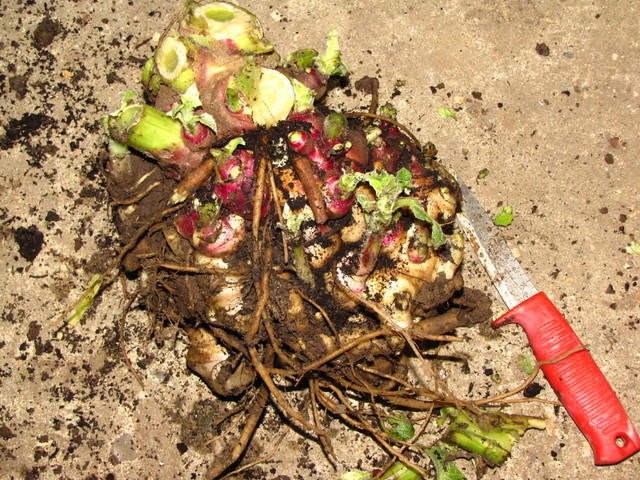
Yacon Crown by British Red, on Flickr
Each of the purple knobbly bits with a a leaf stem coming out is a potential new plant. The only viable way of dividing the up that I have found is to get in there with a knife and cut!
I was aiming for good sized pieces. I could probably divide these again, but I want healthy plants

Yacon Start by British Red, on Flickr
I put a good layer of compost supplemented with pelleted manure in a 5" pot and poked in the tuber
Yacon plant by British Red, on Flickr
These were then covered in compost, given a water to remove air pockets, drained and put into an unheated greenhouse to overwinter. I got 24 new plants which is a 6:1 increase on this years plants as well as the storage tiber harvest. I'm very pleased with that increase in growing stock as well as the harvest.
Part 5 - Using the Storage Tubers
Now the big storage tubers can be used in a number of ways. Just peeled and eaten they are nice. A cruchy, light, slightly sweet flesh - like...crisp pear?
They can easily go in a stir fry....think sweeter lighter water chestnut.
They store much like a potato
One think I wanted to do with this crop though was to make Yacon syrup. This stuff sells for £40 a litre . It had to be tried
First thing was to peel a good batch
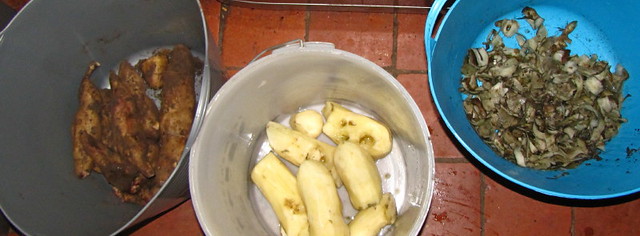
Peeled Yacon Tubers by British Red, on Flickr
Next I pulped them. You can use a grater over a bowl, food processor or apple scratter. Whatever you use, do it over a bucket - the juice floods out - think pulping soft apples. Its the juice you want so capture it!
Pulped Yacon by British Red, on Flickr
Next job is to press the pulp. I set up the 5 litre press as I had made about 5 litres of pulp
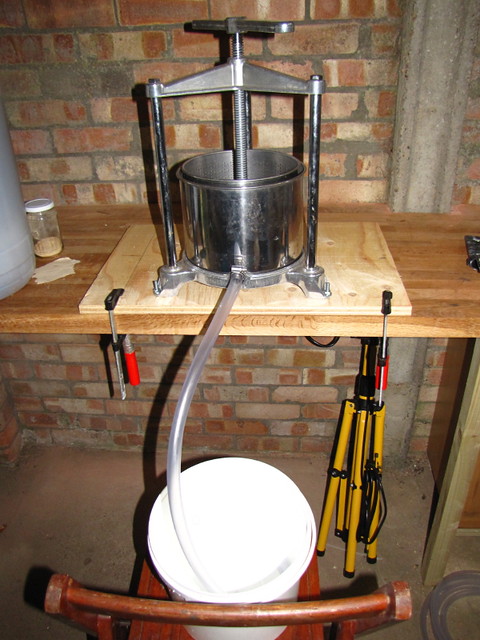
Fruit Press by British Red, on Flickr
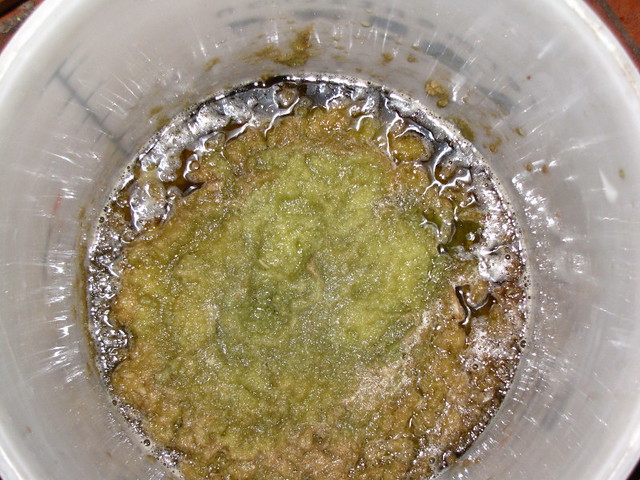
I removed the pressing bin and put the pulp in - good job I had already put the tube in a juice bucket...the juice started flowing fast even without pressing it was so wet!

Syrup Under own pressure by British Red, on Flickr
I found the colours going on here fascinating. The tbers are white inside a brown skin, but when cut the flesh oxidises green and the juice dark brown.
Next I pressed the pulp as dry as I could get it
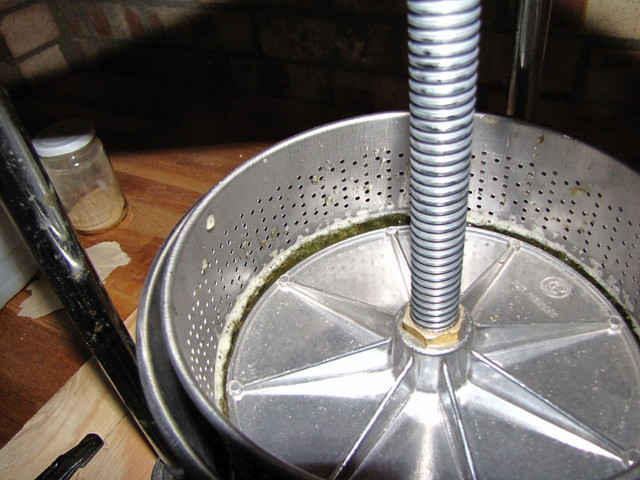
Press Decending by British Red, on Flickr
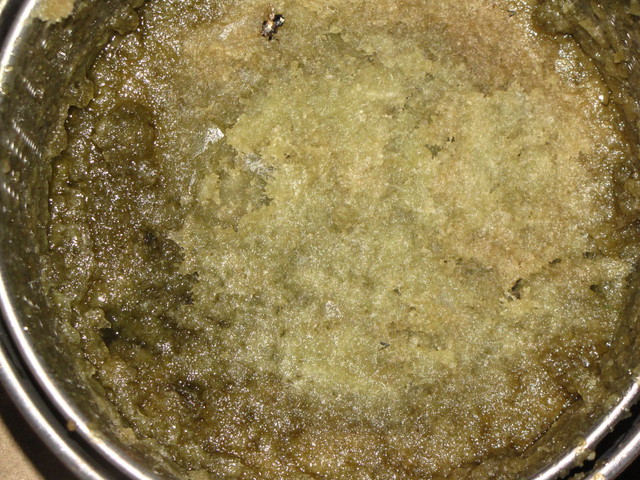
Yacon Pulp by British Red, on Flickr
This yielded about 2 litres of juice - you can see how dark it is
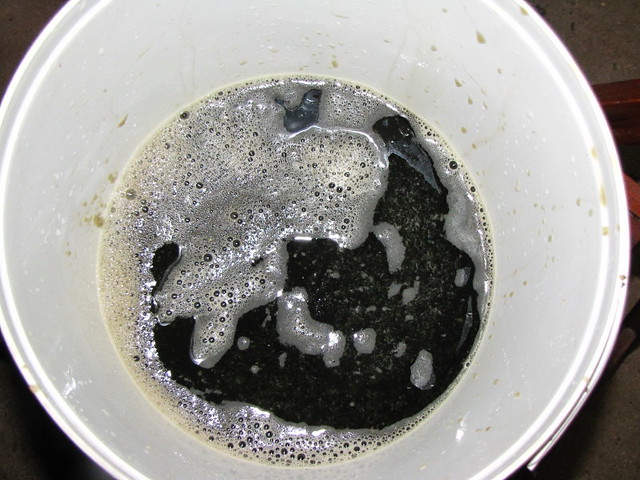
Pressed Syrup by British Red, on Flickr
The next step is to filter the juice before cooking down. I use several layes of muslin in a jelly bag.
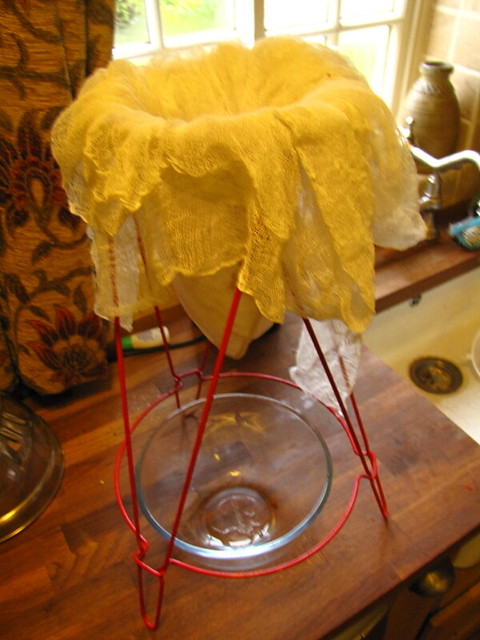
Jelly Bag and Cheesecloth by British Red, on Flickr
The juice ran through quickly
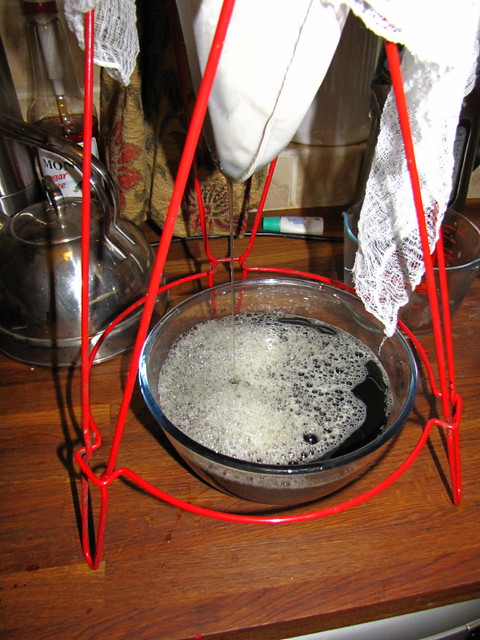
Strain Syrup by British Red, on Flickr
...but a good amount of vegetable fibre was removed

Yacon Fibre by British Red, on Flickr
I was left with a strained syrup ready for boiling down.
Step 6 - boiling down the syrup
Reducing syrup takes a long time. Frankly I don't want to burn a lot of propane to do that. However the upside of living a self sufficient way is that at this time of year we have the wood stove going to heat the house - so cooking heat is free
First I brought the syrup up to heat
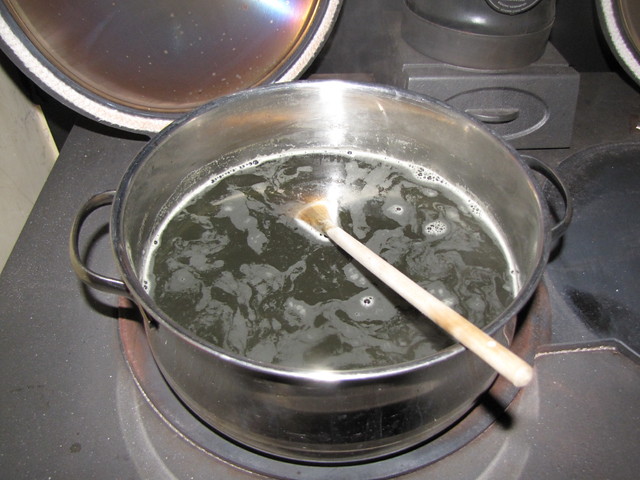
Heating Syrup by British Red, on Flickr
Then moved it across to the cooler plate to simmer
Simmer Side by British Red, on Flickr
Once it had reduced by 80% I put it into a smaller pan to avoid burning. Eventually almost all the water was boiled off and the syrup becam to bubble - I took it off the heat at this point
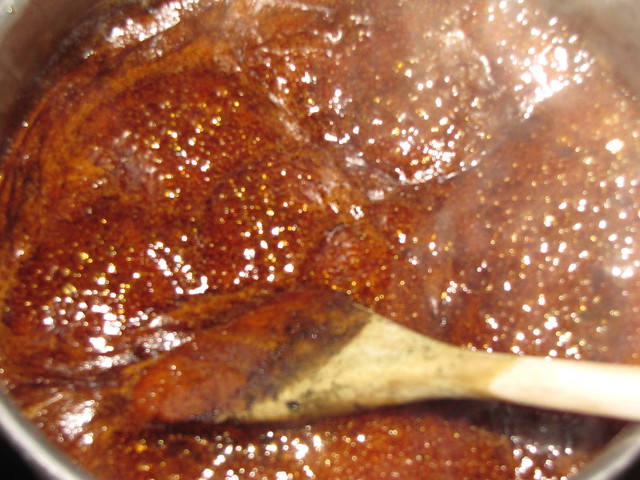
Yacon foaming boil by British Red, on Flickr
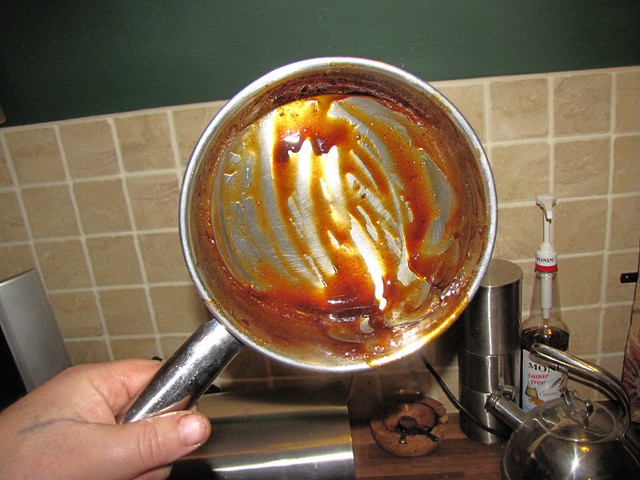
You can see how sticky it is by scraping a spoon across the bottom

Yacon done by British Red, on Flickr
Always remember it gets thicker as it cools.
I stirred it occasionally as it cooled to avoid it crystalising
Once cool I poured it into bottles
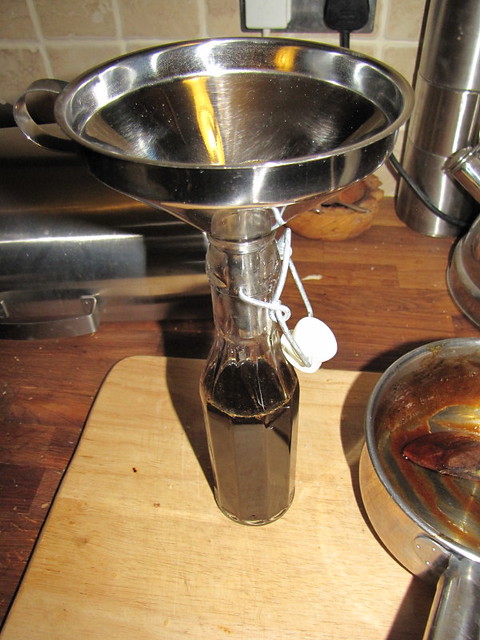
Yacon Syrup Bottled by British Red, on Flickr
Having poured it, you can get a better idea of thickness
Yacon syrup thickness by British Red, on Flickr
Thats it. Taste wise I would say a thick, dark, simple syrup in the treacle / molasses type taste space - but remember - no calories
Part 7 - Post Script - Cooking on a Wood Fired Stove
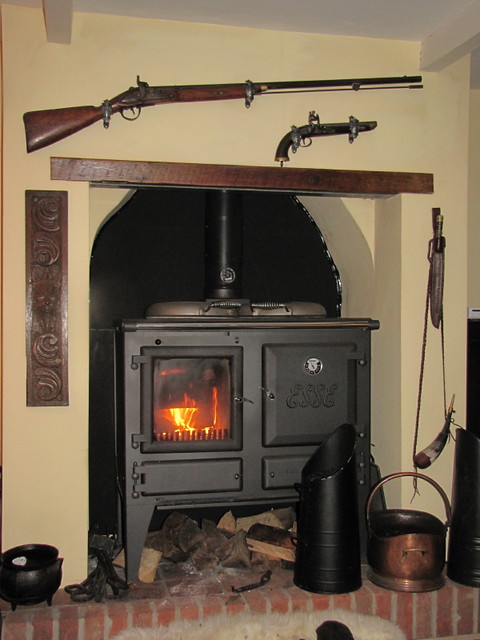
When photos show our Esse Ironheart multifuel stove, people often comment on it, so I thought I would do a few extra pictures and briefly explain how to cook on a wood fired stove for those who appreciate such things. I have done posts on how we render firewood before, so I won't go into that, but here is a brief rundown on how we cook with it
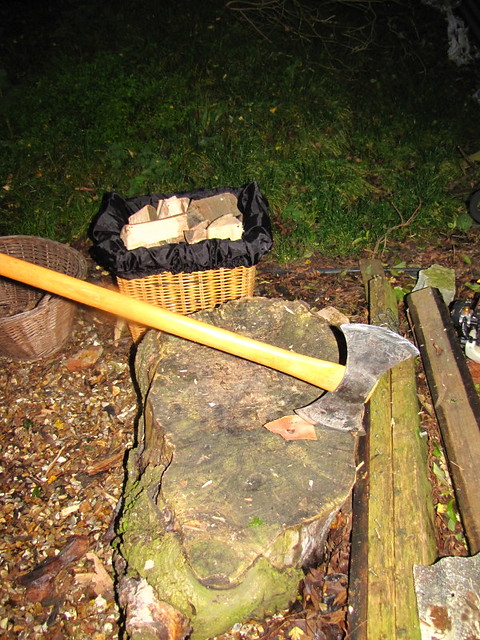
The first tool you need to light your stove is a good axe.
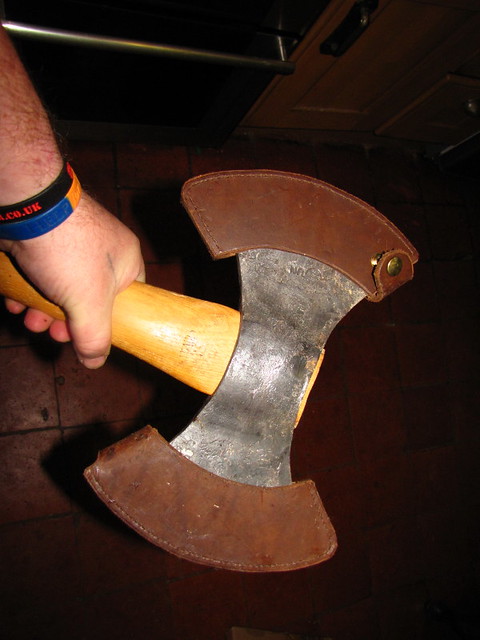
Double Headed Axe by British Red, on Flickr
Nip out to that little woodpile
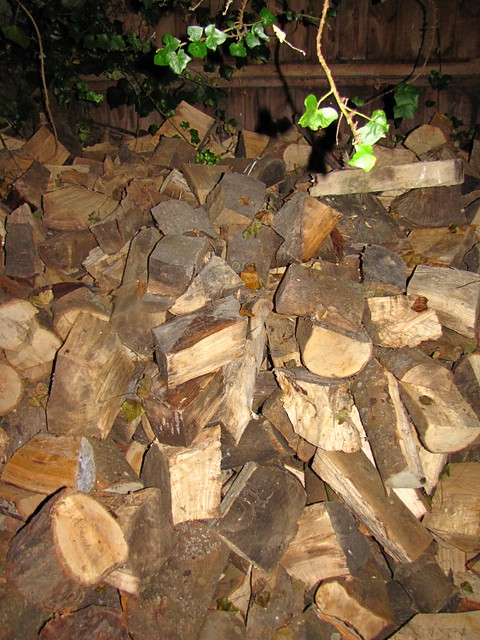
Wood Pile by British Red, on Flickr
....and render some logs down to about 2 x 2 size
Split kindling by British Red, on Flickr
Obviously your stove is stone cold at this point

Cold Stove by British Red, on Flickr
You need to get a nice hot fire going to warm the stove up - that small rendered wood burns quickly
Fire Lit by British Red, on Flickr
To control your stove there are three main controls to worry about
The flue damper - this opens and closes a baffle in the flue. You want this wide open when the stove is cold so the heat goes up the chimney waring the flue. This increases the draw of the flue meaning that smoke doesnt come back into the room

Esse Flue by British Red, on Flickr
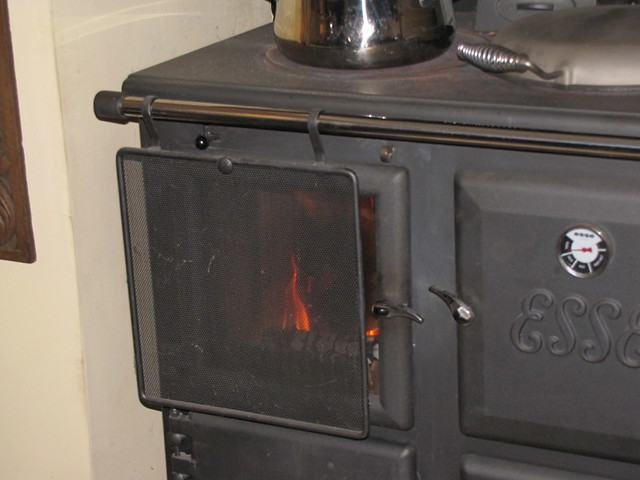
Then there two vents - one at the top of the firebox
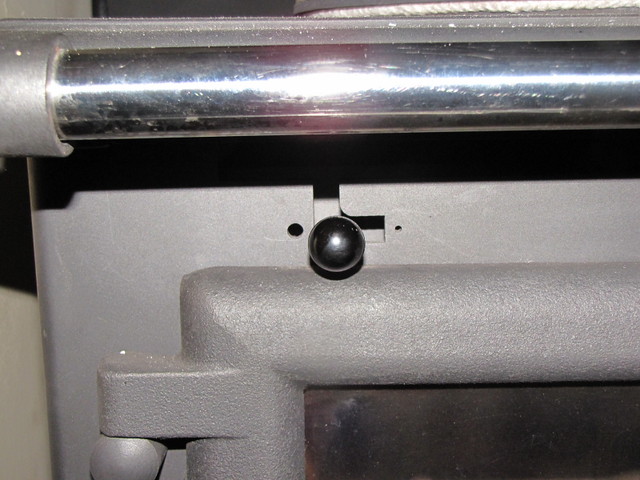
Esse Top vent by British Red, on Flickr
and one at the bottom

Esse Bottome Vent by British Red, on Flickr
When warming the stove, keep both wide open.
When cooking with wood, close the bottom vent and regulate airflow (and hence temperature) using the top vent. This sucks air in the top of the door, over the door and under the grate. The "airwash" over the door prevents the door sooting up. If adding a big log to the firebox, open the bottom vent for a few minutes and the log catches quickly.
When cooking with coal, close the top vent and regulate using the bottom vent. You need cool air over the bars of the firebox, otherwise the hot coal will burn out the bars.
You can tell when the stove is up to temperature as the thermometer on the flue gets above 200C
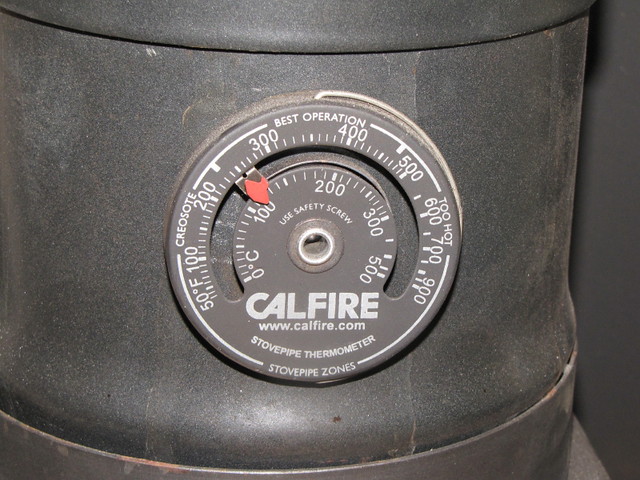
Hot flue by British Red, on Flickr
Running the flue cool causes cresosote to build up on the flue lining risking a chimney fire. We have little risk of that as we have a double wall liner and full insulated stack - but its good practice.
Once the flue is up to temperature, close the damper on the flue. Since we are using wood, close the bottom vent and regulate using the top vent.
The main way to regulate temperature though is the amount and size of the fuel. One big log on a few coals with the vent closed, will just "tick over" on the stove mainaing temperature. Lots of small logs or open vents increases temperature. Get it too hot and it takes an age to cool down!
Want to use the oven? Pull out this lever
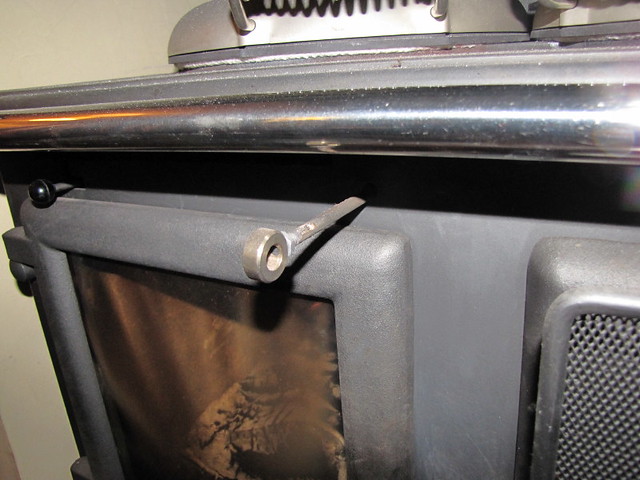
Esse Oven Control by British Red, on Flickr
This directs the hot gases from the fire box around the oven - you can see the temperature rise (slowly)
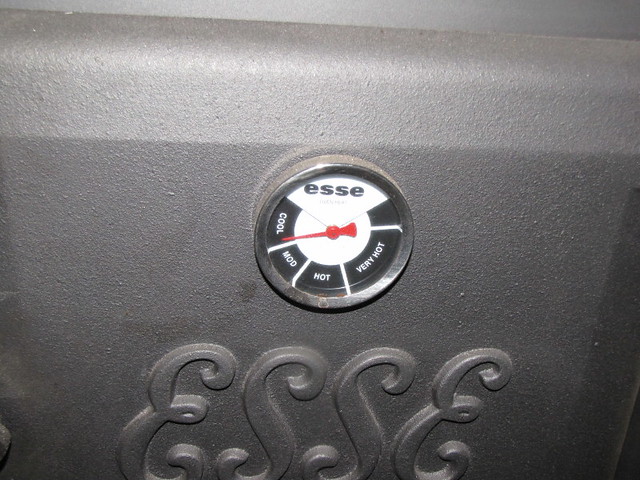
Temperature rising by British Red, on Flickr
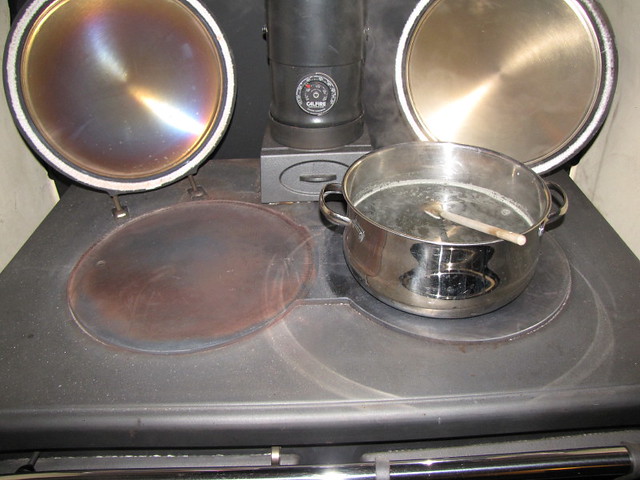
To use the "hob", lift the insulated plate covers. The left side (over the firebox) is hotter
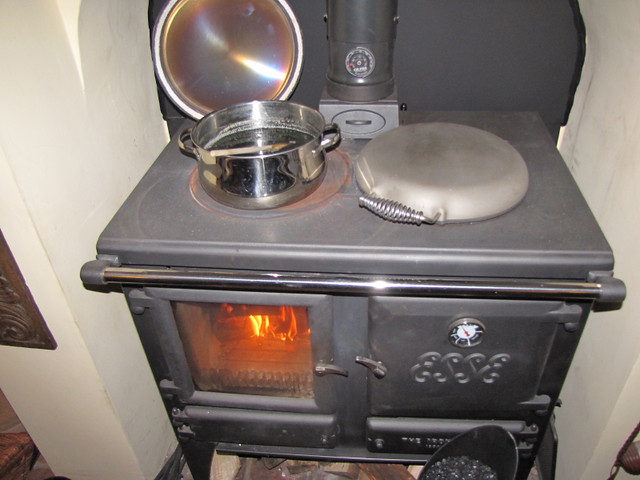
Boiling side by British Red, on Flickr
The right side is cooler
Simmer Side by British Red, on Flickr
Adjust the pan heat by sliding it around
A few other tips - on an Esse it gets mighty hot in front of that firebox - so a heat deflector hangs on the towel rail
Esse Heat Screen by British Red, on Flickr
Of course that heat is useful for drying the cheesecloth used for filtering!
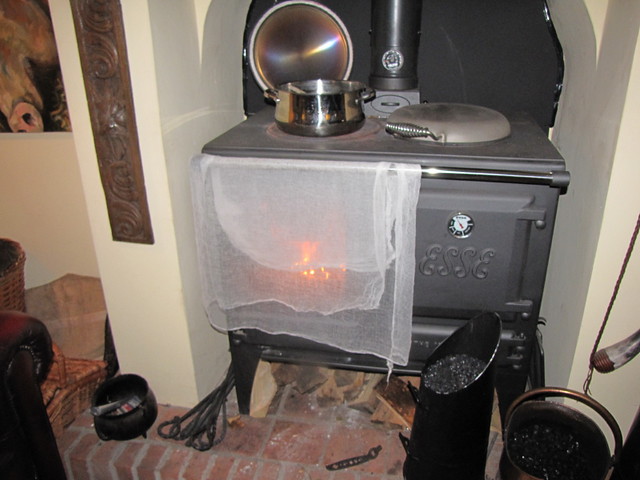
Drying Cheesecloth by British Red, on Flickr
Keep an eye out - it doesn't take long!
Thats it in a nutshell
Red
I have written threads on our beekeeping and sugar beet growing. The third strand of our attempt was to grow Yacon.
Part 1 - About Yacon
Yacon is a tuber bearing plant from the Andes - originally grown by the Incas. Its a member of the sunflower family with sweet, crisp, tuberous roots. In Brazil a tea is made from the leaves that is, allegedly, antidiabetic.
Yacon tubers are full of fructooligosacharides (FOS). FOS are a subset of inulin sugars - complex fructose polymers that, whilst tasting sweet, are not metabolisable by the human intestine. So all the sugar taste - no blood sugar (useful to diabetics) or weight gain.
A nutrional study in overweight premenopausal women shows weight loss following a regular intake - but judge that for yourself!
http://download.journals.elsevierhealth.com/pdfs/journals/0261-5614/PIIS0261561409000302.pdf
I'm interested in a plant that can produce a large crop of edible tubers (nice raw or cooked), edible leaves ..or as a sugar source.
I found one source of Yacon in the UK - but their whole crop was wiped out by rabbits
Part 2 - Growing Yacon
Enter slowworm of BCUK - who kindly send me some growing tubers (they have two sorts - growing tubers which make next years plants and storage tubers which are harvested). The growing tubers were received last Winter. Sort of like small red seed potatoes. They aren't very frost hardy, so I potted them up immediately in large pots of damp compost. They did nothing at all in early Spring.
However come mid April and they all popped up!
Yacon 22-4 by British Red, on Flickr
We grew them on for a month and planted them out in mid May
Yacon 25-05 by British Red, on Flickr
They were pretty slow growers to begin with - this was them in June
Yacon and Oca 22-06 by British Red, on Flickr
They do well in Autumn - they were about 6 foot tall by the end of October
full sized yacon by British Red, on Flickr
When the Yacon flowers, you can certainly see the family resemblance to sunflowers and Jerusalem artichokes
by British Red, on Flickr
Now the tubers need as long as possible to grow - but need to be lifted once frosts start. One morning the top growth showed frost nip
Yacon frost Burn by British Red, on Flickr
I decided this was the time to lift them
Part 3 - Lifting the Tubers
Given our high winds, I had staked and supported the plants. First thing to do was to remove the stakes and bindings
Yacon supports removed by British Red, on Flickr
I then cut away the top growth to abouot 18" to give room to work
Yacon Top Growth Cut by British Red, on Flickr
Now, if you are harvesting Yacon, you can't dig them up. The big storage tubers are fragile. Imagine a cucumber - like that. If you yank on them, they break. If you lever on them, they break. Now Yacon will keep like potatoes - but not if broken. So my technique was to dig a hole off to the side and then brush away the dirt like this
Yacon storage tuber by British Red, on Flickr
The tubers go down a foot or more - so haveing a well prepared bed helps easy removal. I found lifting the big tubers one at a time helped
Yacon Tuber by British Red, on Flickr
Eventually you can lift the crown
Yacon Plant by British Red, on Flickr
At this point I separated all the storage tubers
Yacon Harvest by British Red, on Flickr
The crowns I kept for propogating next years crop
Part 4 - Propogating for next year
One of the great things with Yacon is that you can harvest all the storage tubers and still have growing tubers for next year. To divide these, first I cut away the top growth
Yacon Crown by British Red, on Flickr
Each of the purple knobbly bits with a a leaf stem coming out is a potential new plant. The only viable way of dividing the up that I have found is to get in there with a knife and cut!
I was aiming for good sized pieces. I could probably divide these again, but I want healthy plants
Yacon Start by British Red, on Flickr
I put a good layer of compost supplemented with pelleted manure in a 5" pot and poked in the tuber
Yacon plant by British Red, on Flickr
These were then covered in compost, given a water to remove air pockets, drained and put into an unheated greenhouse to overwinter. I got 24 new plants which is a 6:1 increase on this years plants as well as the storage tiber harvest. I'm very pleased with that increase in growing stock as well as the harvest.
Part 5 - Using the Storage Tubers
Now the big storage tubers can be used in a number of ways. Just peeled and eaten they are nice. A cruchy, light, slightly sweet flesh - like...crisp pear?
They can easily go in a stir fry....think sweeter lighter water chestnut.
They store much like a potato
One think I wanted to do with this crop though was to make Yacon syrup. This stuff sells for £40 a litre . It had to be tried
First thing was to peel a good batch
Peeled Yacon Tubers by British Red, on Flickr
Next I pulped them. You can use a grater over a bowl, food processor or apple scratter. Whatever you use, do it over a bucket - the juice floods out - think pulping soft apples. Its the juice you want so capture it!
Pulped Yacon by British Red, on Flickr
Next job is to press the pulp. I set up the 5 litre press as I had made about 5 litres of pulp
Fruit Press by British Red, on Flickr
I removed the pressing bin and put the pulp in - good job I had already put the tube in a juice bucket...the juice started flowing fast even without pressing it was so wet!
Syrup Under own pressure by British Red, on Flickr
I found the colours going on here fascinating. The tbers are white inside a brown skin, but when cut the flesh oxidises green and the juice dark brown.
Next I pressed the pulp as dry as I could get it
Press Decending by British Red, on Flickr
Yacon Pulp by British Red, on Flickr
This yielded about 2 litres of juice - you can see how dark it is
Pressed Syrup by British Red, on Flickr
The next step is to filter the juice before cooking down. I use several layes of muslin in a jelly bag.
Jelly Bag and Cheesecloth by British Red, on Flickr
The juice ran through quickly
Strain Syrup by British Red, on Flickr
...but a good amount of vegetable fibre was removed
Yacon Fibre by British Red, on Flickr
I was left with a strained syrup ready for boiling down.
Step 6 - boiling down the syrup
Reducing syrup takes a long time. Frankly I don't want to burn a lot of propane to do that. However the upside of living a self sufficient way is that at this time of year we have the wood stove going to heat the house - so cooking heat is free
First I brought the syrup up to heat
Heating Syrup by British Red, on Flickr
Then moved it across to the cooler plate to simmer
Simmer Side by British Red, on Flickr
Once it had reduced by 80% I put it into a smaller pan to avoid burning. Eventually almost all the water was boiled off and the syrup becam to bubble - I took it off the heat at this point
Yacon foaming boil by British Red, on Flickr
You can see how sticky it is by scraping a spoon across the bottom
Yacon done by British Red, on Flickr
Always remember it gets thicker as it cools.
I stirred it occasionally as it cooled to avoid it crystalising
Once cool I poured it into bottles
Yacon Syrup Bottled by British Red, on Flickr
Having poured it, you can get a better idea of thickness
Yacon syrup thickness by British Red, on Flickr
Thats it. Taste wise I would say a thick, dark, simple syrup in the treacle / molasses type taste space - but remember - no calories
Part 7 - Post Script - Cooking on a Wood Fired Stove
When photos show our Esse Ironheart multifuel stove, people often comment on it, so I thought I would do a few extra pictures and briefly explain how to cook on a wood fired stove for those who appreciate such things. I have done posts on how we render firewood before, so I won't go into that, but here is a brief rundown on how we cook with it
The first tool you need to light your stove is a good axe.
Double Headed Axe by British Red, on Flickr
Nip out to that little woodpile
Wood Pile by British Red, on Flickr
....and render some logs down to about 2 x 2 size
Split kindling by British Red, on Flickr
Obviously your stove is stone cold at this point
Cold Stove by British Red, on Flickr
You need to get a nice hot fire going to warm the stove up - that small rendered wood burns quickly
Fire Lit by British Red, on Flickr
To control your stove there are three main controls to worry about
The flue damper - this opens and closes a baffle in the flue. You want this wide open when the stove is cold so the heat goes up the chimney waring the flue. This increases the draw of the flue meaning that smoke doesnt come back into the room
Esse Flue by British Red, on Flickr
Then there two vents - one at the top of the firebox
Esse Top vent by British Red, on Flickr
and one at the bottom
Esse Bottome Vent by British Red, on Flickr
When warming the stove, keep both wide open.
When cooking with wood, close the bottom vent and regulate airflow (and hence temperature) using the top vent. This sucks air in the top of the door, over the door and under the grate. The "airwash" over the door prevents the door sooting up. If adding a big log to the firebox, open the bottom vent for a few minutes and the log catches quickly.
When cooking with coal, close the top vent and regulate using the bottom vent. You need cool air over the bars of the firebox, otherwise the hot coal will burn out the bars.
You can tell when the stove is up to temperature as the thermometer on the flue gets above 200C
Hot flue by British Red, on Flickr
Running the flue cool causes cresosote to build up on the flue lining risking a chimney fire. We have little risk of that as we have a double wall liner and full insulated stack - but its good practice.
Once the flue is up to temperature, close the damper on the flue. Since we are using wood, close the bottom vent and regulate using the top vent.
The main way to regulate temperature though is the amount and size of the fuel. One big log on a few coals with the vent closed, will just "tick over" on the stove mainaing temperature. Lots of small logs or open vents increases temperature. Get it too hot and it takes an age to cool down!
Want to use the oven? Pull out this lever
Esse Oven Control by British Red, on Flickr
This directs the hot gases from the fire box around the oven - you can see the temperature rise (slowly)
Temperature rising by British Red, on Flickr
To use the "hob", lift the insulated plate covers. The left side (over the firebox) is hotter
Boiling side by British Red, on Flickr
The right side is cooler
Simmer Side by British Red, on Flickr
Adjust the pan heat by sliding it around
A few other tips - on an Esse it gets mighty hot in front of that firebox - so a heat deflector hangs on the towel rail
Esse Heat Screen by British Red, on Flickr
Of course that heat is useful for drying the cheesecloth used for filtering!
Drying Cheesecloth by British Red, on Flickr
Keep an eye out - it doesn't take long!
Thats it in a nutshell
Red

 but this plant sounds interesting.