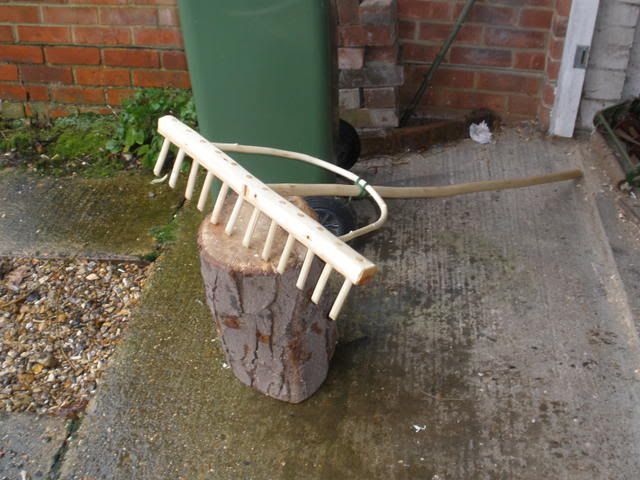
It's been a year since I posted a picture of my hay rake, and I have finally got around to posting an illustrated guide to how I make them. Those of you who have read Mike Abbott's Green Woodwork book will find some of this familiar, but here goes...
There are four main parts to this design, the head, stail (handle), tines (teeth), and the hoop. The rake is made from a mixture of green and dry wood components, and natural shrinkage helps to lock the parts together.
The tines, hoop and stail should be made ahead of time to allow them to dry, and the rake head should be made from green wood.
I like to use mostly willow, as it is plentiful around my way, easy to work and results in a very lightweight end product. Ash makes heavier duty (and heavier) rakes. But you could use whatever is available.
1. The Stail.
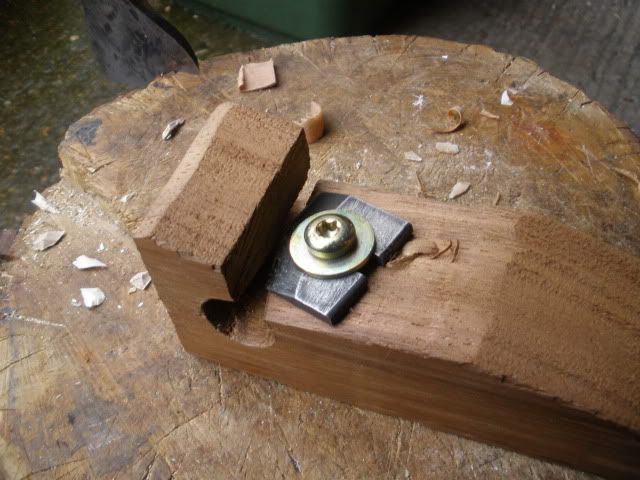
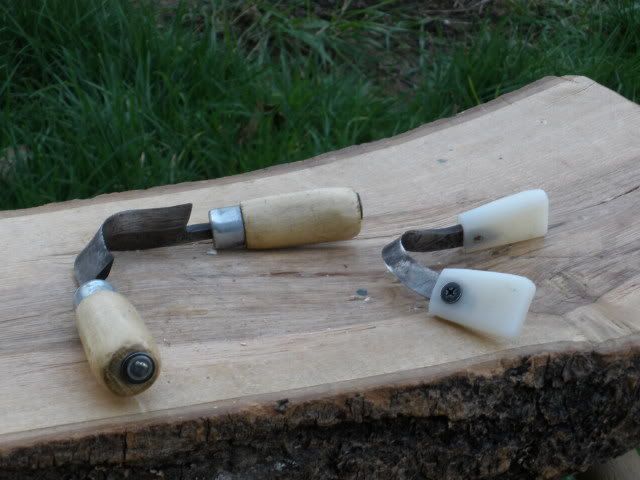
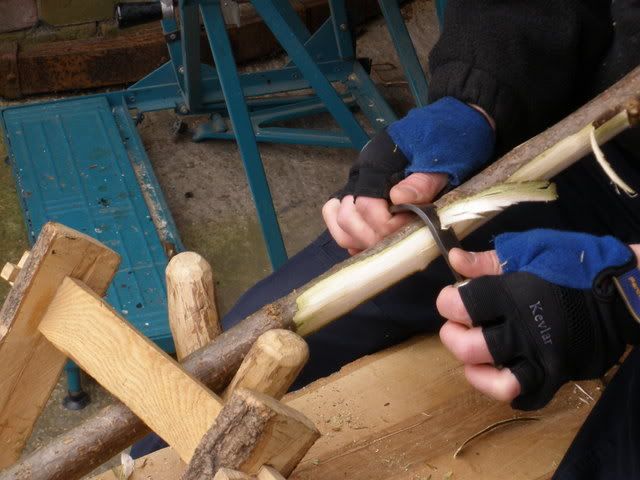
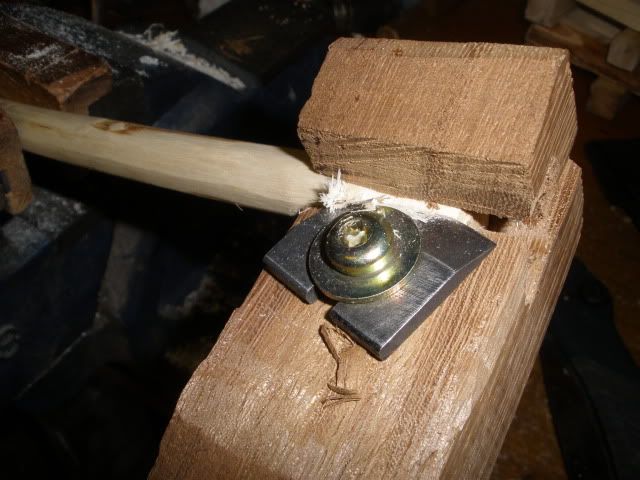
I always look out for fairly straight poles of Ash or Hazel about 5-6ft long and an inch and a quarter diameter at the smallest end. There are no hard and fast rules, and the design can be adapted to whatever materials are available. These are stored under cover to dry out, then I peel them, using some home made draw shaves.
2. The Hoop.
These are made from 3ft lengths of Ash, Hazel or Willow, slightly bigger than half inch diameter, as half inch is the desired final size when dry. These are bent around a jig like so.
This jig is made from scrap wood, and the removable pegs hold the hoop in place, and prevent it from kinking whilst being bent. Some woods may be peeled before bending, but sometimes leaving the bark on may prevent splitting of the fibres on the outside of the bend (the downside is that once bent, they are a b*gger to peel). If there are any knots they should be placed on the inside or neutral plane of the bend. Then the hoop is tied off and left to dry out.
3. The Tines.
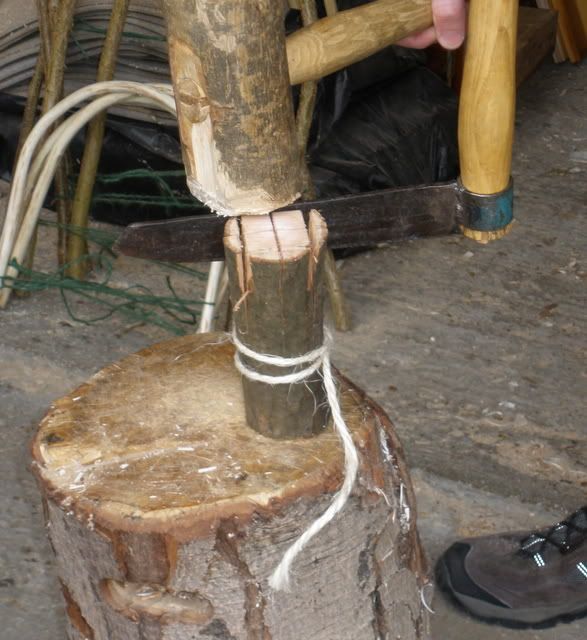
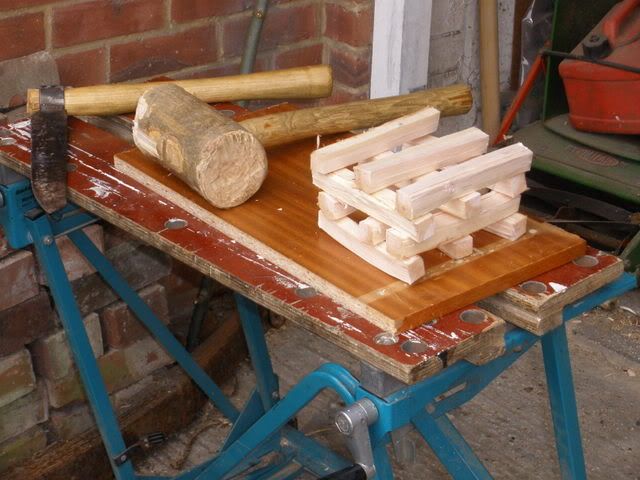
A six inch length of log (again willow, ash or whatever is available) is placed on a chopping block and split down into tine blanks (I use a froe). These should be about 5/8 inch square, so a half inch tine can be cut after it has dried out.
Stacking for drying:
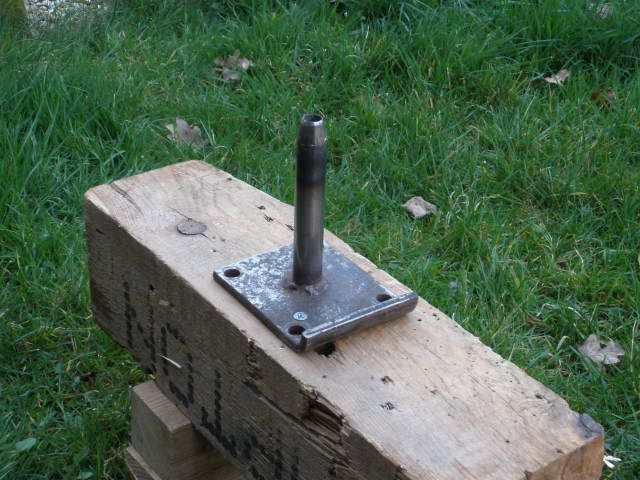
After a few weeks drying the square sections will be noticeably rhomboidal, due to natural shrinkage. Now they can be turned into round tines. This is my version of a tine cutter, made from a 1/2" wad punch head welded to a tube and base plate (apologies for the poor welding - seriously out of practice)
Whacking them through:
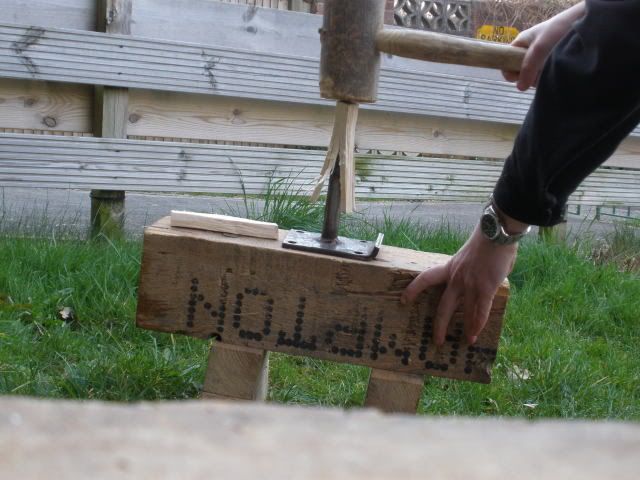
Each new tine knocks the previous one out of the cutter. Some tines may run off a little, but I never throw them away; they may come in useful some day.
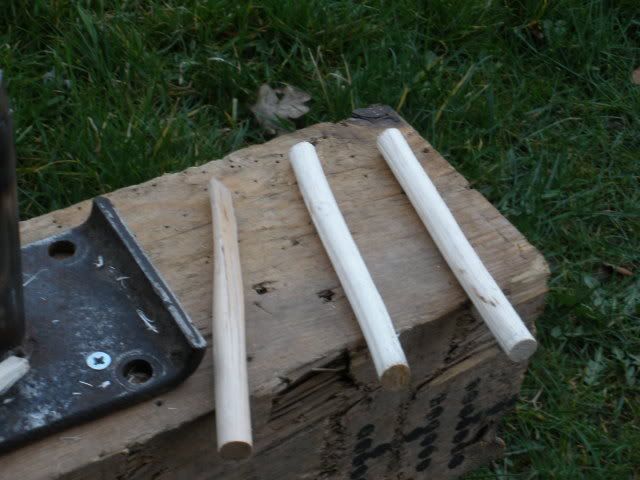
Left to right - severely run off, slightly wavy, first quality.
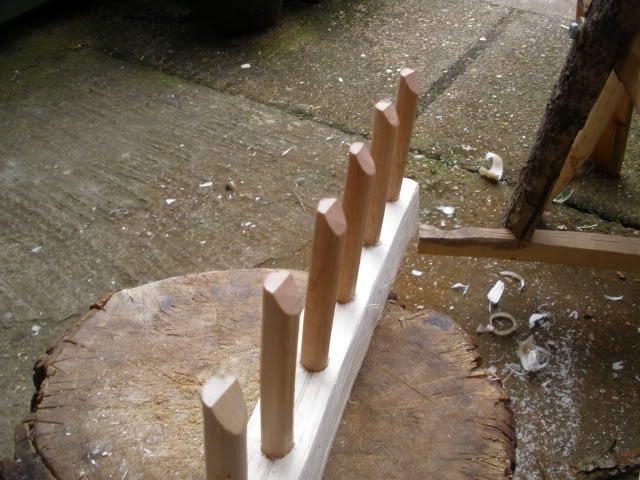
4. The Head.
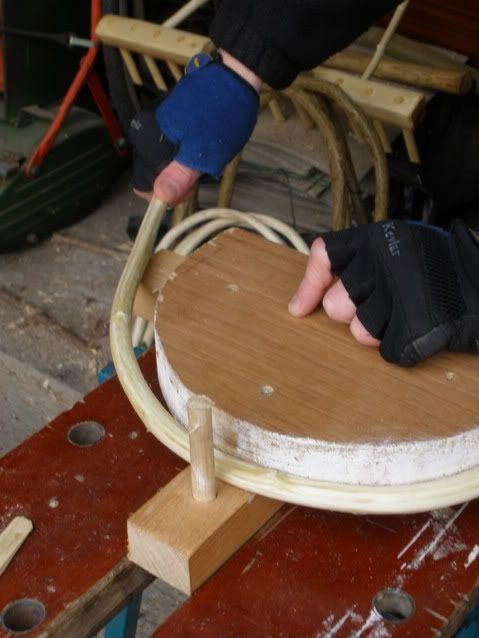
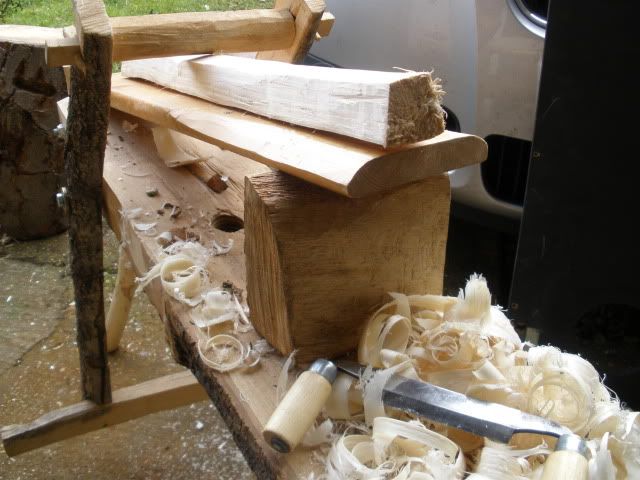
Make the head slightly longer the the final desired length, then the ends won't split when driving the tines home. A 12 tine head with 2" pitch will be 24" final size, so make it 26". I split it from a straight grain log, and use a drawknife to arrive at a shape something like this:
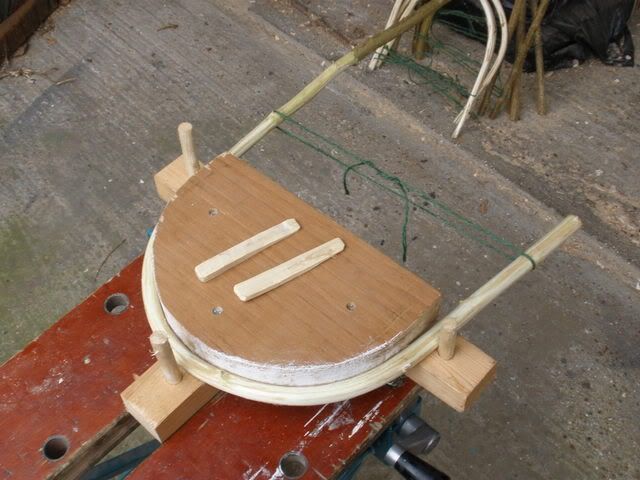
The tine positions are marked, and the end tine holes are drilled with a 1/2" auger bit (all the way through, this is easier and allows for the later replacement of any broken tines). Tines are driven in, and a loop of string tied around to act as a guide for the rest of the holes, to ensure the tines end up in line.
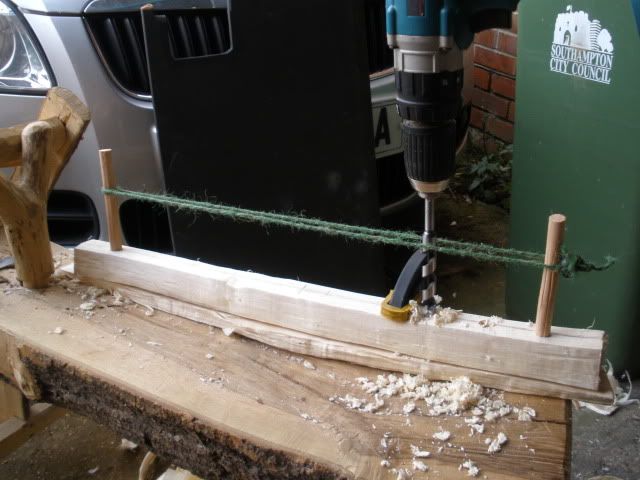
Note the scrap wood under the head to prevent splintering, and protect the surface of the shaving horse. Then the rest of the tines are driven in, and trimmed to the same length. The back edge of the tines need chamfering, to allow the front edge to contact the ground when the rake is in use. Finally the excess end lengths are sawn off, and the edges of the head are given a chamfering.
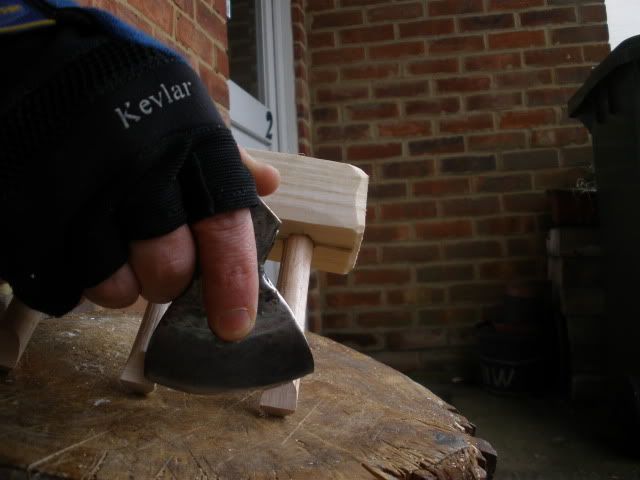
I use my home made 7oz side axe here.
Assembly.
A hole is drilled for the stail to pass through the head (about 7/8" depending on the stail diameter) This may be angled back slightly so there is less than 90 degrees between tines and stail. The end of the stail is whittled to fit, and a groove sawn to just over half the length of the whittled down section. The stail is the fitted and secured with a hardwood wedge, sawn off to length after fitting.
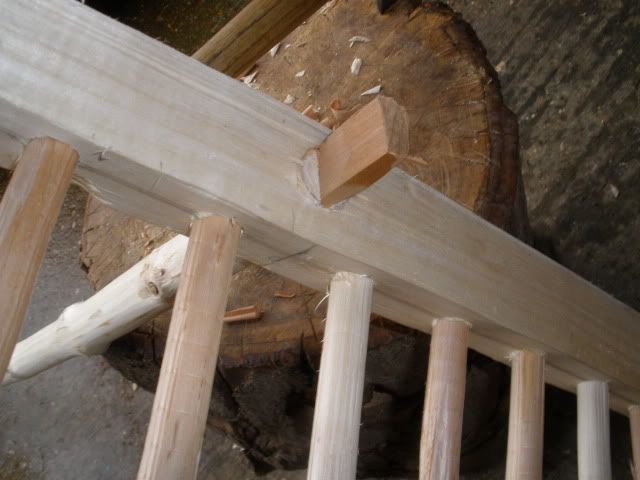
Then the hoop is fitted, with 1/2" holes drilled at an angle (judged by eye) into the head (not all the way through). The ends of the hoop are either whittled down, or shaped with a rounding plane (again home made)
Then the hoop ends are pushed into the holes.
Now the rake can be put to one side to dry out. The head should shrink around the other components, locking them tight. Once dry, a spokeshave is used to tidy up the back of the rake head, as the tops of the tines may be sitting slightly proud. Then linseed oil is applied, and finally the hoop is lashed to the stail (I use green jute string and a square lashing)
Finished! Thanks for your patience in reading this long article, any comments/questions appreciated
There are four main parts to this design, the head, stail (handle), tines (teeth), and the hoop. The rake is made from a mixture of green and dry wood components, and natural shrinkage helps to lock the parts together.
The tines, hoop and stail should be made ahead of time to allow them to dry, and the rake head should be made from green wood.
I like to use mostly willow, as it is plentiful around my way, easy to work and results in a very lightweight end product. Ash makes heavier duty (and heavier) rakes. But you could use whatever is available.
1. The Stail.
I always look out for fairly straight poles of Ash or Hazel about 5-6ft long and an inch and a quarter diameter at the smallest end. There are no hard and fast rules, and the design can be adapted to whatever materials are available. These are stored under cover to dry out, then I peel them, using some home made draw shaves.
2. The Hoop.
These are made from 3ft lengths of Ash, Hazel or Willow, slightly bigger than half inch diameter, as half inch is the desired final size when dry. These are bent around a jig like so.
This jig is made from scrap wood, and the removable pegs hold the hoop in place, and prevent it from kinking whilst being bent. Some woods may be peeled before bending, but sometimes leaving the bark on may prevent splitting of the fibres on the outside of the bend (the downside is that once bent, they are a b*gger to peel). If there are any knots they should be placed on the inside or neutral plane of the bend. Then the hoop is tied off and left to dry out.
3. The Tines.
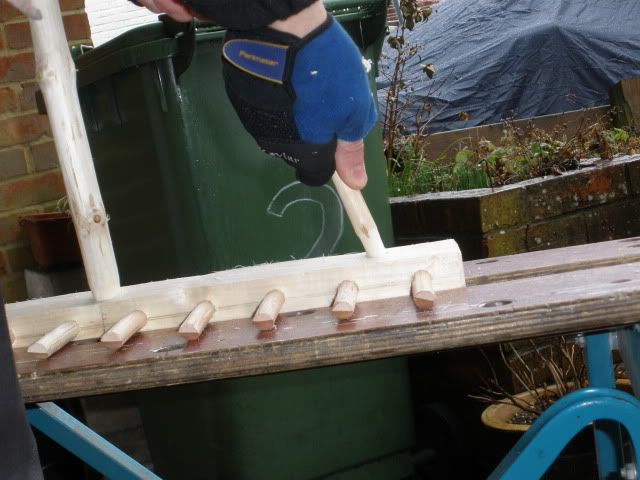
A six inch length of log (again willow, ash or whatever is available) is placed on a chopping block and split down into tine blanks (I use a froe). These should be about 5/8 inch square, so a half inch tine can be cut after it has dried out.
Stacking for drying:
After a few weeks drying the square sections will be noticeably rhomboidal, due to natural shrinkage. Now they can be turned into round tines. This is my version of a tine cutter, made from a 1/2" wad punch head welded to a tube and base plate (apologies for the poor welding - seriously out of practice)
Whacking them through:
Each new tine knocks the previous one out of the cutter. Some tines may run off a little, but I never throw them away; they may come in useful some day.
Left to right - severely run off, slightly wavy, first quality.
4. The Head.
Make the head slightly longer the the final desired length, then the ends won't split when driving the tines home. A 12 tine head with 2" pitch will be 24" final size, so make it 26". I split it from a straight grain log, and use a drawknife to arrive at a shape something like this:
The tine positions are marked, and the end tine holes are drilled with a 1/2" auger bit (all the way through, this is easier and allows for the later replacement of any broken tines). Tines are driven in, and a loop of string tied around to act as a guide for the rest of the holes, to ensure the tines end up in line.
Note the scrap wood under the head to prevent splintering, and protect the surface of the shaving horse. Then the rest of the tines are driven in, and trimmed to the same length. The back edge of the tines need chamfering, to allow the front edge to contact the ground when the rake is in use. Finally the excess end lengths are sawn off, and the edges of the head are given a chamfering.
I use my home made 7oz side axe here.
Assembly.
A hole is drilled for the stail to pass through the head (about 7/8" depending on the stail diameter) This may be angled back slightly so there is less than 90 degrees between tines and stail. The end of the stail is whittled to fit, and a groove sawn to just over half the length of the whittled down section. The stail is the fitted and secured with a hardwood wedge, sawn off to length after fitting.
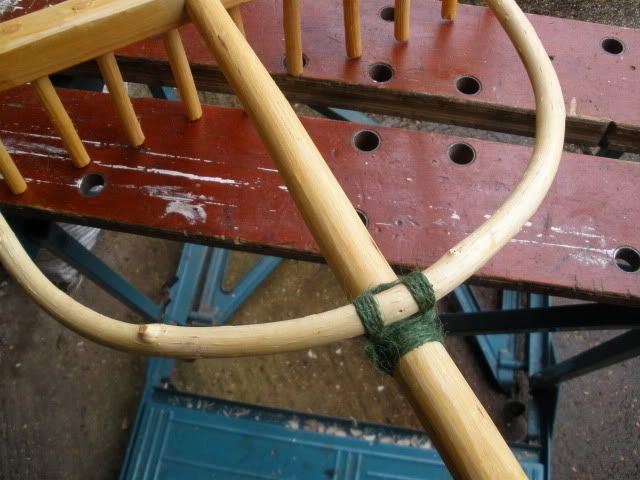
Then the hoop is fitted, with 1/2" holes drilled at an angle (judged by eye) into the head (not all the way through). The ends of the hoop are either whittled down, or shaped with a rounding plane (again home made)
Then the hoop ends are pushed into the holes.
Now the rake can be put to one side to dry out. The head should shrink around the other components, locking them tight. Once dry, a spokeshave is used to tidy up the back of the rake head, as the tops of the tines may be sitting slightly proud. Then linseed oil is applied, and finally the hoop is lashed to the stail (I use green jute string and a square lashing)
Finished! Thanks for your patience in reading this long article, any comments/questions appreciated
Last edited:
")