Handy Hammocks Lightweight Hammock Stand.
Intro:-
Having seen Handy Hammocks lightweight hammock stand mentioned on the Bushcraft UK web site, I thought I would treat myself to a set for use with my DD hammock. My hammock has been modified so a small loop of DD tree hugger has been threaded through the ends and knotted in a loop. A karabiner is then connected to this loop. In normal use DD tree huggers are then passed from the karabiner to the supporting tree. As I am very happy with the DD hammock I did not consider using Handy Hammocks own hammock.
Summery:-
In a nut shell,
1. These things are light..
2. These things are really light.
3. These things work.
4. These things really work.
5. These things are really light and really work.
Items Provided:-
What you get for your money is two foldable poles with there own style of bracing, two “Connector Sets” which act as the main guy(s) and provide a connection to your hammock, 6 base plates which provide your contact with “Terra Firma”, 12 very strong “Tent Pegs” and the required cordage. All this in a small carry bag. I think it is worth noting that the support poles each have 6 holes in the bracing frame to hold the supplied 6 pegs. This means I am not going to leave any behind after use, no small value add if you ask me. To this, add it came quick, was well packed and is a quality build.
Setup
Full set-up instructions are provided. You really need to read these as set up is a bit different to what most people are used to. It is easy to set up 2nd time around but you do need to think about it the first time. On the 3rd time of setting it up I had my 3 year old grandson climbing into the hammock, while my grown up daughter was already in, without any worries at all. Not bad from a system he could carry with ease.
As far as I can make out the system is based around making a pyramid of equilateral triangles to share the workload and balance the loading. What I do know is once up, it provides a very secure hang.
Unfold the support pole and fit the 2 halves together. Next slide down the central bracing until it locks in place “Like an Umbrella” with the 3 support poles locked and the cables tight. This is then held in place by passing the locking cable through the loop at the top of the pole. I still find it hard to believe that something this light is going to support my 46 inch waist and all the rest of me. The quality of build however is very reassuring.

Two of the base plates are laid out so the attached cord is tight with the side marked “top” showing. This is the first side (base!) of a triangle. One of the Connector Sets will then used to provide the other two sides.


The cable from the connector is passed through the hole in the centre of the base plate from the underneath. This is done to both of the base plates. Now 3 of the pegs are used to secure the base plate to the ground, one goes straight down, one goes right to left and the 3rd left to right via the shaped holes, which is why the plate had to be the right way up. Finally the cord is passed around the pegs and secured. Repeat for the 2nd plate. Whatever happens now, that cable is not coming loose.
The connector cable is then stretched out on the ground and a 3rd base plate is lined up with one of the two rings on connector cable. This will eventually go over the top of the support pole, the 2nd connects to the carabiners on your hammock. A spare tent peg is handy just to hold it in place temporarily.


The 3rd base plate has a bit of thin cord connecting it to the 4th base plate and it is this which will need to be adjusted to suit the length of your hammock and the amount of hang you like. 1st time around, just use the length provided. With the 4th base plate in position, this provides the starting point for the 2nd connector cable, which in turn decides the placing of bases 5 and 6. These two bases are again held in place with 3 pegs each. Remember to leave a bit of slack in the connector cable to fasten round the pegs.
So we have two triangles which are joined by a thin guide line. Each of the triangles is made up of two base plates well fixed to the ground and 3 third base plate waiting for the Support pole. The sides of the triangle are made from thin but very strong guy line, the joining cord is merely a place marker and will take no strain. The distance between the 2 triangles will depend of the size of your hammock and how tight a hang you like.
The 1st Support Pole is then placed in the centre of the 3rd base plate and angled back until the first of the two metal loops on the connector cable sits on top. We now have our 1st pyramid.


The provided instructions then talk about using a ridge line to hold up this end while you move to the other end but I found it just as easy to hook the carabiner attached to my hammock into the 2nd metal ring and maintain tension on my hammock as I walk to the other end. Fit the hammock's 2nd 'biner onto the 2nd connector, place the 2nd support pole into the base plate, slip that onto the remaining metal ring and we are done.
While It may seem like a bit of a do to set up, it really is just a way of providing a very firm footing for the guys which support the pole, which support you!
Adjustment:-
On the first set-up it is unlikely that the spacing between support poles is just right for you. I have part of a tree huger providing a loop at each end of my hammock and into that goes a carabiner. As both my hammocks have a slightly differing amount of tree huger and different style of carabiner, the overall length is unique.
.jpg")
Each persons set-up will be just that bit different. Adjust the thin cord connecting bases 3 and 4 and rehang! I Like a very tight hang, its a bit of a pain to get in as I am not very tall, but I find it more comfortable sleep that way. It took 3 practise set ups to get it perfect.
Useage:-


So what do we have.
a) Two custom built poles to support your hammock.
b) Two very strong guys to support the pole.
c) A very secure base to support the guys.
d) A very stable hang for a very little weight.
Downsides
As with all systems in the real world things don't quite go to plan. On one site I used, while it looked smooth and grassy, it was full of stones below the surface. With a tent and normal pegging out, if you come across a stone you can just reposition the peg maybe 6 inches away. This is not really an option with the Handy Hammock Stand as you need to retain a set piece layout. Having said that the pegs are really very strong and with a mallet will drive down past or even through stones. Getting them out could be a problem but I was advised that pouring a bit of water down the hole and rotating the pegs is the way to go.
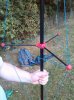
Another issue was because I was unable to drive the pegs in the full amount, the red disks did lift slightly and even bend a small amount. I have been assured that this is not an issue and can say that while some disks where not flat, they where not going anywhere even under a very heavy load. After they bedded down when I first sat on the hammock, they where rock solid when I came to lay down. While it would be better if you had the pegs and disks sitting just perfect, I have shown it as I set it up and used it. It still works in a less than ideal site. Check before use everytime but once I had put some strain on them ( sat in my hammock !) it bedded down and did not move.

Conclusion
A very well engineered, very light weight solution which allows me to use my hammock without trees. Never again will I have to be reduced to sleeping on the ground. I have seen many hammock systems which can be carried in a car. This one will fit on your pack and you would never know its there. That is until you are able to get a good nights sleep off the ground, without trees.

Hammock_man
2014
2014
Attachments

Last edited:
")