We have been discussing wood burning stoves for home use and firewood a good deal given the season, so I thought a few pictures of how I render wood might be interesting. I don't plan to show large trunk sectioning or felling techniques here just some of the tools useful for ground work and how to use them.
First up, I am going to use a chainsaw and other cutting gear. For me that means suiting up with PPE. Chainsaw accidents without protection are the kind of mistakes you only make once, so lets not mess about with this!
I use a bib and brace style set of trousers and a chainsaw jacket
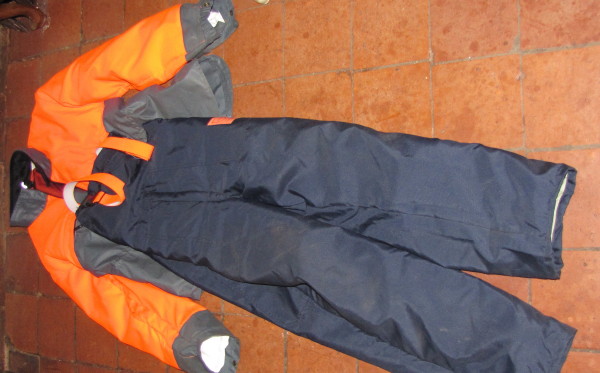
1) Chainsaw Suit by British Red, on Flickr
To top this off Ill wear a helmet with visor and ear protectors, chainsaw gloves and steel toe capped safety boots
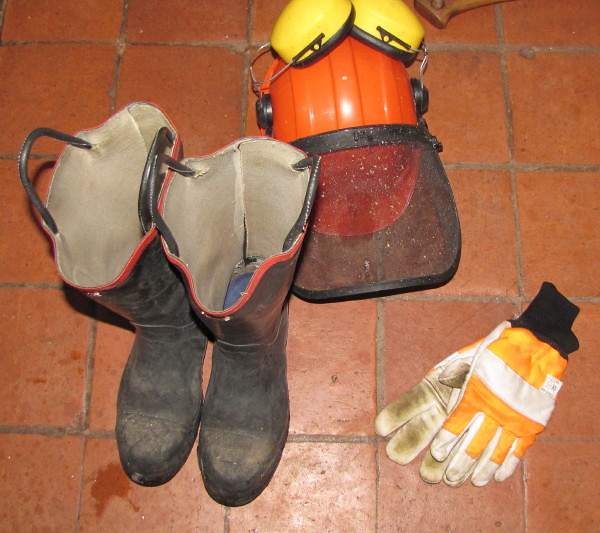
2) Other PPE by British Red, on Flickr
Suitably dressed and looking like a fluorescent gimp (but a safe one) we go out and confront the frozen logpile. A lot of this is green wood and needs time to season out, but I also have some dry stuff under cover
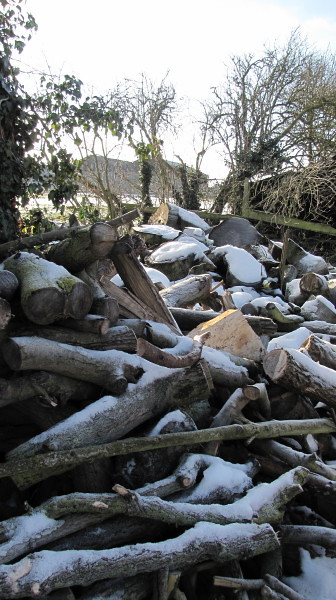
3) My log stack by British Red, on Flickr
Dry stuff once cut and split goes into the wood shed. Note that the shed is floored out with old pallets this keeps the split wood off the floor and lets a breeze in underneath. This shed isnt ideal it needs less walls to get a breeze through, an I will be building a better one for seasoning as time permits
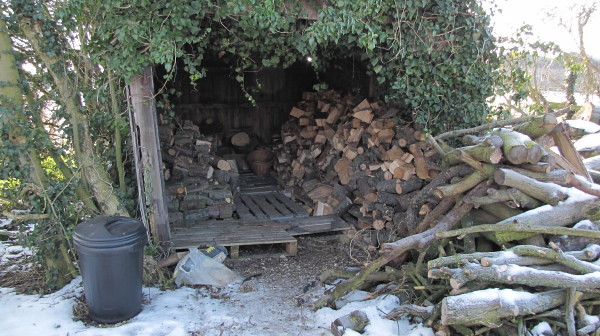
4) The wood shed by British Red, on Flickr
Tools wise I will be using an electric chainsaw with a 14 bar. I have petrol saws as well and they are invaluable where there is no power. For this sort of processing though, electric saws are lighter and a lot less hassle when you are constantly picking up logs and putting down the saw.
I will also use a bunch of hand tools A 6lb maul, 6lb sledge hammer, steel wedges, 3lb axe and a pry bar
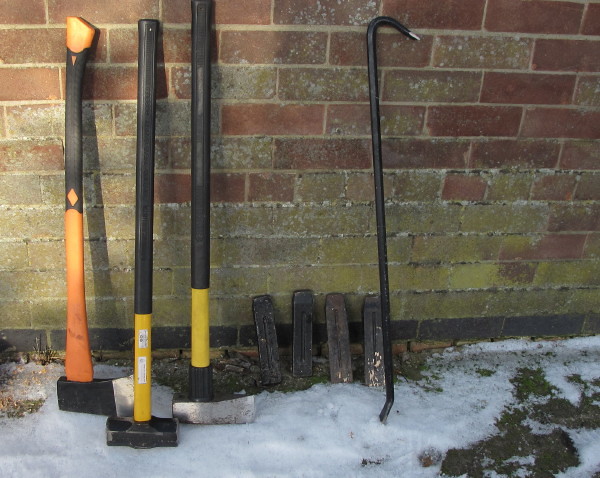
5) Hand tools by British Red, on Flickr
Getting ready to cut, the first thing I do is to set up my cutting yard making sure I have plenty of room to work, no trip hazards or slip hazards ( a real problem in the snow & ice).
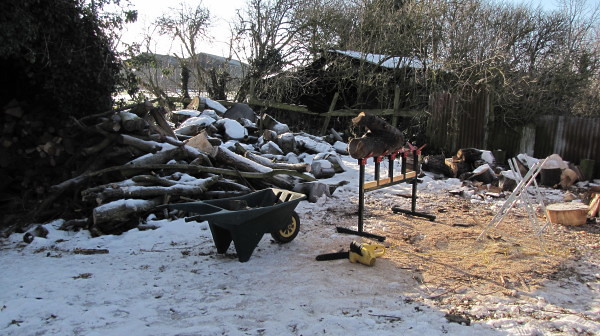
6) The cutting yard by British Red, on Flickr
First Im going to section up an awkward piece of a medium trunk, Ill use my large saw horse for this. This horse has some features I particularly like. Multiple supports mean I can work alone and not need to keep moving the log I can make multiple cuts and the pieces stay supported. Notice also that there is sacrificial wood on the horizontal bar. If the saw blade goes too far, it hits wood not metal!
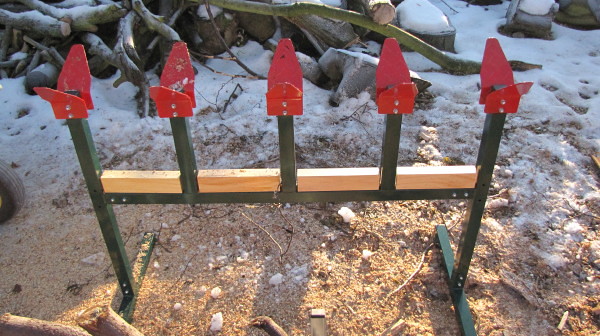
7) Large saw bench by British Red, on Flickr
I dont propose to show how to maintain or operate a chainsaw in this article I believe the best place to learn this is with hands on instructions on a proper course. I will explain why I am making the cuts I am doing though.
Here is our awkward log these Y shapes can be very tricky
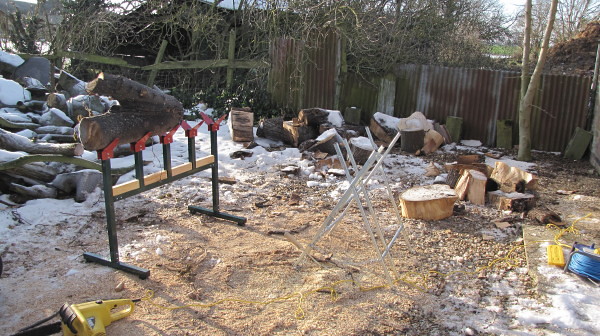
8) Large log by British Red, on Flickr
Thankfully the gripper plates on the large bench mean I can support this piece with one limb upwards. The first thing to do is to remove the smaller limb to give a straightish trunk
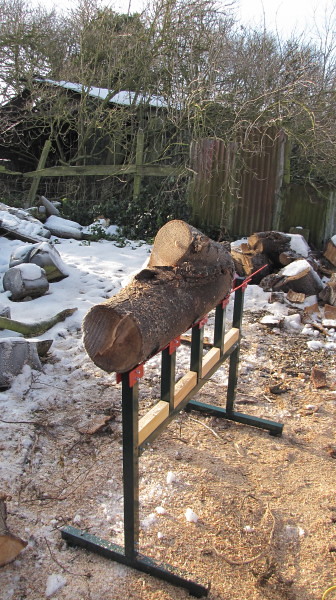
9) Limb off by British Red, on Flickr
I can then take rounds off each end leaving just the awkward V section
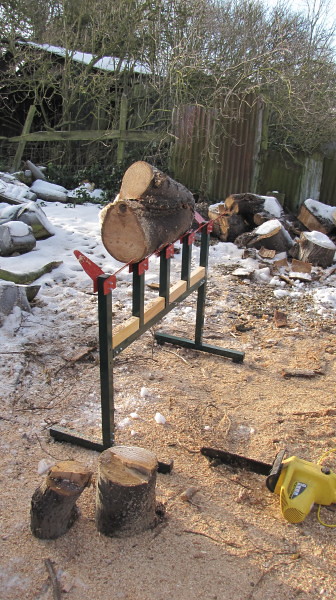
10) Sectioned down by British Red, on Flickr
The rounds can be split into useful stove sized pieces using the maul
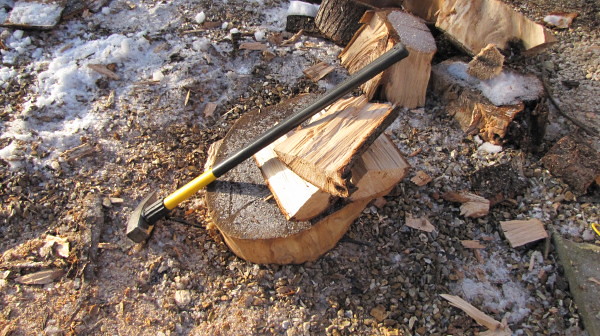
11) Maul Work by British Red, on Flickr
Sometimes you encounter a piece too large or with awkward grain and the maul wont split it. In this circumstance, insert a steel wedge into the cut made with the maul
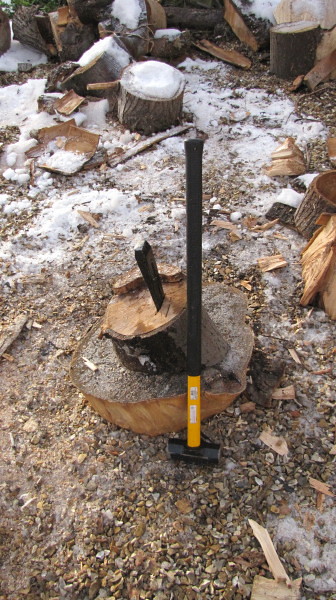
12) Fitting a wedge by British Red, on Flickr
The wedge is pounded in with the sledge hammer. Eventually a crack will form. If the section is very wide or stubborn, an additional wedge can be inserted further along the crack and the wedges pounded alternately. I have used up to four wedges to split rounds several feet across
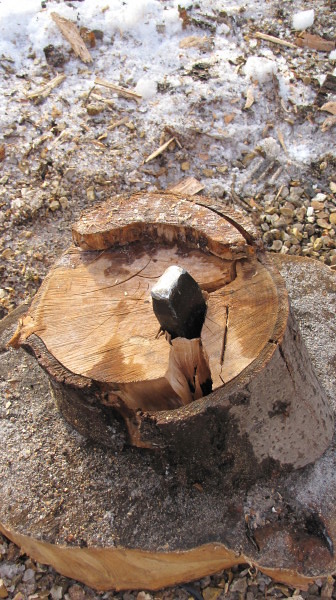
13) Driven wedge by British Red, on Flickr
We are now left with the V section. Where large limbs meet like this, splitting is very difficult as the grain runs in multiple directions
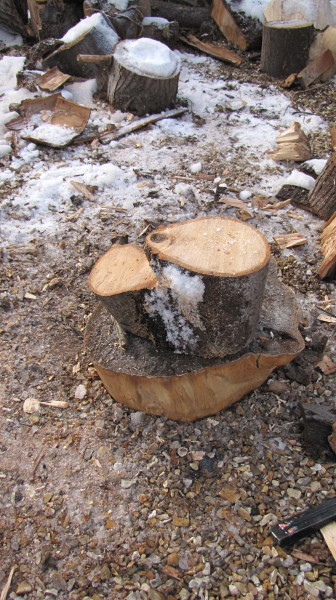
14) V Section by British Red, on Flickr
The easiest way to deal with this is to saw through the log at the join of the V
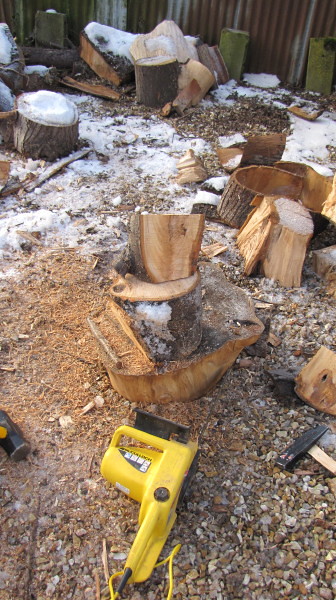
15) Sawn V by British Red, on Flickr
The divided piece can then be split, but start from the side furthest from the join leaving the awkward wiggly grain as a lump.
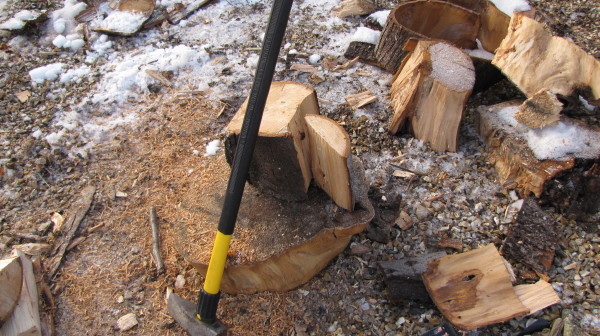
16) Maul from good side by British Red, on Flickr
There we have it the awkward Y piece rendered
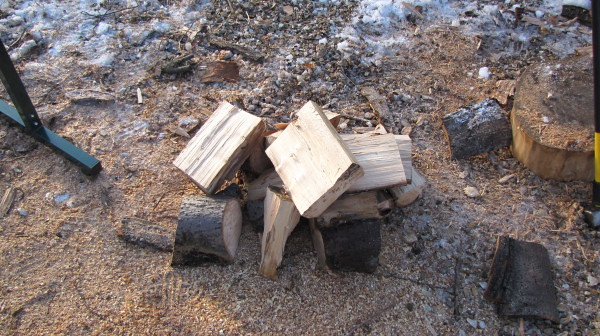
17) Rendered Wood by British Red, on Flickr
Having rendered some large wood, I have some smaller stuff to cut as well. For this I prefer my smaller portable saw horse
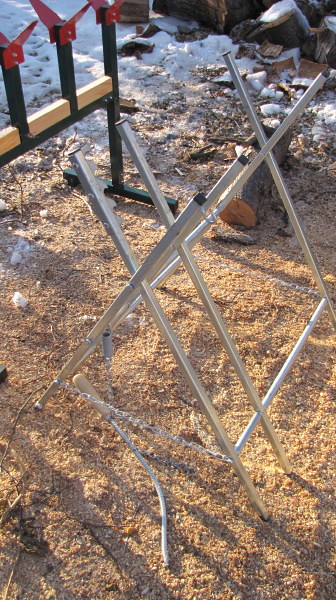
18) Light saw bench by British Red, on Flickr
This bench is equipped with a spring tensioned safety chain you can probably see a spring, chain and handle at the bottom left of the picture above. Heres a close up
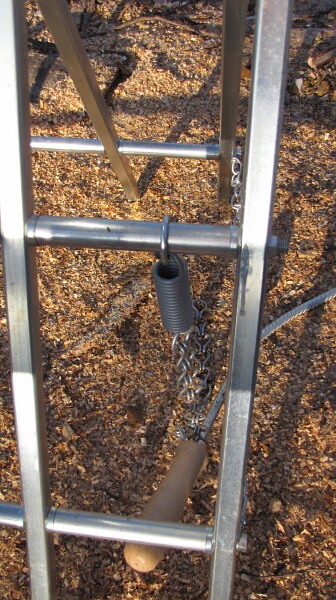
19) Spring, chain and bar by British Red, on Flickr
The chain is wrapped under the log pulling on the spring. The handle passes through one of the links of the chain
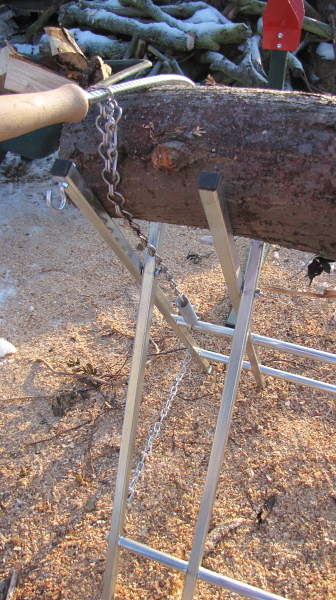
20) Safety chain engaged by British Red, on Flickr
The end of the handle locks into one of several teeth as shown below
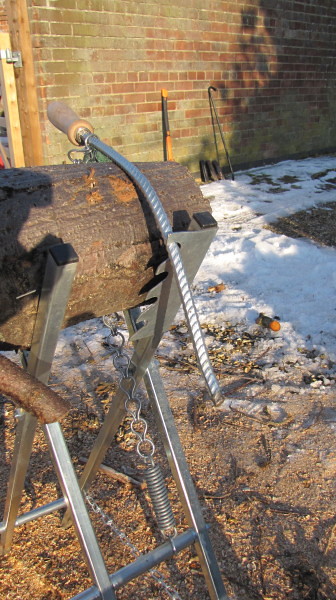
21) Safety chain locking bar by British Red, on Flickr
This chain clamps down the log and prevents it toppling off the horse after cuts. This allows more cuts to be made without re-positioning the log
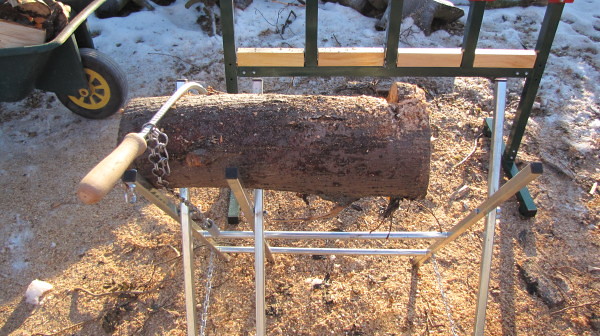
22) Supported log by British Red, on Flickr
These smaller rounds can be burned whole, but are quickly split with a 3lb axe. Splitting them allows them to dry more quickly and stack more easily.
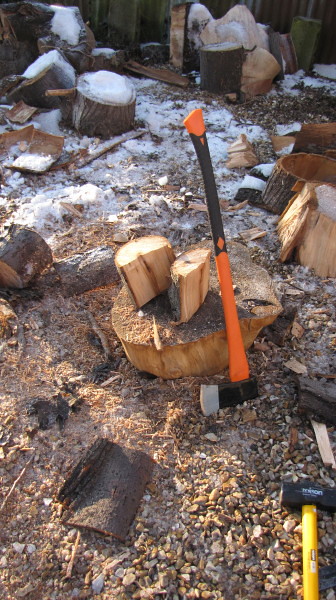
23) Axe splitting by British Red, on Flickr
I hope this might provide some ideas on useful equipment and techniques for processing firewood.
Red
First up, I am going to use a chainsaw and other cutting gear. For me that means suiting up with PPE. Chainsaw accidents without protection are the kind of mistakes you only make once, so lets not mess about with this!
I use a bib and brace style set of trousers and a chainsaw jacket

1) Chainsaw Suit by British Red, on Flickr
To top this off Ill wear a helmet with visor and ear protectors, chainsaw gloves and steel toe capped safety boots

2) Other PPE by British Red, on Flickr
Suitably dressed and looking like a fluorescent gimp (but a safe one) we go out and confront the frozen logpile. A lot of this is green wood and needs time to season out, but I also have some dry stuff under cover

3) My log stack by British Red, on Flickr
Dry stuff once cut and split goes into the wood shed. Note that the shed is floored out with old pallets this keeps the split wood off the floor and lets a breeze in underneath. This shed isnt ideal it needs less walls to get a breeze through, an I will be building a better one for seasoning as time permits

4) The wood shed by British Red, on Flickr
Tools wise I will be using an electric chainsaw with a 14 bar. I have petrol saws as well and they are invaluable where there is no power. For this sort of processing though, electric saws are lighter and a lot less hassle when you are constantly picking up logs and putting down the saw.
I will also use a bunch of hand tools A 6lb maul, 6lb sledge hammer, steel wedges, 3lb axe and a pry bar

5) Hand tools by British Red, on Flickr
Getting ready to cut, the first thing I do is to set up my cutting yard making sure I have plenty of room to work, no trip hazards or slip hazards ( a real problem in the snow & ice).

6) The cutting yard by British Red, on Flickr
First Im going to section up an awkward piece of a medium trunk, Ill use my large saw horse for this. This horse has some features I particularly like. Multiple supports mean I can work alone and not need to keep moving the log I can make multiple cuts and the pieces stay supported. Notice also that there is sacrificial wood on the horizontal bar. If the saw blade goes too far, it hits wood not metal!

7) Large saw bench by British Red, on Flickr
I dont propose to show how to maintain or operate a chainsaw in this article I believe the best place to learn this is with hands on instructions on a proper course. I will explain why I am making the cuts I am doing though.
Here is our awkward log these Y shapes can be very tricky

8) Large log by British Red, on Flickr
Thankfully the gripper plates on the large bench mean I can support this piece with one limb upwards. The first thing to do is to remove the smaller limb to give a straightish trunk

9) Limb off by British Red, on Flickr
I can then take rounds off each end leaving just the awkward V section

10) Sectioned down by British Red, on Flickr
The rounds can be split into useful stove sized pieces using the maul

11) Maul Work by British Red, on Flickr
Sometimes you encounter a piece too large or with awkward grain and the maul wont split it. In this circumstance, insert a steel wedge into the cut made with the maul

12) Fitting a wedge by British Red, on Flickr
The wedge is pounded in with the sledge hammer. Eventually a crack will form. If the section is very wide or stubborn, an additional wedge can be inserted further along the crack and the wedges pounded alternately. I have used up to four wedges to split rounds several feet across

13) Driven wedge by British Red, on Flickr
We are now left with the V section. Where large limbs meet like this, splitting is very difficult as the grain runs in multiple directions

14) V Section by British Red, on Flickr
The easiest way to deal with this is to saw through the log at the join of the V

15) Sawn V by British Red, on Flickr
The divided piece can then be split, but start from the side furthest from the join leaving the awkward wiggly grain as a lump.

16) Maul from good side by British Red, on Flickr
There we have it the awkward Y piece rendered

17) Rendered Wood by British Red, on Flickr
Having rendered some large wood, I have some smaller stuff to cut as well. For this I prefer my smaller portable saw horse

18) Light saw bench by British Red, on Flickr
This bench is equipped with a spring tensioned safety chain you can probably see a spring, chain and handle at the bottom left of the picture above. Heres a close up

19) Spring, chain and bar by British Red, on Flickr
The chain is wrapped under the log pulling on the spring. The handle passes through one of the links of the chain

20) Safety chain engaged by British Red, on Flickr
The end of the handle locks into one of several teeth as shown below

21) Safety chain locking bar by British Red, on Flickr
This chain clamps down the log and prevents it toppling off the horse after cuts. This allows more cuts to be made without re-positioning the log

22) Supported log by British Red, on Flickr
These smaller rounds can be burned whole, but are quickly split with a 3lb axe. Splitting them allows them to dry more quickly and stack more easily.

23) Axe splitting by British Red, on Flickr
I hope this might provide some ideas on useful equipment and techniques for processing firewood.
Red


