I am sure you as I are astounded by the amazing scrimshaw done by the Sami tribes people of the lapish tundra and boreal forests,they make the most wonderful art with a distinctive type of scrimshaw,unlike the scrimshaw practiced by mariners of old and modern scrimshanders who scratch and stipple their designs the Sami actually incise their designs with great precision and then fill the cuts with the desired medium usually birch bark powder sometimes mixed with tallow wax.Reindeer antler as with most deer antler will carve easily where as the traditional mediums of the scrimshander being harder bone tooth and ivory which would be much harder to incise successfully.
Of late i have been making a Scandinavian style knife for a friend and i had decided upon an inset European bison bone inset into the oak burl handle,this would be my canvas for my scrimshaw and as it is bone i will be showing how to use a knife to 'scratch' straight lines,a scribe or sail maker needle could be used but a blade makes for easier straight lines.
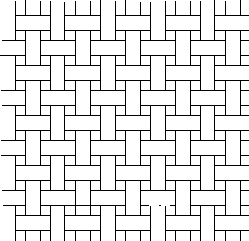
I will be scrimshawing a traditional Sami design,it is commonly known here as a basket weave design for obvious reasons here is its basic form:
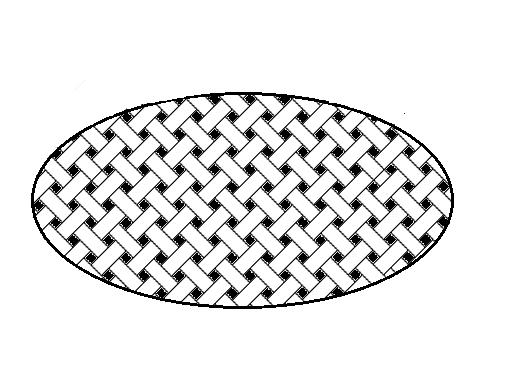
often the design is canted at 45 deg for better effect and the background of the pattern darkened thus:
To begin with ,as with any scrimshaw ,you need a polished surface here you see the bone pannel polished ready to go:

First you will need to draw out your design with pencil ,it is comprised of one thick line and one smaller,if you are doing this on a curved surface you will find it helpful to use a piece of bendy card as a ruler to draw against:
once done add the next layer in a cross fasion,be sure to make your lines at 90 deg to the first set,as a rule of thumb , if the lines make squares your spacing and size are right:
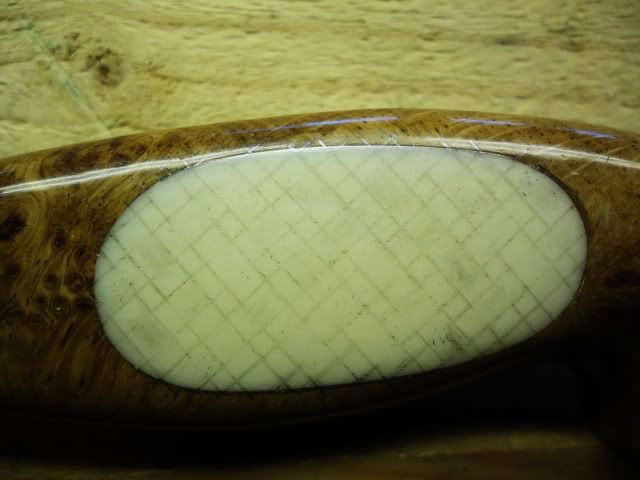
At this point the design is very hard to make out and so now is the hardest part to accomplish,with the corner of an eraser rub out the un wanted lines leaving a basket type weave pattern,under then over and so on until you have your pattern defined,practice this on paper a few times before you try it as scrimshaw,try it and you will see that it is incredibly difficult to keep track of which is over or under!you should now have something like this:
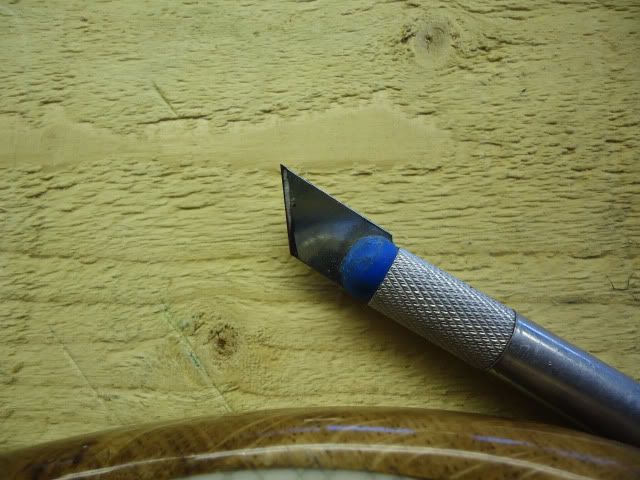
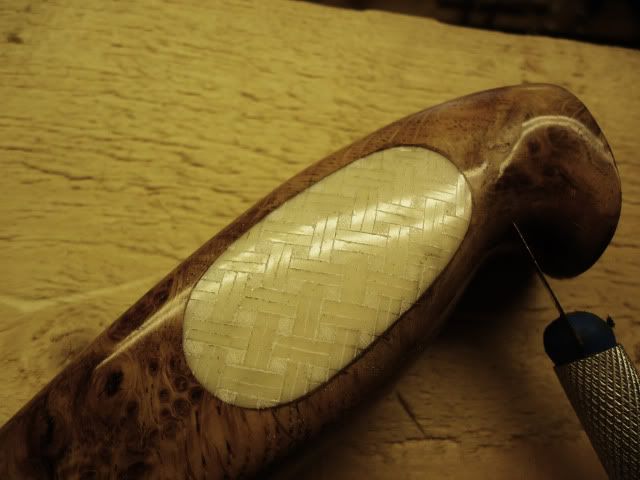
Now your pattern is marked out you will be ready for the scrimshawing itself,i like to use a craft type knife like this:
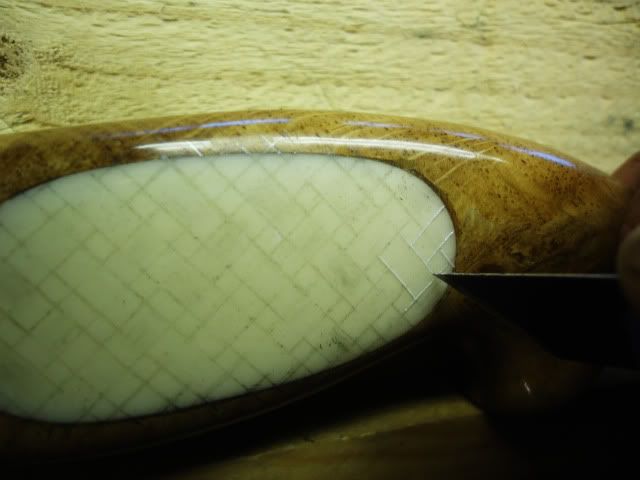
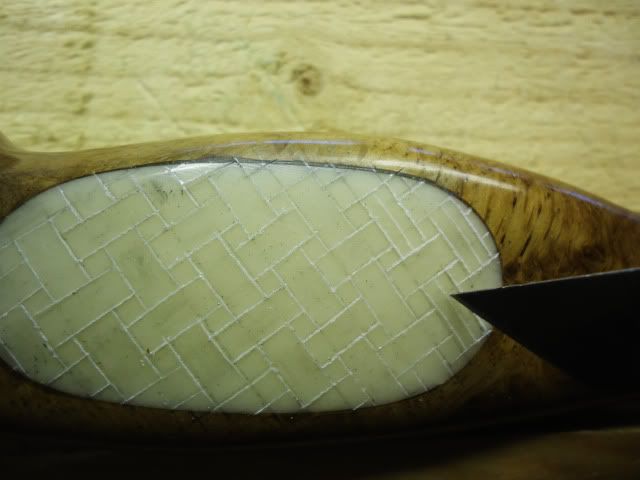
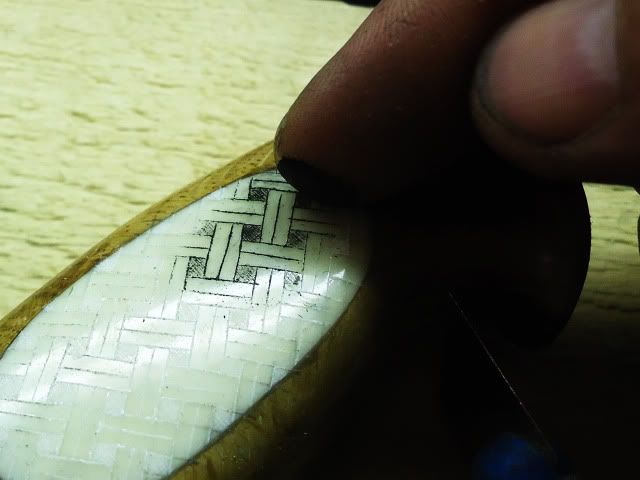
Take your time as you incise your pattern,think about every cut,will it slip over the line? will it wander off to one side?personally i prefer to draw the blade towards me thus:
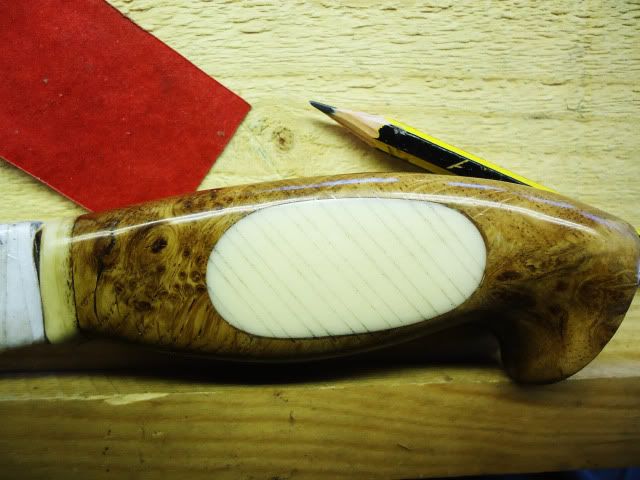
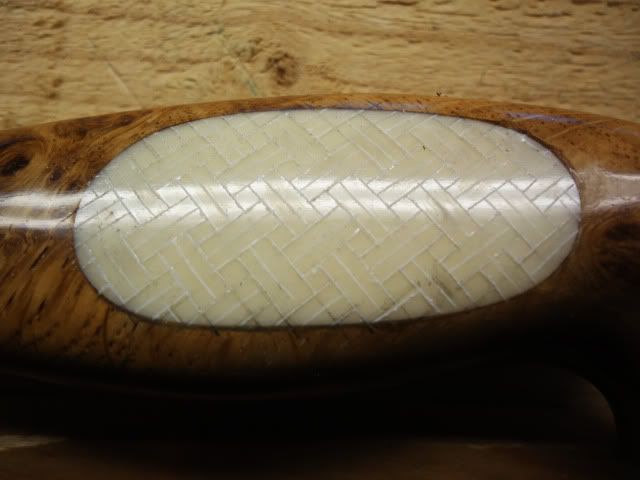
Just repeat this process right across the area to be scrimshawed you should be left with your design visible with light reflected off of the polished surface:
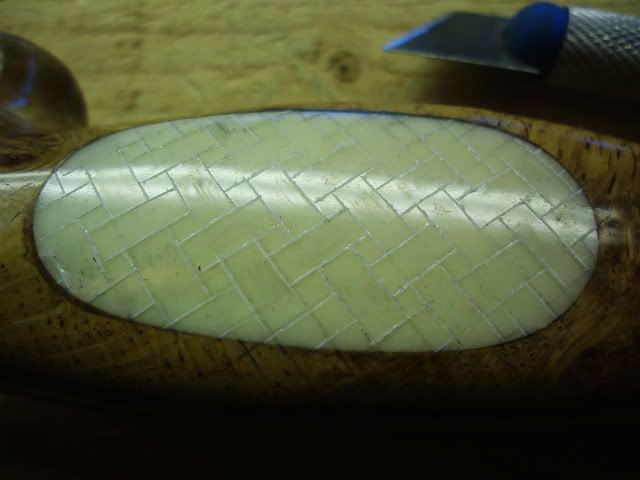
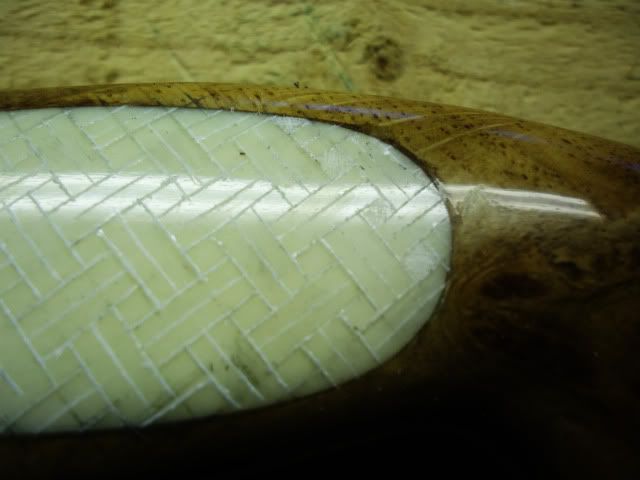
A feature i am wanting to add to this design is a line icised in the middle of each piece of the weave and i do it like this:
After some time you will have a piece looking somewhat like this:
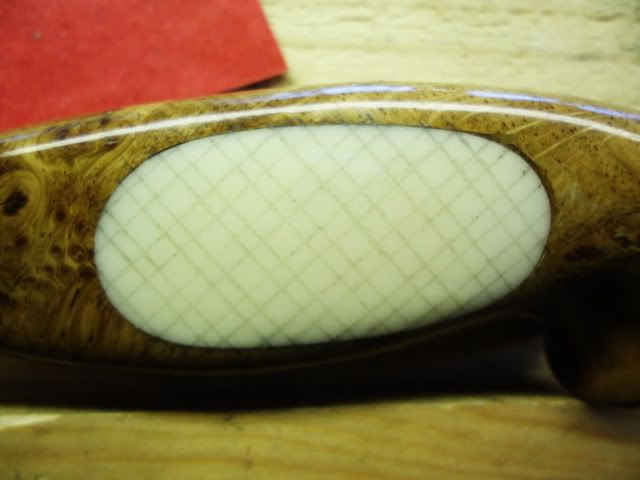
At this point i am ready to colour the background of the pattern,this is the small square shapes left in between the weave ,you could stipple the detail in but this is a right night mare and depending on the size of the area to be shaded could take up to a thousand pin ******,i elected to use a cross hatch design to fill these areas,take your time ,the further through the project you are the more disastrous a mistake becomes,you cant rub it out,it would be a matter of polishing the mistake out ,trust me you dont want to be doing this!
In the next picture you see the cross hatching completed:
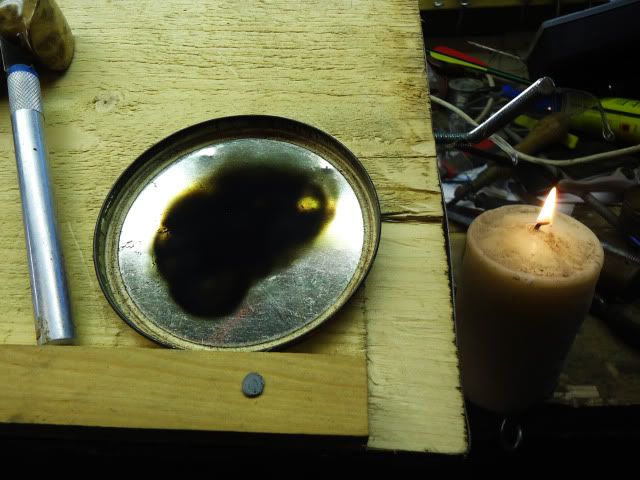
All the hard bit is done now! so what is needed now is a medium to rub into the incisions to show the pattern up,as i said earlier the Sami use inner birch bark powder and wax,i have chosen the traditional mariners method which employed what was readily at hand,tallow soot.The candles of old were nearly exclusively whale tallow,that is candles made with whale fat,whilst i have some antique whale tallow candles i chose to use some tallow candle i made using paraffin wax and mutton fat,to harvest your soot you will need to hold an item that is not likely to burn on the flame,i sometimes uses a china saucer or a tile,here i used a tin lid,be sure not to touch the wick or you will get melted wax in your soot which makes things difficult.
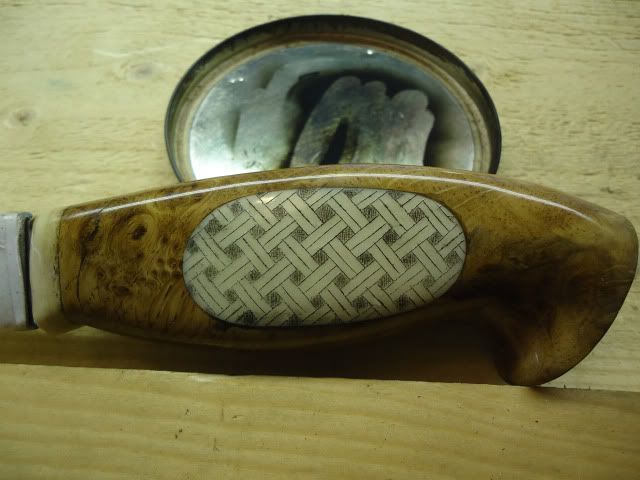
The method i prefer is to just use my finger and apply the soot in a circular motion with just a little pressure,as if by magic the scrimshaw starts to appear:
Carry this on across your design,you may need more than one application to get a uniform amount across the pattern,you should end up with something like this:
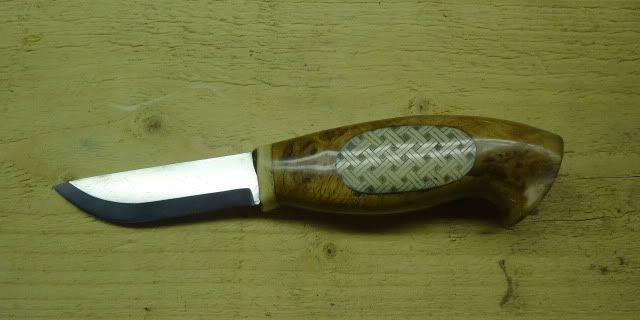
At this point buff the surface with a clean rag to remove any excess soot,and there you have it,a piece of scrimshaw,maybe not perfect but none the less your own work,encompassing methods as old as the Sami and as far as the whaling fleets of 19th century America.
So there it is scrimshaw my way,i hope you have a go ,dont beat yourself up over mistakes,they are all part of learning keep practicing and remember there no sch thing as bad scrimshaw!

Of late i have been making a Scandinavian style knife for a friend and i had decided upon an inset European bison bone inset into the oak burl handle,this would be my canvas for my scrimshaw and as it is bone i will be showing how to use a knife to 'scratch' straight lines,a scribe or sail maker needle could be used but a blade makes for easier straight lines.
I will be scrimshawing a traditional Sami design,it is commonly known here as a basket weave design for obvious reasons here is its basic form:
often the design is canted at 45 deg for better effect and the background of the pattern darkened thus:
To begin with ,as with any scrimshaw ,you need a polished surface here you see the bone pannel polished ready to go:
First you will need to draw out your design with pencil ,it is comprised of one thick line and one smaller,if you are doing this on a curved surface you will find it helpful to use a piece of bendy card as a ruler to draw against:
once done add the next layer in a cross fasion,be sure to make your lines at 90 deg to the first set,as a rule of thumb , if the lines make squares your spacing and size are right:
At this point the design is very hard to make out and so now is the hardest part to accomplish,with the corner of an eraser rub out the un wanted lines leaving a basket type weave pattern,under then over and so on until you have your pattern defined,practice this on paper a few times before you try it as scrimshaw,try it and you will see that it is incredibly difficult to keep track of which is over or under!you should now have something like this:
Now your pattern is marked out you will be ready for the scrimshawing itself,i like to use a craft type knife like this:
Take your time as you incise your pattern,think about every cut,will it slip over the line? will it wander off to one side?personally i prefer to draw the blade towards me thus:
Just repeat this process right across the area to be scrimshawed you should be left with your design visible with light reflected off of the polished surface:
A feature i am wanting to add to this design is a line icised in the middle of each piece of the weave and i do it like this:
After some time you will have a piece looking somewhat like this:
At this point i am ready to colour the background of the pattern,this is the small square shapes left in between the weave ,you could stipple the detail in but this is a right night mare and depending on the size of the area to be shaded could take up to a thousand pin ******,i elected to use a cross hatch design to fill these areas,take your time ,the further through the project you are the more disastrous a mistake becomes,you cant rub it out,it would be a matter of polishing the mistake out ,trust me you dont want to be doing this!
In the next picture you see the cross hatching completed:
All the hard bit is done now! so what is needed now is a medium to rub into the incisions to show the pattern up,as i said earlier the Sami use inner birch bark powder and wax,i have chosen the traditional mariners method which employed what was readily at hand,tallow soot.The candles of old were nearly exclusively whale tallow,that is candles made with whale fat,whilst i have some antique whale tallow candles i chose to use some tallow candle i made using paraffin wax and mutton fat,to harvest your soot you will need to hold an item that is not likely to burn on the flame,i sometimes uses a china saucer or a tile,here i used a tin lid,be sure not to touch the wick or you will get melted wax in your soot which makes things difficult.
The method i prefer is to just use my finger and apply the soot in a circular motion with just a little pressure,as if by magic the scrimshaw starts to appear:
Carry this on across your design,you may need more than one application to get a uniform amount across the pattern,you should end up with something like this:
At this point buff the surface with a clean rag to remove any excess soot,and there you have it,a piece of scrimshaw,maybe not perfect but none the less your own work,encompassing methods as old as the Sami and as far as the whaling fleets of 19th century America.
So there it is scrimshaw my way,i hope you have a go ,dont beat yourself up over mistakes,they are all part of learning keep practicing and remember there no sch thing as bad scrimshaw!
