A couple of weekends ago I had one of my annual axe making courses in the woods and I thought I'd share some pics as several of the course members are regular visitors here.
Also, I've offered the axe that I made as a Raffle prize at the Moot to raise funds for BCUK So here is how it was born...
N.B. my apologies for missing some stages out, I was rather busy and failed to get pictures of everything as we went along. If you would like to see the missing bits then I've more pictures of previous groups on my website, so the gaps should fill in
This was the first group that I let loose with Virgin steel for the heads. Normally I start groups with hammer heads as the hole is already in place and just needs a bit of reshaping. So we all started with a 4" length of 1" square EN9 (spring steel). I had drilled a few holes along the length to start us off with the eyes and to ensure that we punched the eyes through straight.
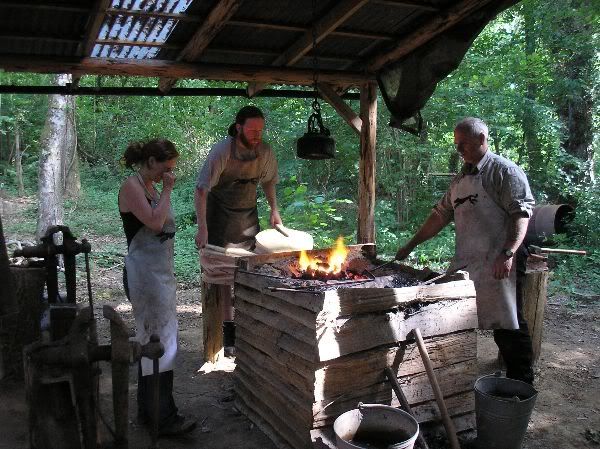
1) get the metal HOT! this is my Roman/Saxon forge with a new set of lungs on it
with such a big lump, a lot of the work is done in pairs using a sledge hammer. After that it's all individual work with hand hammers
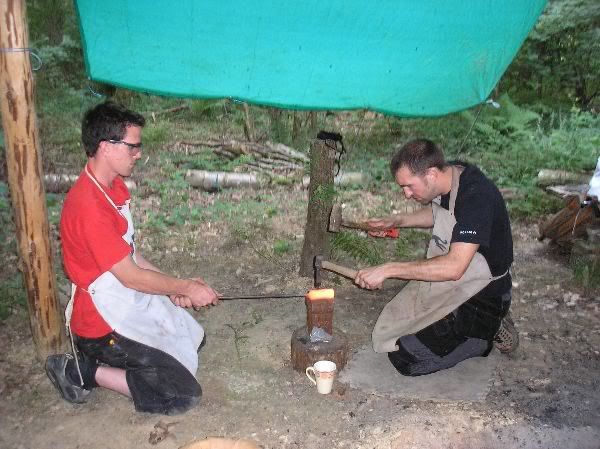
2) Punching the eye. the cup is full of water to cool the punch down periodically

3) a little reshaping of the eye area and drawing of a little more cheek with a sledge. This is the Iron Age forge
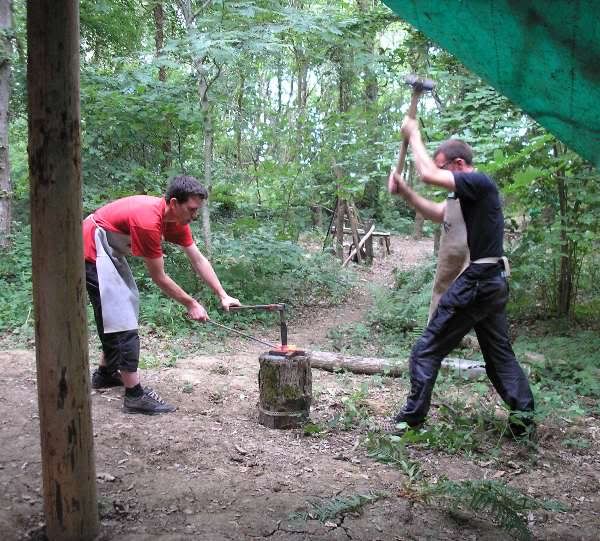
4) Driving a drift through to shape the eye to whatever we fancy. of the 6 axes made only one was a hawk eye, the rest a normal slender apple seed eye.
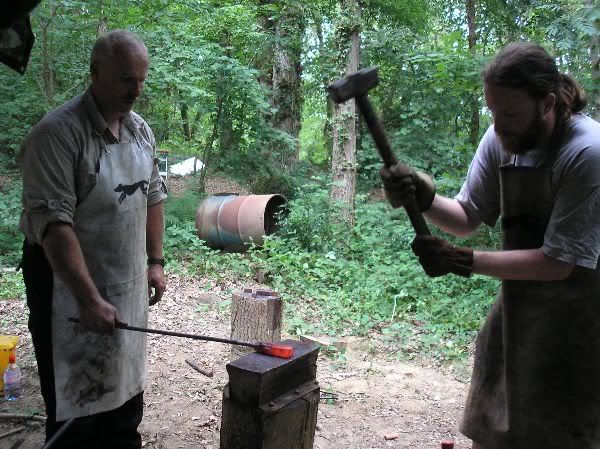
5) moving the bulk of the mass with a sledge hammer.
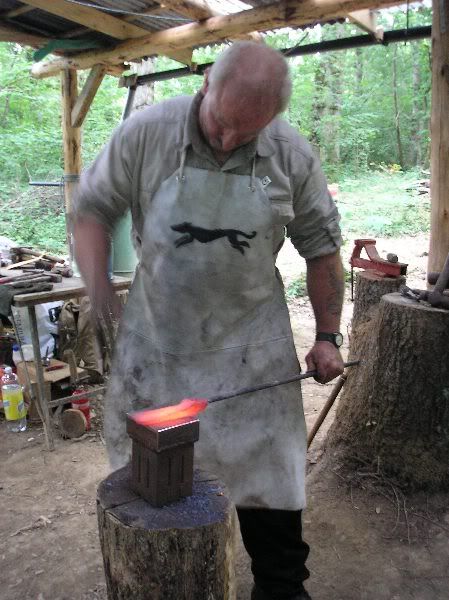
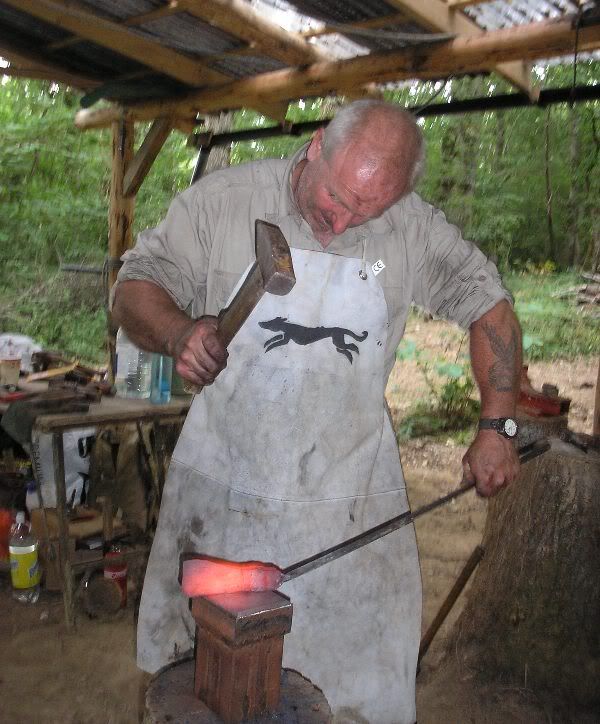
6) final shaping and forging with a hand hammer dictates the style and form of the axe.
Then its a little tidying up with a file and the hardening of the axes in molten tallow. followed by...

7) Tempering in the embers until a pale brown is seen at the edge, this gives the edges a mid to high 50's RC (just right for an axe)
Second day and on comes the woodwork
I provided the group with a selection of cleft ash billets that had been mostly dried over the previous few weeks (the tree was felled last year so was quite well seasoned anyway)
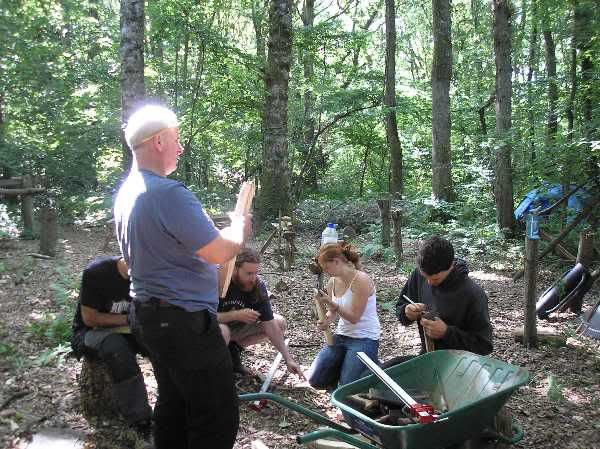
8) select a billet that will provide enough wood for each handle shape. Then draw an outline of the desired handle
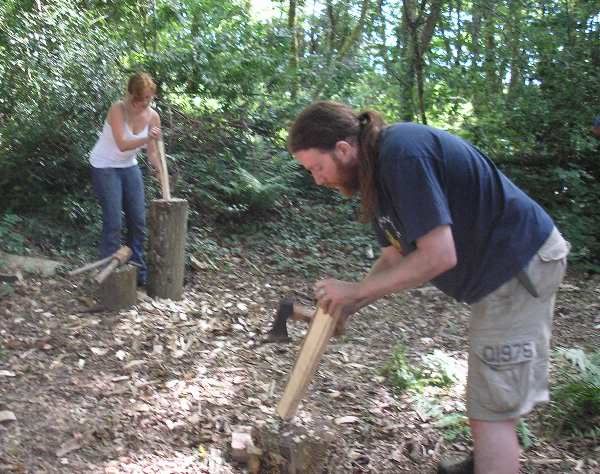
9) Ah, the irony: needing an axe to make one! At least people had the chance to try different shaped handles out before they got into carving their own
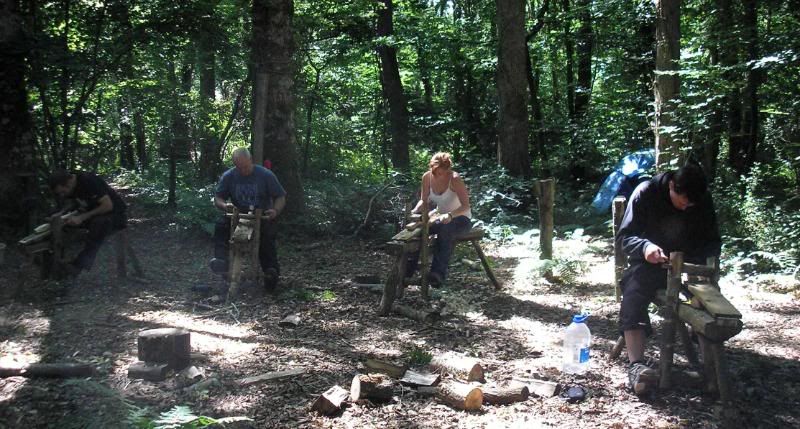
10) taking the shapes closer to dimension with drawknives
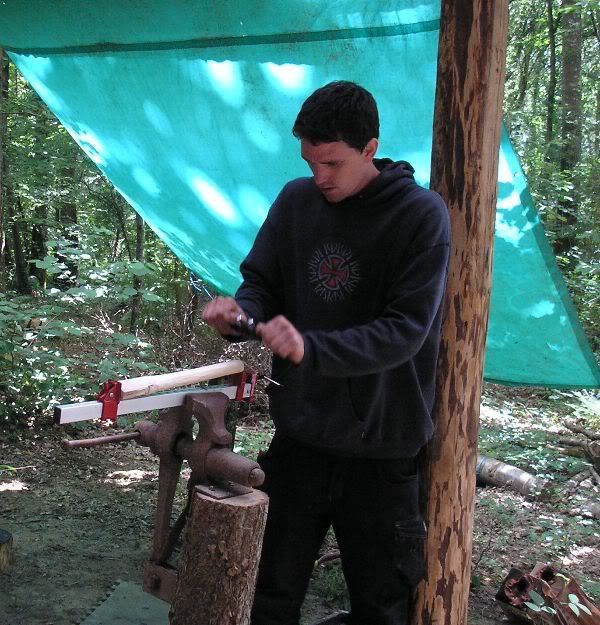
11) final shaping with spoke shaves and scrapers, though rasps were on offer too.
I missed pics of the tricky bit: the fitting of the handles. The head ends were dried further next to the tea-fire and a hard wood wedge was used to secure the head in place. So after that came the grinding of the edge with my pedal powered grinder (it only gets used for sharpening and not grinding)
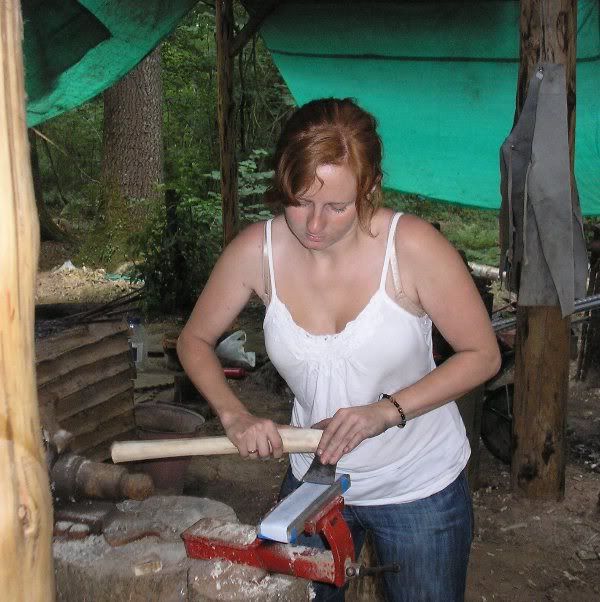
12) Sharpening the axe with wet and dry and foam covered block.
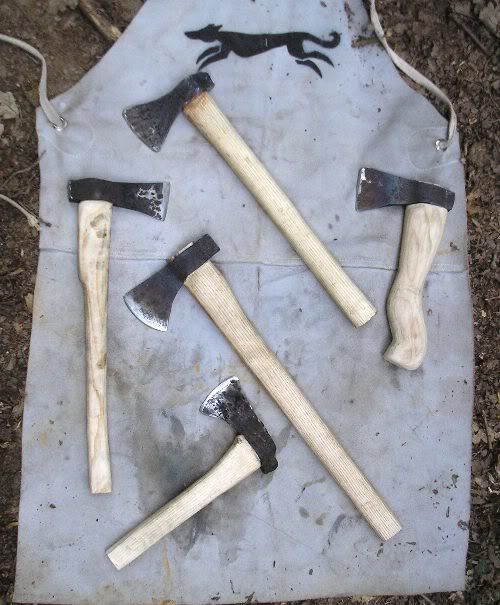
The finished axes


And the rightfully pleased makers!
Everyone on the course did really well to get everything done in the two days that we had. It's hard work but the final tool is worth the effort I would say
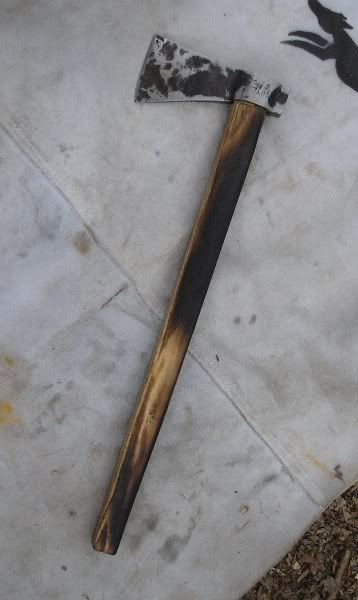
Here is the axe on offer at the Moot, complete with a sheath

Also, I've offered the axe that I made as a Raffle prize at the Moot to raise funds for BCUK
N.B. my apologies for missing some stages out, I was rather busy and failed to get pictures of everything as we went along. If you would like to see the missing bits then I've more pictures of previous groups on my website, so the gaps should fill in
This was the first group that I let loose with Virgin steel for the heads. Normally I start groups with hammer heads as the hole is already in place and just needs a bit of reshaping. So we all started with a 4" length of 1" square EN9 (spring steel). I had drilled a few holes along the length to start us off with the eyes and to ensure that we punched the eyes through straight.

1) get the metal HOT! this is my Roman/Saxon forge with a new set of lungs on it
with such a big lump, a lot of the work is done in pairs using a sledge hammer. After that it's all individual work with hand hammers

2) Punching the eye. the cup is full of water to cool the punch down periodically

3) a little reshaping of the eye area and drawing of a little more cheek with a sledge. This is the Iron Age forge

4) Driving a drift through to shape the eye to whatever we fancy. of the 6 axes made only one was a hawk eye, the rest a normal slender apple seed eye.

5) moving the bulk of the mass with a sledge hammer.


6) final shaping and forging with a hand hammer dictates the style and form of the axe.
Then its a little tidying up with a file and the hardening of the axes in molten tallow. followed by...

7) Tempering in the embers until a pale brown is seen at the edge, this gives the edges a mid to high 50's RC (just right for an axe)
Second day and on comes the woodwork
I provided the group with a selection of cleft ash billets that had been mostly dried over the previous few weeks (the tree was felled last year so was quite well seasoned anyway)

8) select a billet that will provide enough wood for each handle shape. Then draw an outline of the desired handle

9) Ah, the irony: needing an axe to make one! At least people had the chance to try different shaped handles out before they got into carving their own

10) taking the shapes closer to dimension with drawknives

11) final shaping with spoke shaves and scrapers, though rasps were on offer too.
I missed pics of the tricky bit: the fitting of the handles. The head ends were dried further next to the tea-fire and a hard wood wedge was used to secure the head in place. So after that came the grinding of the edge with my pedal powered grinder (it only gets used for sharpening and not grinding)

12) Sharpening the axe with wet and dry and foam covered block.


The finished axes


And the rightfully pleased makers!
Everyone on the course did really well to get everything done in the two days that we had. It's hard work but the final tool is worth the effort I would say
Here is the axe on offer at the Moot, complete with a sheath

Last edited:
