A few of my current projects! *watch this space.*

  • Hey Guest, Early bird pricing on the Summer Moot (29th July - 10th August) available until April 6th, we'd love you to come. PLEASE CLICK HERE to early bird price and get more information.

Samon

Bushcrafter (boy, I've got a lot to say!)
Mar 24, 2011
3,970
44
Britannia!
Another murder weapon i found..


Lol i found this thing in a relatives junk filled garage and only the badger over lord knows how many innocents have been dropped by this ghastly shank!

Looks to be made from an old large hacksaw blade and its about 2mmish thick. If I cut right I may be able to make two out of this bit of steel. And I hope to do all my cutting and steel work finished soon so I can do all the handles done shortly after. I find k get in my zone better when working on steel only for a week end as apposed to shifting back and forth finishing each one individually.

Stay tuned!
 

Samon

Bushcrafter (boy, I've got a lot to say!)
Mar 24, 2011
3,970
44
Britannia!
Yep, good recyclable steel always makes me buzz!

This one is likely infused with the souls of te fallen too so it should take it sharper..


Bleeding weathrrs been a right sod! All I e done is pen out the shape of the knife on that old shiv. I'd like to have got some work done on the less bad days but I've been busy.. Those of you with garages, sheds and workshops, consider yourselves fortunate!
 

Samon

Bushcrafter (boy, I've got a lot to say!)
Mar 24, 2011
3,970
44
Britannia!
I had a little play today, only got a little done with the angle and bench grinder, but made use of the hacksaw blade.


As you can see I've made one long handled general full tang blade. It needs all the extra work done as all I've done is cut out the blank. And as I had a little left over from the tip I had a go making one of those little neck knives people seem to be find of. I did initially leave little remnants of the teeth as jimping but after a bit of a bodge trying something new with the end shape I had to grind it all away and shape the end of the blade. Again, just the blank cut out for now.

I still have several blades that need final touches to make their thicknesses symmetrical and as perfect as possible.. need to source some thick black cow horn stuff too. And thick brass.. hmm..

I figured I'd make the full tang with an extra long handle because I personally like long handles, they make good for wrist flick chop cuts on thin branches, rabbit legs etc. I'll grind them both full flat and handle them in .. whatever I have in my box of goodies. :)

Stay tuned!
 

Nativewood

Forager
Feb 9, 2015
105
28
Caledonia
Cracking kitchen knife that - Yew has to be my favourite wood of all. I look forward to reading of your efforts with the bayonet and billhook. :D
 

Samon

Bushcrafter (boy, I've got a lot to say!)
Mar 24, 2011
3,970
44
Britannia!
Yeah the blades I have found are good stuff, my kitchen knife is my favourite user I've ever made. It cuts like a light saber and has gottena wicked patina from my love of cooking and using it for everything!

The hacksaw blade knives I'm making may look meh so far but that's due to the paint, I'm confident they will be rather nice when finished. And I may reshape the little one as it's original shape was better than that.
 

Samon

Bushcrafter (boy, I've got a lot to say!)
Mar 24, 2011
3,970
44
Britannia!
Right, got a little bit more done.. a slow process sadly but I do what I can when I can!

The file knife blade is now nearly finished, just needs a little final polishing and a strop.. and to round the softened tang so it's easier to peen.. And I decided to go with a stacked leather handle as I really like the look of them! I'll be using thick brass for the bolster and end cap, scrap leather from an old belt and some thin brass sheet for decoration. Roughly stuffed on to check there is enough leather..


The big bit of brass is actually one of those fancy door things you push to open it.. cost me £1.50 from a charity shop :D . It's solid good stuff so I knew it would come in handy (and I'm too cheap to ever buy in something new lol) and after I cut the two bits off I'll still have plenty for a few more jobs. I will use the thin brass every 3 bits of leather, for a sort of bumble bee look. :)


I also reshaped the little scrap end of the yellow hacksaw blade, looks better now. And if I have time tomorrow I'll remove the paint off of both the hacksaw knives and start grinding the big ones grind in.

stay tuned!
 

Robson Valley

Full Member
Nov 24, 2014
9,959
2,666
McBride, BC
I like that. To me, it's a "boning knife." I have 3 of them and use one almost daily in my kitchen.
Mine show a 6" blade with a 5" edge. I could live happily with 1/2 - 1" shorter.
Quite capable of dicing veggies as well as swift and clean jobs in fresh meats.
In that situation, I really need wash-proof handles.
 

Samon

Bushcrafter (boy, I've got a lot to say!)
Mar 24, 2011
3,970
44
Britannia!
The weather has been a git all day, raining then sun, then rain.. then hail.. then sun.. and now finally just wet and grey.

But fear not, I got some work done.

I power sanded off the paint on the hacksaw blades, and got a tiny bit of grind work done with the angle grinder, but I'll complete them on the real grinder free hand, full flat convex! ;)

I cut the line down the tang hoping it would aid drilling into the steel.. that.. it did not. So I'll dremel some bigger holes and use thinner pin stock!


I also drilled all the brass.. took a while and as I don't have any really cool tools like a milling machine or even a drill press it got a little scary and frustrating. But, I got it done and did the top bolster to fit the tang pretty darn good considering I only used a dremel and a tiny file. I then got the epoxy out! took 1.5 packs to get each layer coated and rammed on. I'll do the very last bottom brass cap tomorrow, as I'm going to reshape the tang tip round and try to get it perfectly tight fitting. And I'll drill into the bottom cap and insert brass rod for added strength, a few inches x 2 will be enough. I've never done a stacked leather handle before and I don't want to fart it up and make it weak! :D


And once glued and in the vice..


It's really quick setting epoxy, and I had cable ties on it for a while before taking the picture, so with any luck, it should hold tight.

And due to the rain, the last bit and the bolster hole shaping were done in the kitchen.. luckily wifey is away or she'd probably be a little cheesed off.. :O

stay tuned!

p.s I also reshaped the bowie blade. I've removed alot of steel to make it look more tradtional and less 'arrrghh'. I'll snap a shot tomorrow.
 

Samon

Bushcrafter (boy, I've got a lot to say!)
Mar 24, 2011
3,970
44
Britannia!
Thank you very much! :)

Sadly..


Heavy handed angle grinder work on the new handle.. and snap! By the looks of the steel grain, it is very fine and light grey, so must have been too hard.. I didn't alter the temper with the file in the first place and although it was fine on the edge, no chipping etc I guess it was still too hard. never mind, if it broke while in the vice it would have likely broke during use in the woods, so better now rather than then!

And for anyone who hasn't done a stacked leather handle before, it's really fin to shape! smells rank but was really fun while it lasted. And I'll make use of the remaining blade by turning it into a much smaller knife.. :( lol

I will work on the kindling/batonning knife next. Just need to scavenge the charity shops for some belts. And I'll get to work next week.
 

Samon

Bushcrafter (boy, I've got a lot to say!)
Mar 24, 2011
3,970
44
Britannia!
Unlucky.

Is that curtains for the other blade too samon? Or will you trust them?

Sorry mate, I don't really understand??


I've been in the garden grinding, cutting and filing away and got some bits sorted for fitting and shaping in the coming days! I'm happy as nothing snapped lol.

Talking about snapped, here's what I've got planned for that blade that went separate ways.. (and a double bit axe offcut from one of our members, that will likely be turned into something horrific and medieval lol) it's gone be a little skinning knife that I'll handle in Holly. Just need to cut the holly to shape and get it together, as it'll be a skinner I won't adjust the hardness. :)


Next, I cut the beech rolling pin I got from the shop (£3) to size and cleaned up the tang on the kindling/batonning knife. I will shape it obviously, and I have cut a solid brass bolster/finger guard from a coat hook! lol cost me 50p at a flea market and I kenw it had potential. In the picture you can see I've cut off the tear drop shaped hook and polished it a little. Dremel is on charge for the cutting of the tang hole so it fits flush to the base of the blade! I'll shape the handle so it can be chocked up on and used for light wrist whip cuts. I hope to manage a clean hawk head shape on the bottom of the handle, like the americans do with their 'fighting bowies'.


And with the handle that I kept from what the kindling knife originally had, I've decided to reuse it for the bayonet blade! I'll flip it around and fill in the hollow bottom with epoxy and metal, fit a brass cap and spike to the base (spike from a broken crossbow bolt tip ;) ) and I traced the coat hook guard from the kindling knife to use on this one too. right now it's way too wide, but I only ground it to the outside of the outline, incase I cocked it up. I'm looking forward to this one, again I need to cut the tang hole in the bolster but I've cleaned up the tang for a hopeful tight fit. SHould looked gnarly! I'll slim the handle down too, it's round at the mo', and I want it more rectangular in the hand.


And finally, the beast meat cleaver has had it's tang derusted, it's original handle scales cleaned up and is pinned and epoxied up! (I used nails as my pins didn't fit and no way will my cheap junk drill bits eat through this sort of steel) I will only polish up the edge, and leave the patina on the body of the steel, and off course grind off the excess epoxy and reshape the scales somewhat to remove flaking wood. They are also cracked so I'm going to fill that in with super glue and give it a rough sand after for a good grip. Then it'll be ready to take off heads all day long! :D


Thanks for watching, I will keep updating as regular as I can, and hopefully with large amount of content. ;)
 

Samon

Bushcrafter (boy, I've got a lot to say!)
Mar 24, 2011
3,970
44
Britannia!
Thank you for the kind words! :)

And I got more done!

As you saw yesterday, I got some brass bolsters made up. Well today I measured up and cut out the tang slot on both. I used a dremel tool with a ball blade tip to mill out the metal and then filed it to a better shape. This is the underside of the bolster for the kindling knife thing.


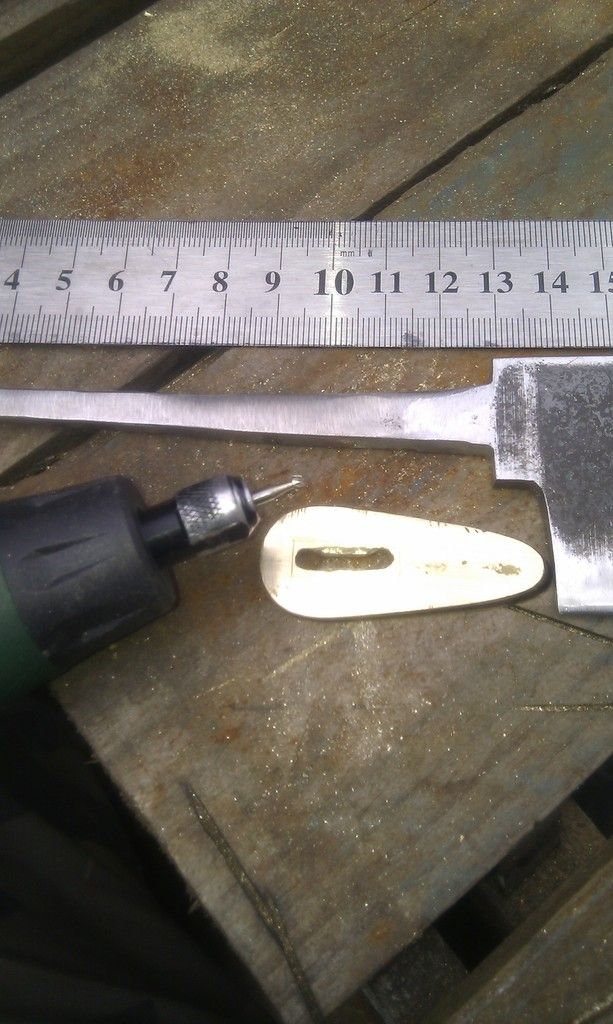
It fits nicely and I glued it into place in preparation for when I get the handle drilled out.. something I got side tracked and didn;t get done today. But maybe tomorrow!..


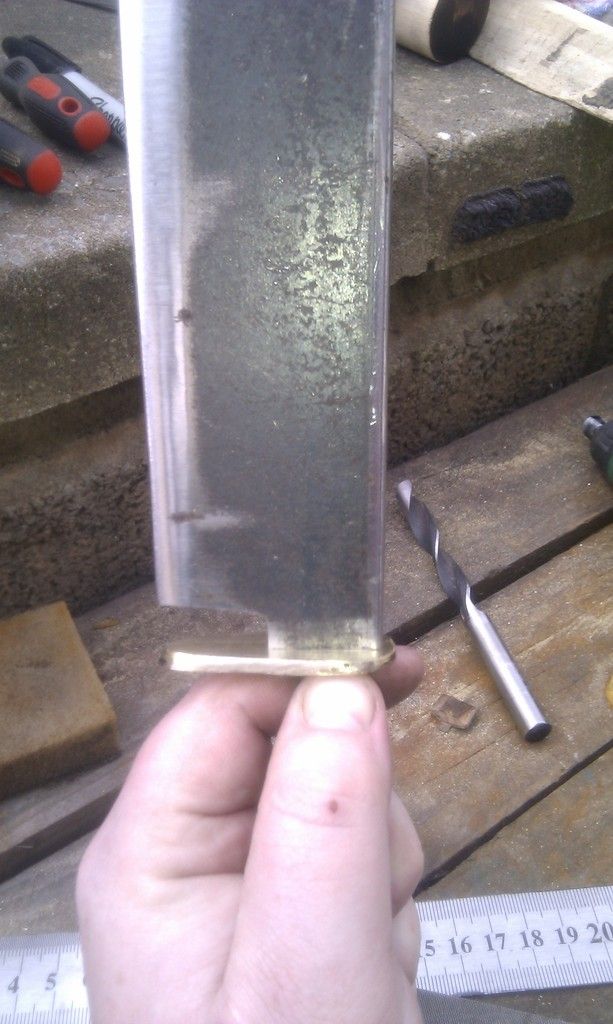
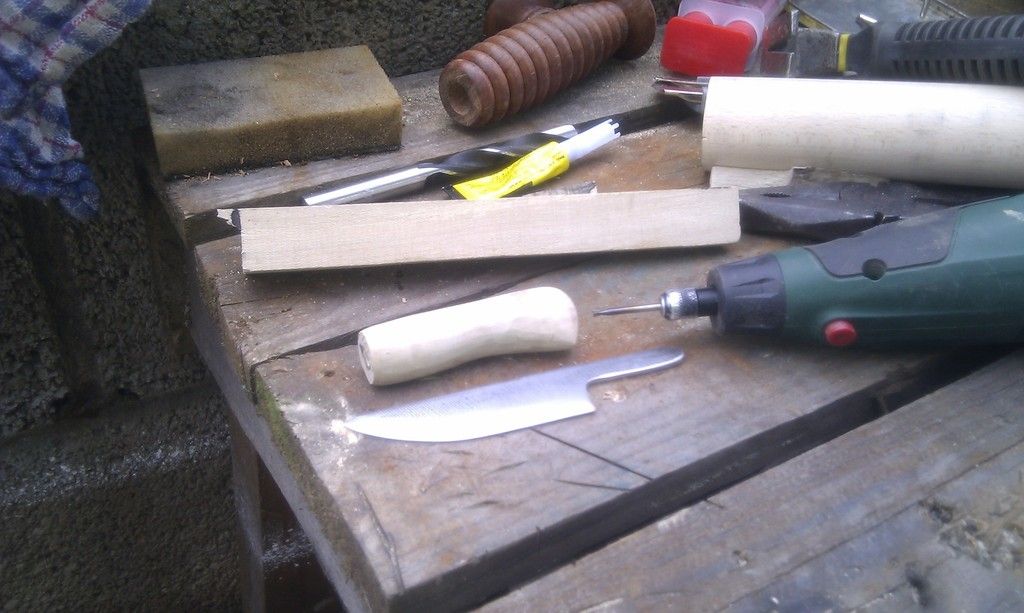
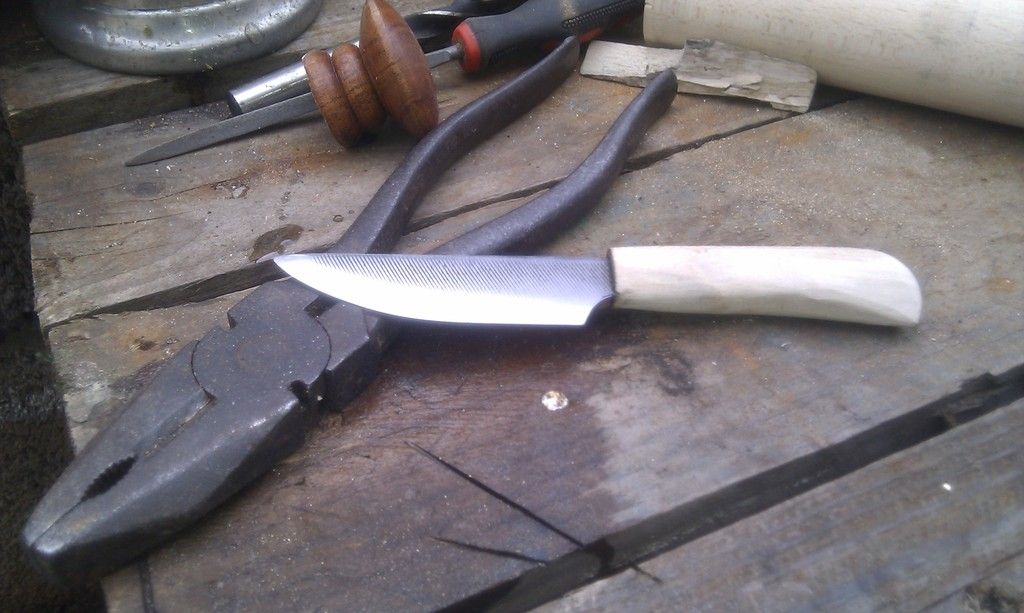
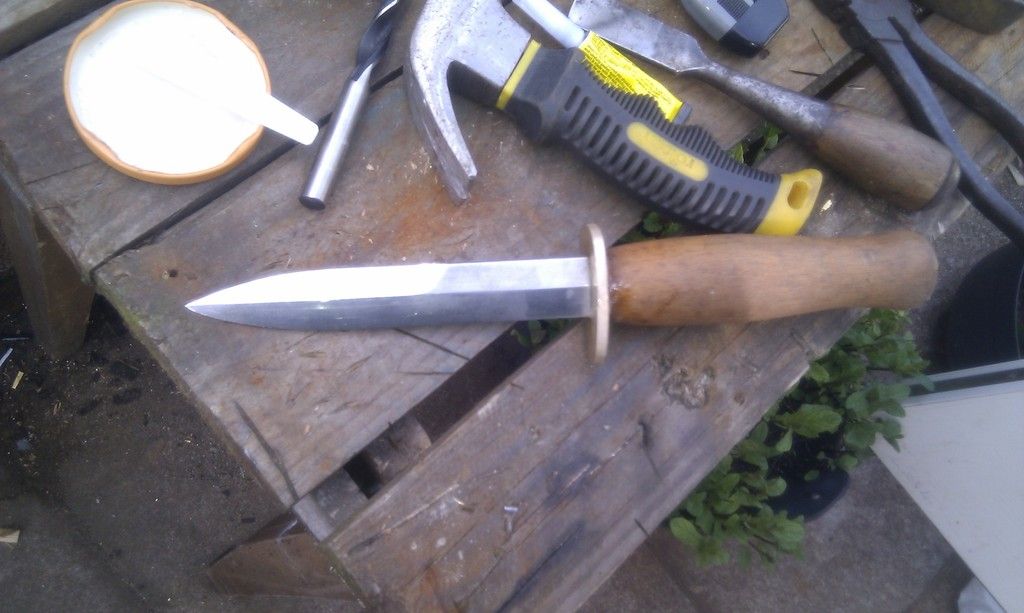
So, while I was digging around in my box of bits I found the holly I mentioned before, the wood I'll use for the blade that snapped. Well, I cut a bit off, penned on what I wanted to cut off and I just got stuck in.. spent some time on the belt grinder first, then dremeled out the tang hole, heated up the tang to burn it in the last few steps and then stuffed it with epoxy. Bang bang bang with a hammer and it's pretty darn snug! I left it aside.. and though meh, let's carry on. So I did, epoxy still curing deep inside, I got most of the meat off the wood and used the dremel stone end to grind in a finger choil so it can be three finger gripped! Now it nust need final sanding on the spine of the blade as I slightly reshaped it and a hand sand to clean up all the imperfections on the wood. Then I'll oil it, then seal it with superglue. < a cheap hack to seal wood! ;)

And the pictures..


And the bayonet knife.. It's all glued and rammed together! I knwo some of you are particularly interested in this one and I'm excited to start refining the handle on the grinder asap!

I milled out the bolster tang hole and glued it together to start with.


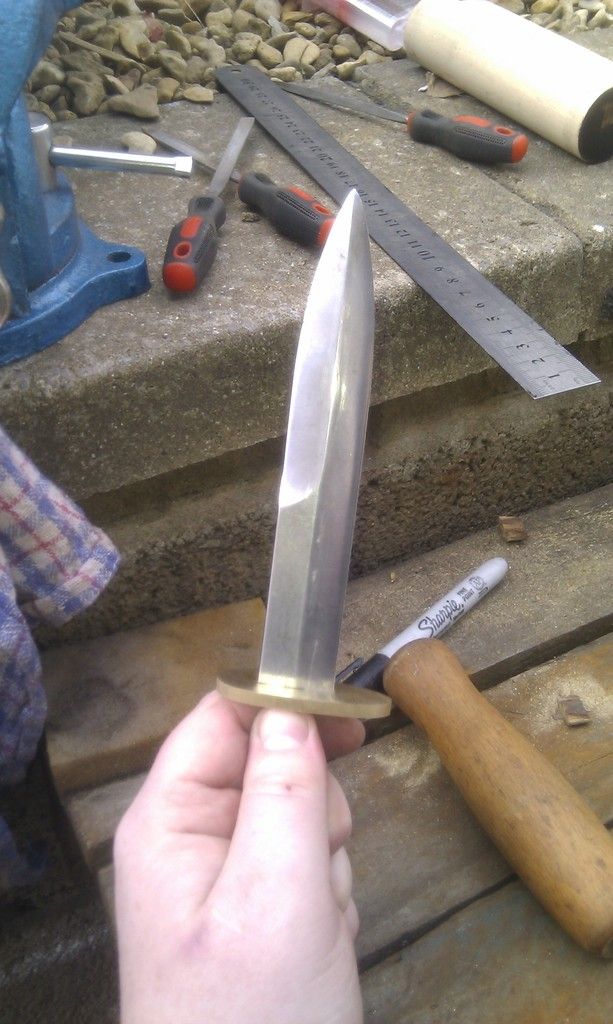
And on closer inspecting at the underneath, there was gaps on the fit to the tang.. something I didn't like. Not if I want a tight fit with no movement. So.. a hillbilly improv' was needed. I do not own a welder or anything to trap it all together, but I do have loads of little brass off cuts on the floor.. little bits that would make for perfect wedges to hammer into any gaps! And that;s what I did, I pounded in some scap brass to make sue it stayed snug. And I bent the bolster so it was slightly turned up and each end. (scientifically proven to poke werebadgers better than standard straight bolsters)


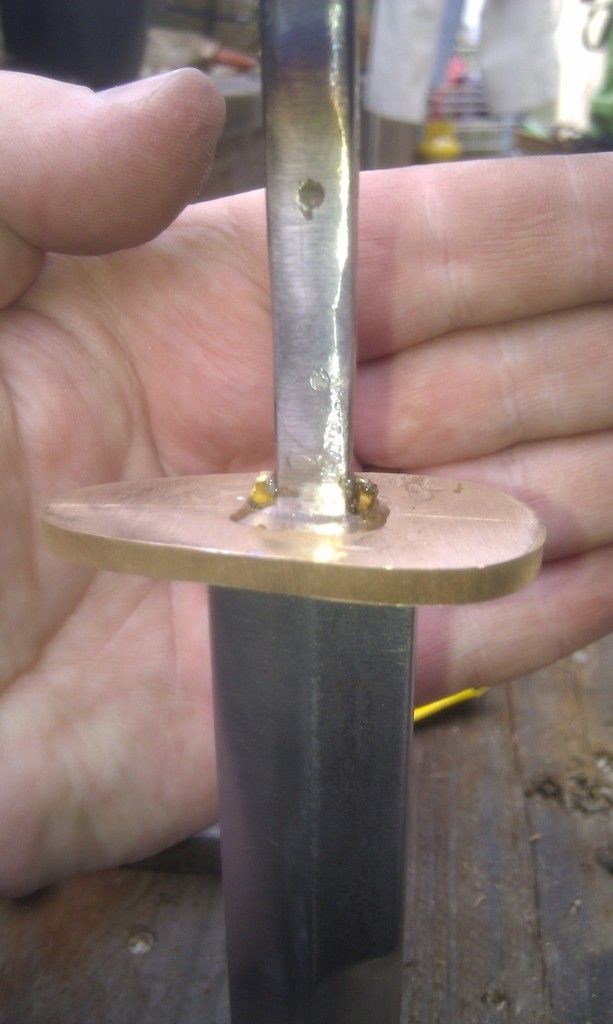
Then I drilled out any internal much from the old handle I'm using and filled it to the brim with epoxy and hammered it down onto the bolster and tang!


I filled in all the little gaps in and around the parts and Will crack on getting an end cap made, and that nasty crossbow bolt tip for a spike on there. Just incase poking the werebadgers with the big end doesn't go to plan. ;)

Well, that's all for today! I'm sleepy and need some food. But I'm excited to crack on asap and get then all finished!

Thanks for checking in, any questions just ask.
 

Samon

Bushcrafter (boy, I've got a lot to say!)
Mar 24, 2011
3,970
44
Britannia!
Finished all blade and handle work on the little neck knife I made from my broken file knife blade remains..


Really nice mirror shine on it, the holly handle came up really nice with linseed oil and sealed well with a final coat of super glue for a grippy but shiny texture.

And! No need to waste the handle section that was left from said broken file knife.


An awl! :D

Sealed the leather with linseed oil then superglue again, works a treat and this one will be a gift for a family member who is getting more and more into making bits (mainly due to me offloading freebies on him lol).

And I removed the handle from the bayonet blade, I filed it down too thin and didn't like the guard. SO I will make a new guard in a trench knife pattern and make the handle from the remains of a siolid beech rolling pin I used on the batoning knife thing.

Stay tuned!
 

BCUK Shop

We have a a number of knives, T-Shirts and other items for sale.

SHOP HERE