To preserve food, one has to either kill or prevent reproduction of the micro organisms that cause food spoilage.
There are many ways of preserving food:
Lowering the temperature (refrigeration, freezing, clamping, root cellaring, evaporative cooling)
Raising the acidity (preserving in fruit juice, pickling, lactic fermentation)
Raising the alkalinity
Increasing sugar content (jams, jellies etc.)
Removing water (dried fruit, jerky, vine dried legumes etc.)
Increasing salt content (brining, Parma ham etc.)
Adding chemicals (sulphide type food preservatives)
Raising the temperature (cooking)
Removing oxygen (Vacuum Packing, adding chemical anti oxidants, preserving in fat or aspic)
Using benign micro organisms (cheese making, wine making etc.)
Irradiating
For me, these techniques break into several types
1) Continuous Power input required (refrigeration and freezing)
2) Flavour altering (pickling, making jam)
3) Chemical addition (brining, salting)
4) Organic (cheese and wine making)
5) Technological (irradiating, vacuum sealing)
6) Heating and sealing (canning)
For me, a variety of these ways are needed on the homestead to keep food fresh. In the UK, almost the only “home managed” way of preserving meat is freezing. Freezing is fine, but freezers need power, and they break down.
Some of us make jerky, hamburger rocks and biltong. Again, fine in its way – makes for light and easily transported “trail food” – but not so big on convenience.
A few make hams, bacon or brawn or even quails in aspic. These are all good techniques – but limited.
Something almost never done in the UK is “pressure canning”. Sure we preserve foods that are naturally resistant to bacteria (jams, pickles, chutneys etc.) but pressure canning is different. Pressure canning uses a pressure canner to superheat steam to get the internal temperatures of the jar contents much higher than can be achieved with any amount of direct heating of contents. This is important for one reason – botulism. Botulisum is a nasty – often fatal form of food poisoning caused by neurotoxins produced by Clostridium Botulinum bacteria. Clostridium Botulinum is a soil based spore forming bacteria. Being soil based it can find its way into many foods. The spores are very resilient and can survive being boiled at 100C. No amount of heating liquid based foods will kill them. However being cooked in a pressure cooker at a hot enough temperature for long enough will. If foods are processed in this way and then sealed, they remain safe for as long as the seal remains.
Processing food in this way is known as pressure canning. The tools, consumables and materials are common in the US. This article is intended to show the process of pressure canning, it is safe for low acid vegetables, meats, soups and stews etc. if done properly without adding salt, acids or sugars common in making pickles and chutneys – thereby preserving the desired taste. It also offers the advantages on not requiring electricity ongoing and letting the cook decide what goes into home preserved “convenience meals”.
Today I was pressure canning tomatoes. Tomatoes can be preserved without pressure canning but these are for long term storage, so I decided to pressure can them. The process is the same for meats in gravy, chillis, soups etc. – but the amount of pressure (and hence internal temperature) required and the canning times vary. This cannot be home calculated – a good reference book is required and is absolutely mandatory for the process
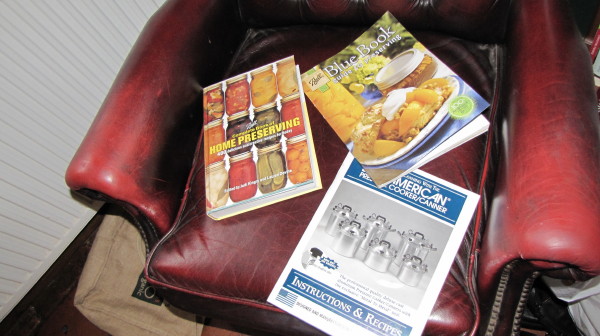
IMG_6335 by British Red, on Flickr
The “Top Guide” for pressure canning is the “Balls Blue Book” – it gives advice on the process and recipes, pressures and canning times. I also use the Balls guide to home preserving – and of course the manual supplied with my canner.
You do need these books – seriously. For example, the weights and pressures you use depend upon your height above sea level. As our school science (and my article on the Science of Water) observes, water boils at lower temperature at higher altitudes. So to be sure of killing the bacterial spores, we need to increase the pressure in the canner to achieve the required temperatures.
So to business. I picked a few tomatoes today…
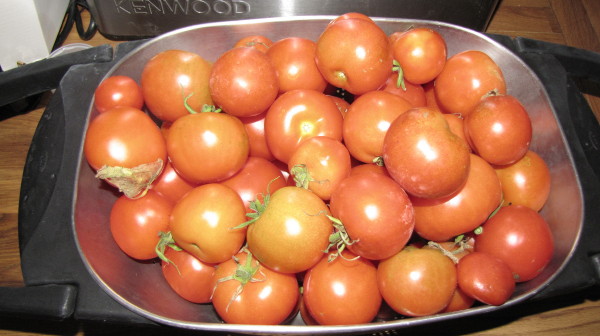
1) Tomatoes by British Red, on Flickr
…well more than a few
IMG_6279 by British Red, on Flickr
So its time to can some. I can as chopped tomatoes in their own juice, but you can can them whole or made up into sauces.
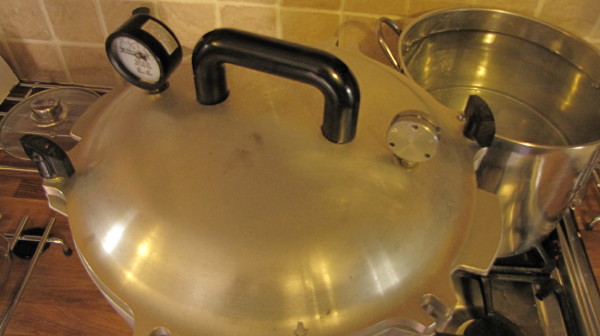
Here is the main piece of equipment – a pressure canner. Like a monstrous pressure cooker, but not the same. You can cook in a canner, but people wiser than me advice against canning in a cooker. Note that this model (one of the “All American” range has a pressure gauge and a round regulator (weight) on top. The regulator has three holes and setting each of those holes on the spigot creates different internal pressures and hence temperatures (5, 10 and 15lbs of pressure)
You can’t get pressure canners in the UK – you have to import them from the US. There are large companies there who are happy to ship however. Mine is a large one and will take 16 pint jars at a time.
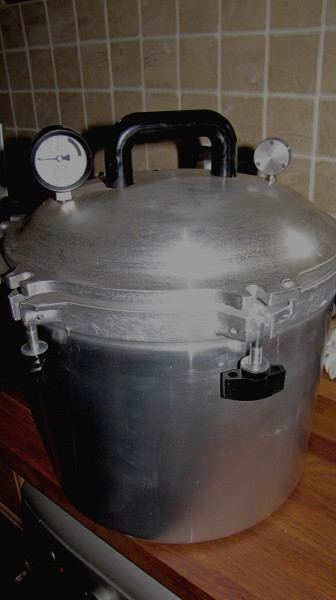
3) Pressure Canner by British Red, on Flickr
The Pressure Gauge
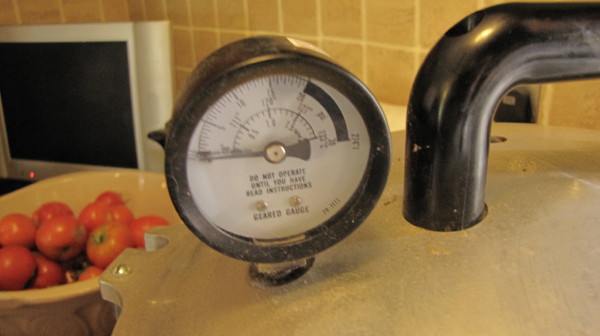
4) Pressure Gauge by British Red, on Flickr
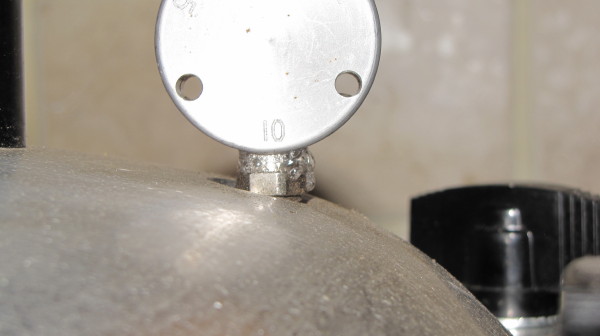
The Pressure Regulator
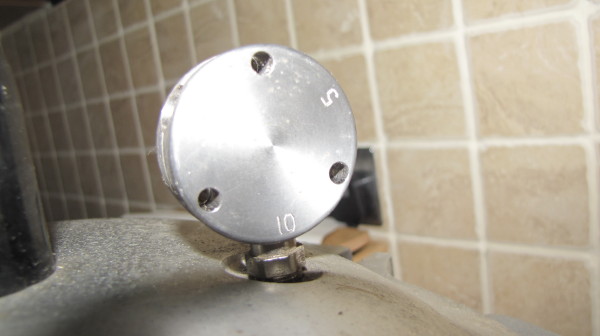
5) Pressure Regulator by British Red, on Flickr
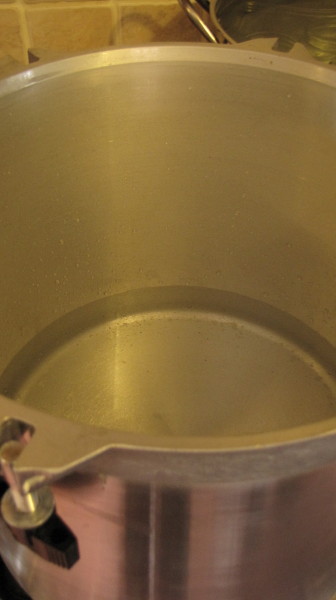
I’m also going to need at least one of the very large stock pots that I use for all sorts of major cooking
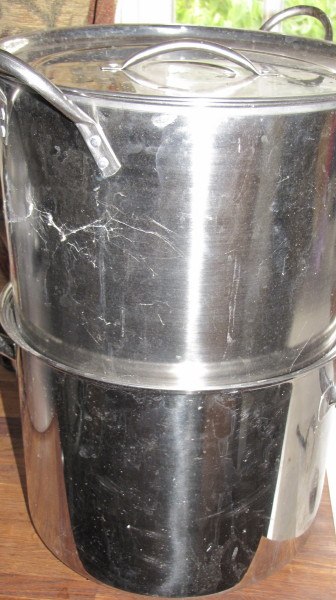
6) Stock Pot by British Red, on Flickr
I’m also going to use some canning tools

7) Canning Tools by British Red, on Flickr
From left to right
Jar lifter
Lid tightener
Lid lifter (magnet on a stick)
Non metallic spatula (I like silicone ones)
Tongs
I’ll show all these tools in use later.
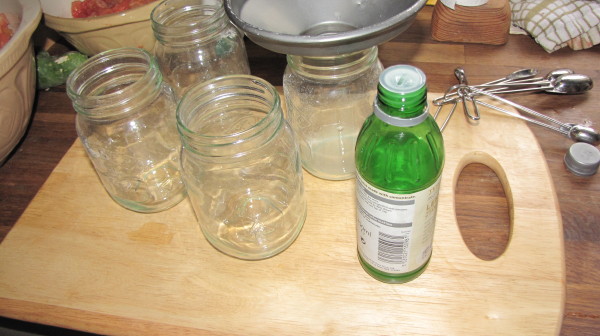
Next we need some jars. Jars come in all sorts of sixes and shapes. For most purposes, there are two main types. Pint jars (500ml) and Quart jars (1 litre). Canning jars are not the same as jam jars – this may seem obvious to our US colleagues – but not to us UK types! They take a different kind of lid.
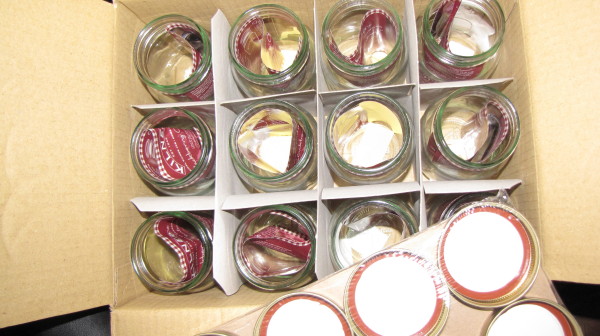
8) Jars by British Red, on Flickr
Next we need lids and bands. Lids are flat. They have a bit of temperature sensitive glue round the outside and seal in a near vacuum as the jar cools. Bands serve only to hold the lids in place. Bands are re-useable, most lids are not.
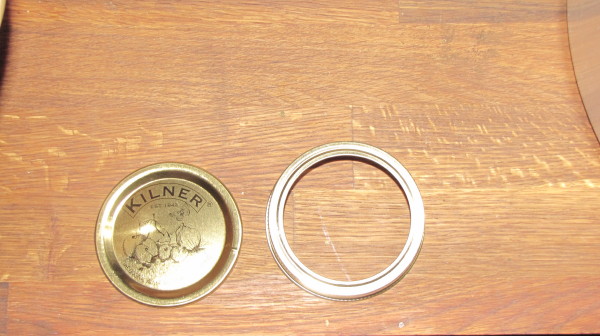
9) Lids & Bands by British Red, on Flickr
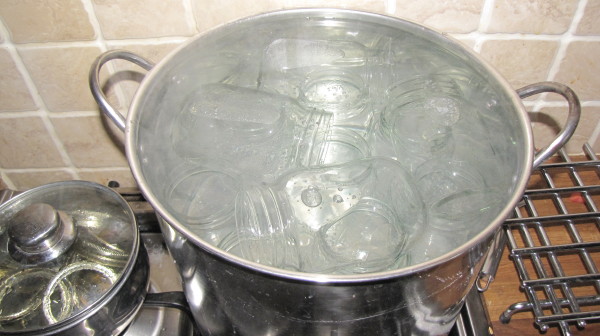
Before we get cracking we need to sterilise the lids, jars and rings. The jars go in the big stock pot, get covered in water and given a boil for at least ten minutes
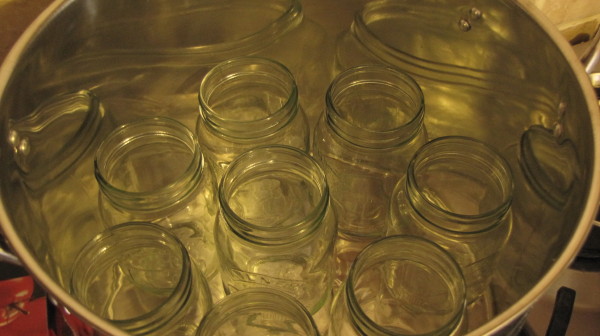
10) Boil Jars by British Red, on Flickr
Lids and rings go in a small saucepan, get given a gentle simmer (not boiled!)
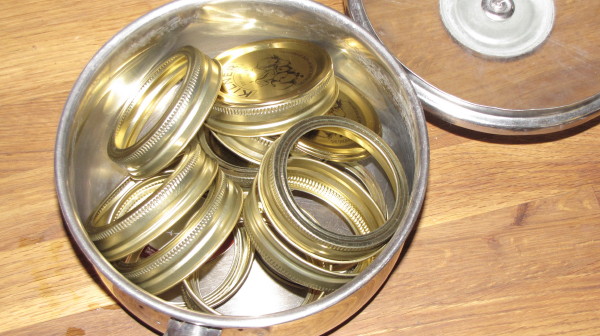
11) Simmer Lids and Bands by British Red, on Flickr
Right, lets get on with the tomatoes.
Each one gets a cross sliced into the skin (just through the skin)

12) Score Toms by British Red, on Flickr
The tomatoes get blanched for about a minute – then the skins just slip off
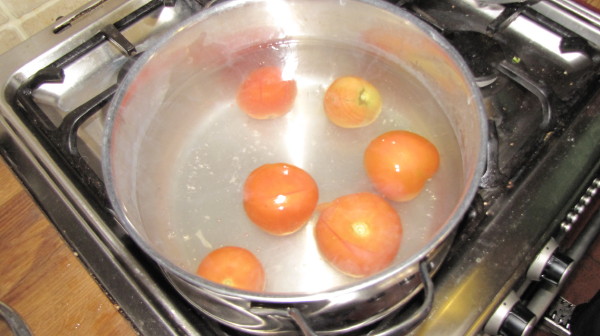
IMG_6300 by British Red, on Flickr
This is where BB and I work together – her getting the skins off, me chopping. It makes the work smoother and company is nice!
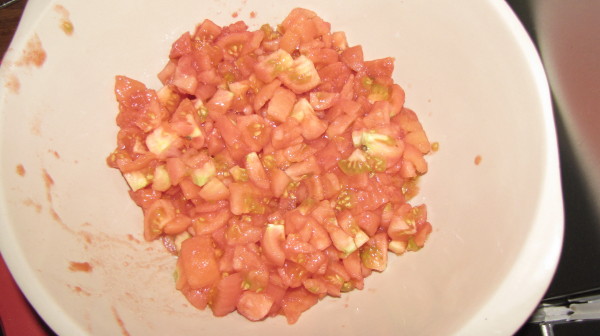
IMG_6302 by British Red, on Flickr
So we have skinned chopped toms – and boiled jars
15) Jars Boiled by British Red, on Flickr
The tongs come in handy here – for picking up and emptying the jars – they are very hot!
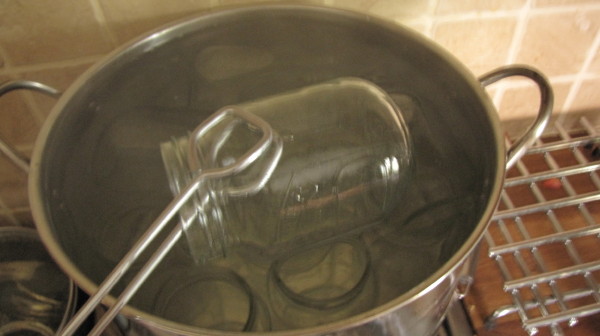
16) Drain Jars by British Red, on Flickr
I remove the jars a few at a time so they are hot when packed. This recipe calls for a tablespoon of lemon juice to raise the acidity. In the packing a ladle and a jam funnel (the grey thing at the back), make life a lot easier!
17) Funnel and lemon by British Red, on Flickr
The jars should be filled allowing an inch of “headspace” (a gap between the filling and the top of the jar)
18) Headspace by British Red, on Flickr
Next sliding a spatula around the edge removes any air pockets
19) Spatula by British Red, on Flickr
Its important to wipe the rim of the jar. Any “goop” on the rim means the lid won’t stick!
20) Wipe by British Red, on Flickr
Next we put the lid on. Using a lid lifter saves scalded fingers – just pick it up with the magnet!
21) Pick Up Lid by British Red, on Flickr
The lid is popped on and a band screwed on just finger tight. The band keeps the lid in place but not having it totally screwed down hard means gases can escape from boiling liquid.
Now we have to prepare the canner. First 2” of water go in the bottom
22) 2 inches water by British Red, on Flickr
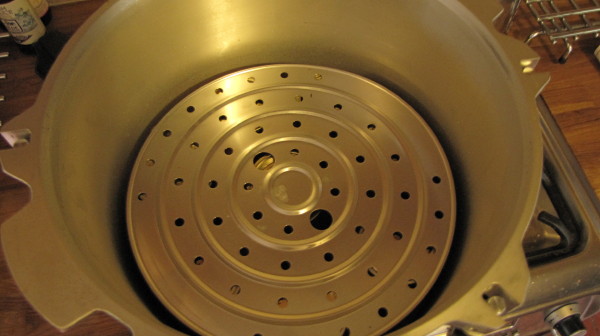
Next we put a jar rack in the bottom. The jars must not sit directly on the bottom of the canner
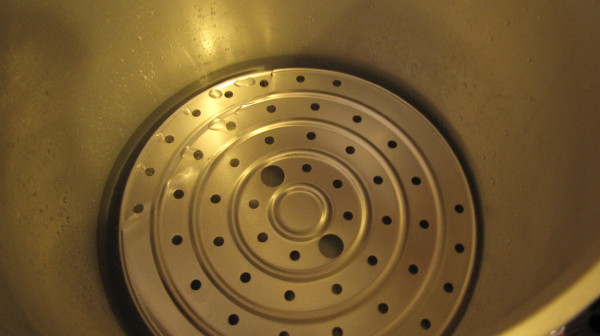
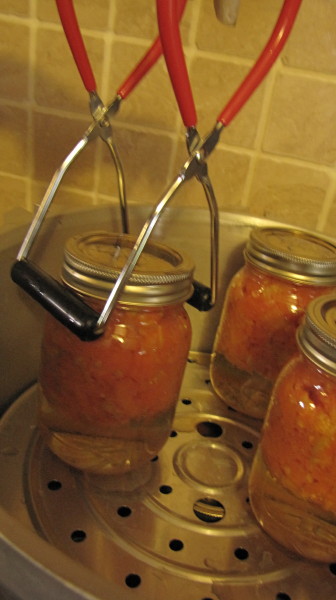
23) Jar Rack 1 by British Red, on Flickr
A layer of jars are placed in the canner – not touching each other or the canner walls
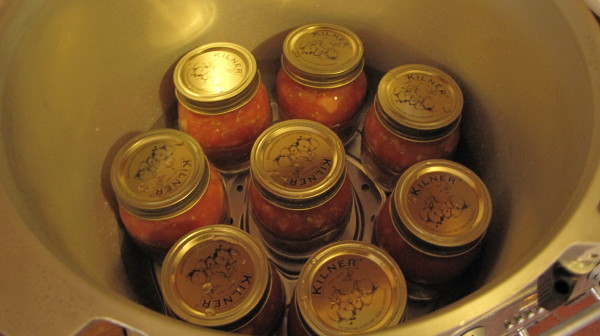
24) Layer of Jars by British Red, on Flickr
Another jar rack is placed on top of the first layer of jars and more jars added
25) Jar Rack 2 by British Red, on Flickr
The lid is placed on. It only goes on one way. The arrow on the lid needs to align with the mark on the body of the canner
26) Line Up Lid by British Red, on Flickr
The lid clamps are then done up. They should be tightened two at a time on opposite sides so the lid is even
27) Lid Clamps by British Red, on Flickr
Next – I check the recipe
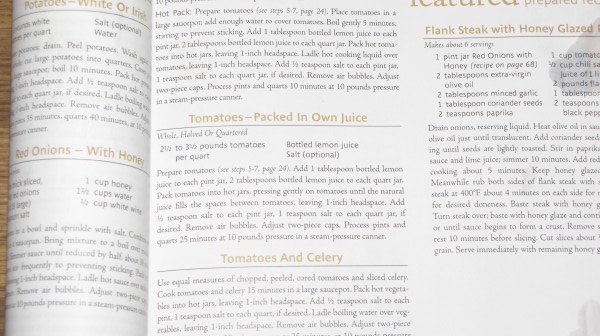
28) Recipe by British Red, on Flickr
The recipe calls for 10lbs of pressure for 25 minutes. I do not need to adjust this as I am not over 1,000 ft, so I set the pressure regulator to 10 and light the propane stove
I can watch the pressure rise on the gauge.
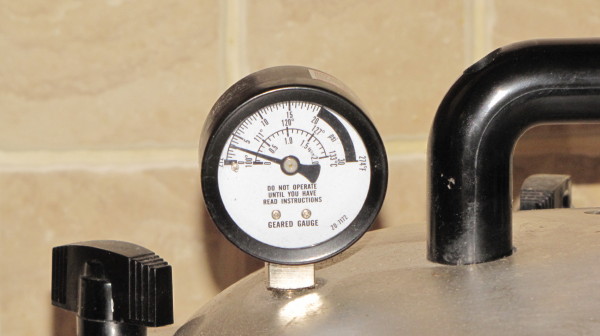
29) Pressure Rising by British Red, on Flickr
When the gauge reaches 10, the regulator starts to jiggle and hiss, trying to hold the pressure there. The heat needs to be turned down to let the regulator jiggle three or four times a minute – keeping the pressure up but not venting too much steam. Don’t run the canner too hot. You pretty much have a large metal bomb at this point!
Here you can see the steam escaping
30) Escaping Steam by British Red, on Flickr
I keep the pressure there for twenty five minutes and then turn off the heat. Its now vital to let the canner cool until the pressure gauge registers zero. At this point the regulator can be removed allowing any pressure to escape before undoing the clamps and removing the lid. Failure to do this will get you scalded with super heated steam at best and at worst will cause the lid to fly off, jar to explode and flying glass to erupt!
Once the lid has been safely removed, the (hot) jars can be lifted out with the jar lifter.
31) Lift Jars by British Red, on Flickr
The bands are screwed down tight with the lid tongs and the jars left to cool
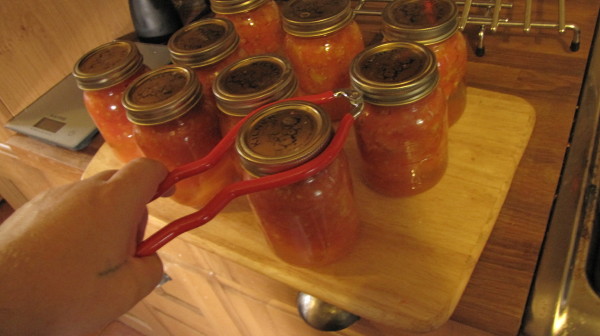
32) Screw Down Lids by British Red, on Flickr
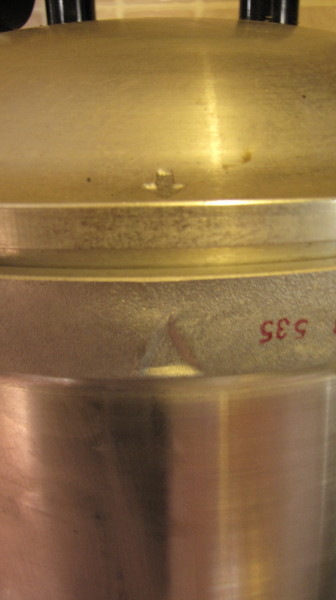
As the jars cool, the contents contract. This sucks the lid down and you will hear a “ping” as they pop inwards. This is the proof that the jar is properly sealed – and can be checked even after storage.
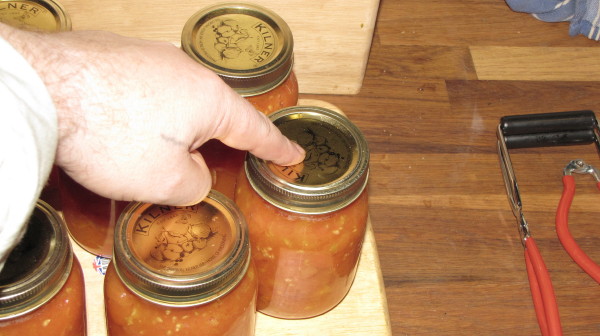
33) Check for Ping by British Red, on Flickr
The jars can then be left to cool at which point the bands can be removed.
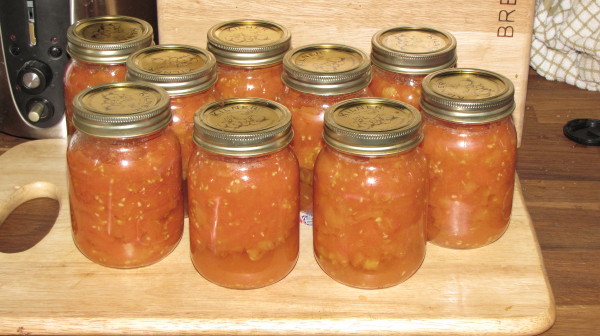
IMG_6347 by British Red, on Flickr
…and there we have it – pressure canned tomatoes.
Red
There are many ways of preserving food:
Lowering the temperature (refrigeration, freezing, clamping, root cellaring, evaporative cooling)
Raising the acidity (preserving in fruit juice, pickling, lactic fermentation)
Raising the alkalinity
Increasing sugar content (jams, jellies etc.)
Removing water (dried fruit, jerky, vine dried legumes etc.)
Increasing salt content (brining, Parma ham etc.)
Adding chemicals (sulphide type food preservatives)
Raising the temperature (cooking)
Removing oxygen (Vacuum Packing, adding chemical anti oxidants, preserving in fat or aspic)
Using benign micro organisms (cheese making, wine making etc.)
Irradiating
For me, these techniques break into several types
1) Continuous Power input required (refrigeration and freezing)
2) Flavour altering (pickling, making jam)
3) Chemical addition (brining, salting)
4) Organic (cheese and wine making)
5) Technological (irradiating, vacuum sealing)
6) Heating and sealing (canning)
For me, a variety of these ways are needed on the homestead to keep food fresh. In the UK, almost the only “home managed” way of preserving meat is freezing. Freezing is fine, but freezers need power, and they break down.
Some of us make jerky, hamburger rocks and biltong. Again, fine in its way – makes for light and easily transported “trail food” – but not so big on convenience.
A few make hams, bacon or brawn or even quails in aspic. These are all good techniques – but limited.
Something almost never done in the UK is “pressure canning”. Sure we preserve foods that are naturally resistant to bacteria (jams, pickles, chutneys etc.) but pressure canning is different. Pressure canning uses a pressure canner to superheat steam to get the internal temperatures of the jar contents much higher than can be achieved with any amount of direct heating of contents. This is important for one reason – botulism. Botulisum is a nasty – often fatal form of food poisoning caused by neurotoxins produced by Clostridium Botulinum bacteria. Clostridium Botulinum is a soil based spore forming bacteria. Being soil based it can find its way into many foods. The spores are very resilient and can survive being boiled at 100C. No amount of heating liquid based foods will kill them. However being cooked in a pressure cooker at a hot enough temperature for long enough will. If foods are processed in this way and then sealed, they remain safe for as long as the seal remains.
Processing food in this way is known as pressure canning. The tools, consumables and materials are common in the US. This article is intended to show the process of pressure canning, it is safe for low acid vegetables, meats, soups and stews etc. if done properly without adding salt, acids or sugars common in making pickles and chutneys – thereby preserving the desired taste. It also offers the advantages on not requiring electricity ongoing and letting the cook decide what goes into home preserved “convenience meals”.
Today I was pressure canning tomatoes. Tomatoes can be preserved without pressure canning but these are for long term storage, so I decided to pressure can them. The process is the same for meats in gravy, chillis, soups etc. – but the amount of pressure (and hence internal temperature) required and the canning times vary. This cannot be home calculated – a good reference book is required and is absolutely mandatory for the process
IMG_6335 by British Red, on Flickr
The “Top Guide” for pressure canning is the “Balls Blue Book” – it gives advice on the process and recipes, pressures and canning times. I also use the Balls guide to home preserving – and of course the manual supplied with my canner.
You do need these books – seriously. For example, the weights and pressures you use depend upon your height above sea level. As our school science (and my article on the Science of Water) observes, water boils at lower temperature at higher altitudes. So to be sure of killing the bacterial spores, we need to increase the pressure in the canner to achieve the required temperatures.
So to business. I picked a few tomatoes today…
1) Tomatoes by British Red, on Flickr
…well more than a few
IMG_6279 by British Red, on Flickr
So its time to can some. I can as chopped tomatoes in their own juice, but you can can them whole or made up into sauces.
Here is the main piece of equipment – a pressure canner. Like a monstrous pressure cooker, but not the same. You can cook in a canner, but people wiser than me advice against canning in a cooker. Note that this model (one of the “All American” range has a pressure gauge and a round regulator (weight) on top. The regulator has three holes and setting each of those holes on the spigot creates different internal pressures and hence temperatures (5, 10 and 15lbs of pressure)
You can’t get pressure canners in the UK – you have to import them from the US. There are large companies there who are happy to ship however. Mine is a large one and will take 16 pint jars at a time.
3) Pressure Canner by British Red, on Flickr
The Pressure Gauge
4) Pressure Gauge by British Red, on Flickr
The Pressure Regulator
5) Pressure Regulator by British Red, on Flickr
I’m also going to need at least one of the very large stock pots that I use for all sorts of major cooking
6) Stock Pot by British Red, on Flickr
I’m also going to use some canning tools
7) Canning Tools by British Red, on Flickr
From left to right
Jar lifter
Lid tightener
Lid lifter (magnet on a stick)
Non metallic spatula (I like silicone ones)
Tongs
I’ll show all these tools in use later.
Next we need some jars. Jars come in all sorts of sixes and shapes. For most purposes, there are two main types. Pint jars (500ml) and Quart jars (1 litre). Canning jars are not the same as jam jars – this may seem obvious to our US colleagues – but not to us UK types! They take a different kind of lid.
8) Jars by British Red, on Flickr
Next we need lids and bands. Lids are flat. They have a bit of temperature sensitive glue round the outside and seal in a near vacuum as the jar cools. Bands serve only to hold the lids in place. Bands are re-useable, most lids are not.
9) Lids & Bands by British Red, on Flickr
Before we get cracking we need to sterilise the lids, jars and rings. The jars go in the big stock pot, get covered in water and given a boil for at least ten minutes
10) Boil Jars by British Red, on Flickr
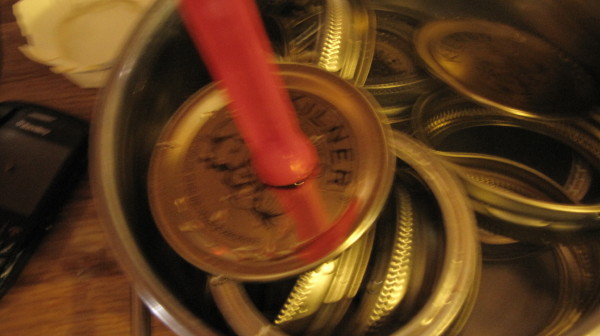
Lids and rings go in a small saucepan, get given a gentle simmer (not boiled!)
11) Simmer Lids and Bands by British Red, on Flickr
Right, lets get on with the tomatoes.
Each one gets a cross sliced into the skin (just through the skin)
12) Score Toms by British Red, on Flickr
The tomatoes get blanched for about a minute – then the skins just slip off
IMG_6300 by British Red, on Flickr
This is where BB and I work together – her getting the skins off, me chopping. It makes the work smoother and company is nice!
IMG_6302 by British Red, on Flickr
So we have skinned chopped toms – and boiled jars
15) Jars Boiled by British Red, on Flickr
The tongs come in handy here – for picking up and emptying the jars – they are very hot!
16) Drain Jars by British Red, on Flickr
I remove the jars a few at a time so they are hot when packed. This recipe calls for a tablespoon of lemon juice to raise the acidity. In the packing a ladle and a jam funnel (the grey thing at the back), make life a lot easier!
17) Funnel and lemon by British Red, on Flickr
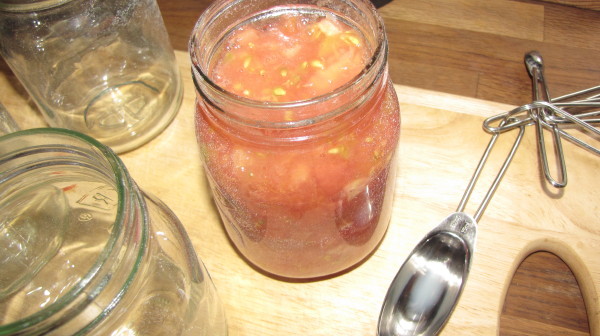
The jars should be filled allowing an inch of “headspace” (a gap between the filling and the top of the jar)
18) Headspace by British Red, on Flickr
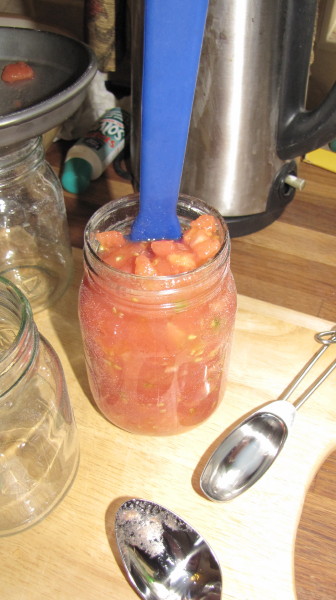
Next sliding a spatula around the edge removes any air pockets
19) Spatula by British Red, on Flickr
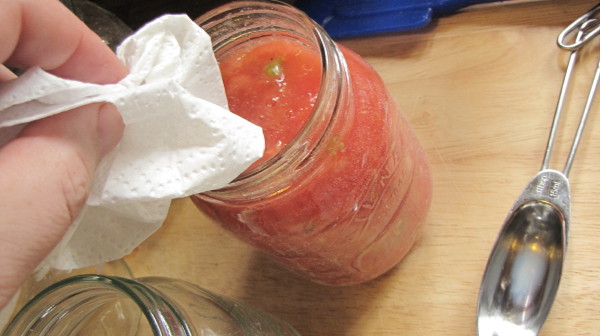
Its important to wipe the rim of the jar. Any “goop” on the rim means the lid won’t stick!
20) Wipe by British Red, on Flickr
Next we put the lid on. Using a lid lifter saves scalded fingers – just pick it up with the magnet!
21) Pick Up Lid by British Red, on Flickr
The lid is popped on and a band screwed on just finger tight. The band keeps the lid in place but not having it totally screwed down hard means gases can escape from boiling liquid.
Now we have to prepare the canner. First 2” of water go in the bottom
22) 2 inches water by British Red, on Flickr
Next we put a jar rack in the bottom. The jars must not sit directly on the bottom of the canner
23) Jar Rack 1 by British Red, on Flickr
A layer of jars are placed in the canner – not touching each other or the canner walls
24) Layer of Jars by British Red, on Flickr
Another jar rack is placed on top of the first layer of jars and more jars added
25) Jar Rack 2 by British Red, on Flickr
The lid is placed on. It only goes on one way. The arrow on the lid needs to align with the mark on the body of the canner
26) Line Up Lid by British Red, on Flickr
The lid clamps are then done up. They should be tightened two at a time on opposite sides so the lid is even
27) Lid Clamps by British Red, on Flickr
Next – I check the recipe
28) Recipe by British Red, on Flickr
The recipe calls for 10lbs of pressure for 25 minutes. I do not need to adjust this as I am not over 1,000 ft, so I set the pressure regulator to 10 and light the propane stove
I can watch the pressure rise on the gauge.
29) Pressure Rising by British Red, on Flickr
When the gauge reaches 10, the regulator starts to jiggle and hiss, trying to hold the pressure there. The heat needs to be turned down to let the regulator jiggle three or four times a minute – keeping the pressure up but not venting too much steam. Don’t run the canner too hot. You pretty much have a large metal bomb at this point!
Here you can see the steam escaping
30) Escaping Steam by British Red, on Flickr
I keep the pressure there for twenty five minutes and then turn off the heat. Its now vital to let the canner cool until the pressure gauge registers zero. At this point the regulator can be removed allowing any pressure to escape before undoing the clamps and removing the lid. Failure to do this will get you scalded with super heated steam at best and at worst will cause the lid to fly off, jar to explode and flying glass to erupt!
Once the lid has been safely removed, the (hot) jars can be lifted out with the jar lifter.
31) Lift Jars by British Red, on Flickr
The bands are screwed down tight with the lid tongs and the jars left to cool
32) Screw Down Lids by British Red, on Flickr
As the jars cool, the contents contract. This sucks the lid down and you will hear a “ping” as they pop inwards. This is the proof that the jar is properly sealed – and can be checked even after storage.
33) Check for Ping by British Red, on Flickr
The jars can then be left to cool at which point the bands can be removed.
IMG_6347 by British Red, on Flickr
…and there we have it – pressure canned tomatoes.
Red
Last edited:
")
 )
)")